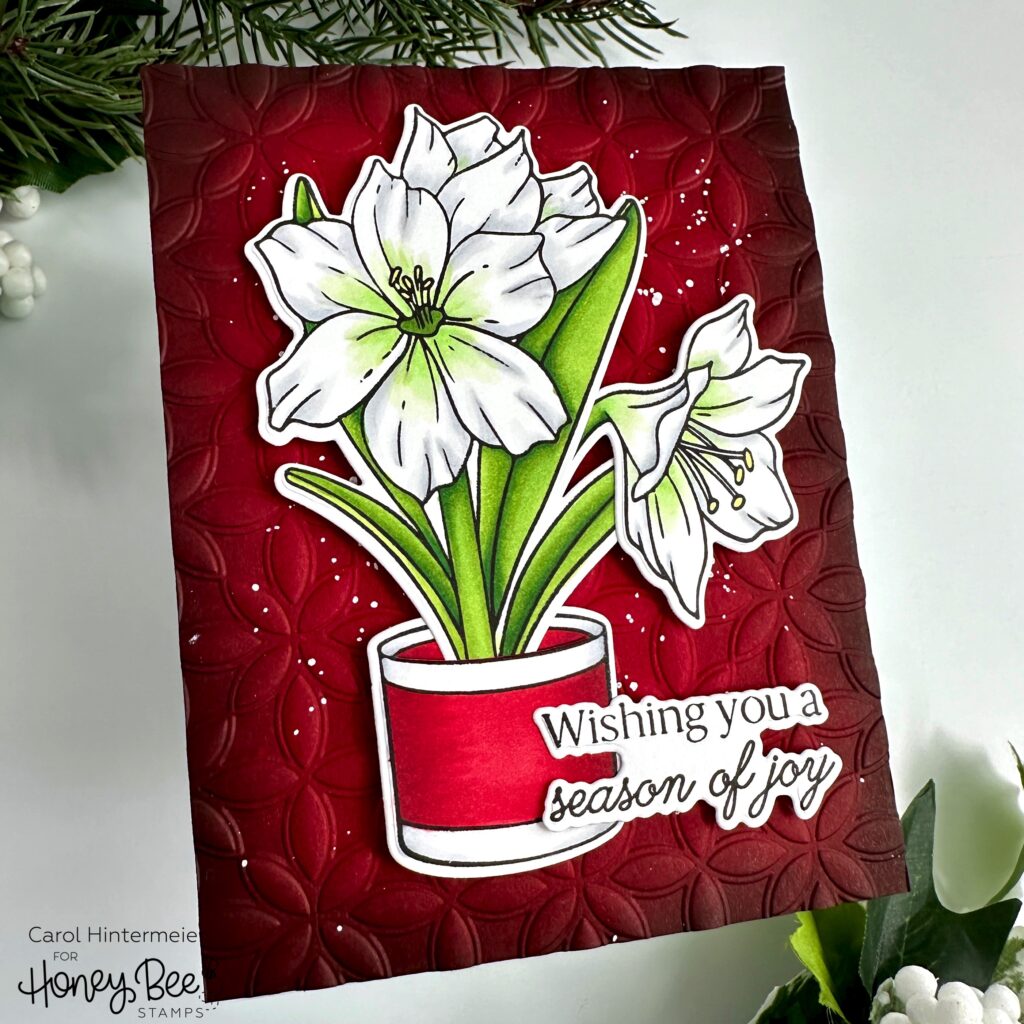
Hello Honey Bee friends!! Are you finished with your holiday cards yet? If not, I have one today that is easy to make, yet beautiful too! It includes some simple coloring of the gorgeous Holiday Blooms stamps backed with a beautifully embossed background.
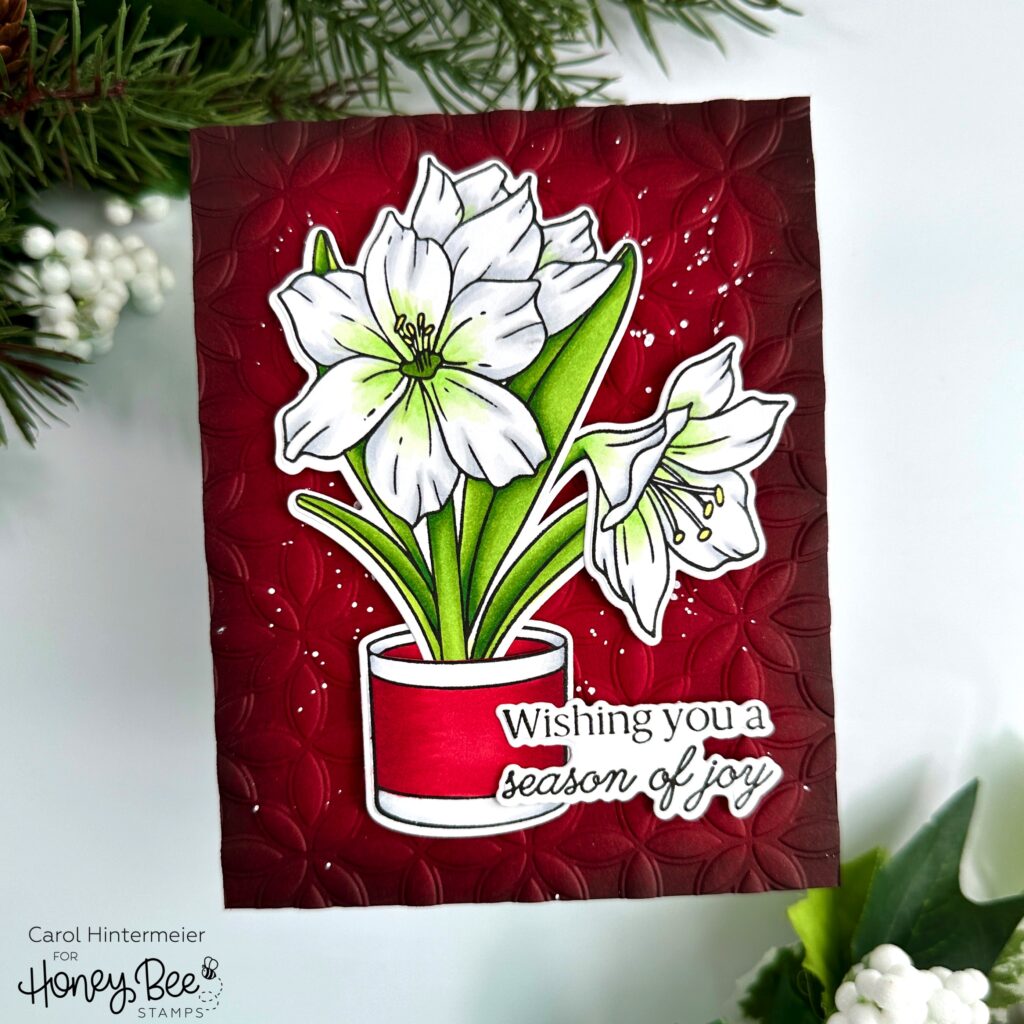
First I stamped the flower and pot images from the Holiday Blooms set with Intense Black ink onto 80# Neenah. Then I used my Copic markers to color them. The colors I used are: B63, R29, R27, R35, Y13, C3, C2, C1, C00, green in flowers: YG13, YG11, G20; leaves: G07, YG17, YG25, YG23.
Next I cut them out with the coordinating Holiday Blooms Honey Cuts. I love that the flowerpot die cuts a slit to insert the flower stems into! I used Bee Creative Glue to adhere the stem to the flowerpot. Then I tucked the extra flower to the right of the main bunch of amaryllis and secured it with glue.
Add some foam dots to the back of the floral image and set it aside while we create the background.
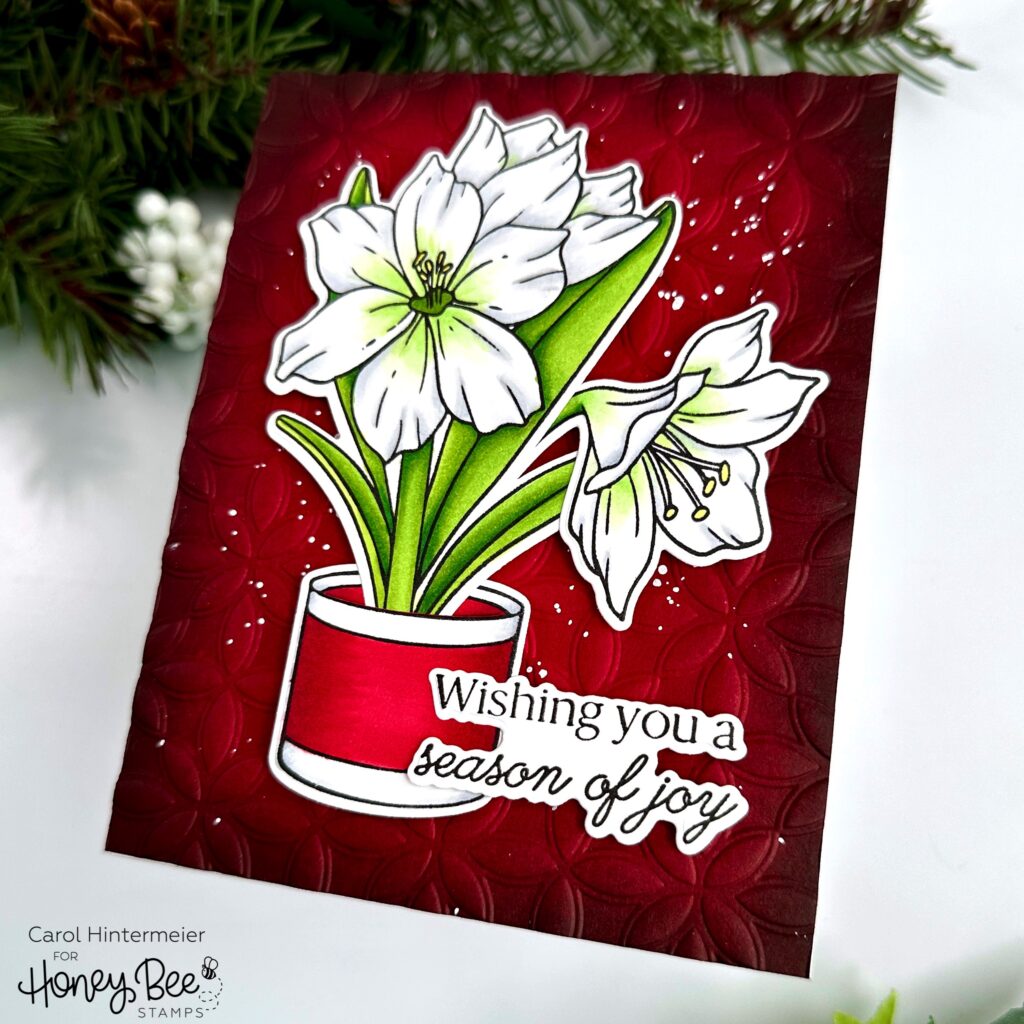
I trimmed a piece of red cardstock (from my stash) to 4-1/4″ x 5-1/2″. Then I used my ink blending brushes to add Aged Mahogany Distress Ink around the edges. Next I added a lighter shade of red ink a bit further, still leaving the center un-inked. To deepen the look, I lightly blended Black Soot Distress ink just barely around the edges. Such an elegant look!
I placed the inked panel into the Kaleidoscope 3D embossing folder and ran it through my die cutting machine. Then I added white splatters to the panel. When the splatters were dry, I glued it to an A2 card base. I adhered the flowers to the card and added a sentiment I stamped from the Holiday Blooms stamp set.
I hope you have been inspired by this card! Be sure to check out the entire Holiday Blooms set to see all of the included flowers and sentiments. Thank you for stopping by. Have a wonderful day filled with lots of crafty time!