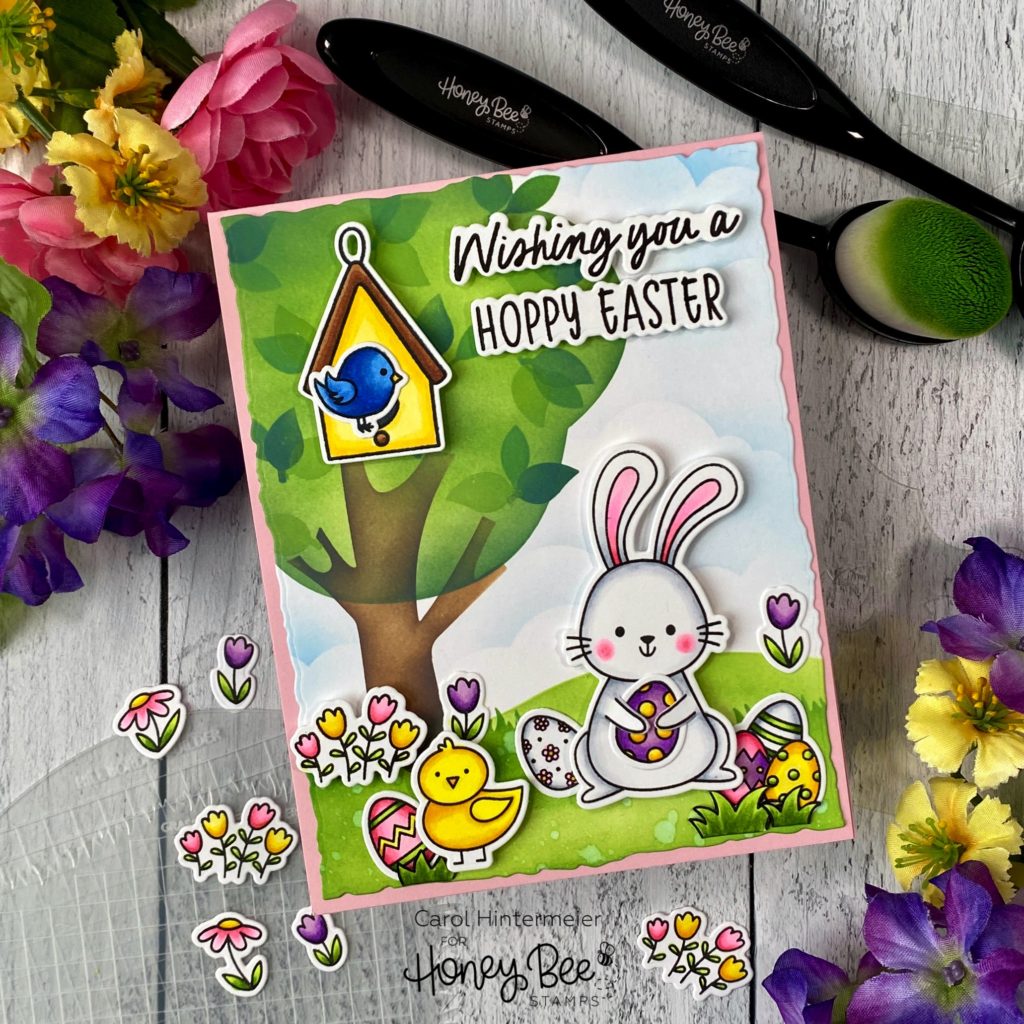
Hello Honey Bee friends! Sunday is Easter and I just had to make a one more springtime, cute Easter card with the so adorable Easter Buddies stamps and coordinating Honey Cuts! I also had lots of fun stenciling the background for my scene! Read on for all of the fun details!
First I created my background scene on an A2-sized piece of 80# Neenah Solar White card stock. I have a photo below that gives you a visual of my steps. First I laid out the Oak Tree stencil and the Grassy Hill Borders stencils out on my card stock to kind of plan what I wanted to do. I used my Background Blender Brushes with Distress Oxides for all of the stenciling. I used Gathered Twigs and Ground Espresso for the tree trunk. For the tree and leaves I used Mowed Lawn, Twisted Citron and Rustic Wilderness. I used Mowed Lawn and a touch of Twisted Citron on the hill and grass areas. Then I realized I hadn’t done anything for the sky! I picked up my Background Blender brush I use just for blue Oxides and brushed on some clouds with the cloud stencil from the Outdoor Scene Builder stencil set. So I have no idea which specific Oxide it is! (TIP: I keep one Blender Brush for each Oxide color family. I just wipe it off on a clean, dry paper towel between each shade of that color and it works great!)
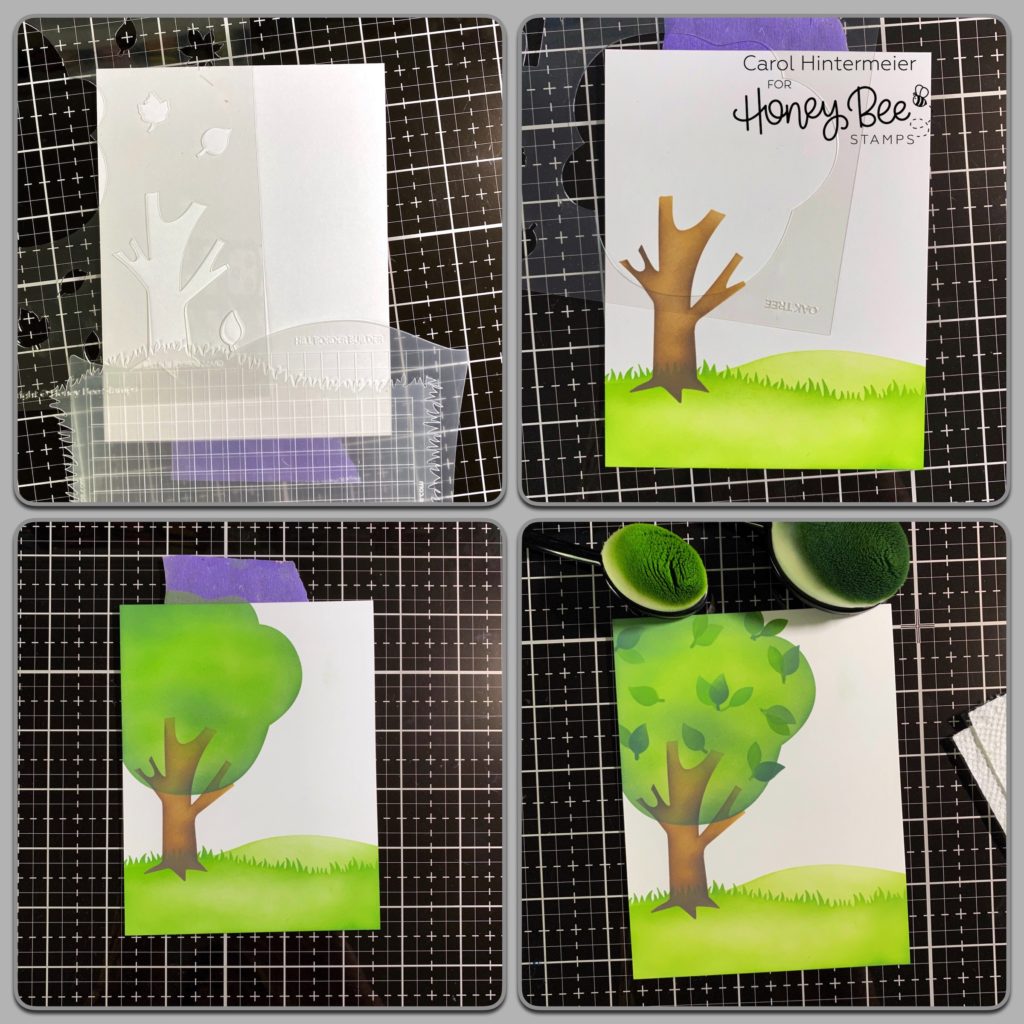
I decided to add a few water splatters to the grassy area and covered up the other parts before sprinkling on the water drops. Next I took a clean paper towel and blotted it dry. I thought about adding water drops to the tree, but I was too afraid of messing it up! LOL!
I die cut the piece out with the largest Deckle Edge A2 Honey Cuts. I like the size of this and I needed all the space I could get for my cute images! Haha!
Next I stamped all of the adorable little images from the Easter Buddies set in Copic safe ink and colored them with my Copic markers. Then I cut them out with the coordinating Honey Cuts. As I was planning on where to put everything on the card, I thought the tree looked like it was needing something more! I remembered the cute little birdhouse and bird in the Birds and The Bees set and stamped, colored, and die cut them with their coordinating Honey Cuts.
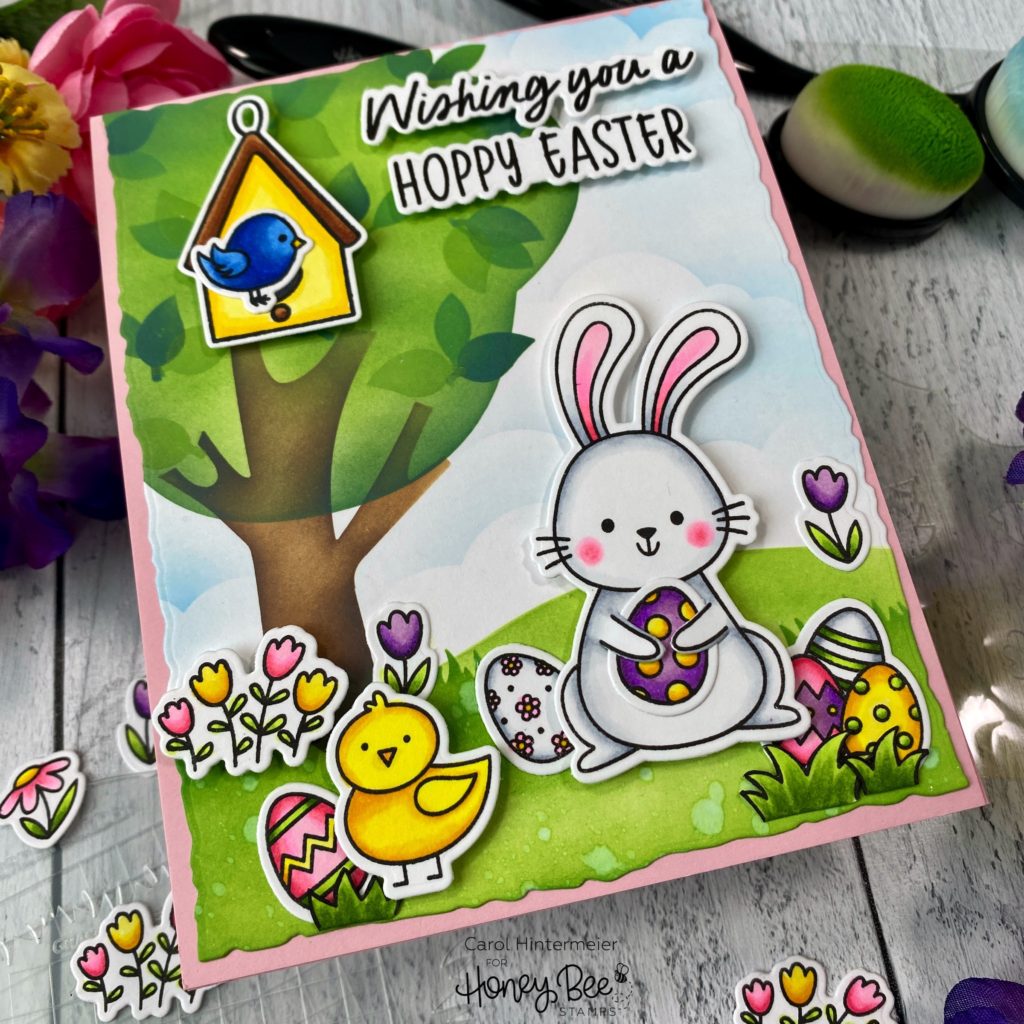
I decided to fussy cut the little grass pieces so they wouldn’t cover up the eggs as much. I added foam tape to the back of the birdhouse, bunny, chick, and flower group and adhered them to the card front. I adhered the other images with Bee Creative glue.
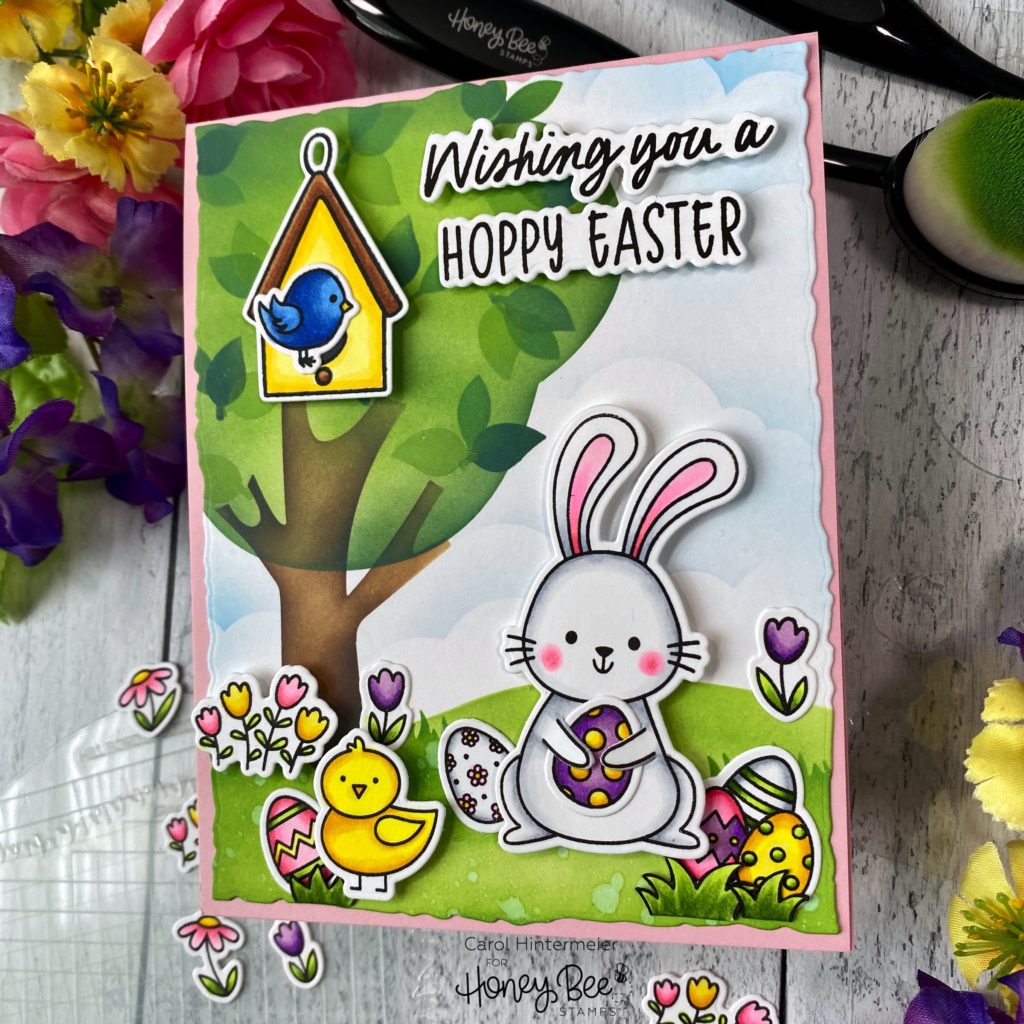
I had a hard time choosing from all of the fabulous sentiments in the Hoppy Easter set, but finally decided on two. I stamped them in Onyx Black ink and die cut them with the coordinating Honey Cuts. I LOVE having dies for sentiments and Honey Bee does them so well!

I had so much fun creating this card! The stencils sure do make creating backgrounds so easy! I hope you all have a wonderful weekend and a very “Hoppy” Easter! Thank you so much for stopping by! Stay crafty, my friends!