Happy new week friends! It’s Keiko from Happy Tree Studio today! I am sharing this rustic wreath shaped card. If you see closely, you can see the little red pickup belongs to Santa!
Texts in blue indicates a direct link to the Honey Bee Stamps store. You can just click them to check them out.

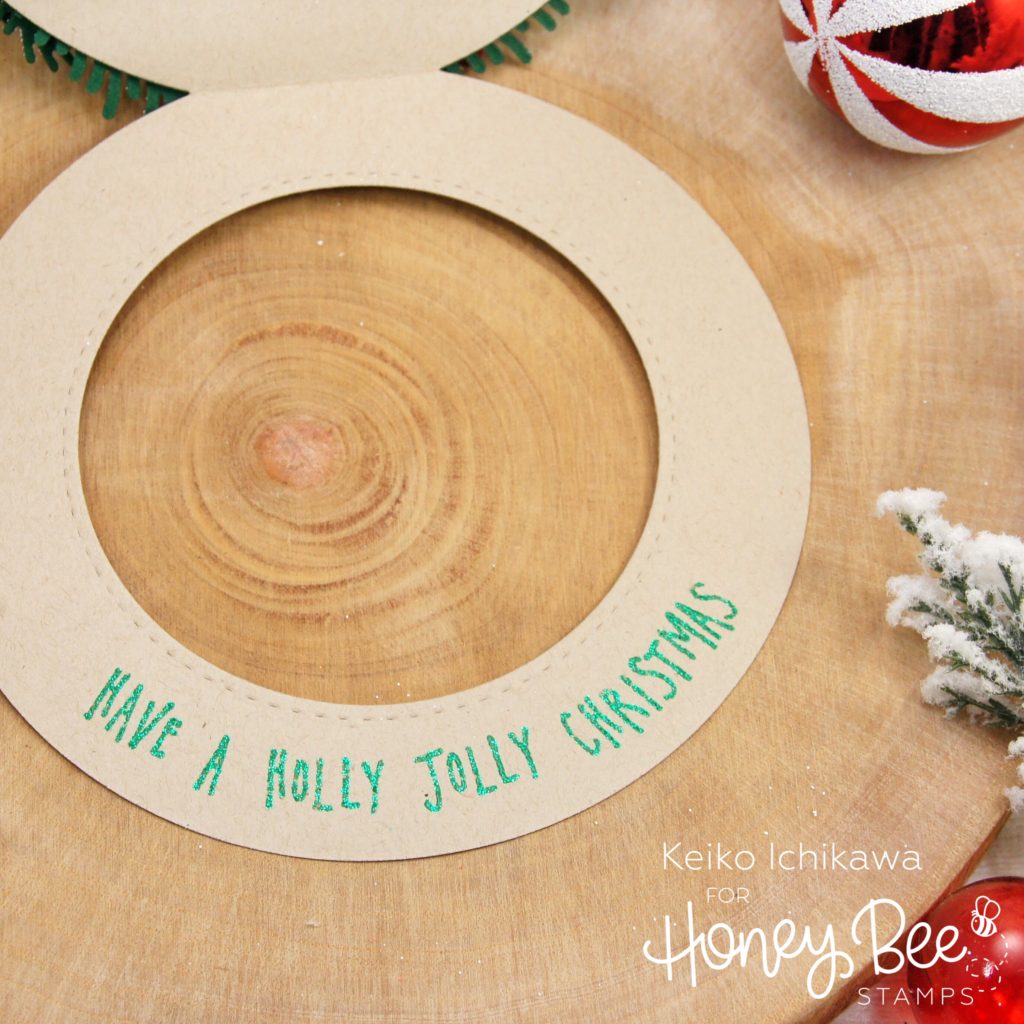
This card might look complicated to make, but it is actually pretty simple. You just have to use your muscle to die cut a bunch of shapes! The card base is made from Kraft colored card stock die cut with Donut Card die. This will give you a donut shaped card base, but in order to make the hole in the middle bigger, I die cut out a bigger circle using a circle die in my stash. Inside, I heat embossed a sentiment “HAVE A HOLLY JOLLY CHRISTMAS” in green sparkle embossing powder.
Now on to die cutting. I cut out bunch of greenery pieces from two shades of green card stocks using Winter Bouquet die. I think I die cut about 40 of them but you might not need that many. It just depends on how full you want the wreath to be. I then lightly sponged on clear embossing ink, sprinkled on white puff embossing powder and heat set them. This will make them look like they were covered in snow! TIP: Go easy on sponging so you can still see the green underneath. From the same die set, I die cut berries, brunches and pine cones. Berries are cut from white glitter paper and colored with red Copic markers. Brunches are die cut from brown and silver foil card stock and I glued the berries onto the brown brunches and added Glossy Accents to the berries. I cut these pine cones from brown card stock and added Nuvo Glitter Accents in Fresh Snowfall color. I also die cut some stars from copper foil paper.
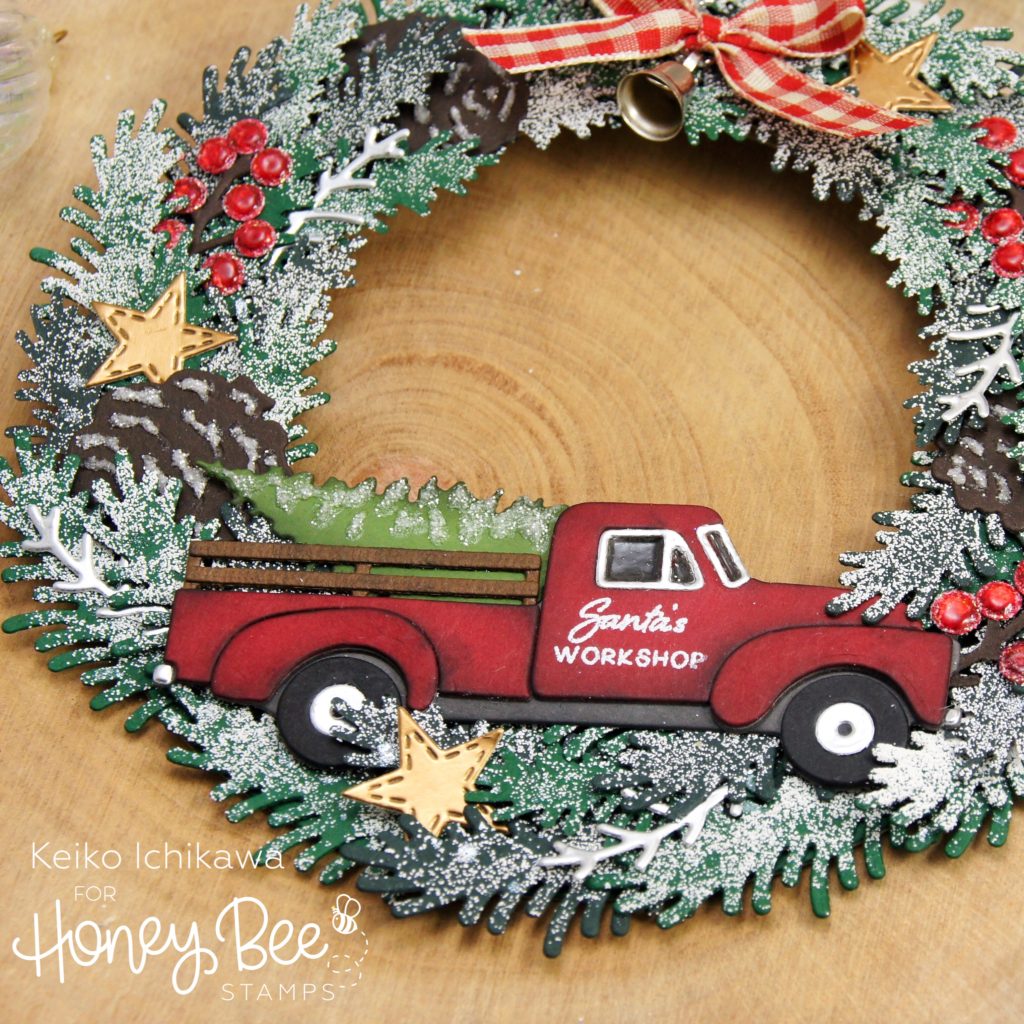
The little pickup truck along with all the accessary pieces are die cut from various colors of card stock. I die cut some of the parts several times so I can stuck them up to make the truck look more dimensional. Before putting the truck together, I stamped “Santa’s WORKSHOP” from Gingerbread House Add-On stamp on the door and heat embossed it with white powder. I then inked the parts with black ink to add dimension and make them look a little rusty. After glueing all the parts together, I added Glossy Accents to the windows, and Nuvo Glitter Accents to the tree.
To build the wreath, I first glued all the greenery pieces to the card base. TIP: Only apply the glue to the bottom end (not the tip) of the pieces so you can add other elements in between later on. After all the greenery pieces are adhered, you can now add other elements to the wreath. TIP: Tucking part of these elements under the greenery will make the wreath look more natural. I added a ribbon bow and a jingle bell on the top to finish off the wreath.

Thank you so much for stopping by! I hope you will give the wreath shaped card a try! (If you do, make sure you tag us!) It will make a super cute hanging decoration too!
Have a wonderful week!

One response to “Winter Wreath Shaped Card”
This is so pretty!