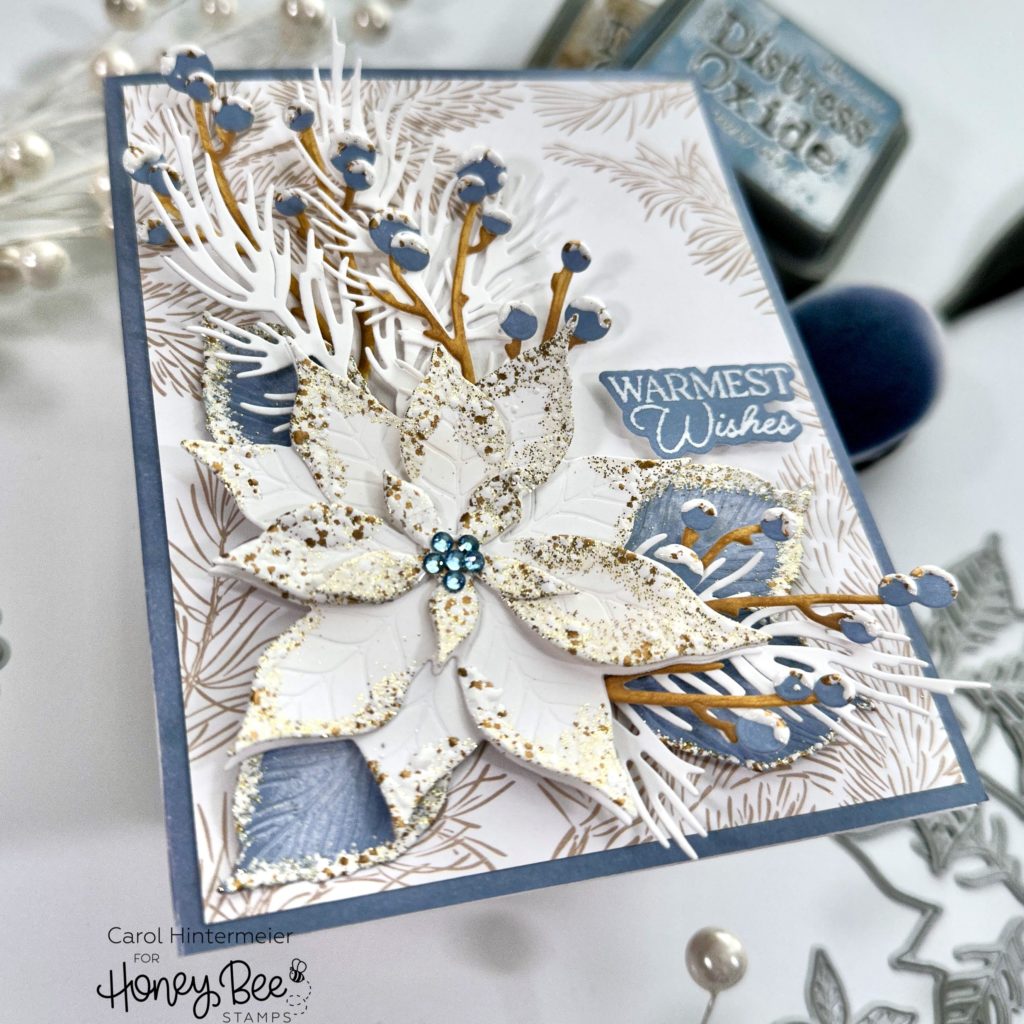
Hello Honey Bee friends! Today I’m sharing my monochromatic winter card that features the Lovely Layers: Poinsettia Honey Cuts with lots of gorgeous sparkles! I love adding sparkles to cards anytime I can get away with it! Haha!
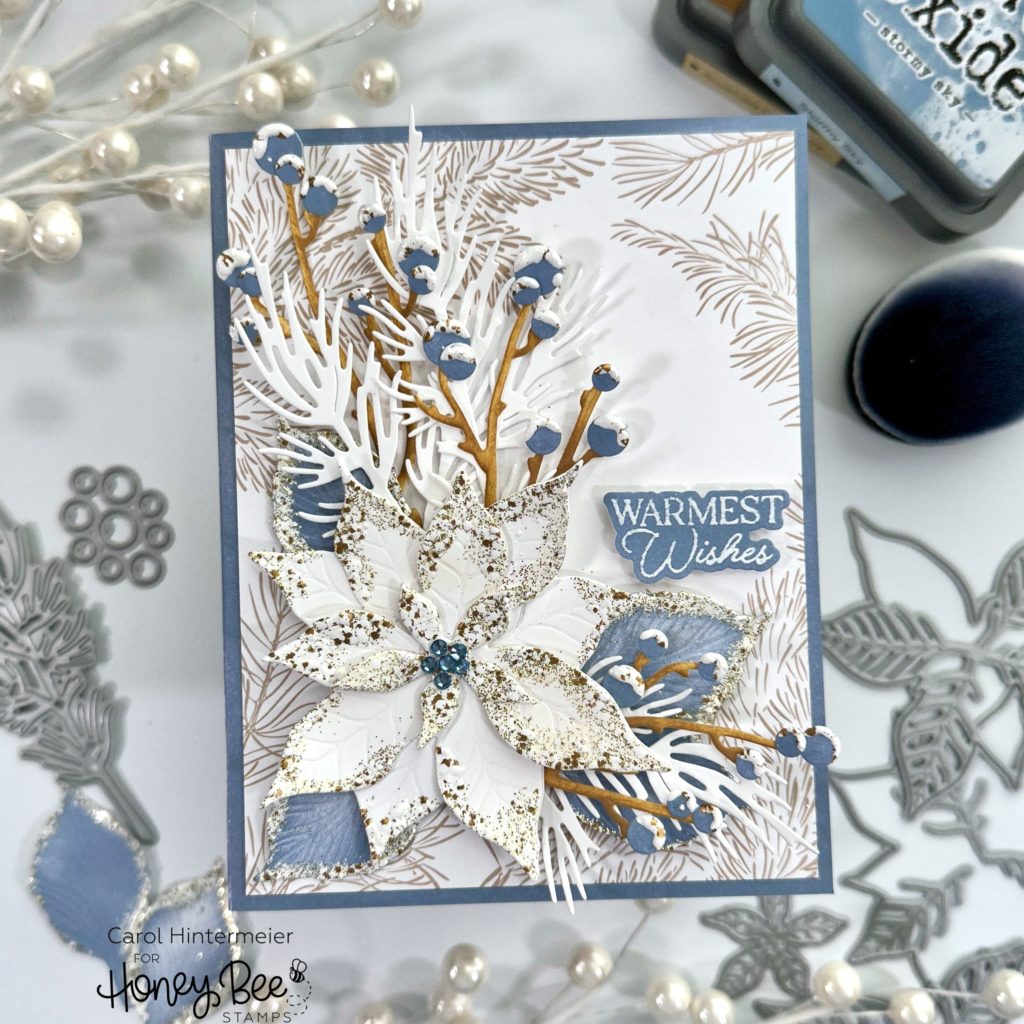
For the card base, I used a Detail Blender brush to add Stormy Sky Distress Oxide just around the edges of the folded card base. Then I used one of the papers that comes in the current “FreeBee” paper pack (free with a qualifying purchase). I used Bee Creative glue to adhere it to the card base.
Next I die cut the Lovely Layers: Poinsettia and Lovely Layers: Winter Greenery (pine sprigs, branch, and berries) from 80# Neenah. To add the sparkle to the poinsettia, I used an embossing dabber and swiped it along the edges of the petals. Then I added some embossing powder that I’ve had in my stash forever (and sadly just discovered it’s been discontinued) but I think that this sparkly gold embossing powder would be beautiful too. I heat set the powder and repeated the steps for each layer of the poinsettia. Then I used glue to adhere the layers together.

Before I embossed the leaves and berries, I colored them with some Stormy Sky Distress Oxide using a Detail Blender brush. I repeated the embossing steps. My reverse tweezers made this easy and also protected my fingers from the heat!
I quickly colored the twigs with a blender brush and some Brushed Corduroy Distress Oxide.
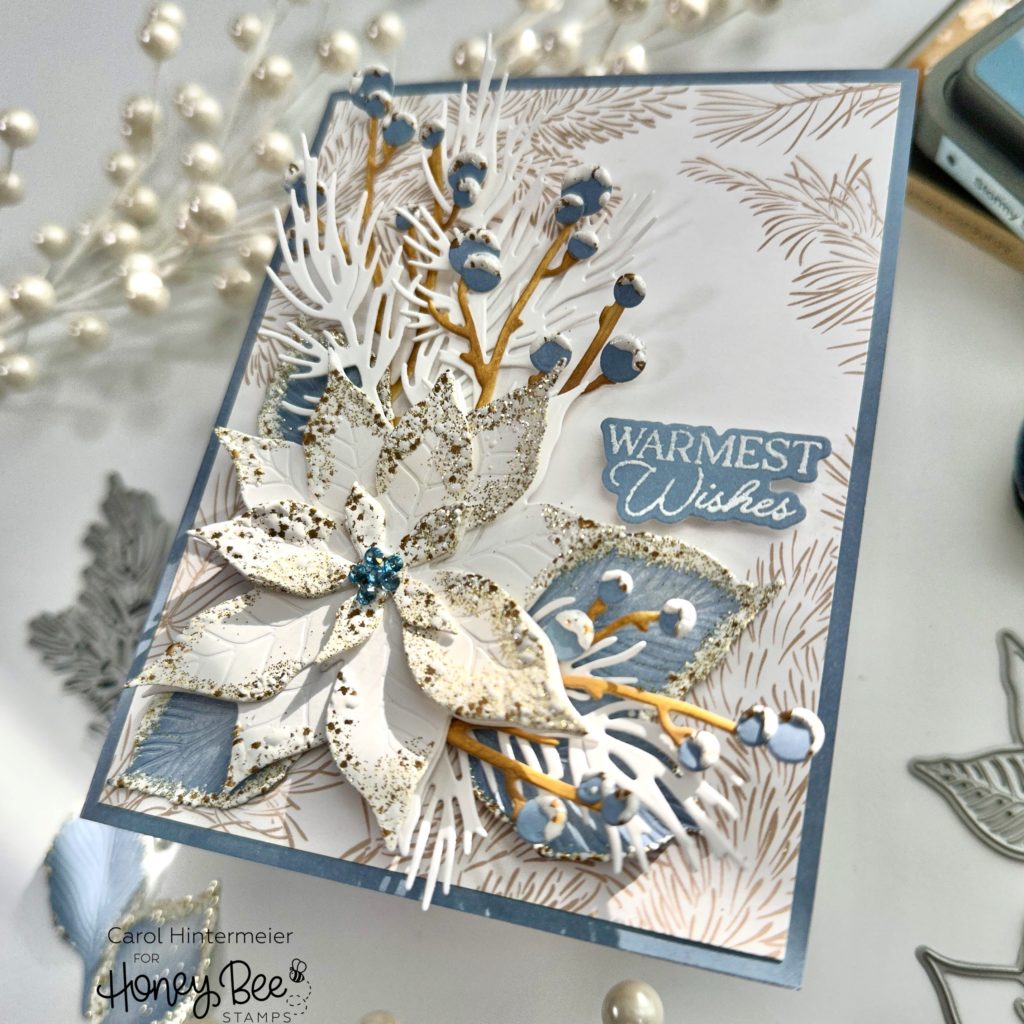
I arranged the poinsettia and other die cuts on my card. I used a piece of Press N Seal to pick up all of the stems and branches to add glue to the back. Then just replace the Press N Seal to adhere the die cuts to the card. I added glue to the poinsettia to adhere it. Then I tucked in the leaves with more glue. To add more dimension, I used my fingers to slightly shape the twigs, sprigs, and leaves.
I colored a scrap of white cardstock with Stormy Sky Oxide. Then I brushed it with my anti-static tool and stamped the sentiment from the Home For The Holidays stamp set with clear embossing ink. I added white embossing powder and heat set it. Then I used the coordinating Honey Cut to die cut it out. I popped it up with a few foam squares.
I added a few gem stickers from the Winter Wonder gem sticker set to the center of the poinsettia.
I so wish cameras would pick up the gorgeous sparkle! It’s so pretty in real life. If you celebrate Christmas, I wish you the happiest of holidays! If not, have a wonderful day, and I’ll see you next week after Christmas! Thank you so much for stopping by–you are so appreciated!
8 responses to “Winter White Sparkling Poinsettias”
One of the most beautiful cards I’ve seen in awhile.
Oh wow, thank you so very much, Cindy, for your so kind comment! It really means a lot. Wishing you all the best in 2023!
This card is so beautiful. As a newbie, I appreciate your details of how you made it. Thank you so much for sharing.
Thank you so much Diana!!! Welcome to the awesome card making world! We are happy you’re here!
Such a pretty card!
Thank you very much Lynda!!
Gorgeous card!
Thank you so much Tracy!!