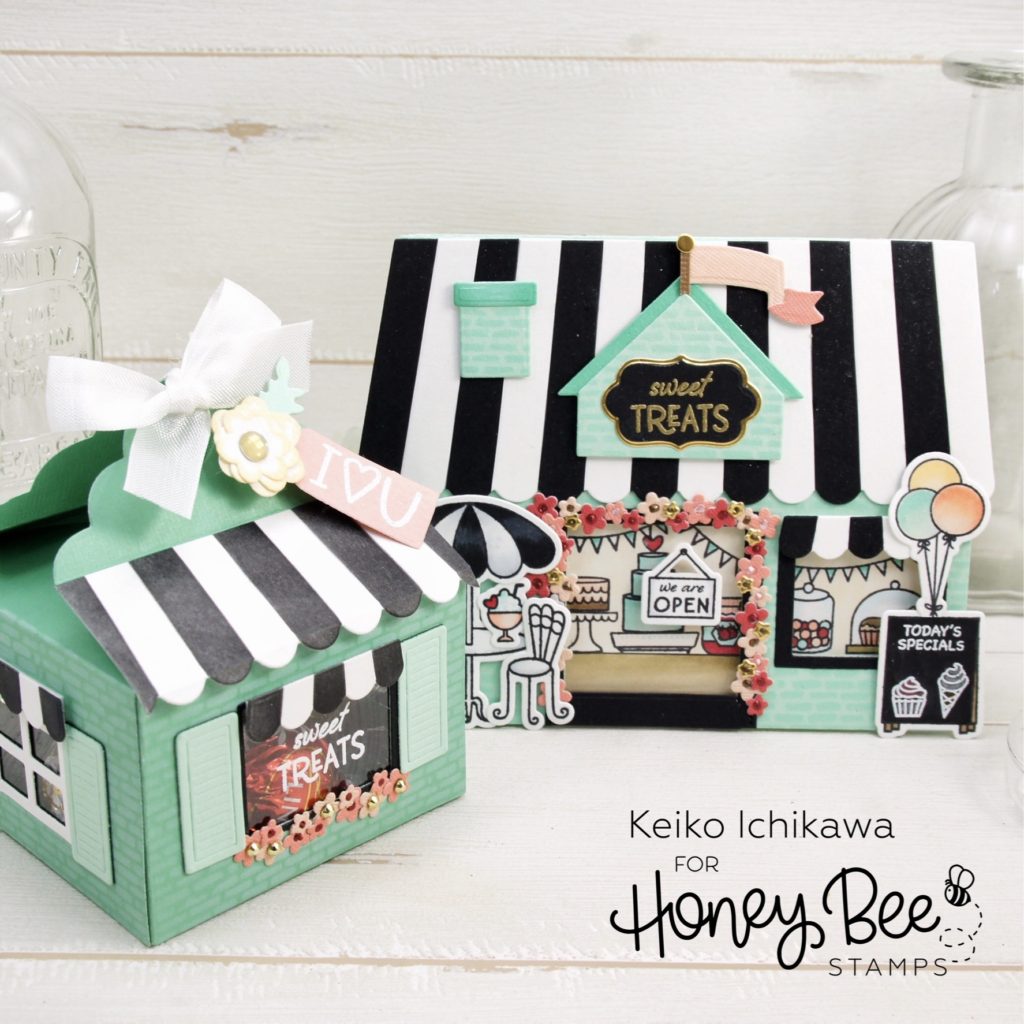
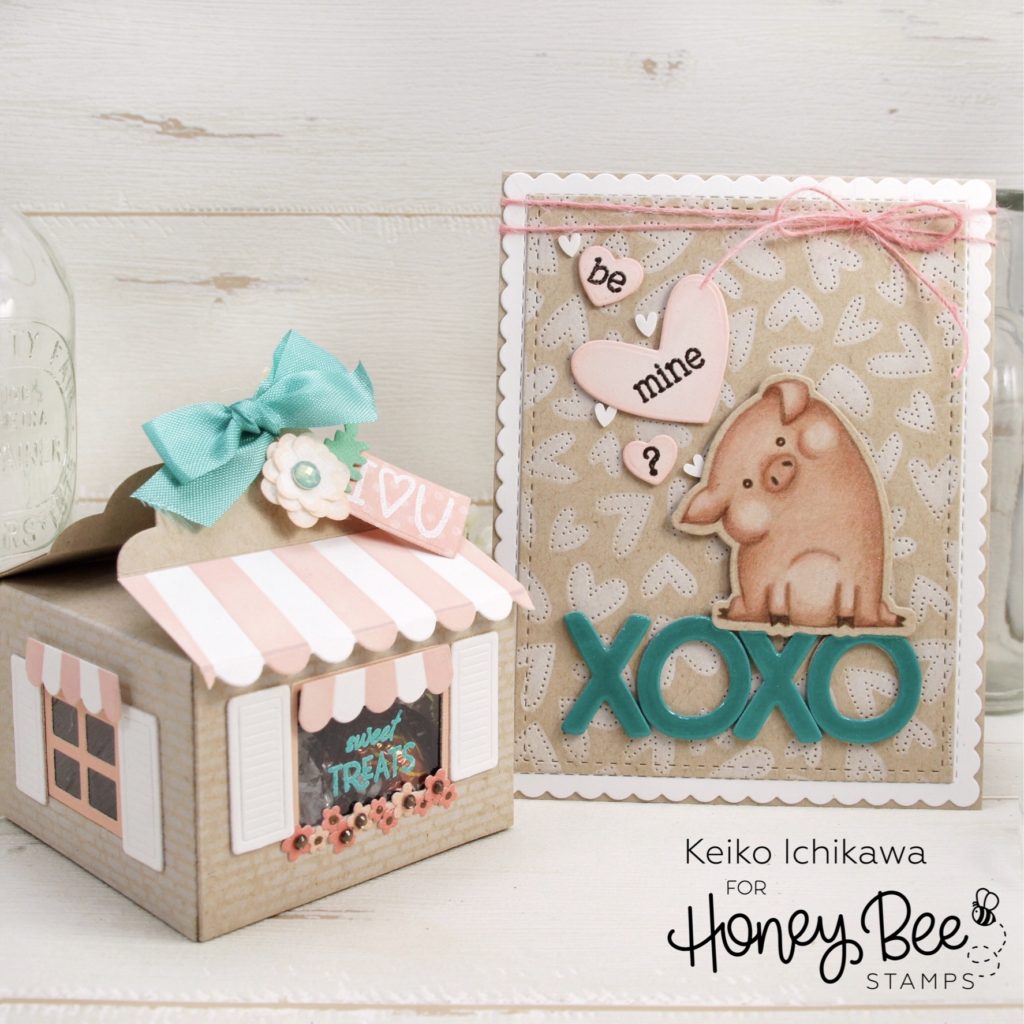
Welcome crafty friends! It’s Keiko from Happy Tree Studio here today and I have two adorable treat boxes to share with you! I specifically designed these boxes to coordinate with the Valentine’s Day cards I made a while back. They look like a little houses and perfect for sweet treats!
*The texts in blue are direct links to the Honey Bee Stamps store. You can click to check them out!
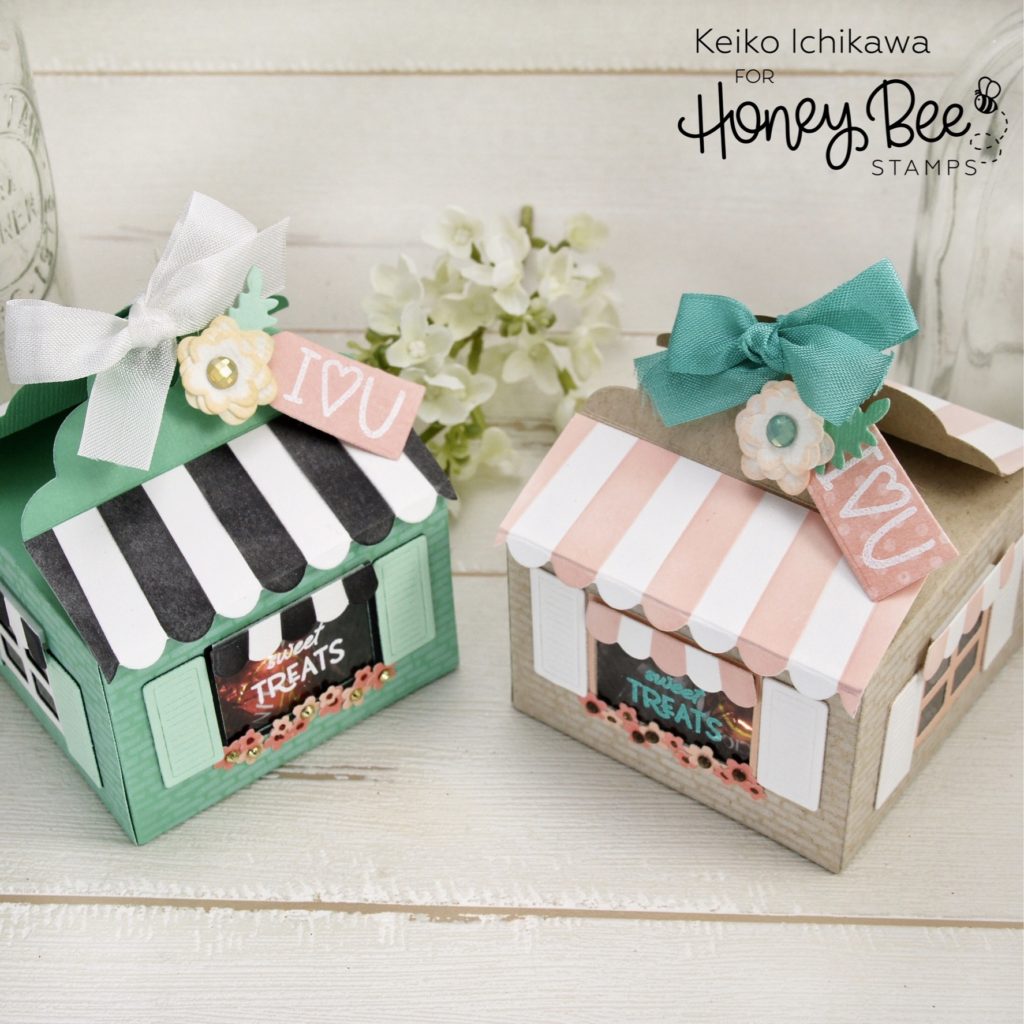
The first step is to die cut everything you need. Here are the dies I used:
Box: Sweet Treat Box
Roof, awning, front window, tiny flowers: Treat Shop Add-On
Side windows and shutters: House Builder
Tag: Piece of Cake
Flower & leaves: Bunch of Bouquets
Next step is to add color and textures with stencils. For the brick wall look, I used Salvaged Bricks stencil and for the roofs and awnings, used the new Treat Shop Add-On stencils. I used white pigment ink for the bricks, Tattered Rose Distress Oxide Ink for the pink, and Black Soot Distress Ink for the black. TIP: Before adding colors to the roofs, I trimmed them to fit on the treat box so I don’t have to ink the whole piece.
I then die cut the windows out from the front and the two side panels (I am going to hand write the messages on the back side). I stamped and white heat embossed the “I *heart* U” from the Piece of Cake stamp set on the tag and threaded some twine. The flowers were made from three die cut pieces glued together and I added some color to the edges and gem stone to the centers. I glued a piece of acetate to the back of each windows. For the front windows, I white heat embossed the “sweet TREATS” sentiment from Treat Shop Add-On stamp set on heat resistant acetate.
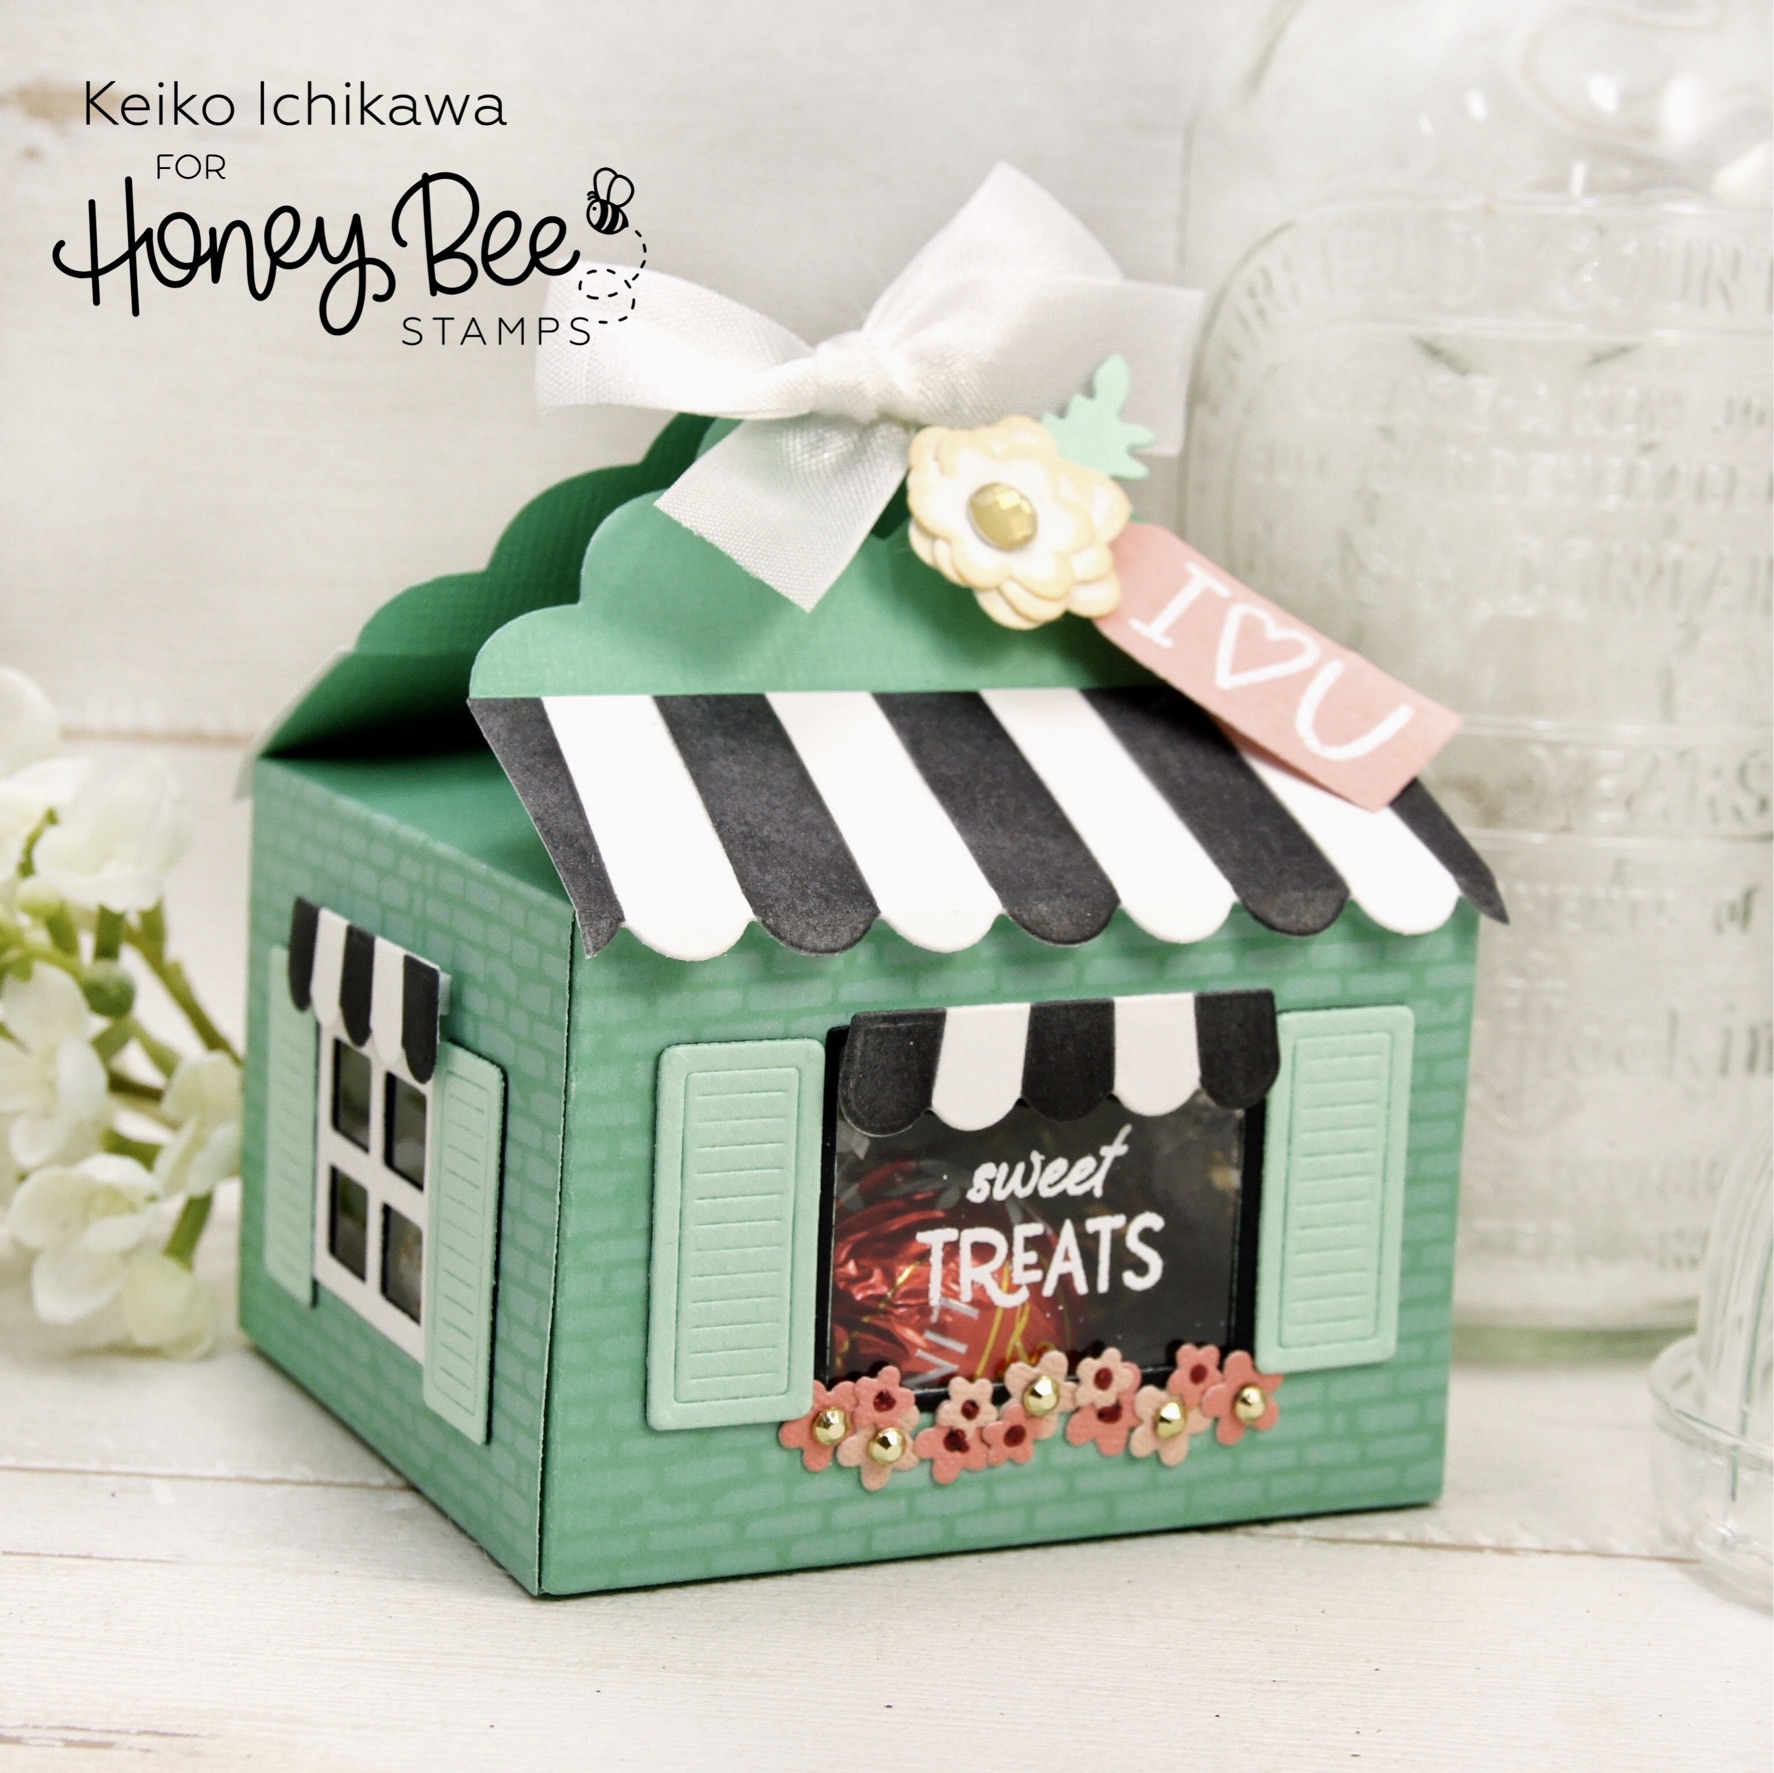
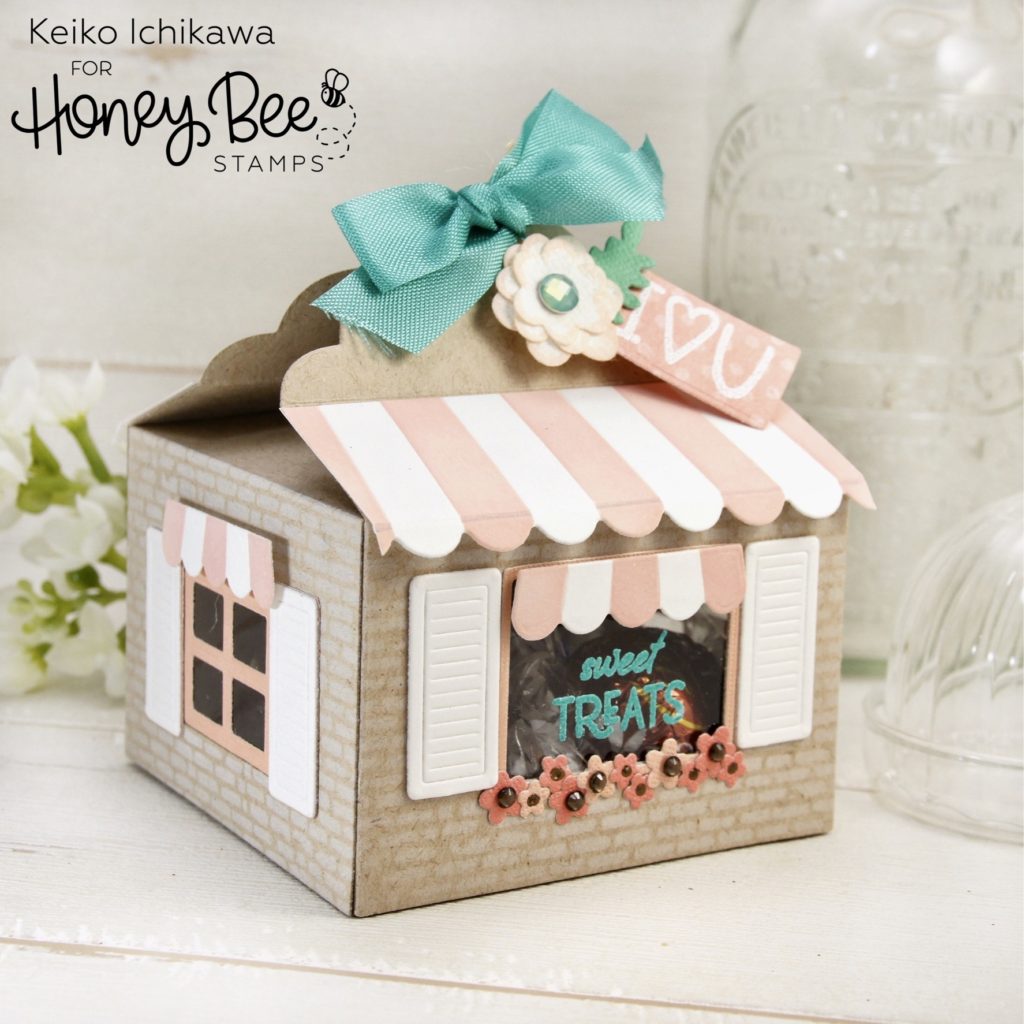
I thought it would be easier to adhere all the accessary parts to the box panels before putting them together, so using liquid glue and foam tapes, I added all the components. TIP: I added score line to the bottom of the roof and folded them. I think they look cute!
Assembling the treat box is super easy. You just need to reinforce the score line made by the die with your bone folder and adhere them together. If you are not sure, click HERE for Kelly’s sneak peak video to see how to instructions!
Now all you need to do is to put the sweet treat of your choice (mine are chocolates!) and close the box. I tied a bow with a piece of ribbon and added a tag and the flower & leaf. I think they coordinate pretty well with the cards I previously made!
Thank you so much for stopping by! Wishing you a wonderful week!!

4 responses to “Valentine Treat Boxes”
This is the cutest treat box I have ever seen! I am always inspired by your creations! I love seeing so many talented people in this World!!
Thank you so much Tina!! That is so sweet of you!
These are absolutely wonderful! I love the treat boxes and the matching cards. I definitely need to go shopping.
Thank you Patti!! I have never created a matching gift package & card, but they look cute together! I think I’m going to do this again!