Hello, Honey Bee friends!! I hope you are all doing well!!
When I sit down to do some type of technique, I usually like to try to make multiple cards while I have those supplies out! That’s exactly what I did for the three cards I have to share today!! Although they turned out a bit different than I had originally planned, but we’ll get to that…ha!
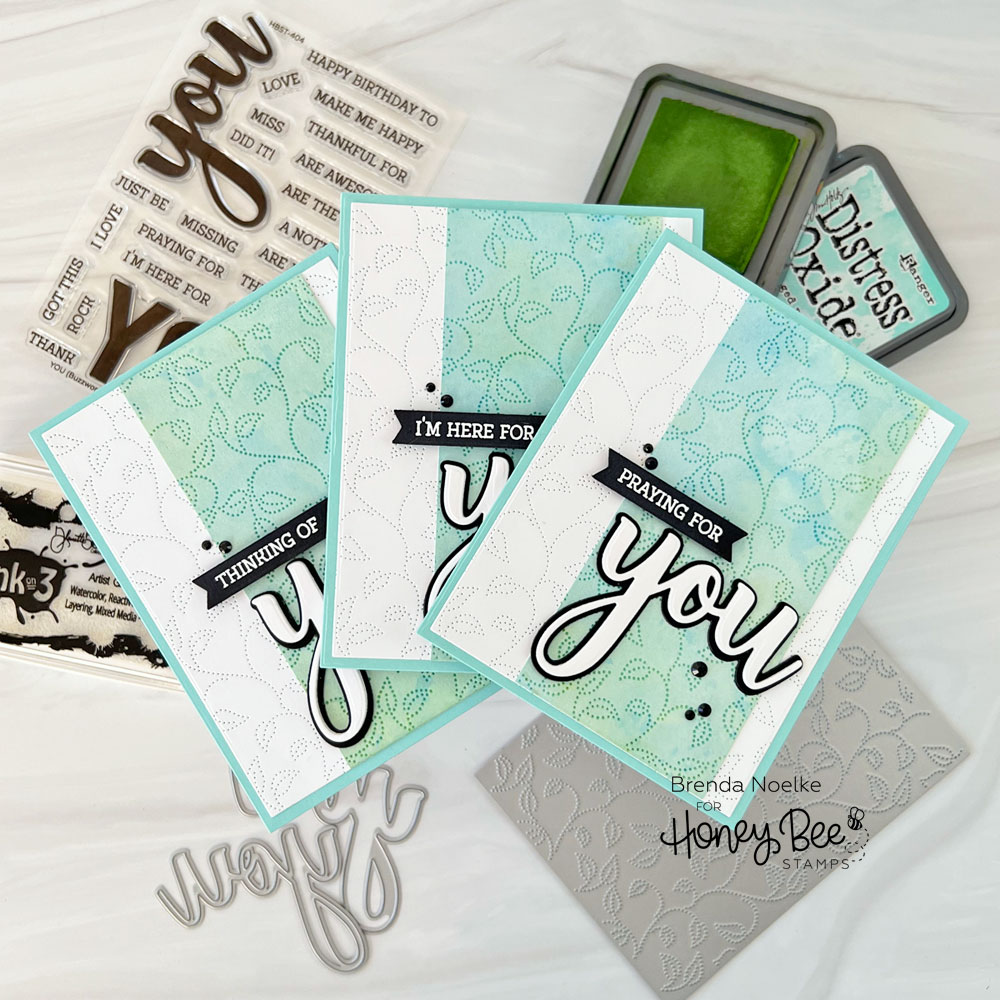
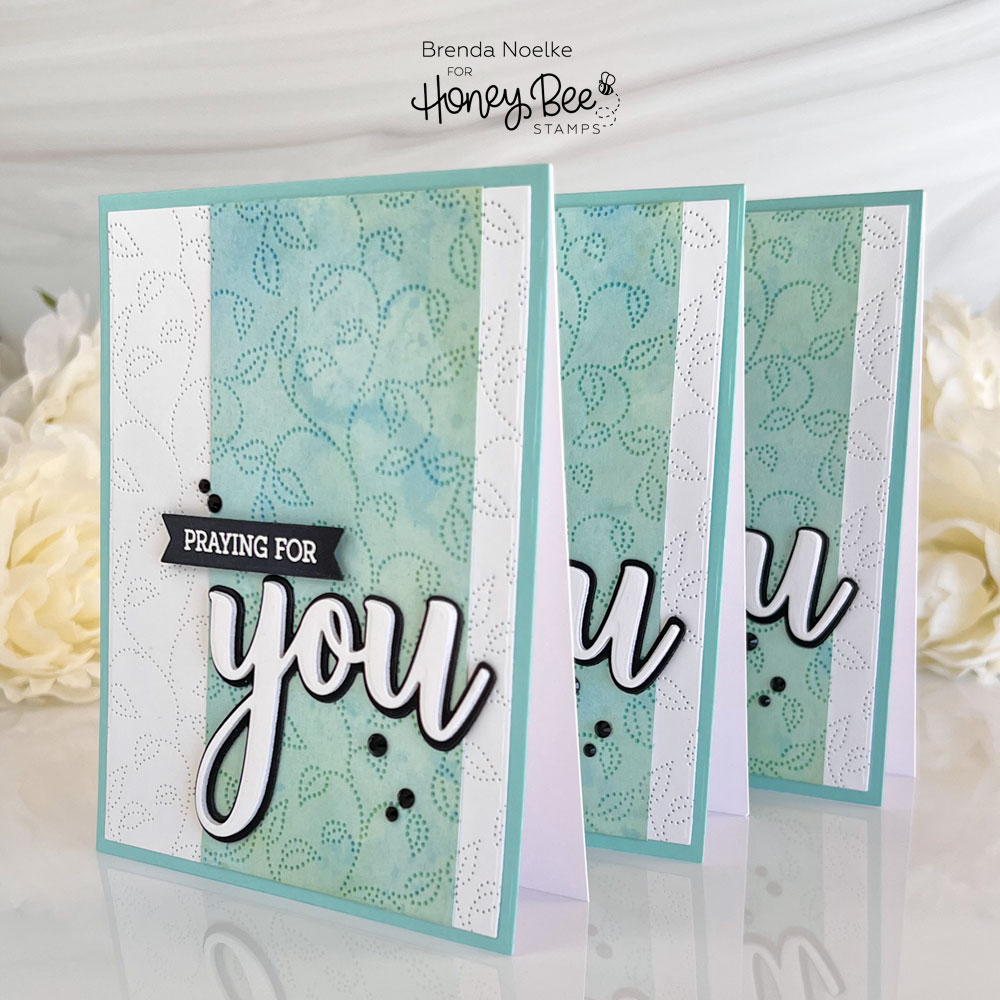
I began by ink smooshing Salvaged Patina, Mowed Lawn and Mermaid Lagoon Distress Oxide Inks onto panel of Bristol cardstock by applying the ink to acetate and then smooshing it onto the cardstock. Once the panels were dry, I die-cut them with the Swirling Leaves Pierced A2 Cover Plate Die. I also cut three panels of white cardstock with the same die. All of the panels were die-cut with the second largest die in the Sweet Stacks: Rectangle Honey Cut Set.
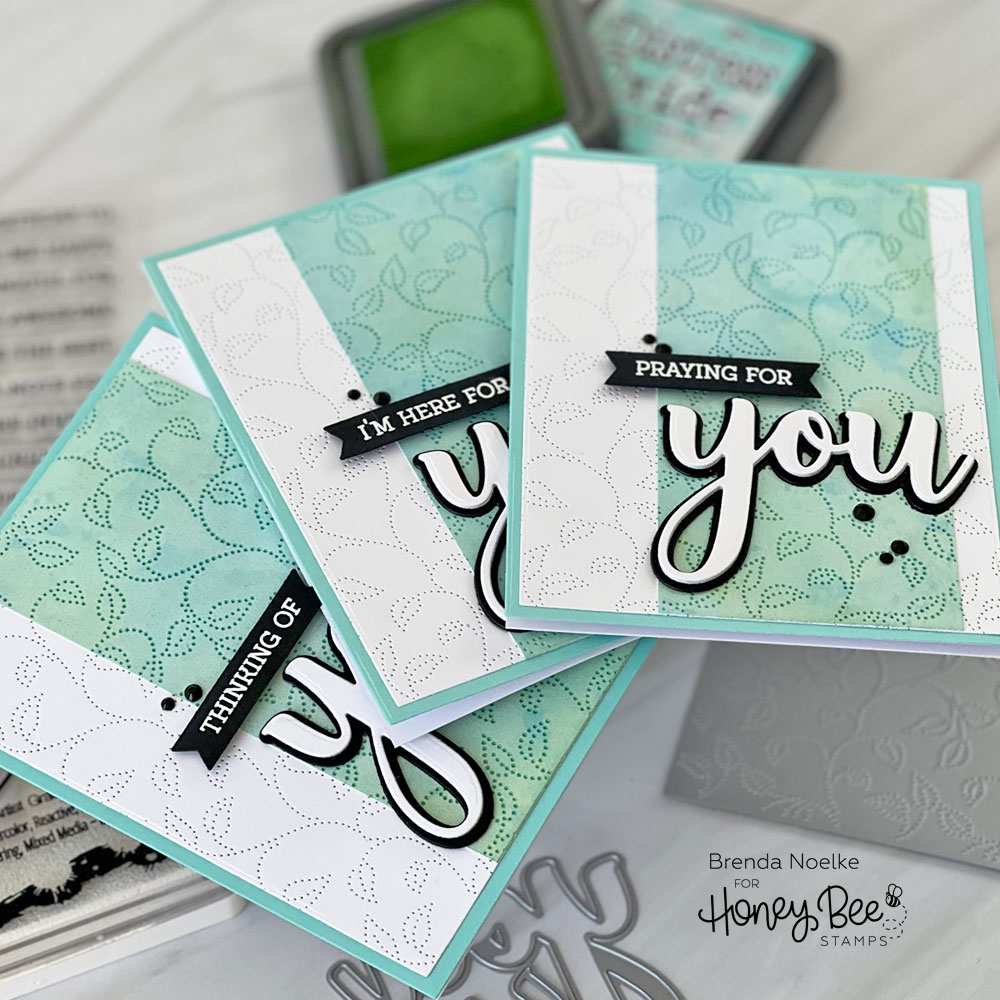
I trimmed the inked panels into strips to create a continuous pattern across the cards. Then I found that I didn’t like the brightness of the ink, so I needed to figure out how to lighten them. I decided to add white pigment ink onto the panels with a brayer. I rolled on two layers of ink, letting them dry between. This takes a bit longer, since this is a pigment ink. This is one time when the solution to a problem actually turned out better than the original. The piercing is darker and stands out more on those panels! Once they were dry, I adhered them to the white panels, being sure to line up the stitched lines for a continuous look. I used the largest die in the Sweet Stacks: Rectangle Set to cut three panels from aqua cardstock and adhered the stitched panels to them.
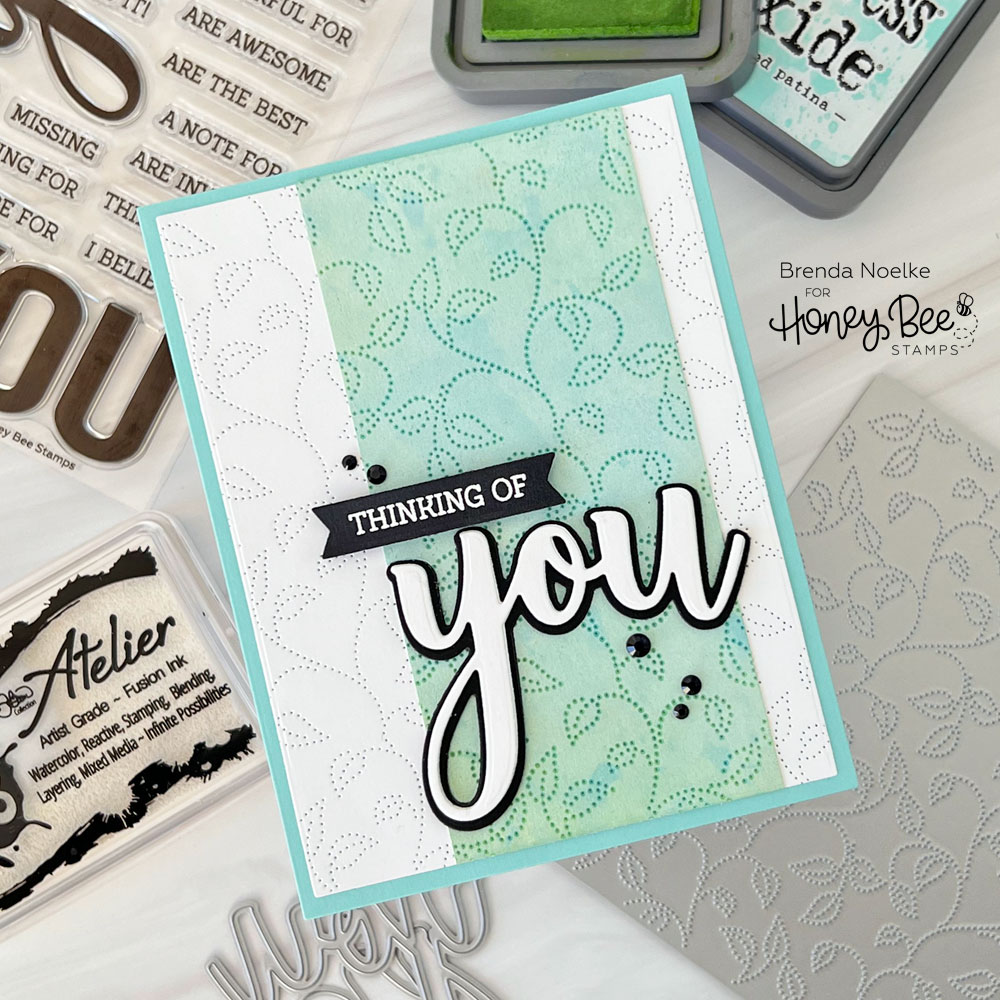
For the sentiments, I die-cut the bottom layer of the You Buzzword Honey Cuts from black cardstock twice and the top layer from heavyweight white cardstock three times for each card. I stacked and adhered those together for dimension.

The rest of the sentiments, from the You Buzzword Stamp Set, were stamped onto black cardstock with Bee Creative Clear Embossing Ink, sprinkled with white embossing powder and melted with a heat tool. They were die-cut with a die in the Sentiment Banners Die Set and popped up with foam adhesive.
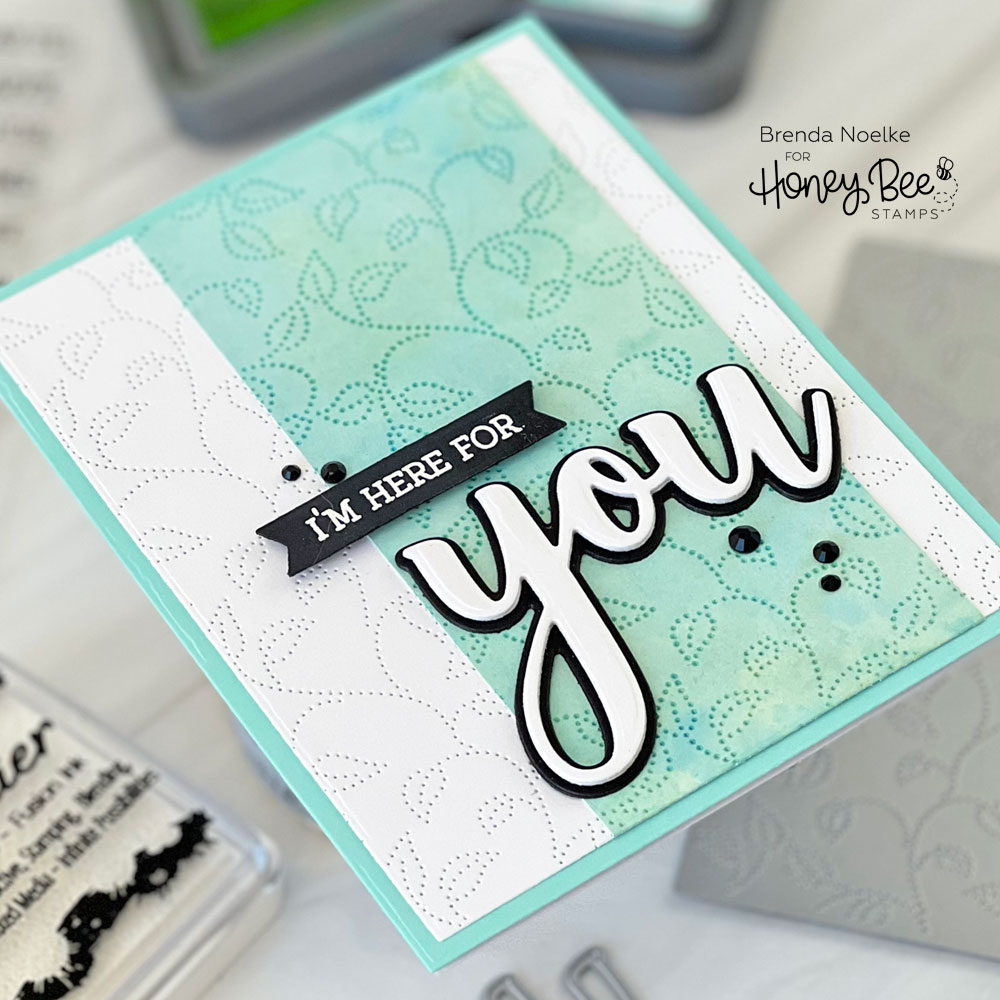
For the finishing touch, a few gems from the Back to Basics Gem Stickers were added to each card.
I’m really happy with how these turned out!!
Thanks so much for dropping in today!! I appreciate it!!
Have a great week!!