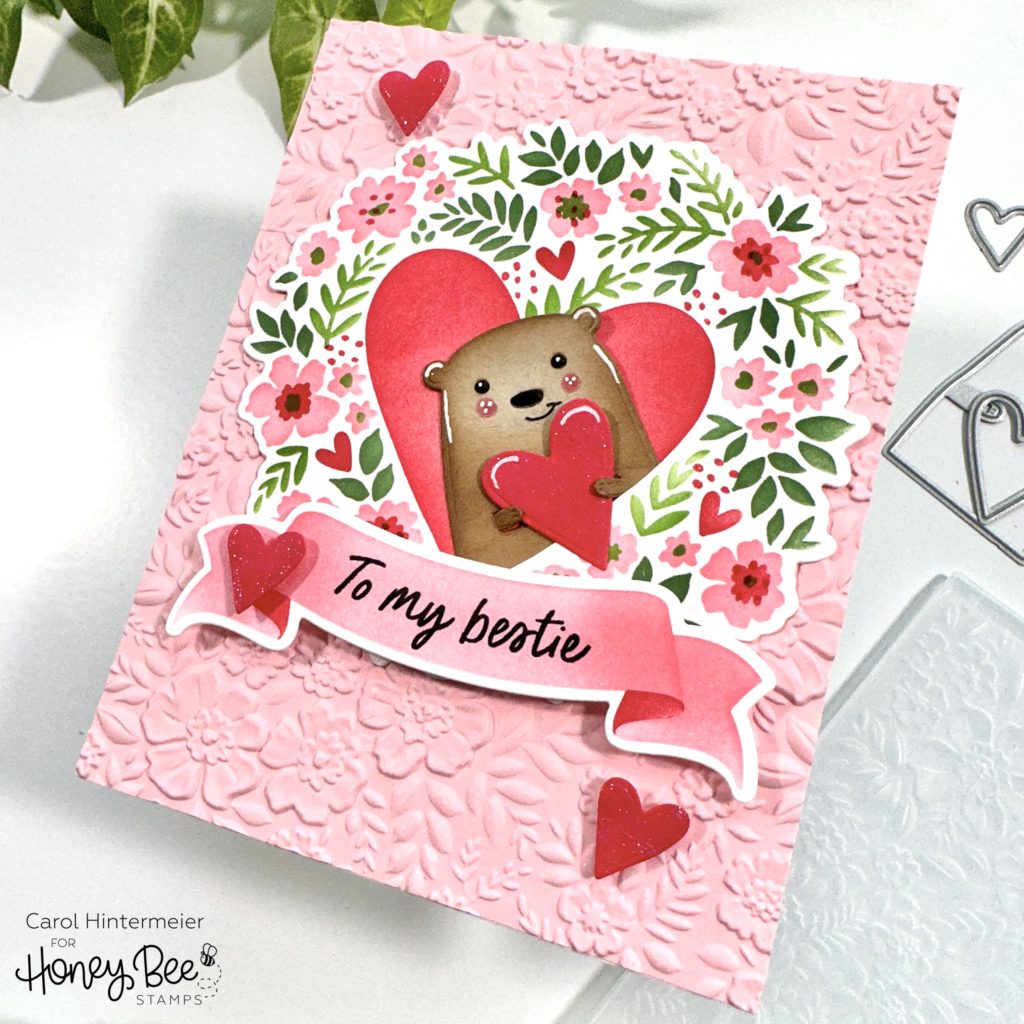
Hello Honey Bee friends! Today I’m sharing a sweet card for all the besties out there that features the beautiful new set called A Little Note. This is from the newest Happy Hearts release and also has coordinating Honey Cuts and a set of stencils to color the image!
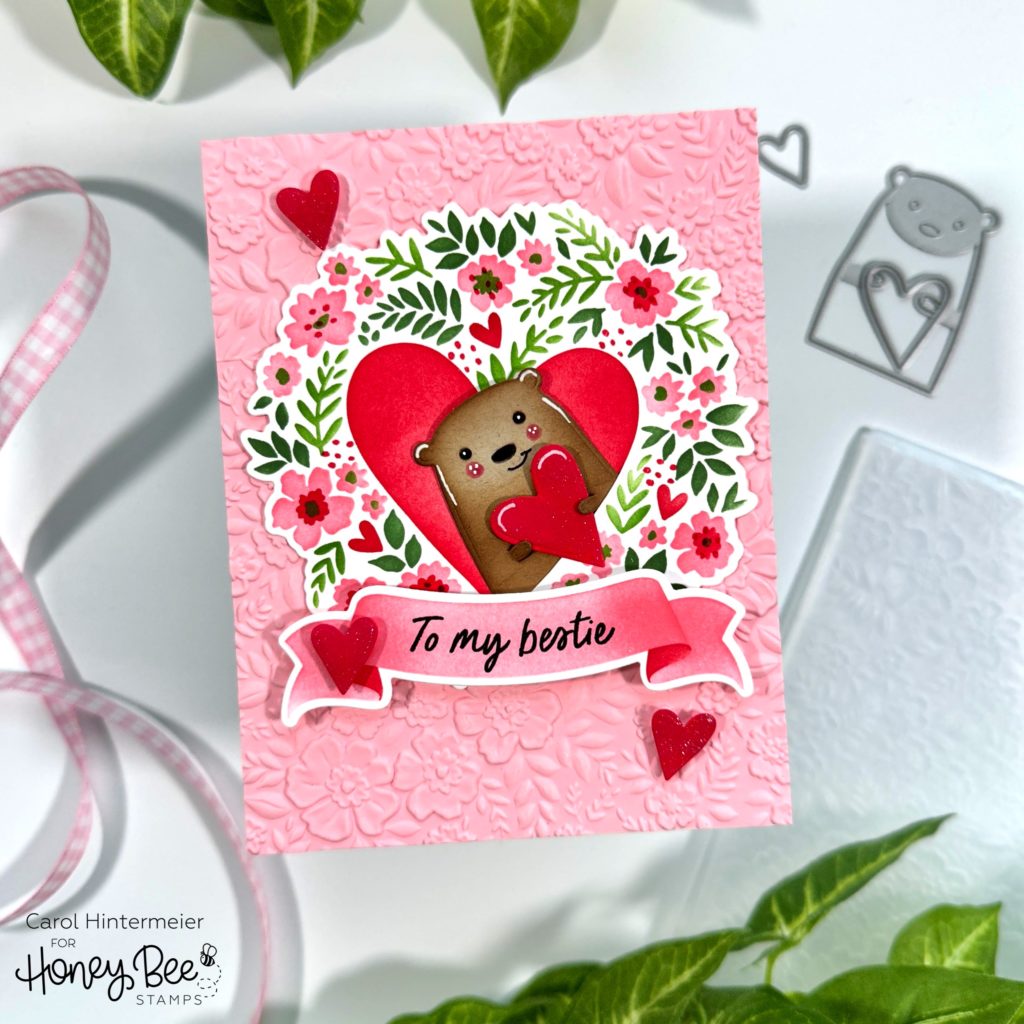
First I placed some pink cardstock in the Spring Medley 3D embossing folder and ran it through my die cutting machine. This embossing folder is absolutely beautiful and is definitely at the top of my favorites!! I used Bee Creative glue to adhere it to an A2 card base.
Then I placed a piece of 80# Neenah into the corner of a stencil mat. I selected some Distress Inks to color through the A Little Note coordinating coloring stencils with my Detail Blender brushes. I used Worn Lipstick, Festive Berries, Rustic Wilderness, and Mowed Lawn. I decided to not used the outline stamp so the image would have a softer look to it, but I do love this stamped too! I used the coordinating A Little Note Honey Cuts to die cut the floral image and the banner image.
I chose a sentiment from the A Little Note set and stamped it onto the banner with black ink. I added foam dots to the back of the banner and set it aside to finish the other card elements.
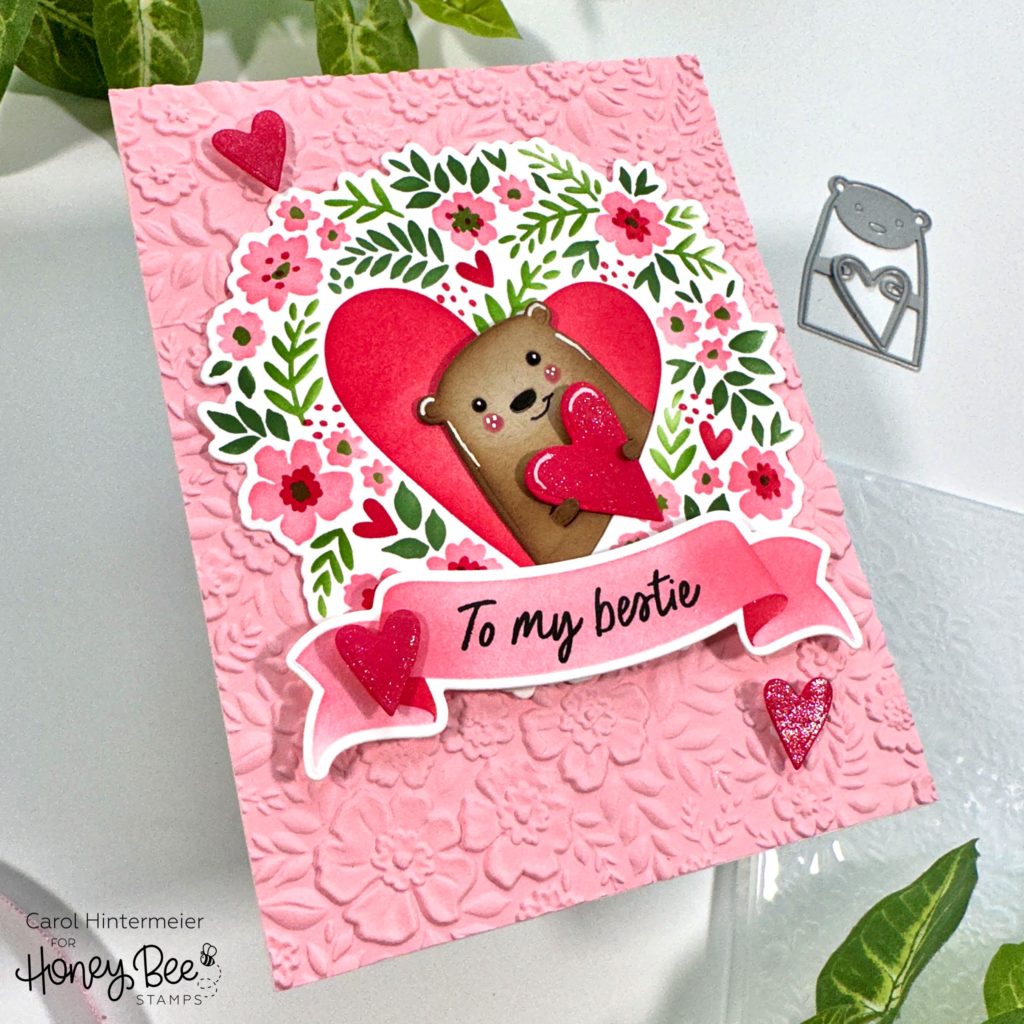
Next I used the body of the hedgehog from the Heart Hugs Honey Cuts and die cut some kraft cardstock. I love that you can use this for a small bear too! I die cut the eyes and nose from black cardstock. To add some shading to the little bear I used a blender brush and some Gathered Twigs Distress ink. I die cut three of the small hearts and one larger one that’s also in the Heart Hugs set. I blended on Festive Berries Distress ink and then added sparkle with a pink glitter pen I’ve had in my stash forever!
I used a white gel pen, a black pen and a pink Copic marker to add details to the bear. Then I used a craft knife to cut a slit right at the edge of the large heart and slipped the bear in! So cute! I added the heart under his hands with small foam dots.
I adhered the floral image to the card with glue and added foam dots to the back of the small hearts and placed them on the card.
I really had fun making this sweet and adorable card! The A Little Note stencils make such a beautiful image and I hope you’ve found some inspiration here today! Thank you so much for stopping by–you are so appreciated!
2 responses to “To My Bestie!”
This is precious!! TFS
Thank you so very much Lori!!