Greetings, Bee friends! It’s Bobbi Lemanski here sharing a card that offers a sky filled with an array of beautiful colors. What’s fun about this card is that you can apply any background of colors to fill the sky area for a new look! I’m using the following Honey Bee Stamps products:
The featured project below is made from Neenah 80lb Solar White cardstock for the card base and the bottom of the card front panel. The inside panel is made from Canson XL Watercolor paper. All of the black ink stamping was done using Honey Bee’s Bee Creative Intense Black Ink. I use Honey Bee Stamps Bee Creative Precision Glue for adhering my elements together. My card is 5″ X 7″ in size. Now for the details…
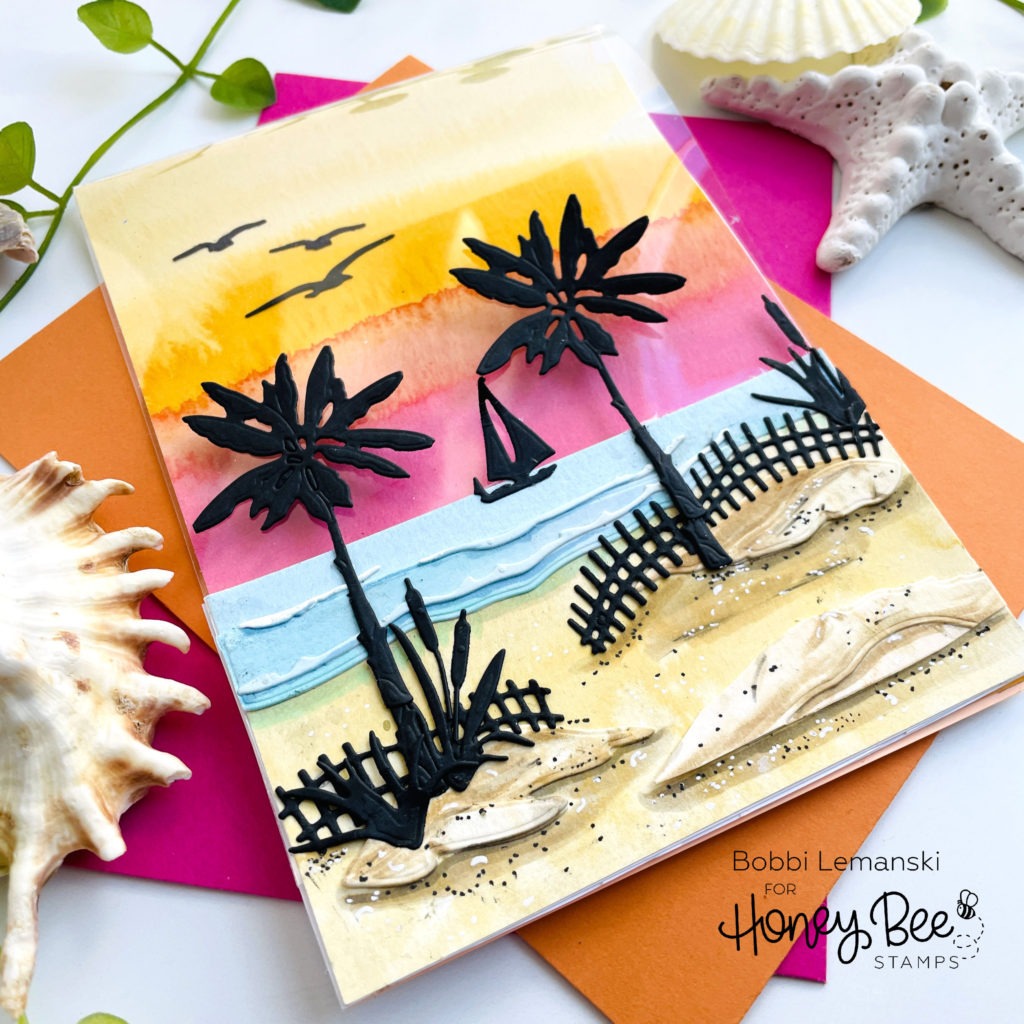
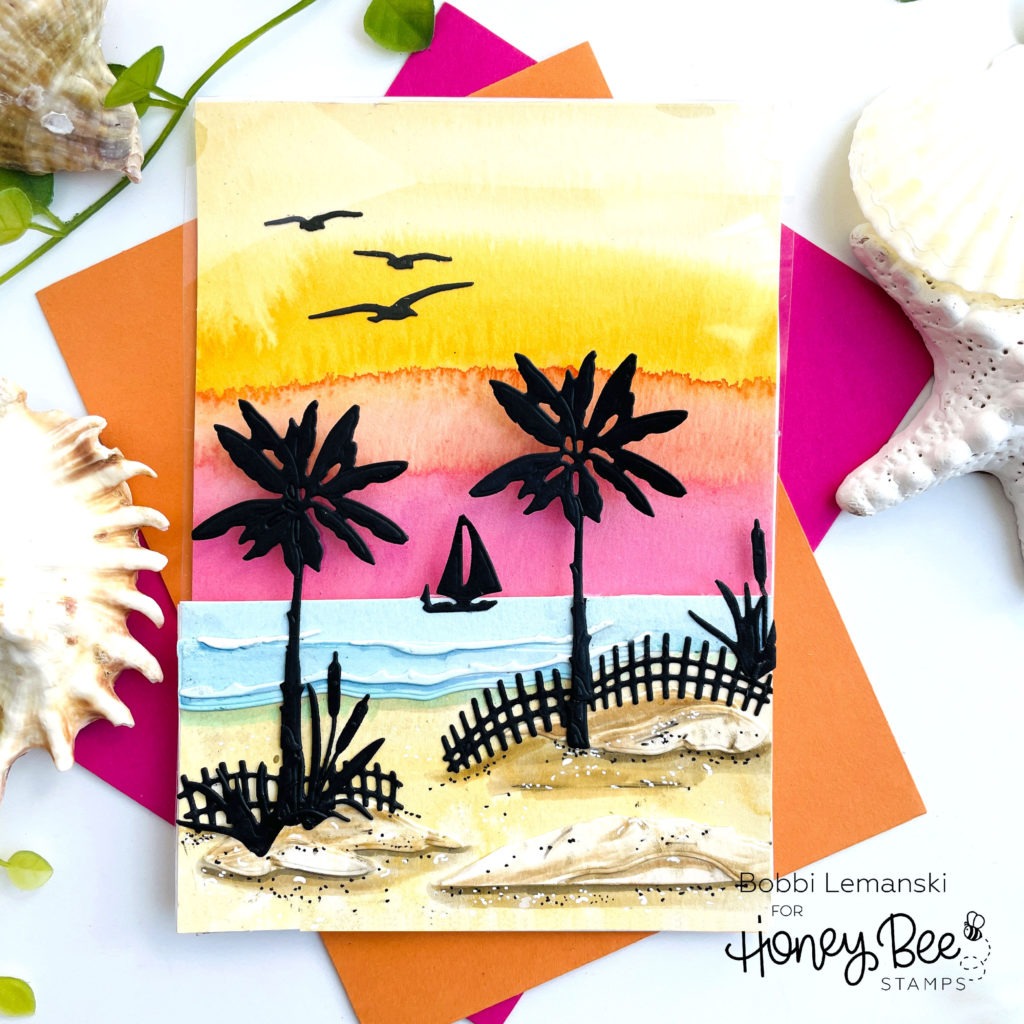
To make this 5″ x 7″card, I die cut the scene images from the Shoreline Scene Builder Dies including the palm trees, fencing, cattails, boat (all in black cardstock) and the water, ripples and sand hills in white cardstock. I created the shoreline, added the water and stopped with my scene.
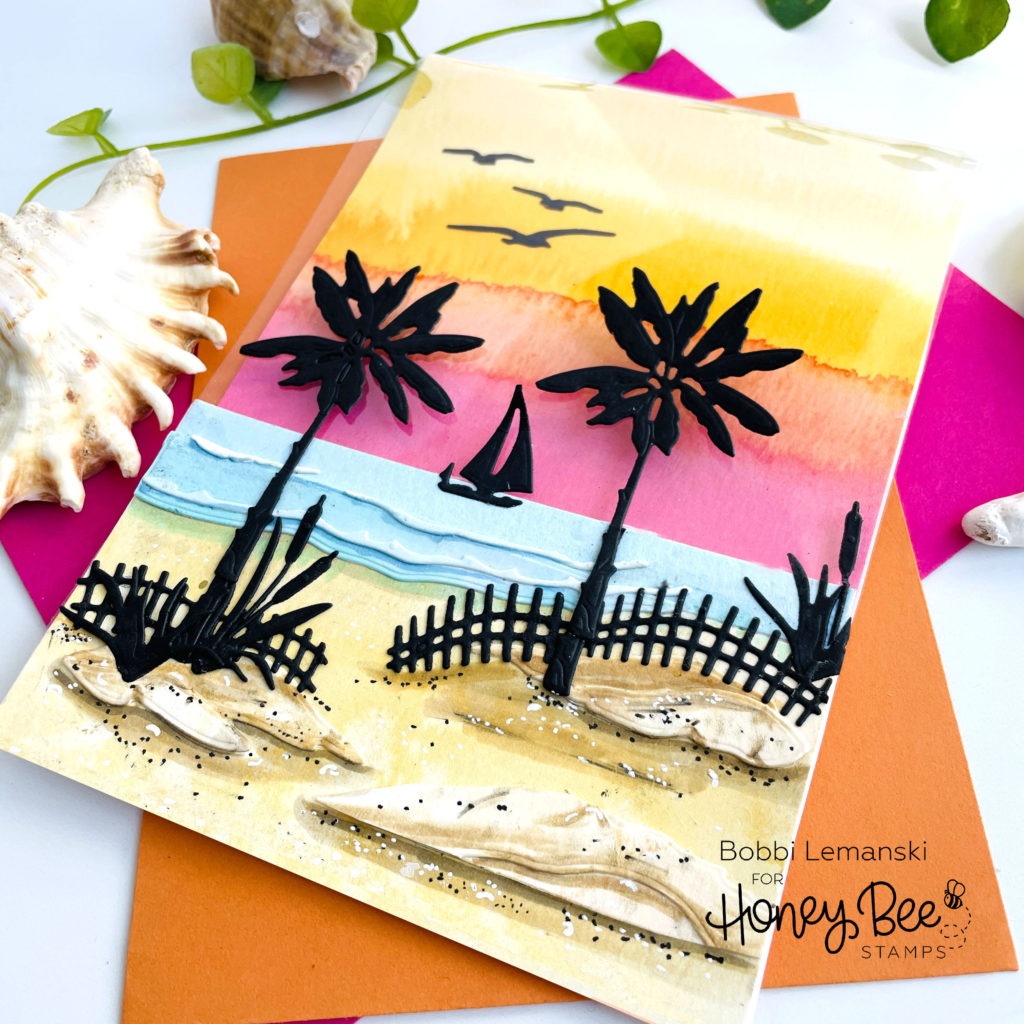
For my card base, I cut two panels from the 80lb cardstock. On is 5″ X 7″ (for the card’s back side) and the other is 5″ wide X 2-3/4″ long for the card front bottom (shoreline and water). I added a clear acrylic sheet measuring 5″ wide X 6-1/4″ long and scored 1″ from the top. The 1″ section at the top (above the score line), will create the “hinge” at the top and is “sandwiched” between the back panel and the watercolor interior panel. The acetate allows the card’s interior panel to show through in a 4-1/4″ long area. Note: One inch of the acetate at the bottom is hidden behind the card front bottom.
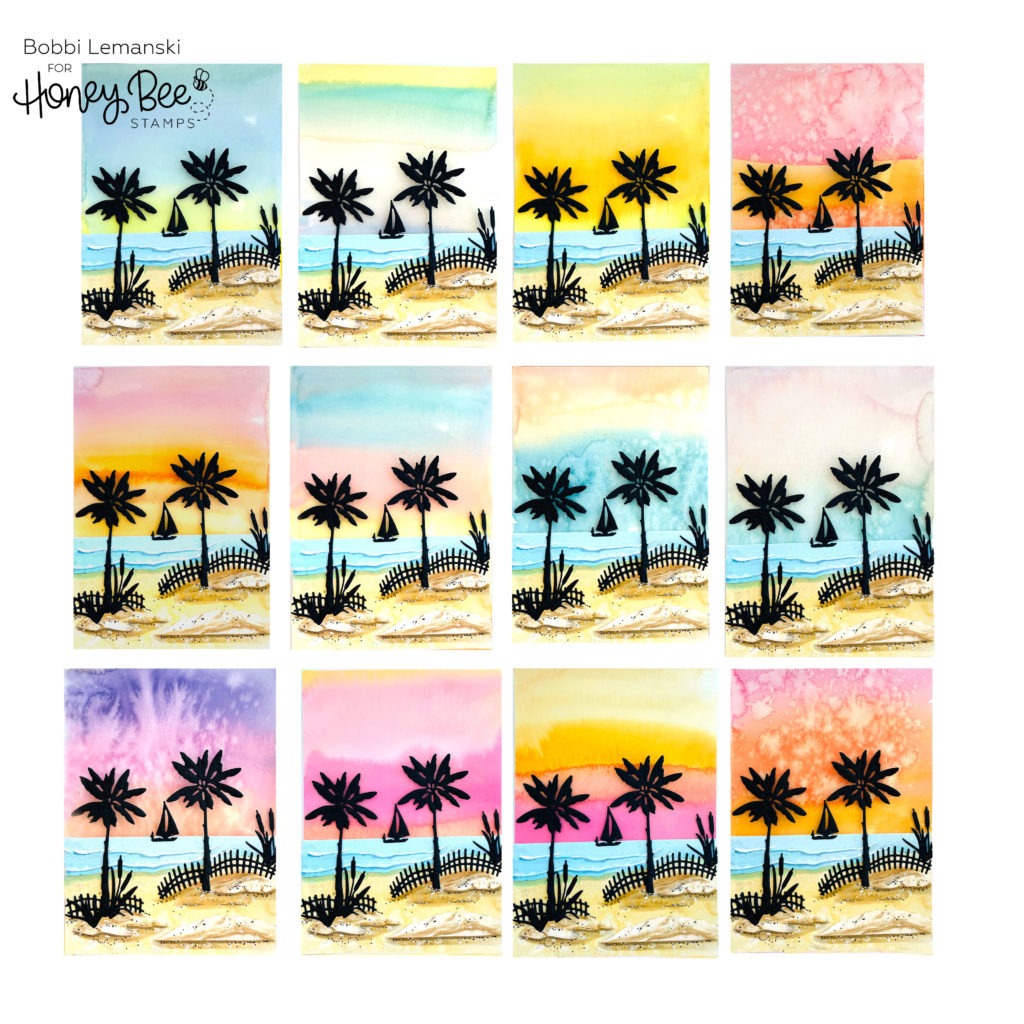
Next, I made a number of 5″ X 7″ watercolor backgrounds using an array of watercolors and tried them all out with the shore line scene. Look how pretty they all are! I loved everyone of them, but had to finally decide on one.
I attached the chosen watercolor A7 panel to the inside of the card, making sure to “sandwich” the 1″ scored edge of the clear acetate between the watercolor panel and the outer white cardstock base. I used double sided tap to attach the clear acetate between the paper panels for a firm hold. I did the same at the bottom of the top panel for a clean finish inside.
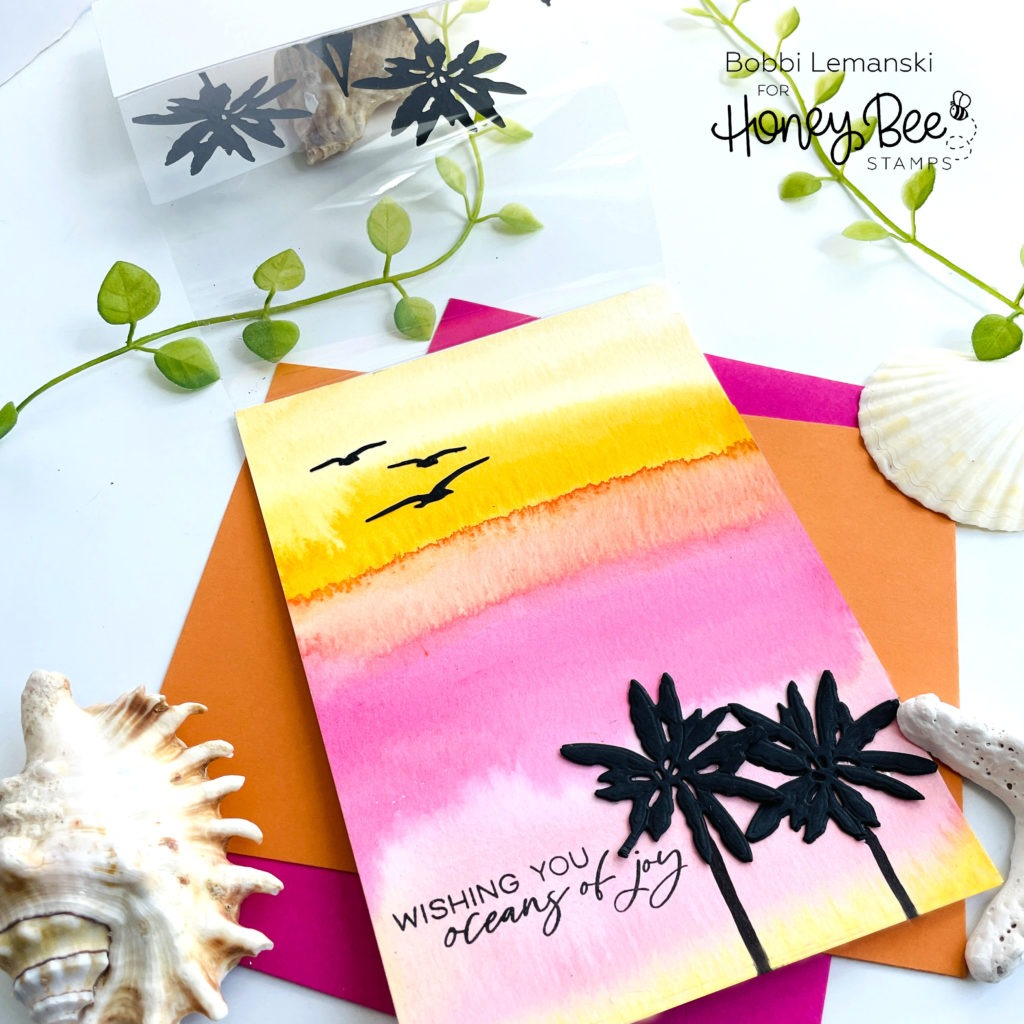
Inside the card, I added a few more silhouette trees and three birds in the sky and stamped a sentiment from the Seas the Day stamp set. I made sure that the trees and sentiment were lower than the acetate clear window area so that they would not be seen from the front when the card is closed. This keeps it as a hidden surprise inside. 🙂 This card is ready to give!
You can shop the entire Honey Bee Stamps Perfect Day release here. If you decide to place an order, please use the links in this post so that Honey Bee knows which ideas inspired you!
Thanks for stopping by today. If you want to see more ideas and inspiration from me, subscribe to my blog, BobbiHartDesign.com. I’ll send you updates on new posts! You can also find me on Instagram as @BobbiHartDesign and on Facebook as BobbiHartDesign.