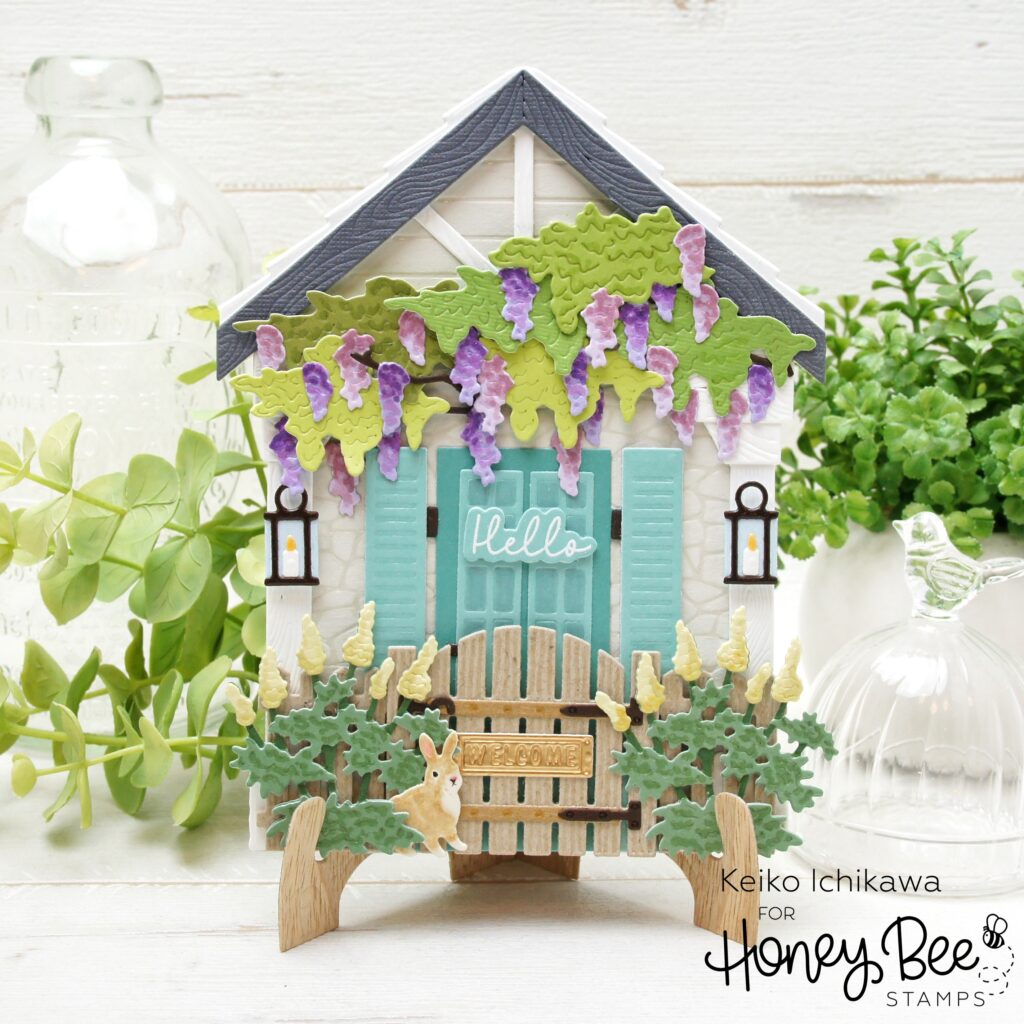
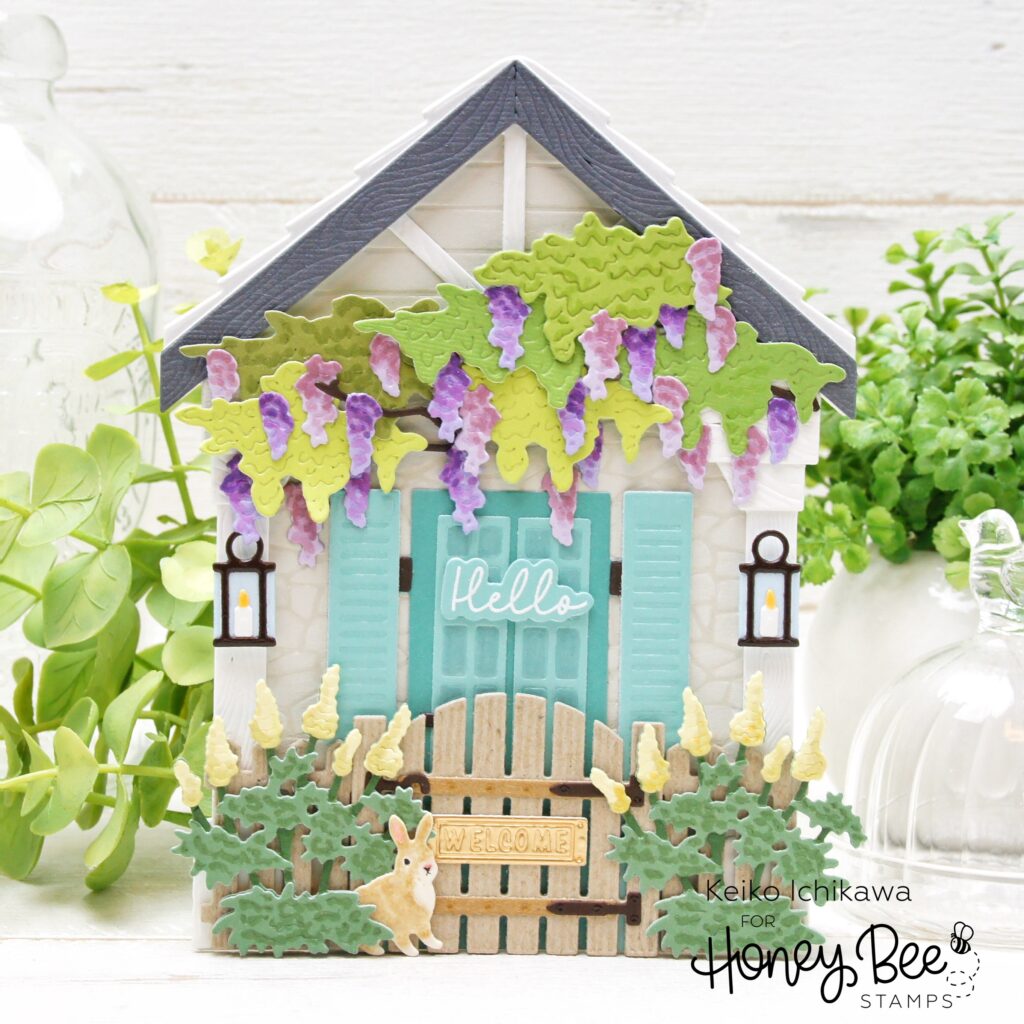
Hello friends! Happy new week! It’s Keiko from Happy Tree Studio and I am sharing my favorite kind of card, house shaped card! If you follow me, you certainly know I love love love making cards with die cuts and house shaped ones are my absolute favorite for some reason. There are so much you can add (or choose not to add!) to the scene and I love laying out the dies and decide which ones to use.
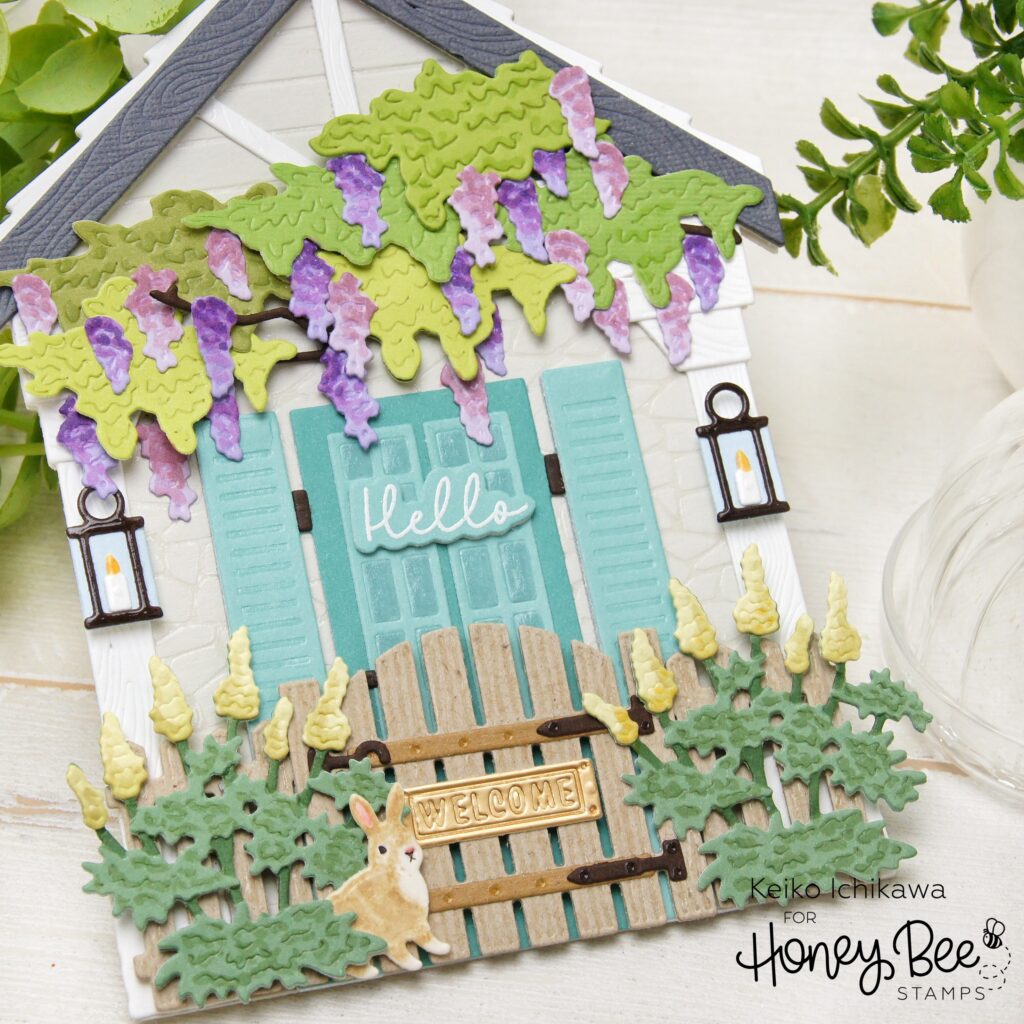
The base of the front porch are all from the previously released Lovely Layers: Front Porch dies set and all the accessary pieces including the florals are from the new Lovely Layers: Front Porch Spring Add-On die set. I used almost all the dies included in this set except the planter pot and the florals in it. I die cut the pieces from various colors of card stocks including the gold foil for the welcome sigh.
Once I have all the pieces ready, I laid them out to see if the design I had in mind really works and also if I need some additional pieces. Since most if not all the Honey Bee Stamps dies have these details that press into the paper when die cuts, you really can leave the die cuts with no inking and still look really amazing. I was going to do no inking or coloring but because I can’t leave anything alone, I ended up adding just a bit of color after I assembled the card.

Putting together these die cuts are pretty easy but if you want to make sure what goes where, you can check out the layering guide available. I used both liquid glue and foam adhesives to assemble. The hello sentiment is from the new Blessings Of Spring stamp set and I white heat embossed it on the same teal card stock as the glass door and die cut it with the coordinating die. To make it stand out a little, I layered two extra die cuts on the back before adhering it on the card.

After I finished assembling the house, I felt the bottom potion was too symmetrical for my taste. I made the wisteria on the roof asymmetrical to make them look more organic, and wanted to do the same for the bottom part. Instead of changing up the florals, I decided to add the cute bunny I found in the Farmer’s Market Cart Add-On die set. I colored him and tucked him on the left side and this made me feel so much better! Then I went on to add some dots and scribbles to the florals with my Copic markers. The card look beautiful as is and you really don’t need to do this step! While I’m at it, I also added some clear gel pen details to some of the die cuts such as shutters and fences.
To make this into a shaped card, I die cut another base panel, scored about half an inch from the top and adhered it to the card panel.
Thank you so much for stopping by today. Have a wonderful week!!

2 responses to “Spring Front Porch Shaped Card”
This is gorgeous, Keiko! I also love to make house-shaped cards, and this one is just so perfect for spring and summer. Thanks for the inspiration ~ I feel my credit card slipping out of my wallet already!
Thank you so much Danita! Yes, this die set is super fun and you can make it into any occasion card too! Happy crafting!