Hello Honey Bee friends! I’m taking a little break from the pretty pinks and reds of Valentine’s cards to bring you this springtime inspired card. I had a lot of fun using the adorable Post Box Card Base to make this bright and cheerful card!

Steps for the card base:
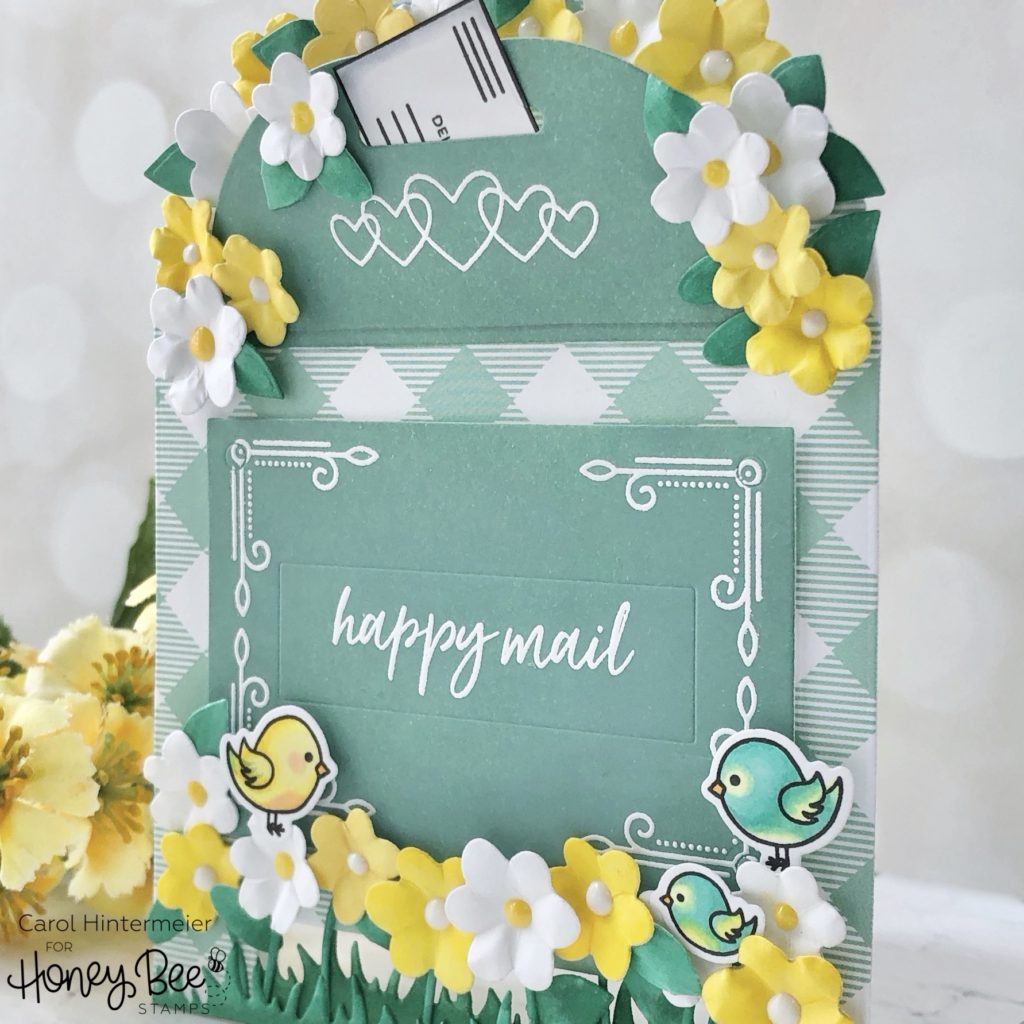
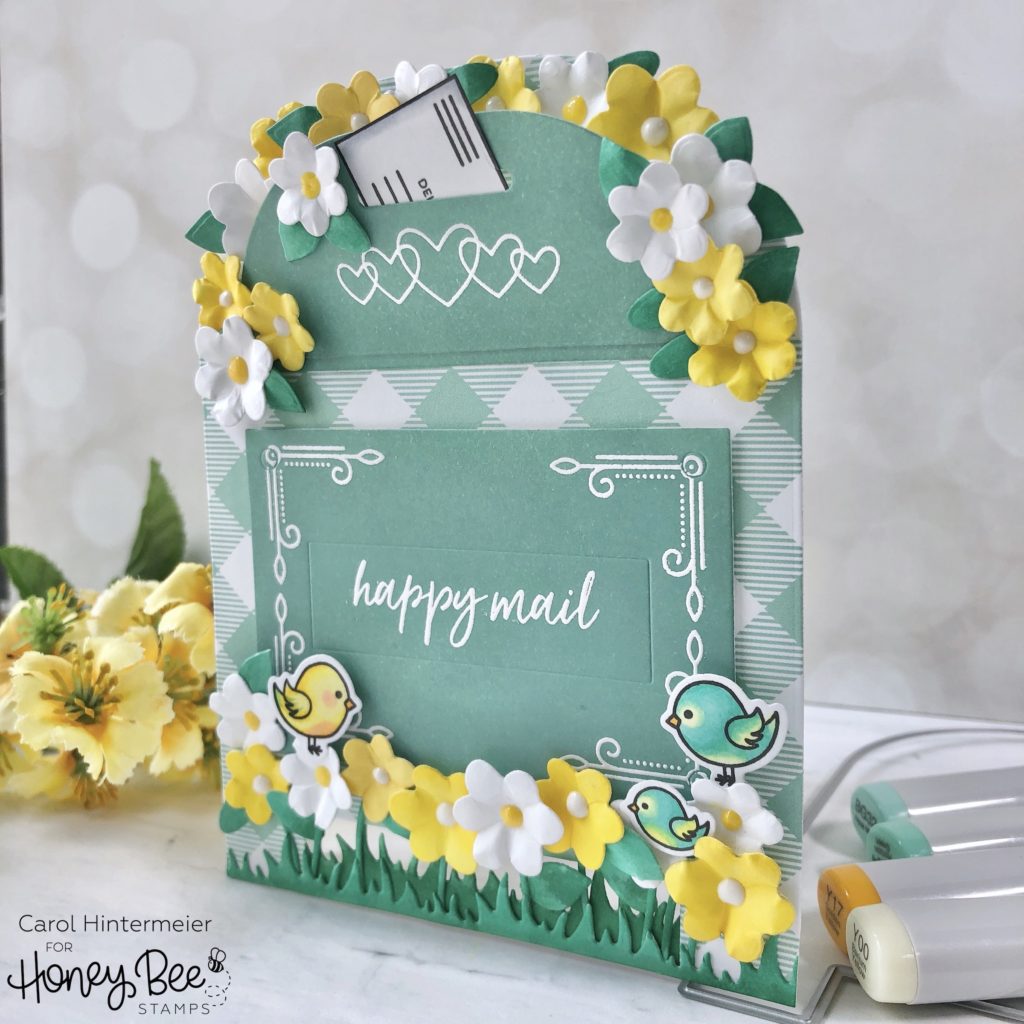
- Die cut the Post Box card base and the hinge from patterned paper. I used a piece from the Great Outdoors 6×6 paper pad. Die cut another post box from Neenah 80# card stock.
- For the two additional pieces on the post box, I inked some white card stock with Evergreen Bough Distress Oxide using a foam ink blending tool. I then die cut them out with dies in the set.
- Next I used stamps from Love Enclosed and stamped the sentiment, hearts and decorative corners with Versamark. I heat embossed it with WOW Opaque Bright White embossing powder.
Embellishing the Post Box card:
- Next comes the fun part! Die cut a bunch of flowers, stems, and leaves from the Bunch of Bouquets Honey Cuts. (Note: Before die cutting the yellow flowers, green stems and leaves, I used a few Copic markers to color the white card stock.)
- Using an embossing stylus from the Flower Shaping Essentials Kit, shape the flowers and leaves.
- Add yellow and white NUVO Chrystal Drops to the flower centers and set them aside to dry.
- Stamp an envelope from the Love Enclosed set in black ink and cut it out. Tuck it into the mail slot adding some glue to hold it in place.
- Once the flower centers were dry, I used liquid glue to attach stems and leaves to some of them. I adhered the stemmed flowers along the bottom and then used the Grass Border Honey Cut to cut out two strips of grass. I colored the front and back of these strips with a Copic marker. This will hide the Copic ink bleed through when the card is open. Adhere one grass strip to the bottom front.
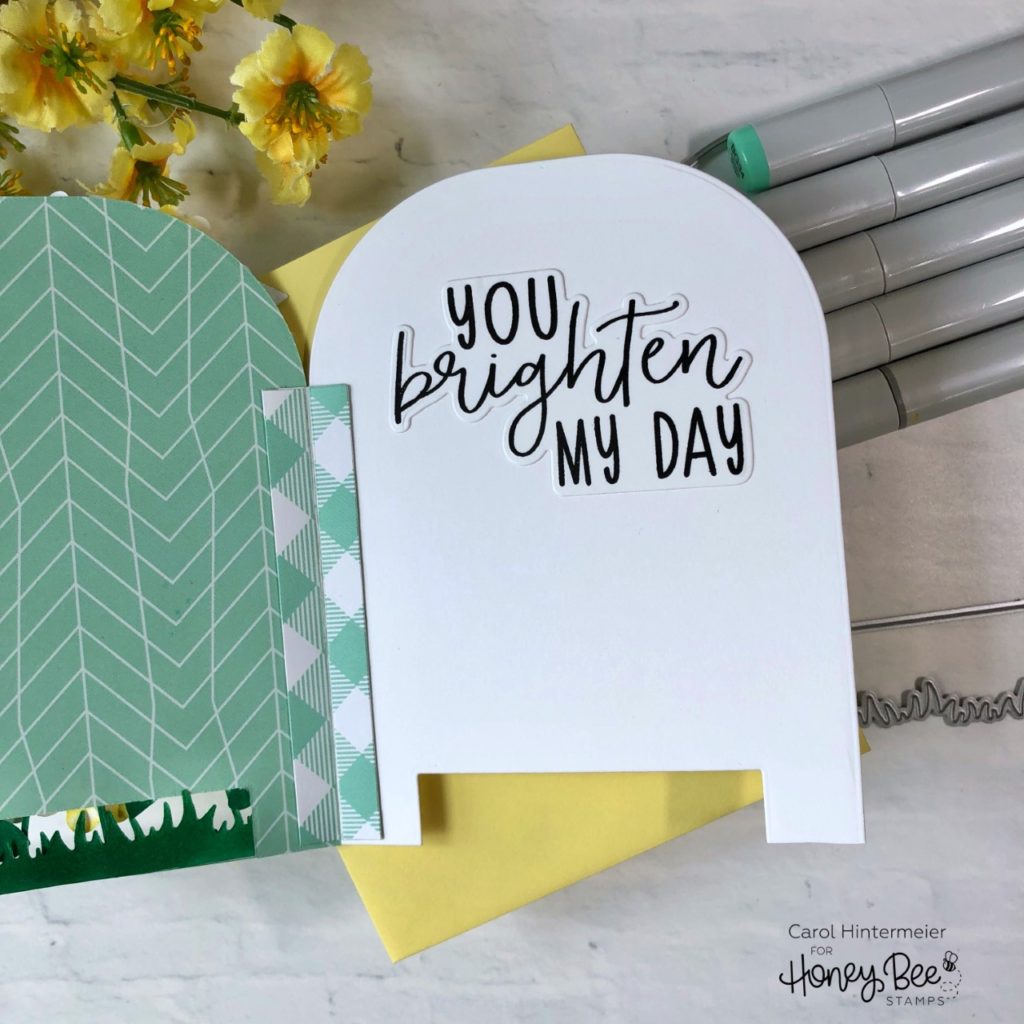
- Open the card and color any of the backs of stems that show. Adhere the second grass piece on the inside of the card front. (see photo below)
- I totally forgot to stamp the inside sentiment before adding all the dimensional elements! The Thanks A Bunch set is perfect for this as it also has coordinating dies for the sentiments. I stamped it with black ink, die cut it, and adhered it with liquid glue.
To add a bit more cuteness, I stamped and Copic colored three birds from the Bird and The Bees set. I used the coordinating Honey Cuts to die cut them.
I hope my card has brightened your day some. Spring will be here before we know it! Thank you for stopping by!
6 responses to “Spring Flowers Post Box Card”
you are SO creative. I never would have thought to make this unusual GORGEOUS mailbox with all of the details. That’s why YOU are a designer and I am not. LOVE IT!
Oh Sharon, you are SO kind! Thank you so much for your sweetest comment!!
I LOVE this, I’m planning on purchasing the die, but trying to figure out what to do with it. You NAILED it for spring. You are a FANTASTIC designer.
Joan, thank you SO much for your so very kind comment! You made my day!!! Hugs!
Wow, your colors! Many thanks for designing a card that I’d never dream up. Quite unexpected use of pattern papers—I LOVE IT! I can’t find this die anywhere and am hoping Honeybee gets them back in stock, as it can be used for every holiday!
Thank you so much Kathy! You are so sweet and I really appreciate your kindness! I’m sure the dies will be back in stock soon and I can’t wait to see what you create! Hugs!