Hello Bee Friends! It’s Bobbi Lemanski here wishing you a Happy Easter and/or a Happy Spring day! With a new season comes fresh plantings and fanciful blooms, the sound of birds and fresh-made nests and warmer, longer days ahead! I made this card to represent all things, Spring! I’m using the following Honey Bee Stamps products:
Spring Vine Layering Frames Honey Cuts
Daisy Field 3D Embossing Folder
Lovely Layers: Spring Greenery Honey Cuts
Simply Spring Wax Melts and Hugs & Kisses Wax Melts
Bee Creative 1″ Wax Seal Stickers
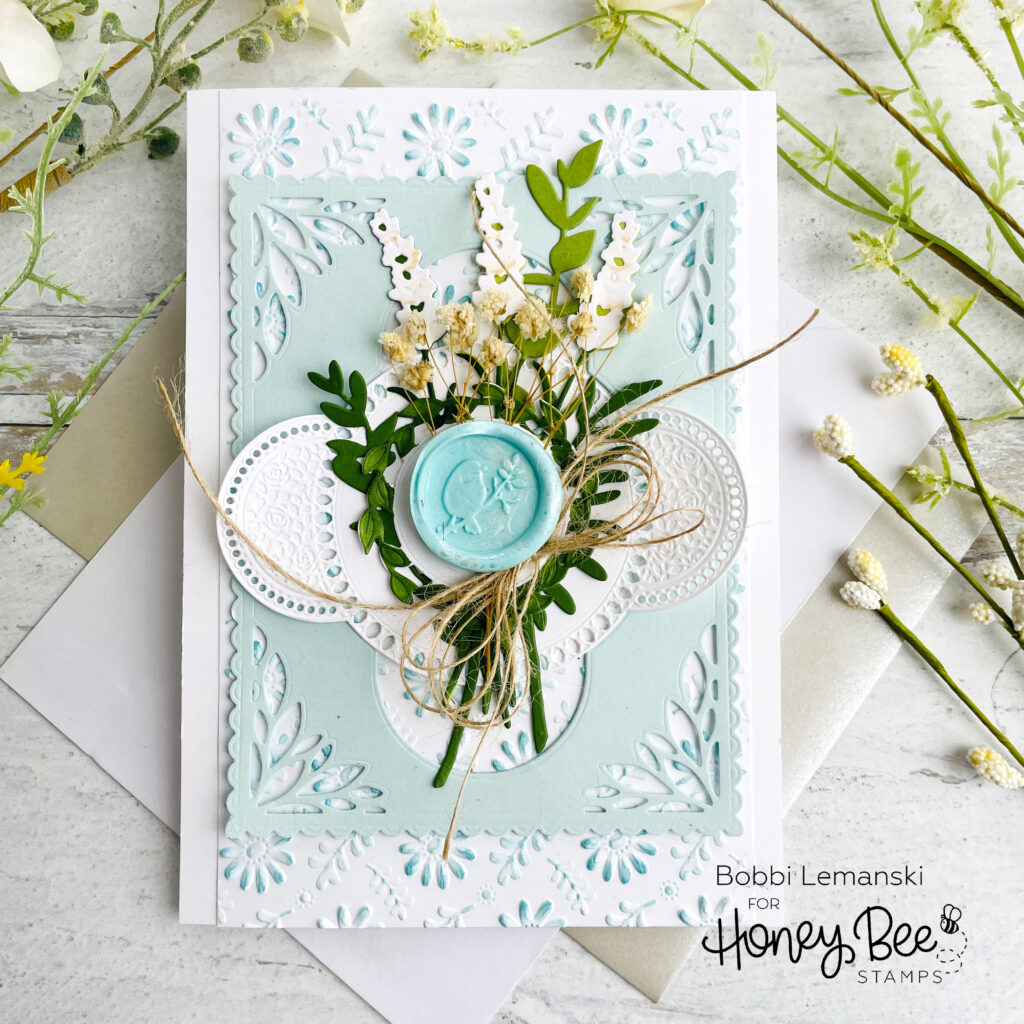
The featured project below is made from Neenah 80lb Solar White cardstock for the card base and card front panel. I use Honey Bee Stamps Bee Creative Precision Glue for adhering my elements together. My card is 5″ X 7″ in size and fits inside an A7 envelope.
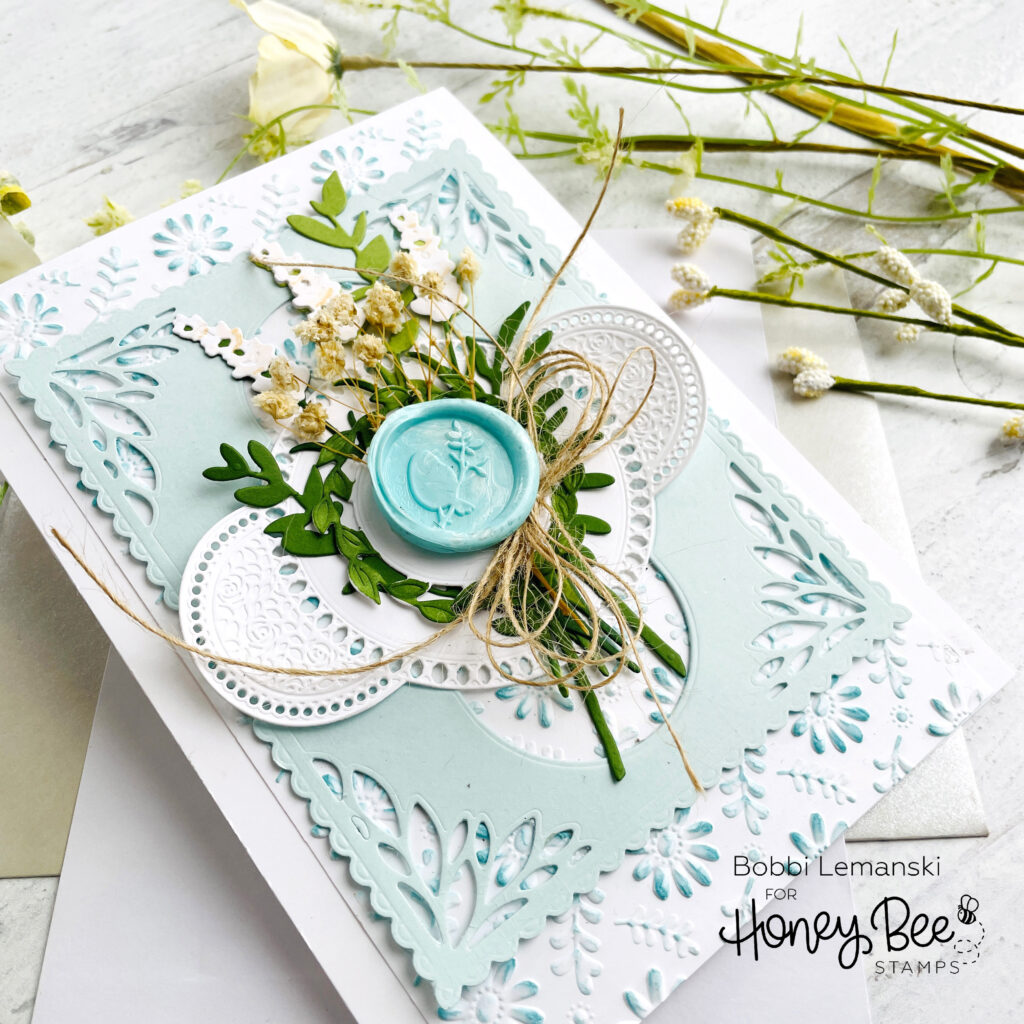
To make this 5″ X 7″ card, I embossed a 4″ X 7″ piece of white cardstock using the Daisy Field 3D Embossing Folder. This folder is sized for an A2 card front, but since my card is 7″ long, I ran the folder through twice to make the embossed panel long enough for my card. It’s easy to match up the design and emboss the entire length from both short ends. I used by Blender Brush and Distress Oxide Ink in Broken China to add a touch of color to the raised edges of the embossed daisy vine design. Layered on top of the daisies is the fanciful frame from the Spring Vine Layering Frames Honey Cuts in an aqua blue. Next, I layered another frame from the same set, cut as well as the circular vine design frame from white cardstock. I glued the layers together.
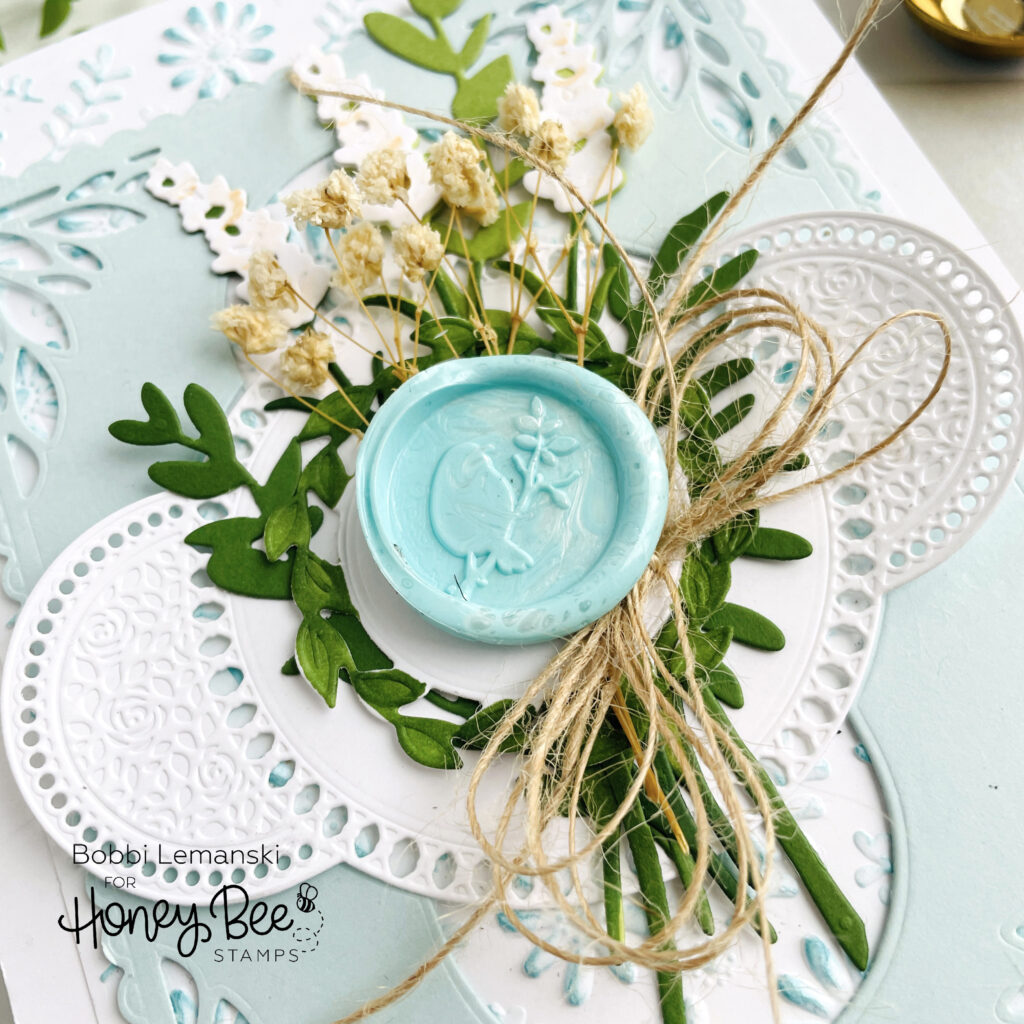
I colored the leaves around the circular frame design in green and added more Spring Greenery vines using the Lovely Layers: Spring Greenery Honey Cuts and green cardstock. I glued some dried babies breath and a hemp twine bow in place over the the vines.
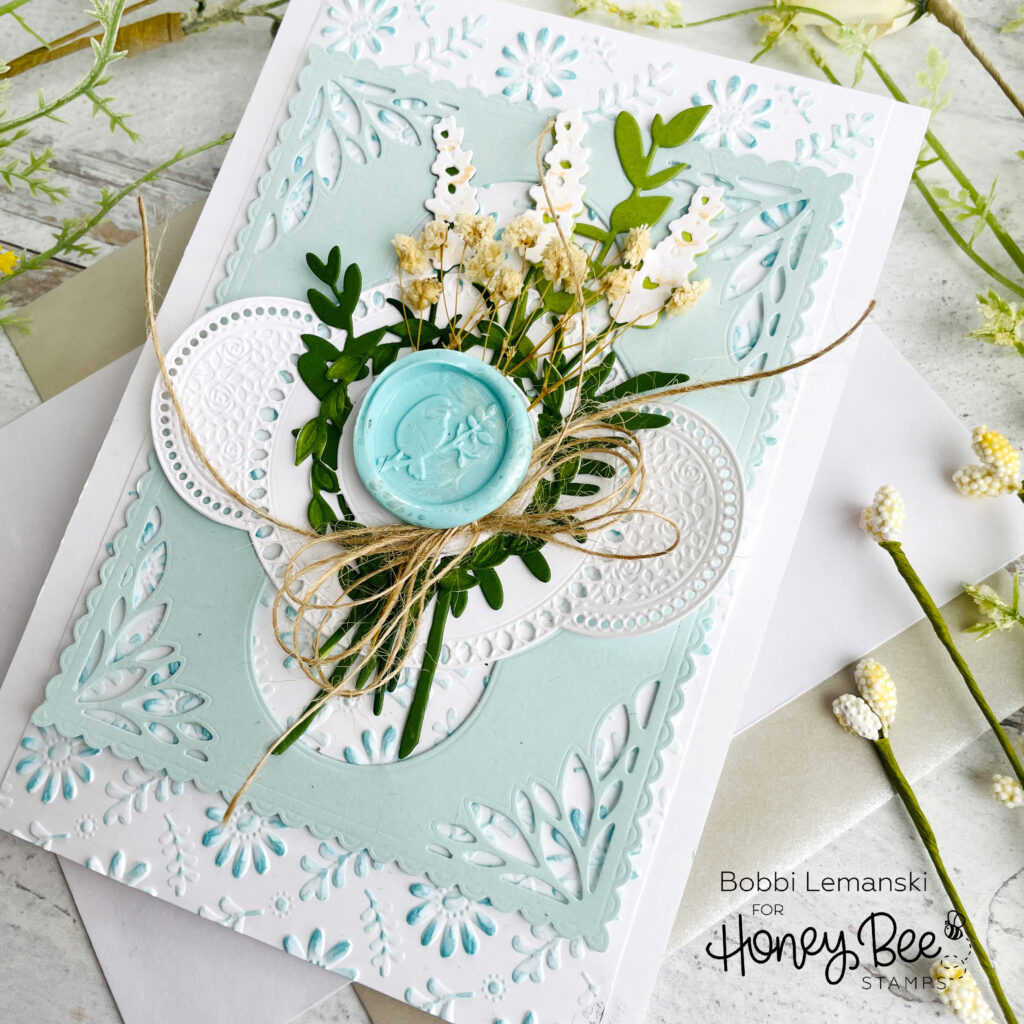
My final step was creating this beautiful wax seal for the card’s focal point. I used three aqua blue wax melts from the Hugs & Kisses Wax Melts package and two light cream wax melts from the Simply Spring Wax Melts. I melted the wax into over the Wax Melting Furnace using the spoon. I stirred the colors to combine them. I poured the hot wax into the Bee Creative Silicone Craft Mat to create a perfectly round seal and stamped it in the center with the Spring Bird Wax Stamper. I added a 1″ Wax Seal Sticker to the back of the seal and attached it to the ivy framed circle.
You can shop the entire Honey Bee Stamps Simply Spring release here. If you decide to place an order, please use the links in this post so that Honey Bee knows which ideas inspired you!
Thanks for stopping by today. If you want to see more ideas and inspiration from me, subscribe to my blog, BobbiHartDesign.com. I’ll send you updates on new posts! You can also find me on Instagram as @BobbiHartDesign and on Facebook as BobbiHartDesign.