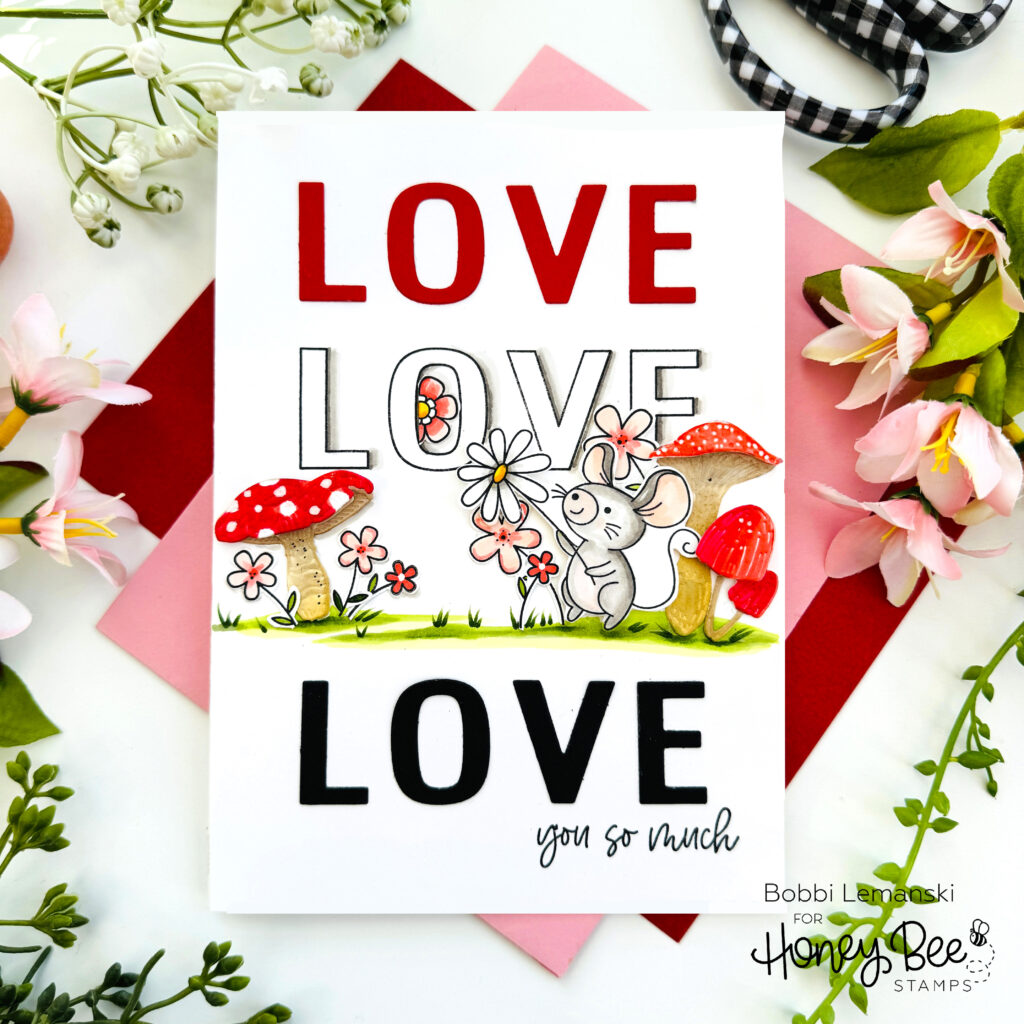
Hi there! It’s Bobbi Lemanski with a whole lot of love to give in this sweet, valentine card. I am using the following Honey Bee Stamps products:
Lovely Layers: Mushrooms Honey Cuts dies
Sweet Spring Mice stamps and coordinating Honey Cuts dies
LOVE LOVE LOVE stamps and coordinating Honey Cuts dies
The featured project below is made from Neenah 80lb Solar White cardstock for the card base and card front panel. All of the black ink stamping was done using Honey Bee’s Bee Creative Intense Black Ink. I use Honey Bee Stamps Bee Creative Precision Glue and for when I want more dimension, Bee Creative Foam Dots With Tab for adhering my elements together. My card is 5″ X 7″ in size.
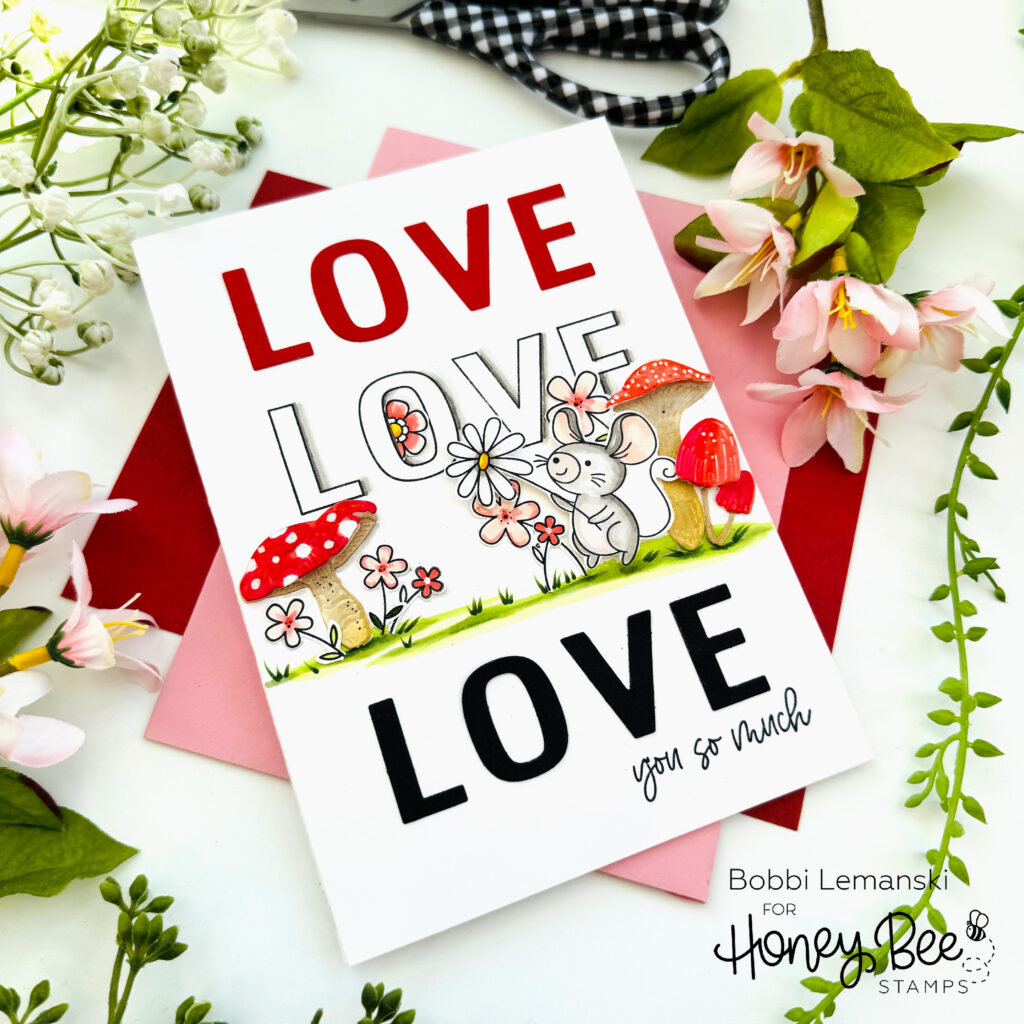
To make this 5″ X 7″ card, I started by cutting my card base (10″ X 7″ scored in the middle at 5″) and card front panel (5″ X 7″) from white cardstock. I stamped the “LOVE” outline stamp image on the card front panel, slightly above the middle. I added shading to the right of the letters so that they pop from the white. I used W5, W3 and W1 Copic markers for the shading. I die cut the LOVE letters from red and black cardstock using the LOVE A2 Cover Plate die. Using the larger die cut as a positioning guide, I attached the red letters above the stamped word and glued them in place. I attached the black ones later, after I positioned my scene in the middle, just to make sure I had plenty of room for the scene.
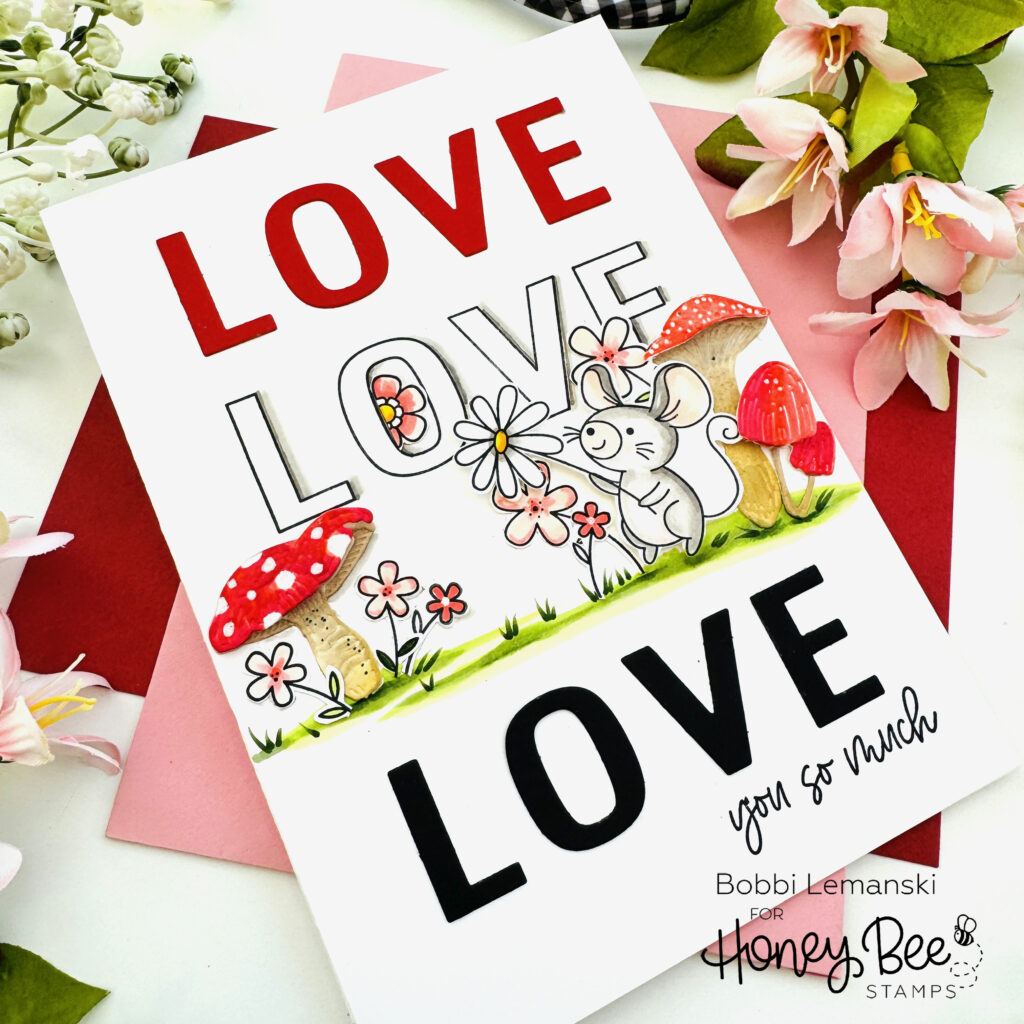
Using the Lovely Layers: Mushrooms Honey Cuts dies, I cut the mushrooms from white cardstock, colored the ‘shrooms in reds and tans (colors listed below) and assembled the layers. I used Honey Bee Stamps Bee Creative Precision Glue for attaching the layers. I added Bee Creative Foam Dots With Tab for adhering the layers that I want to stand out.
I stamped the mouse, and the singular flowers on white cardstock and colored them using Copic Sketch Markers. I used the following colors:
- Mouse: W5, W3, W1, R00
- Flowers: R22, R21, R20
- Greenery: YG67, YG63, YG23, YG03
- Mushrooms: E43, E41, E50, R46, R29, R17, R14
- White Gelly Roll Pen for highlights and polka dots on the mushrooms

I attached the mouse, mushrooms, flowers and colored a green ground below them using YG67, YG63, YG03. The mouse was attached using foam tabs to make the critter stand out from the scene. With the scene in place, I glued the black “LOVE” letters below it, using the die cut backing as a positioning guide.
You can shop the entire Honey Bee Stamps store here. If you decide to place an order, please use the links in this post so that Honey Bee knows which ideas inspired you!
Thanks for stopping by today. If you want to see more ideas and inspiration from me, subscribe to my blog, BobbiHartDesign.com. I’ll send you updates on new posts! You can also find me on Instagram as @BobbiHartDesign and on Facebook as BobbiHartDesign.