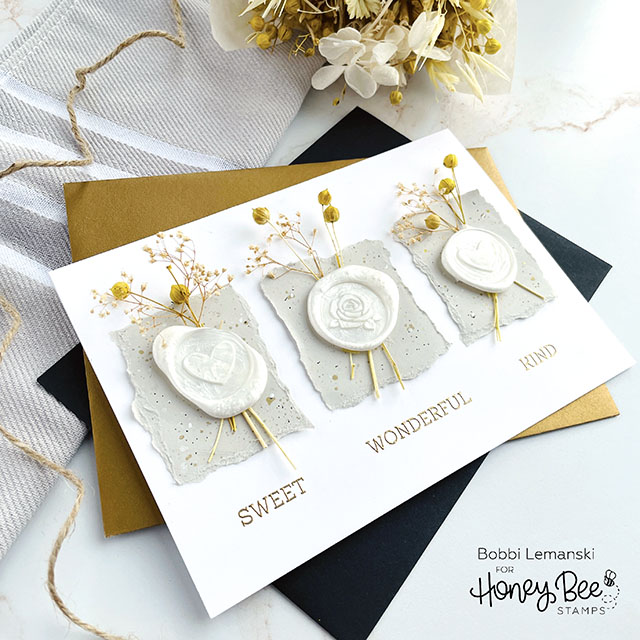
Hello Bee friends. It’s Bobbi Lemanski here sharing more handmade seals using the new Bee Creative wax seal products by Honey Bee Stamps. I have had so much fun working with these products. Each wax seal I make is imperfect and unique, giving my projects a wonderful, handmade, textural feel. I think they are too pretty to put on the envelope, so I put them right on the front of my cards!
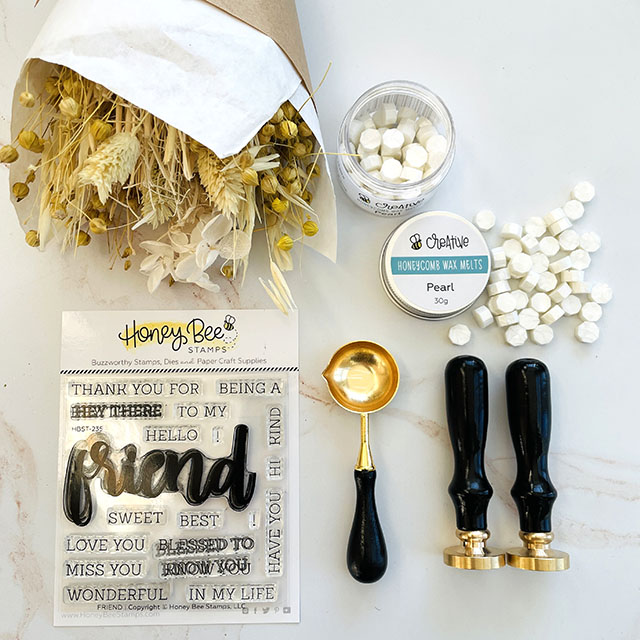
Today, I’m using the following Honey Bee Stamps products:
Bee Creative Wax Melts – Pearl
Bee Creative Wax Stamper – Heart
Bee Creative Wax Stamper – Rose
Bee Creative Wax Melting Spoon
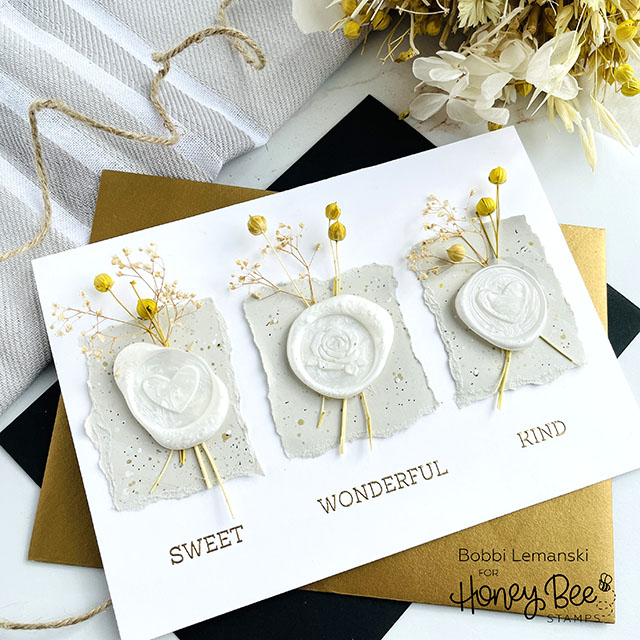
I’m also using some dried flowers I had in my craft stash, Neenah 80lb Solar White cardstock for the card base and a warm gray colored cardstock for the torn rectangles on the front. Gold Embossing powder and Bee Creative Clear Embossing and Watermark pad were used to emboss the words on the card.
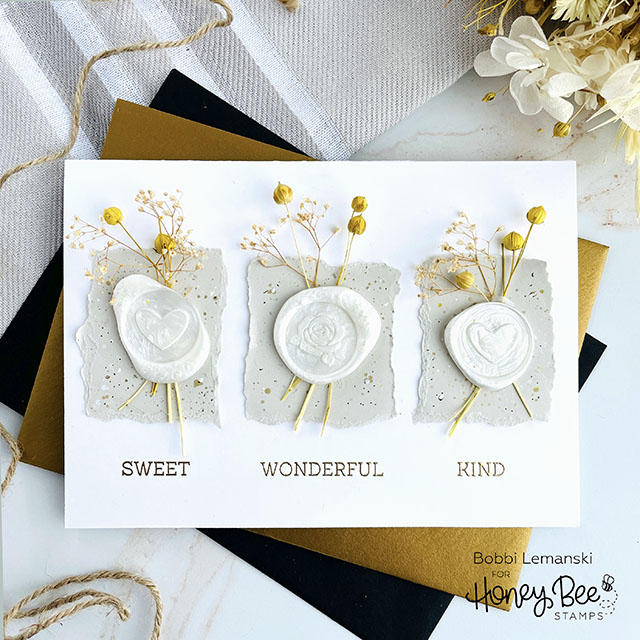
To make this 5″ X 7″ (A7) card, I started with a white card base. I cut three warm gray rectangles measuring 2″ wide X 2-1/2″ tall and tore the edges to make them imperfect (torn size 1-1/2″ wide (side pieces) and 2″ wide (center piece) X 2-1/4″ tall). I splattered paint over the gray pieces using a metallic gold watercolor paint and Dr. Ph Marten’s Bleed Proof white paint. The pieces were attached to the front of the card base.
Next, I heat embossed the three words – sweet, wonderful and kind – from the Friend stamp set using Gold Embossing powder and my Bee Creative Clear Embossing and Watermark pad. Each word was centered under a square.
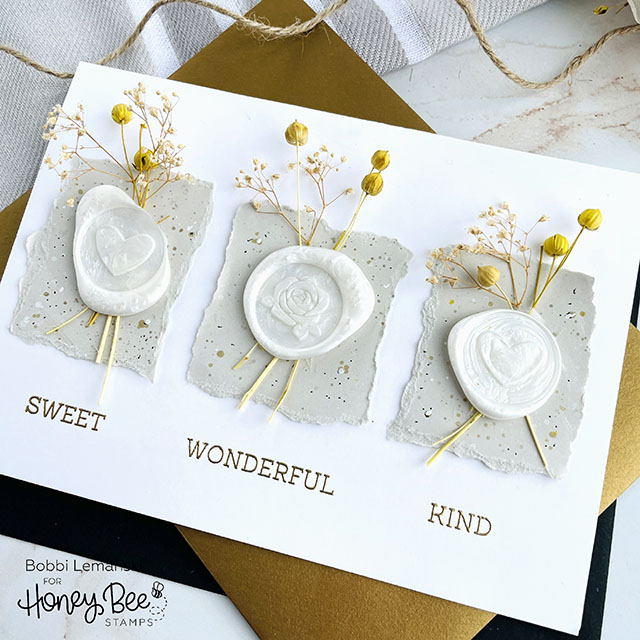
Now comes the fun…. creating the wax seals! I used the Bee Creative Wax Melts – Pearl. I have a lot of candle jars at home so I used one to heat the wax inside the melting spoon. It goes quick so I just hold my spoon over the flame until my wax melts. Bonus: I get to enjoy the fragrance of my Bath & Body candles while crafting, too. 🙂 I use three melts for each seal. I created all three on a separate splat mat by pouring the wax on the mat and pressing the stampers into the wax. I peeled them off the mat after they were completely cool and set. You can also use wax paper for this step or apply directly on your card. All three seals were attached to the center of the squares along with some dried star flowers and baby’s breath behind them. I used Bee Creative Precision Tip Glue to attach everything to the base. That’s it!
The pearl wax melts make beautiful seals that are creamy smooth with a little shimmer, too. If you love this organic look, check out my card from last week for another idea using wax seals and dried flowers together. You can shop the Honey Bee Stamps store here. If you decide to place an order, please use the links in this post so that Honey Bee knows how you found these products!
Thanks for stopping by today. If you want to see more ideas and inspiration from me, subscribe to my blog, BobbiHartDesign.com. I’ll send you updates on new posts! You can also find me on Instagram as @BobbiHartDesign and on Facebook as BobbiHartDesign.
Bobbi Hartmann Lemanski, Bobbi Hart♥ Design, Adding h♥art into every design