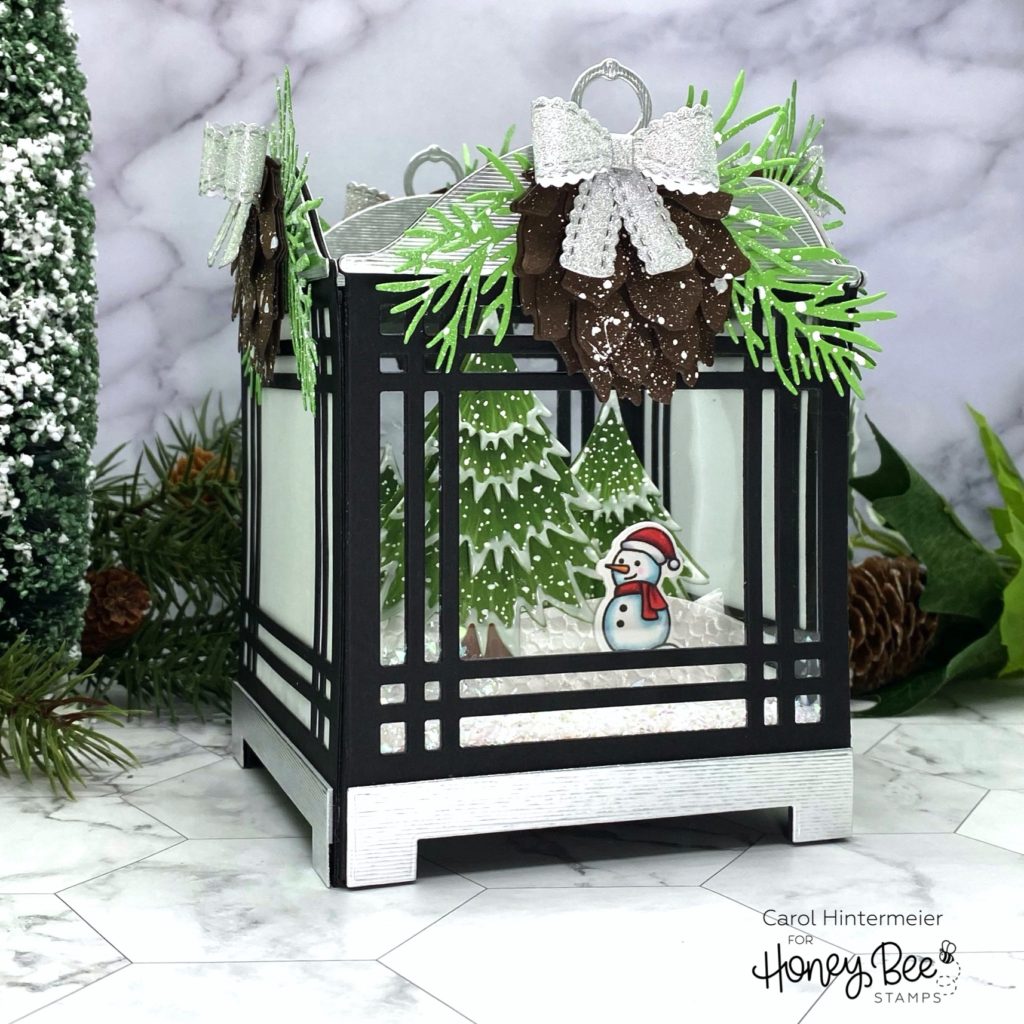
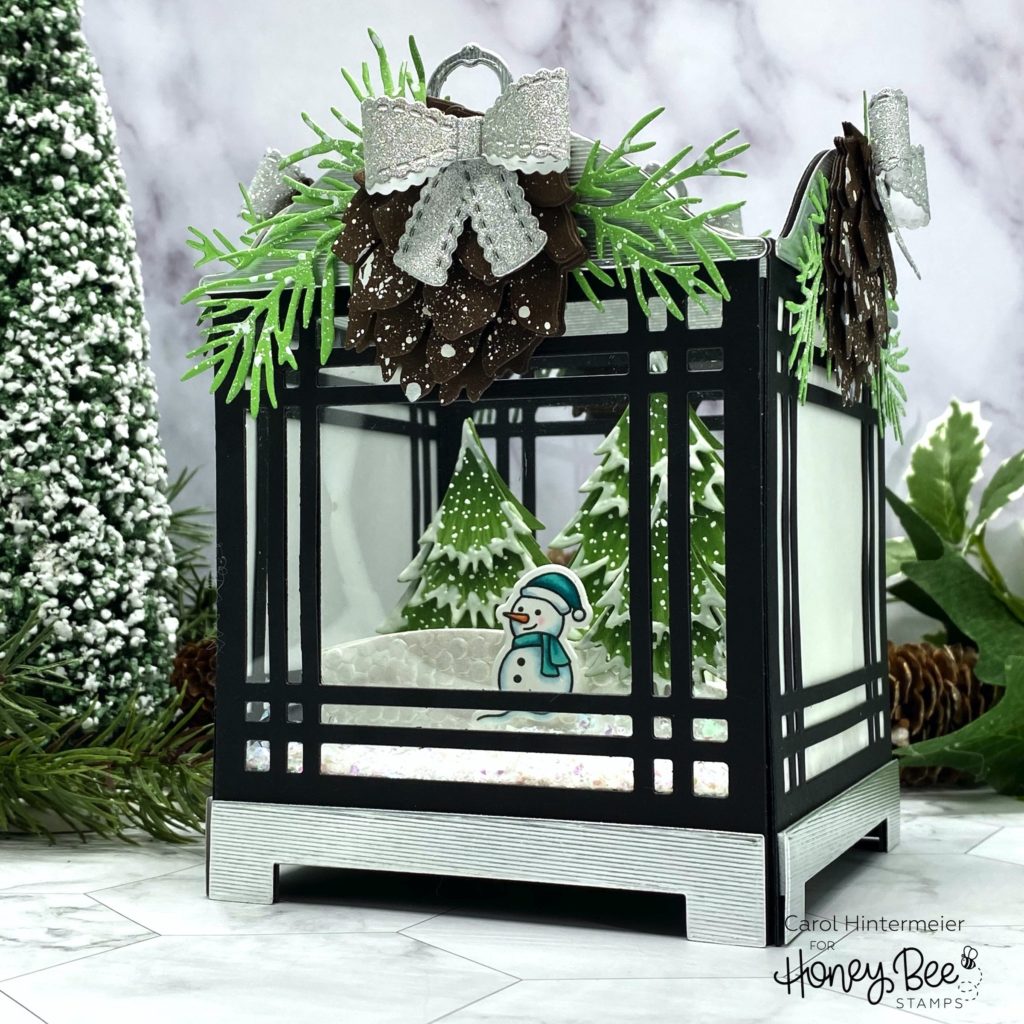
Hello Honey Bee friends! I want to share with you how I’ve used the Lantern Builder A2 Honey Cuts to make a decorative 3D lantern! I love the decorative lanterns that you see in shops with scenes inside and was inspired to give this project a try. This was so much fun to make! I have detailed directions on how to create the lantern, so keep reading!
Here are the directions for creating the four-sided lantern:
- Die cut eight lanterns from the Lantern Builder A2 from black card stock.
- Adhere acetate and vellum to the back of the lantern window openings.
- Adhere the extra lantern die cuts to the back of these to hide the edges of the acetate and vellum.
- Cut four ½” x 4-¼” strips of black card stock. Score in the center and fold. Add 1/8″ Scor-Tape to each side of the tab. These will be the tabs to join the lantern die cuts into a four-sided lantern. Adhere one tab strip to the left side of each lantern side.
- Add ½” Scor-Tape to the inside of the lantern die cuts just below the window openings.
- I die cut eight decorative lantern top pieces and four of the bottom leg pieces from THIS silver card stock. I adhered four of the tops to the inside of the lantern sides with BEE Creative glue. I popped up the remaining tops and leg pieces with thin foam squares and adhered them to the outside of the lantern sides.
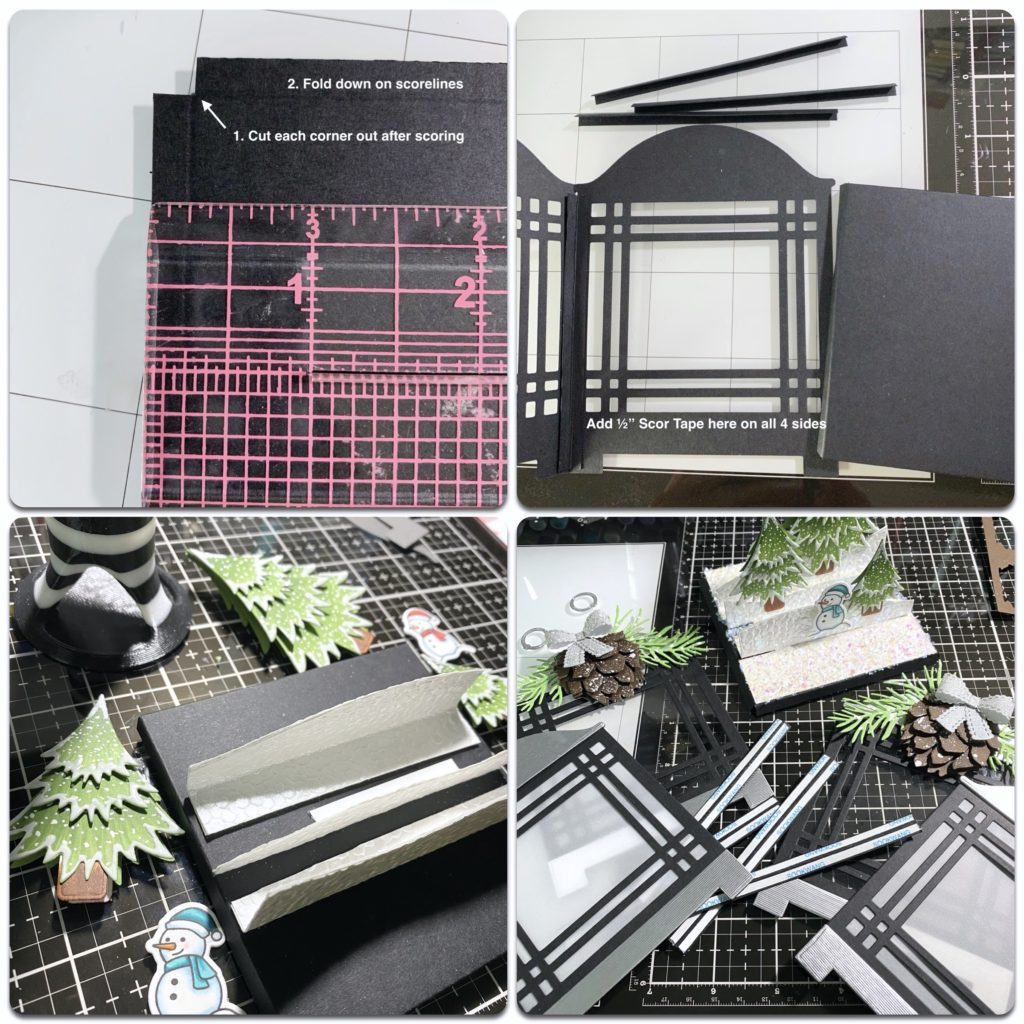
- Cut a piece of black card stock to 4-9/16″. (I know that’s an odd size but it will fit inside the lantern as a base for the scene.) Note: Cut white card stock to fit the top of this now and adhere. I forgot and had to piece some on it. In hindsight, I would have created this base from white card stock!
- Score each side of the base at ¼”. Trim out the square created by the score lines at each corner. (See photo.)
Before assembling the lantern, I need to create my images for the inside and decorations for the outside of the lantern:
- Die cut tree pieces from green card stock. Die cut double the amount of layers for the number of trees you’ll have so you can make them double sided. The tress I used are from the Toy Store House Builder Add-on Honey Cuts. I added shading with two Copic markers, dots for snow with a white gel pen, and then Nuvo White Crystal Drops for the snow on the edges. Let dry.
- I adhered the tree layers with glue at the tops and thin foam squares at the bottom edge of the layers for dimension. Take two trees of the same size and place them back to back. Add glue just to the top to adhere them together for a two-sided tree.
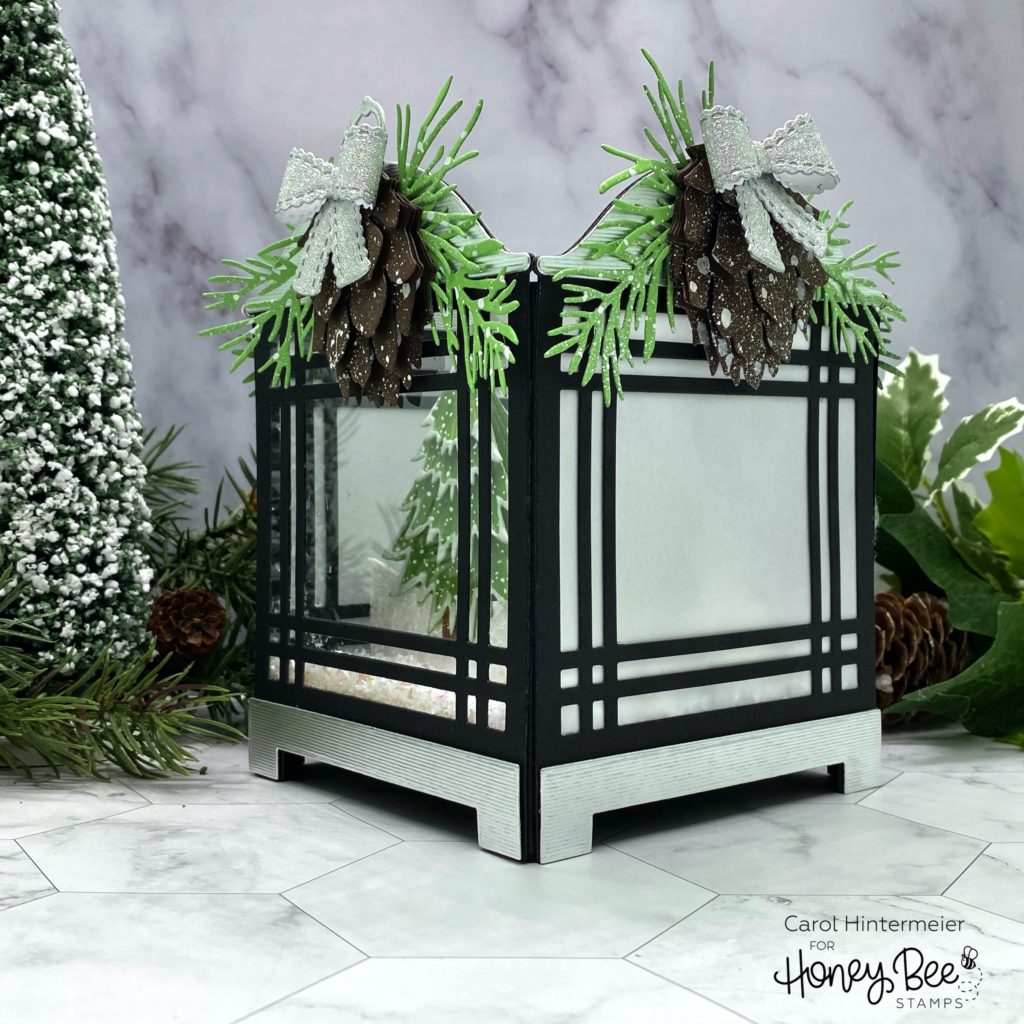
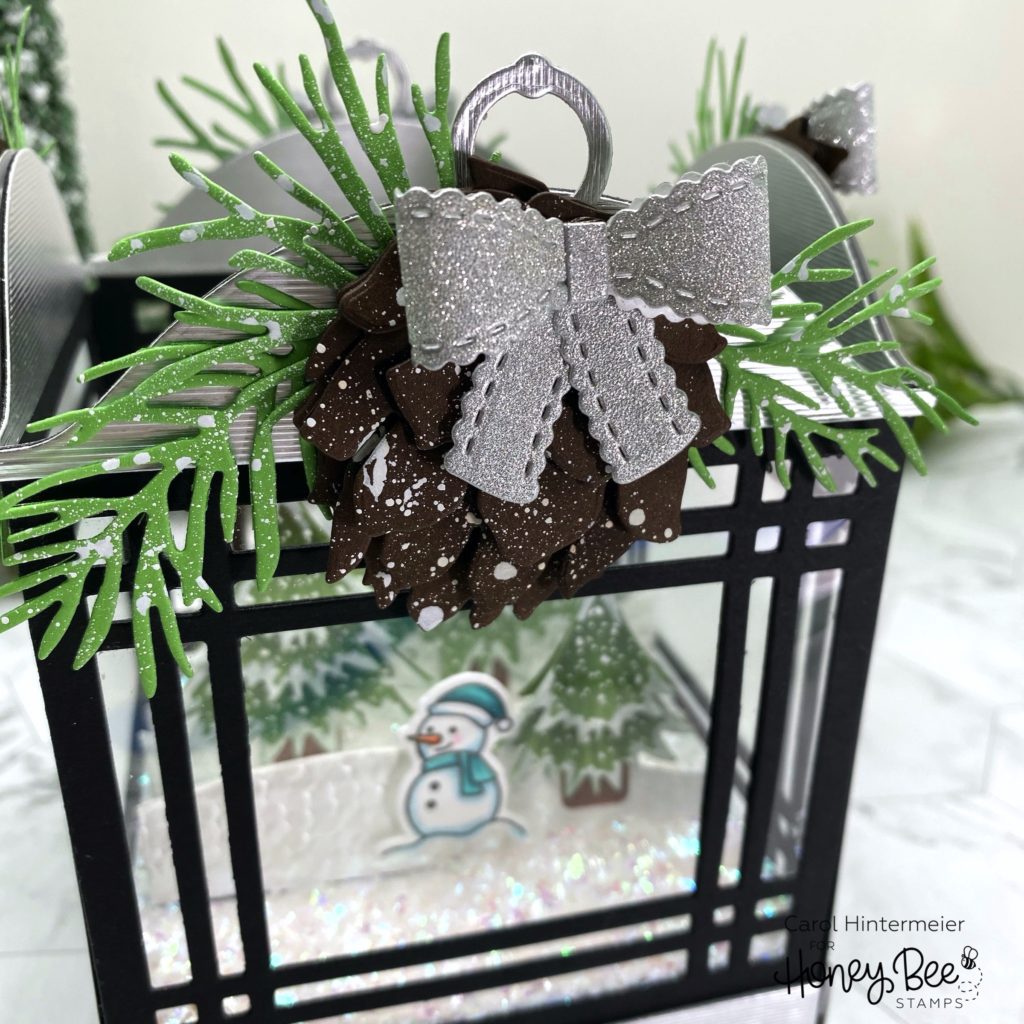
- I die cut enough pinecone layers for four with the Lovely Layers: Pinecone and each pine sprig four times. I die cut four bow pieces each from silver glitter paper in my stash. After adding white paint splatters, I assembled the pinecones and adhered them and the pine sprigs to the lantern sides. I glued the assembled bows to the top of the pinecones. Then added them to the lantern with foam squares.
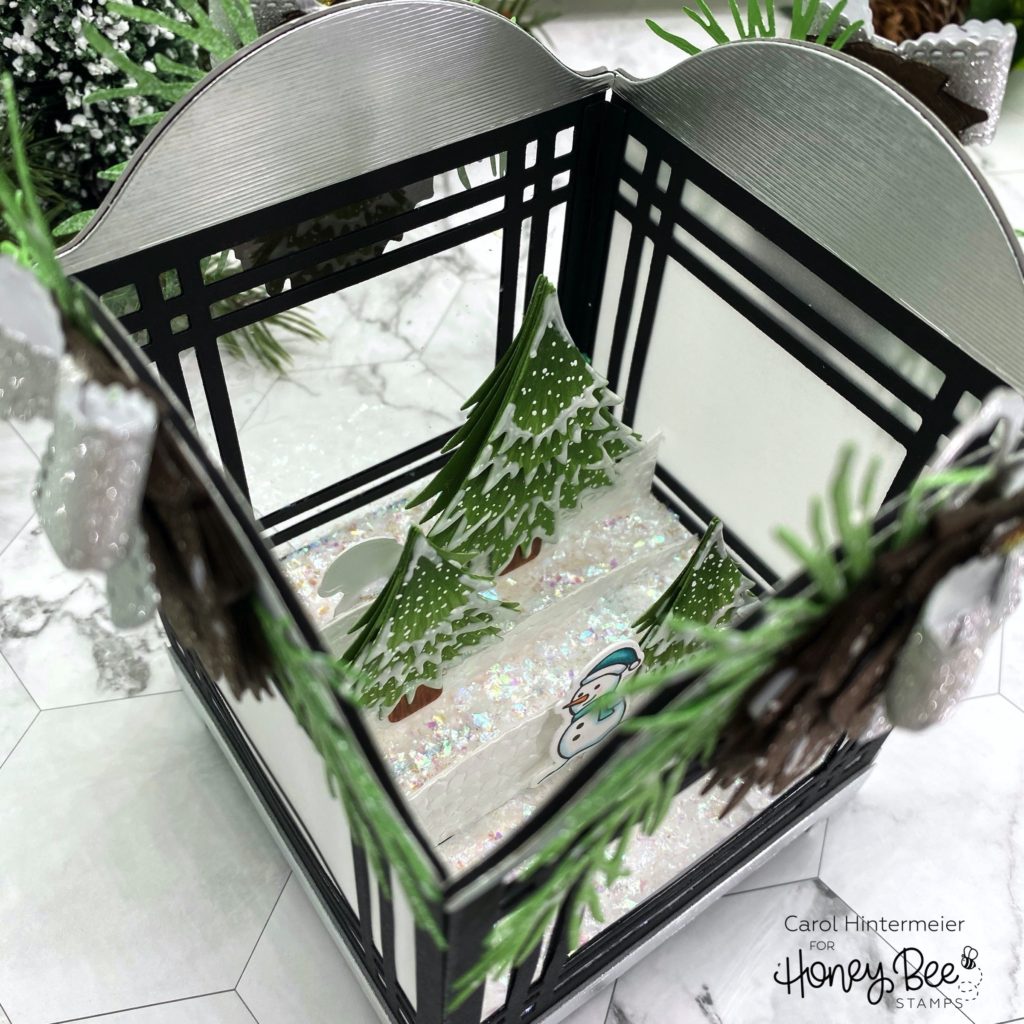
- Using the Hill Border Honey Cuts, die cut the hills. I used used THIS specialty paper and backed the hills with white card stock for more stability.
- Score the hills horizontally along the bottom to create a flap and adhere to the lantern base. Where you score them depends on how high you want your hills.
- Take the trees, add glue to the bottom inside and slip them over the hills to adhere. You should have one side on either side of the hill.
- I stamped two snowmen from the Toy Store House Builder Add-on stamp set, Copic colored, and die cut them with the coordinating Honey Cut. I attached them to the hills with foam squares.
- The photo above shows all of the pieces and parts just before assembling.
To assemble I removed the Scor-Tape from the lantern side tabs and began joining the sides. When I had two sides joined, I began adhering the lantern base by removing the Scor-Tape that is just below the windows.
When I finished assembling the lantern, I sprinkled in some iridescent “snow” to complete the scene. Here are more photos for you to see.

I know this was a long post, but I tried to keep it as succinct as I could. If you have any questions at all about creating this, please leave me a comment below and I’ll get back to you as soon as possible. Thank you so much for stopping by!
5 responses to “Scenic 3D Holiday Lantern”
Wow. Just beautiful!
Thank you so much Laurie!
This is an amazing project. Gorgeous.
Thank you so much Iris!
Totally awesome! My goodness! Love the frosted sides too, everything is fantastic!