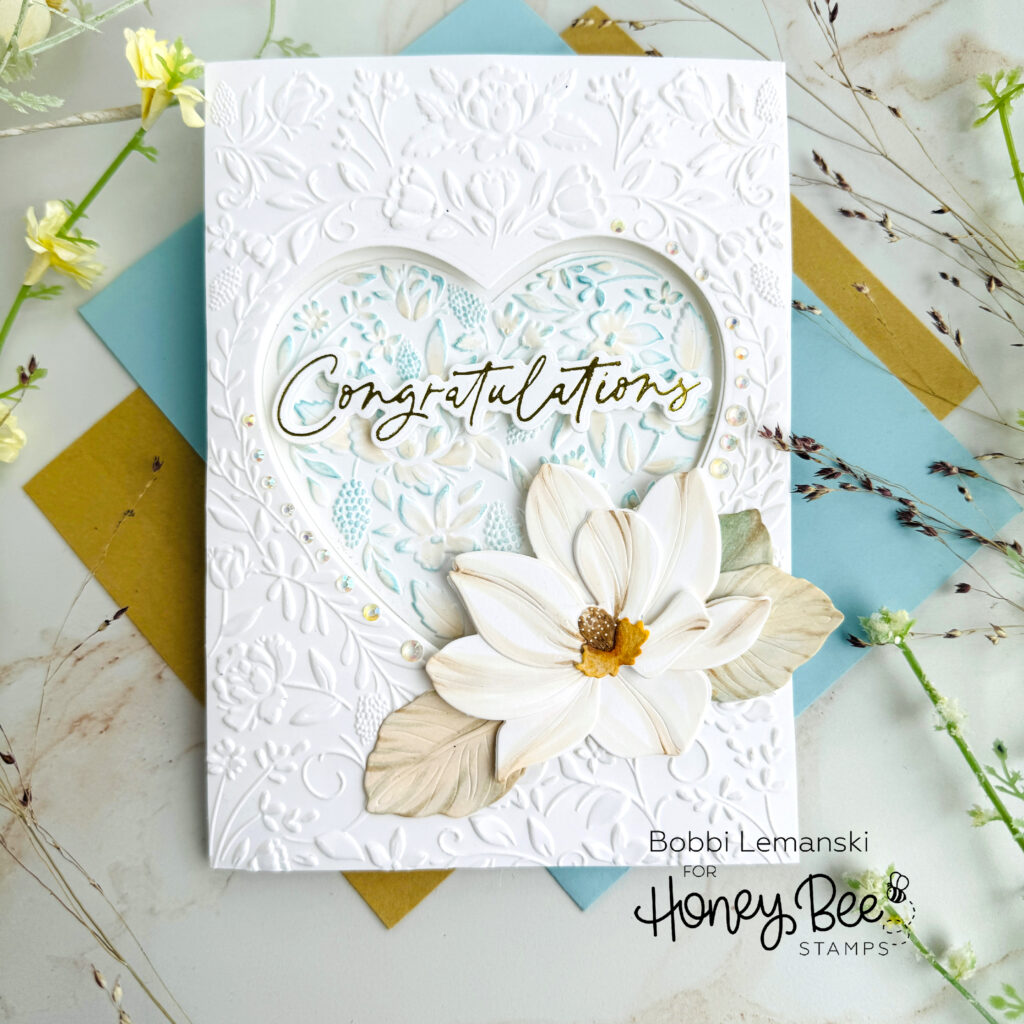
Bells will be ringing soon for happy couples all over the world. I am preparing for those fun-filled wedding weekends this coming late spring – early summer. Today, I made a card using my favorite embossing folder from the Vintage Love Release by Honey Bee Stamps. It’s the Floral Heart 3D Embossing Folder and Coordinating Die Set and isn’t she lovely? This folder makes any card stylish, fancy, elegant, dimensional and oh so perfect!
My card uses the following Honey Bee stamps products:
Floral Heart 3D Embossing Folder and Coordinating Die Set
Lovely Layers: Magnolia Flower Honey Cuts dies
Foil Script: Wishes – Hot Foil Plate & Honey Cuts
The featured project below is made from Neenah 80lb Solar White cardstock for the card base and card front panel. All of the black ink stamping was done using Honey Bee’s Bee Creative Intense Black Ink. I use Honey Bee Stamps Bee Creative Precision Glue and for when I want more dimension, Bee Creative Foam Dots With Tab for adhering my elements together. My card is 5″ X 7″ in size.
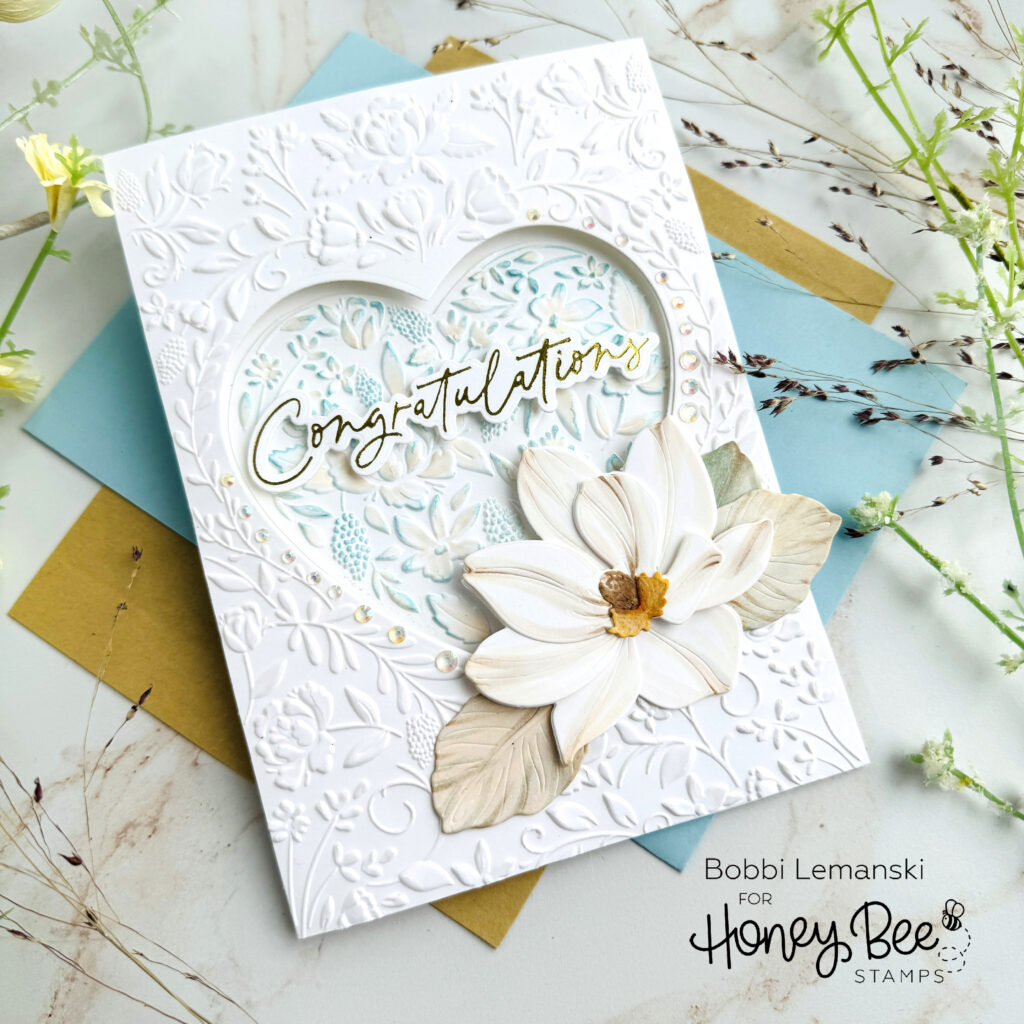
To create this 5″ X 7″ heart window, wedding card, I started by cutting out the heart design from two sheets of 5″ X 7″ white cardstock. (Note: I ran them through my Empress machine. I just got this machine and already LOVE it. Honey Bee Stamps was the best price I found, too!) I ran the two panels through at the same time so that they would match perfectly. One will be the card front and the other will be the backing that conceals my back panel flap. For the back of the card, I cut a 5-1/2″ wide X 7″ tall piece of cardstock and scored it 1/2″ in from the left side. This will be the “hinge” to connect my front and back panels.
With my heart window cut out, I positioned the front panel and the cut out heart on the embossing folder, making sure to line up the cut out with the folder’s heart design. I used the Empress to emboss the papers. TIP: It’s important to cut the heart out first, then emboss it so that you are not running the embossed paper through and flattening the embossed design.
I added a touch of “something blue” to the embossed heart using my blender brushes and Distressed Oxide Ink in Tumbled Glass. I like the touch of color on the raised design. I use a soft touch, applying the ink so that it is light and soft looking. I also used my Copic E50 marker to add a little more off-white to the flowers to make them stand out even more from the white backdrop. It’s subtle, but makes a big difference in softening the look.
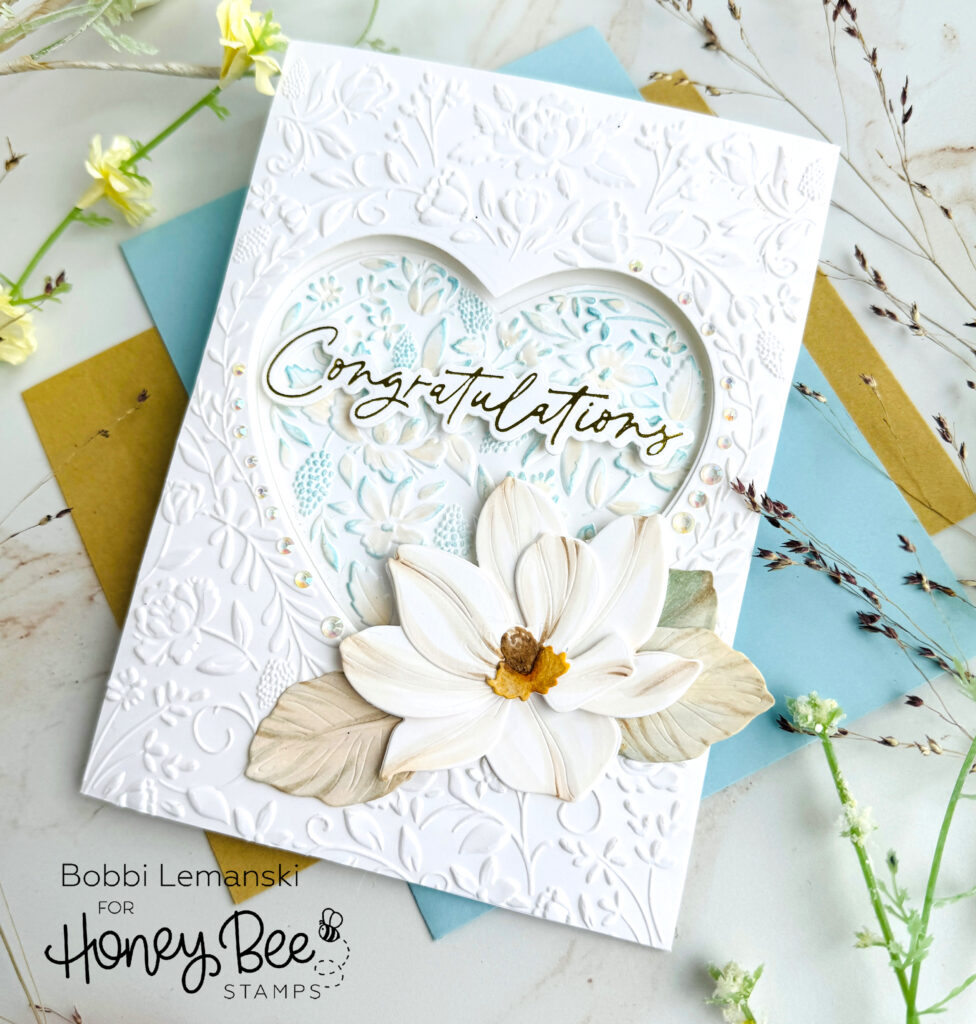
Next, I made the magnolia by cutting all the pieces out of white cardstock and adding some color to the leaves and the petals with my Copic Markers. I used E44, E42, E420, E50 for the petals and E44, E49, YR27, YR24 for the center. I used YG63, G41, and the E shades from the flower for the leaves. I assembled the flower and glued it together. I die cut the largest, bottom petal piece and glued it to the back of the flower for a clean finish on the flower’s back. It will show through the heart window. I attached the flower to the front panel, allowing the flower to spill over into the window at the top. I also added some pretty gem stickers around the heart opening on the front.
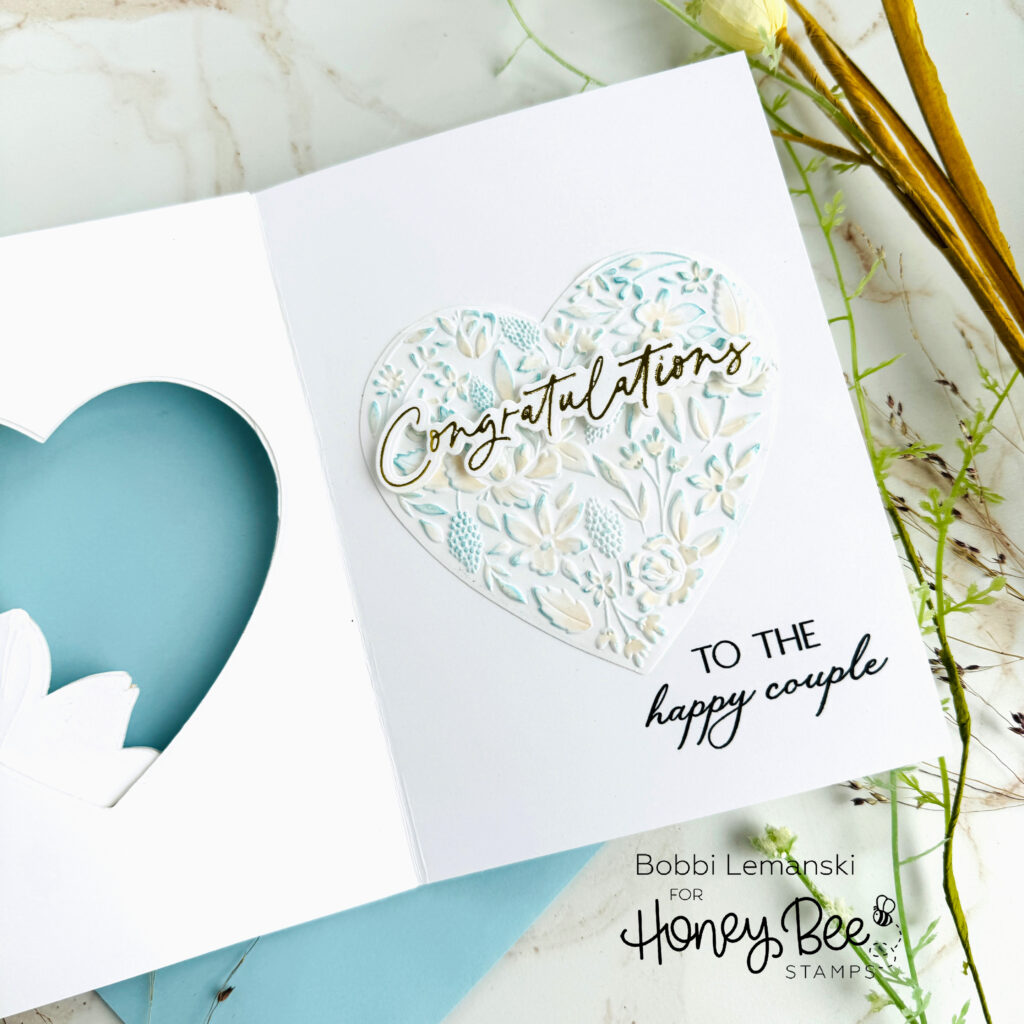
Inside the card, I attached the embossed heart, matching it up with the window opening and stamped the “to the happy couple” in the lower right. I also hot foiled in gold the “congratulations” and cut it out using its coordinating die in the set and attached it over the heart using mini square foam tabs. I glued the embossed front panel to the back cut out panel (matching up the window perfectly), leaving the left side open to insert my back panel flap. I inserted and adhered the black panel flap between the cutout panels to finish the card.
Thanks for stopping by today. If you want to see more ideas and inspiration from me, subscribe to my blog, BobbiHartDesign.com. I’ll send you updates on new posts! You can also find me on Instagram as @BobbiHartDesign and on Facebook as BobbiHartDesign.