Hello friends! I’m excited to share a few new sets with you today. Honey Bee Stamp’s latest 9th birthday release includes intriguing new sets to celebrate birthdays, spring, Easter and more. I saw these adorable herbs and could not wait to grow them for you! I’m using the following new items:
Lovely Layers: Herb Garden – Honey Cuts dies
Celebrating You stamp set and coordinating Honey Cuts dies
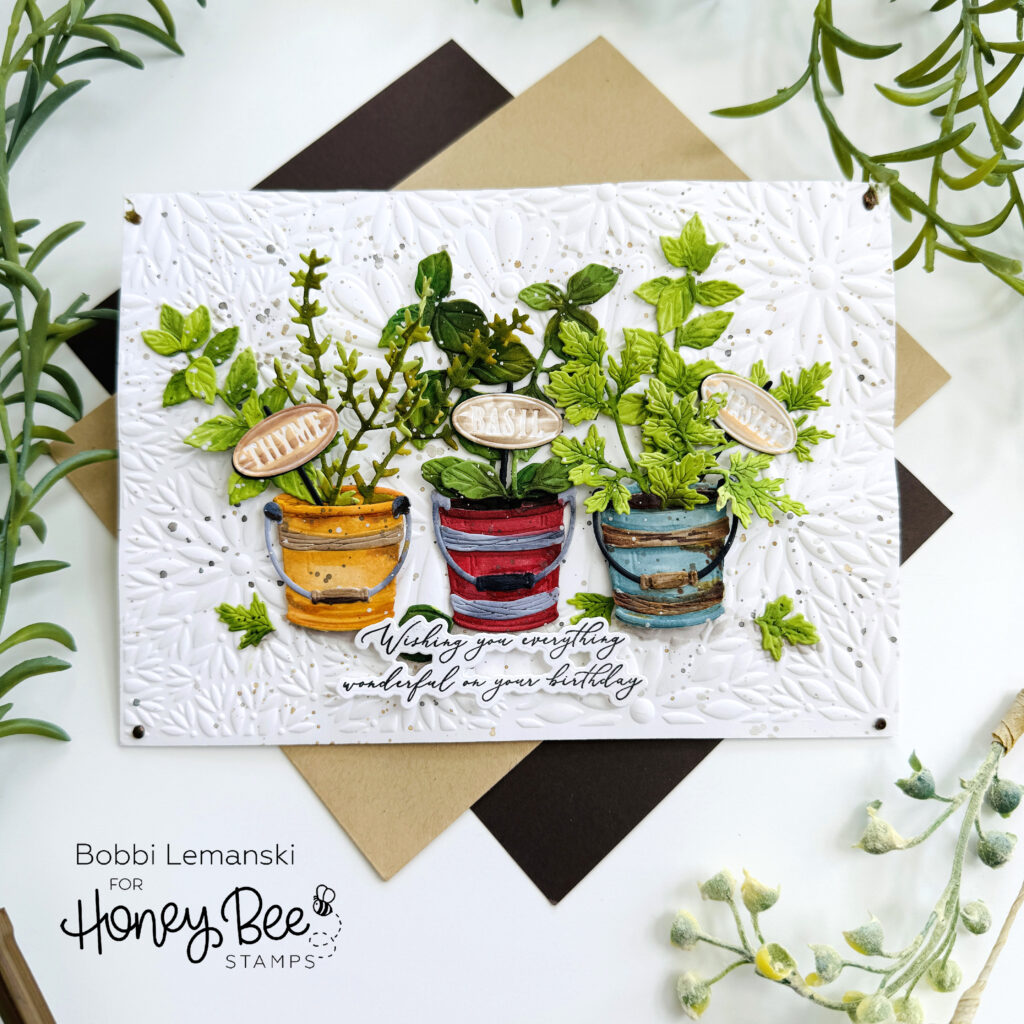
The featured project below is made from Neenah 80lb Solar White cardstock for the card base and card front panel. All of the black ink stamping was done using Honey Bee’s Bee Creative Intense Black Ink. I use Honey Bee Stamps Bee Creative Precision Glue and for when I want more dimension, Bee Creative Foam Dots With Tab for adhering my elements together. My card is 5″ X 7″ in size.
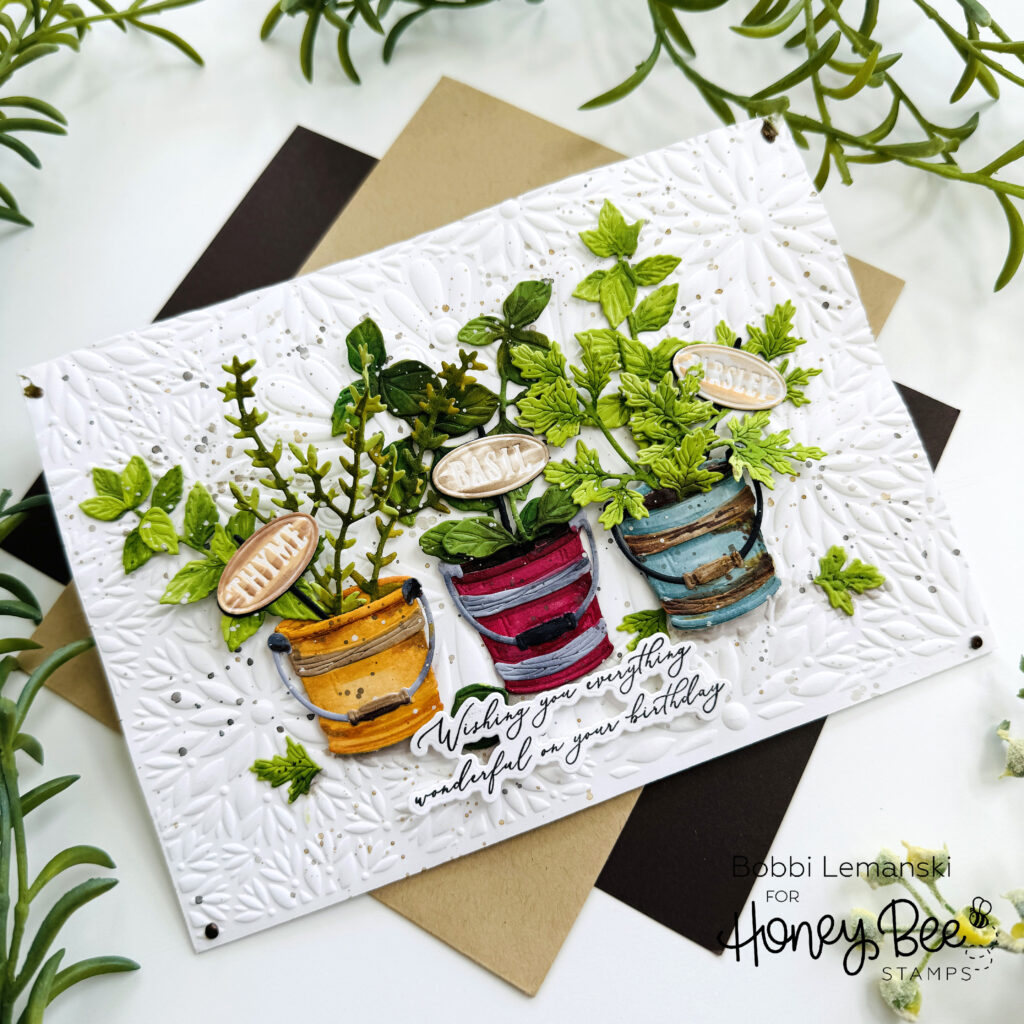
To make this 5″ X 7″ card, I started by embossing a 5″ X 7″ white card front panel using the Soiree – 3D Embossing Folder. I splattered some watercolors over the design using paints in black, metallic gold and a little mustard yellow. I set it aside to dry.
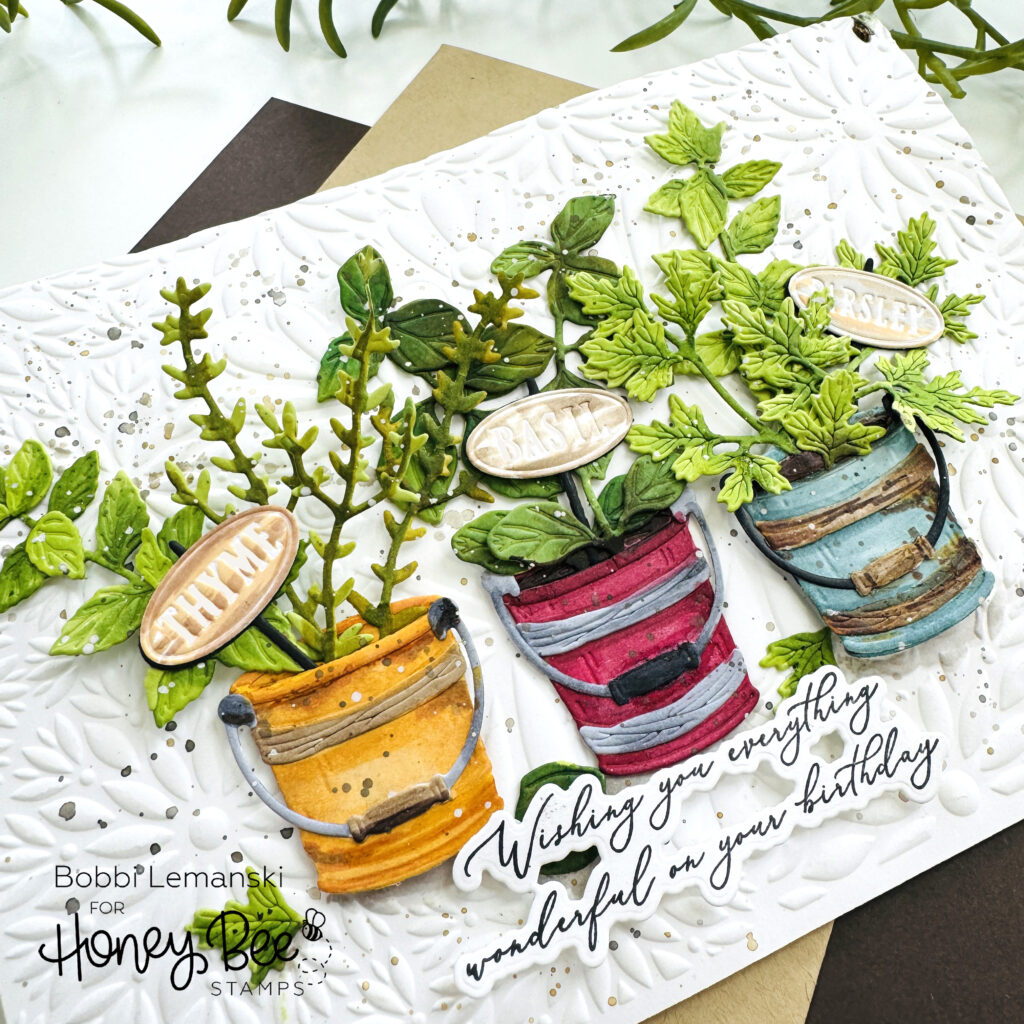
I die cut all of the pieces from the Lovely Layers: Herb Garden – Honey Cuts dies. I cut the greenery from green cardstock and the rest from white. I used Copic markers to color the pots, label stakes, and greenery. I used the following Copic marker colors:
- Greens: YG67, YG23, YG03, G28, YG95, YG99
- Yellows: YR27, YR24, YR21
- Browns: E49, E44, E57, E55
- Grays/Black: 100, C5, C3, W3
- Reds: R89, R59, R29
- Teals BG99, BG75, BG72
I assembled each bucket with the greenery, handles and name stakes. I also added extra stems to the pots until I was happy with the overall look.

I used foam tabs to attach the two outer buckets and glued the middle pot directly to the card panel. I added a few individual leaves to the base of the pots and added shadows under them along with the pots using my Copic W3. I stamped the phrase from the set, Celebrating You stamp set and coordinating Honey Cuts dies and attached it to the bottom center of the landscape-oriented card. I attached the front panel to the card base to complete the look.
You can shop the entire Honey Bee Stamps , 9th birthday release here. If you decide to place an order, please use the links in this post so that Honey Bee knows which ideas inspired you!
Thanks for stopping by today. If you want to see more ideas and inspiration from me, subscribe to my blog, BobbiHartDesign.com. I’ll send you updates on new posts! You can also find me on Instagram as @BobbiHartDesign and on Facebook as BobbiHartDesign.