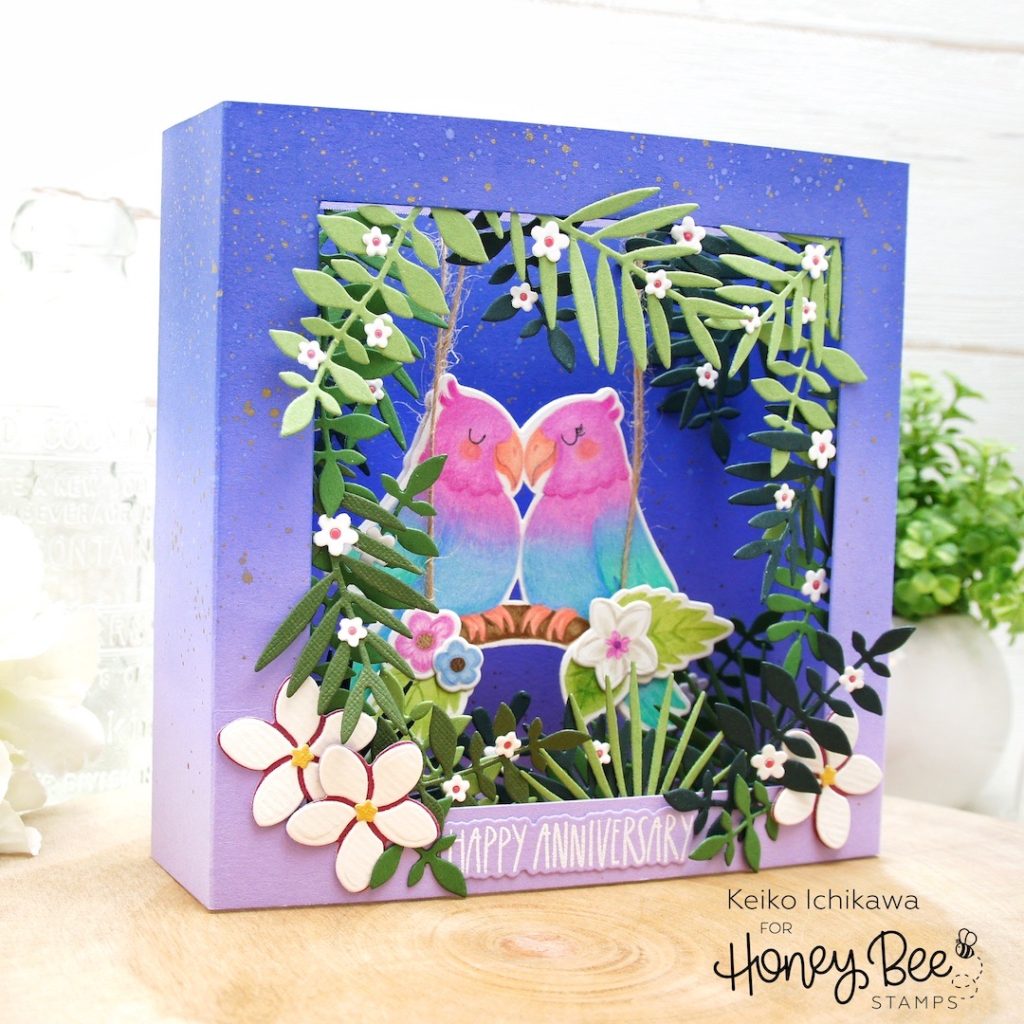
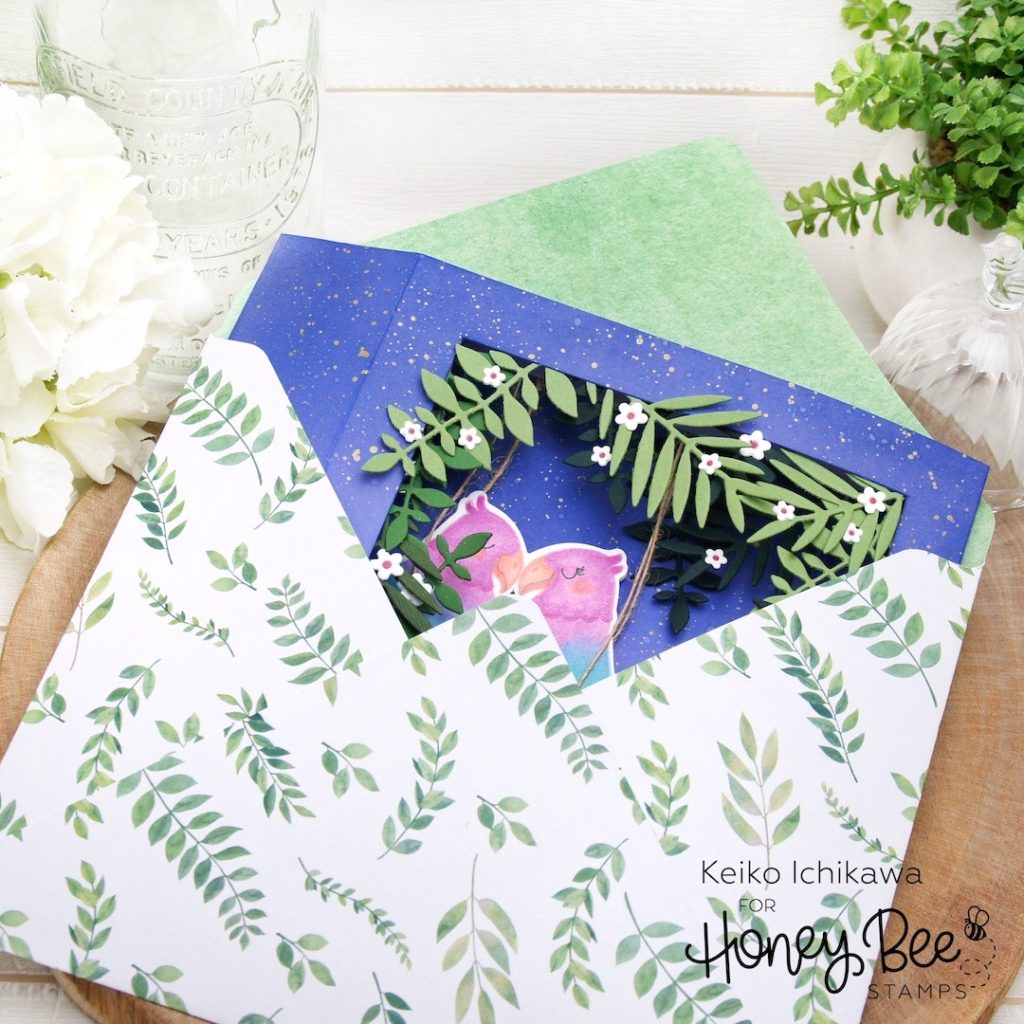
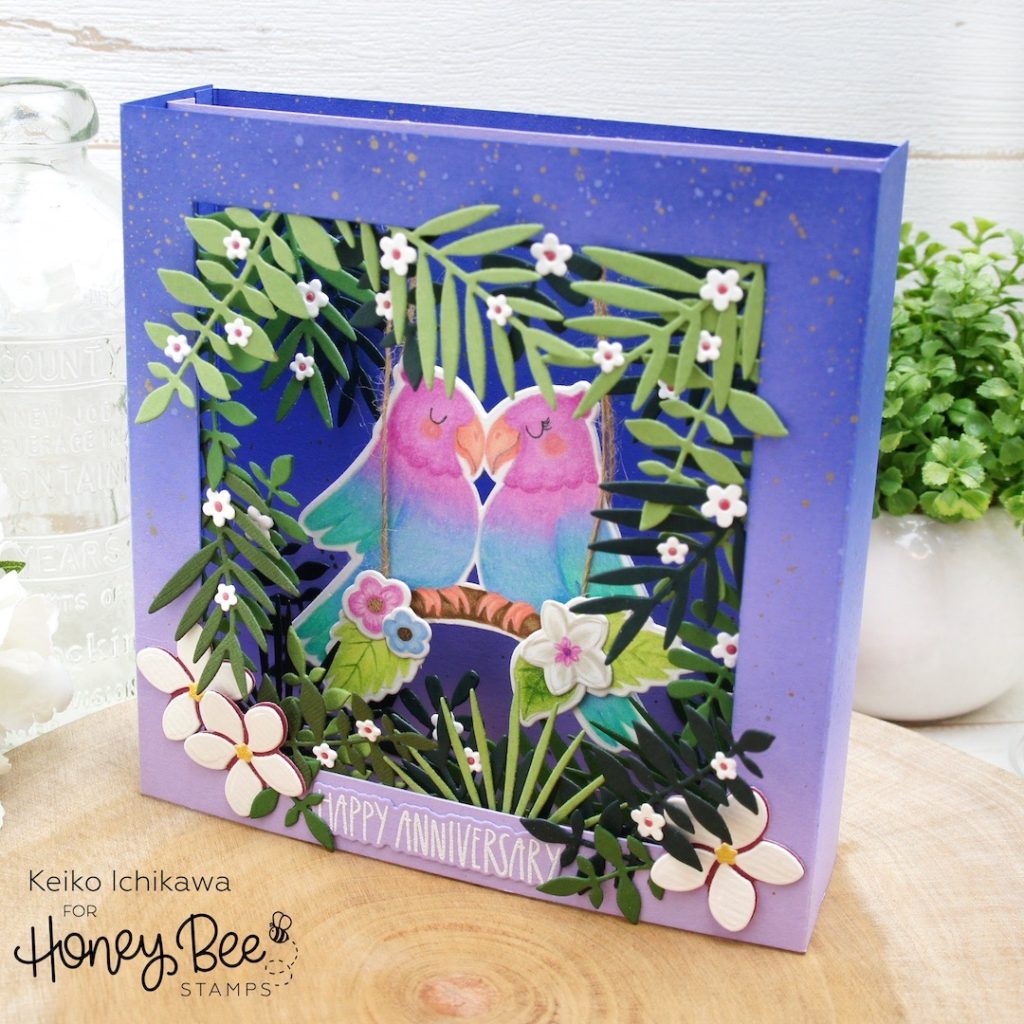
Happy new week friends! It’s Keiko from Happy Tree Studio and today, I have this pop up card for you! This is very dimensional (1 1/2″ thick) when it is popped up, but still lay flat to fit in an envelop to be mailed. The birds on the swing are suspended in the middle of the box card so they swing when you handle the card. I made this for my hubby (no need to mail!) so the card is not exactly an average A7 size (it measures 5 1/2″ x 7″ when flat). I made my own envelop but if you make this 5″ tall instead of 5 1/2″, it will perfectly fit in an A7 envelop.
For the card base, I cut a piece of light purple card stock to 5 1/2″ x 8 1/2″ and scored at 1 1/2″ from the both end (this is going to be the front and two sides) and cut out 4″ square window in the middle using craft knife. For the back piece (and the tabs to adhere to the sides), I cut another piece of light purple card stock to 5 1/2″ x 6″ and scored at 1/4″ from both ends. You also need two pieces of 1/2″ x 6 1/2″ card stock scored at 1/2″ from both sides. These will be glued inside of the pop up box (one on the top and the another to the bottom) so we can add elements in the middle of the box.
To add some color to the box, I blended some purple and blue inks on both the background piece and the front/side piece. TIP: I inked the sides (both outside and inside) too so the card looked more finished. The inks I used are Shaded Lilac, Blueprint Sketch, and Chipped Sapphire (all Distress Oxide Inks). I also added some splatters with water and gold water color paint so it kind of looks like a starry sky.
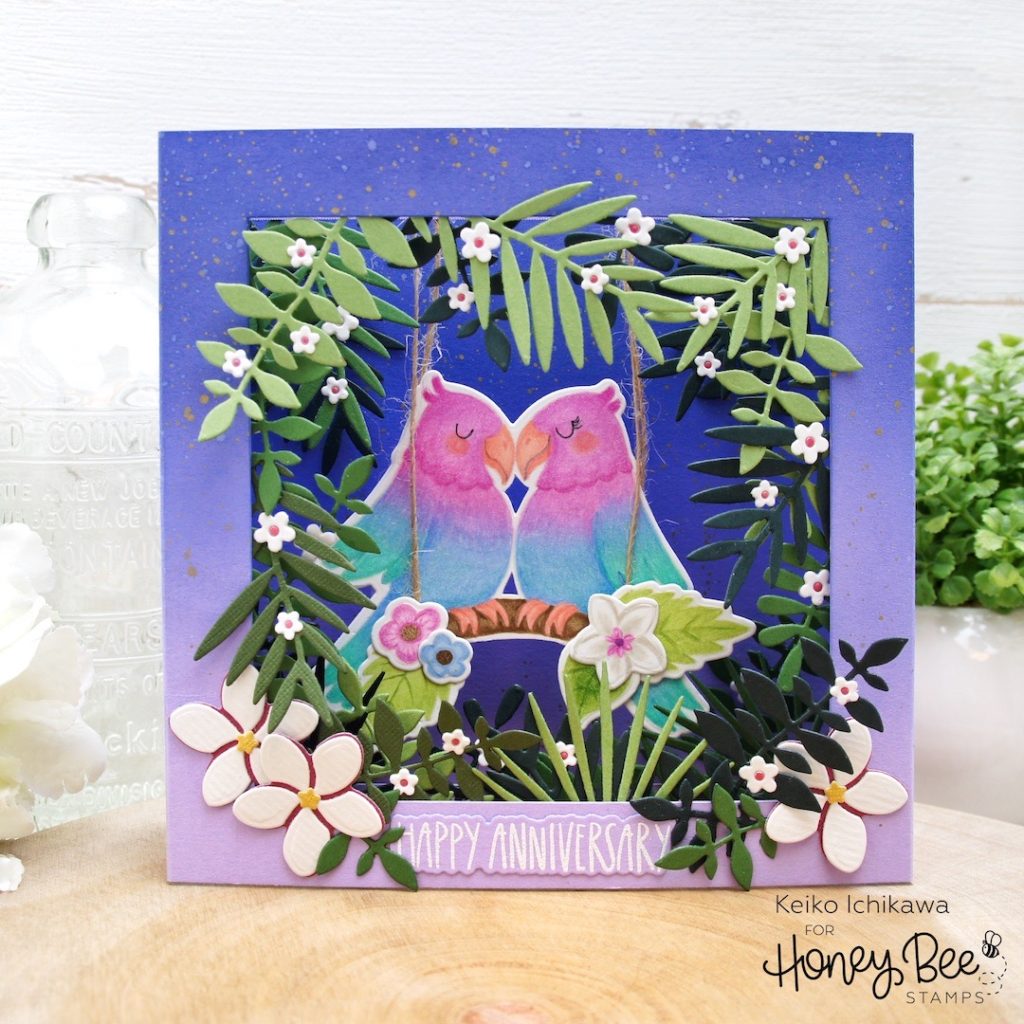
These love birds are from Birds Of Paradise set and I stamped them along with some flowers and leaves included in the set using the new No Line Coloring Ink. I added the base color with my Copic markers and then added some details with colored pencils. I die cut all the images using the coordinating dies (I cut out the two small openings between the birds with craft knife. You can totally skip this!). I then punched small holes and thread some twine to make it look like a swing. TIP: To hide the holes, you can adhere the floral die cuts!
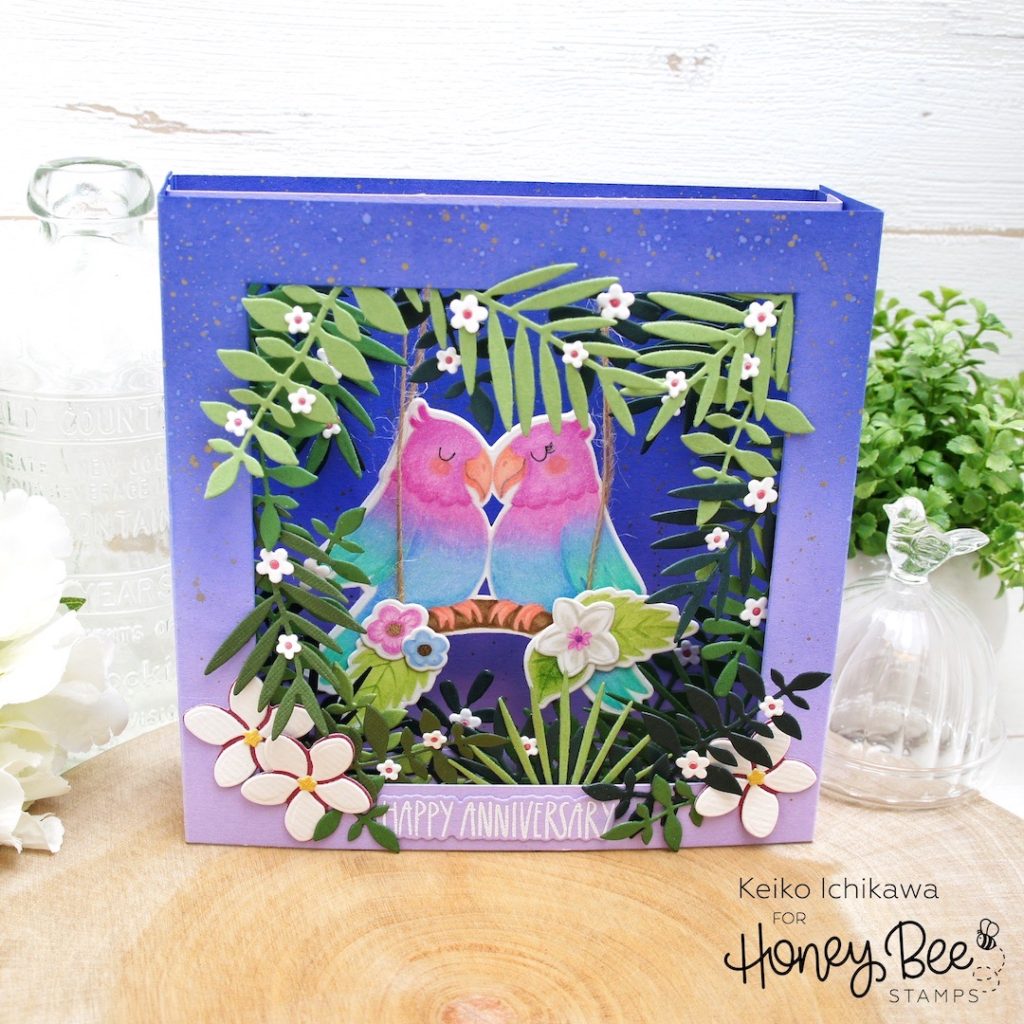
To assemble the pop up card, you can just reinforce the score lines with bone folder and glue the front/side panel and the back panel together by applying adhesives to the two tabs on the back panel (make sure your paint splatters are all dry!). I also added the two strips we created to the top and bottom of the card (roughly in the middle) and adhered the birds on the swing to the back of the strip on top. TIP: I found adding an extra white die cut to the back of the birds made them hung/swing better. I heat embossed the ‘HAPPY ANNIVERSARY’ sentiment from Tropical Tweets set on the same purple card stock and die cut with the coordinating die to add it to the card.
You can now decorate the box with die cuts! I went for a tropical forest look, so used flowers and leaves in the Tropical Bouquets die set (except the die for the tiny white flowers are in Treat Shop Add-On die set). I die cut a bunch of them as I go and adhered them on three different layers to achieve dimension (front, middle, and the back).
Thank you so much for stopping by today. Have a wonderful week!!

One response to “Pop Up and Swing Anniversary Card”
Awesome card. It’s so beautiful. Love your coloring.