Hello Bee Friends! It’s Bobbi Lemanski here, baking up some chocolate chip cookie-themed cards featuring new products by Honey Bee Stamps. The Let’s Celebrate release includes several baking-themed products that play well together. I made a batch of chocolate chip cookies for you and had one leftover that I used for card two. 🙂 I’m using the following Honey Bee Stamps products:
Cookie Sheet Honey Cuts die set
You Bake Me Happy stamp and coordinating die set
Baked with Love stamp and coordinating die set
Apron: BBQ Add-On Grill die set (for the oven mitts, only)
Mae the Mouse stamp and coordinating die set (for the glass frames, only)
Let’s Celebrate 6″ X 6″ pattern paper pad
Team Tye-die 6″ X 6″ pattern paper pad
Spring Lullaby 6″ X 6″ pattern paper pad.
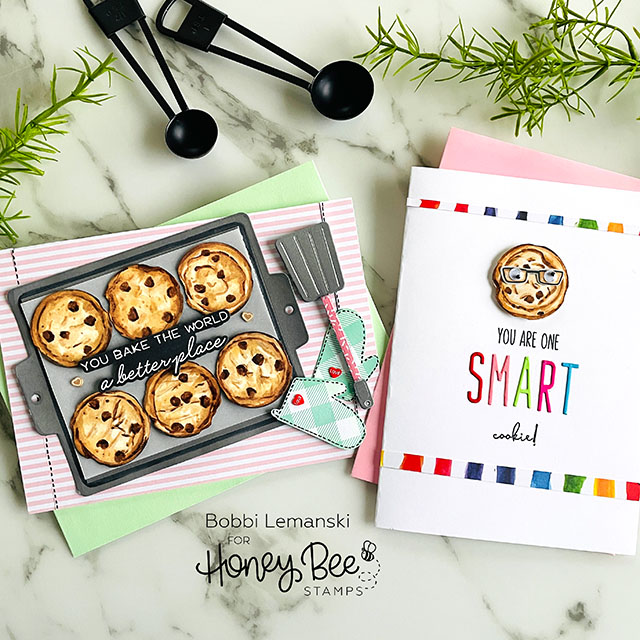
Card 1: Bake the World a Better Place
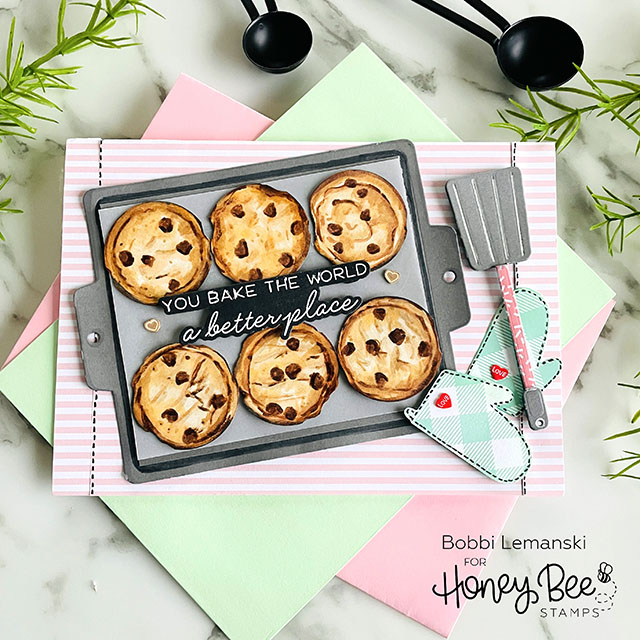
To make this 5″ X 7″ card, I started with a white card base and added pattern paper on the card front from the Spring Lullaby 6″ X 6″ paper pad. Since my card is 7″ wide and the pattern paper is 6″ wide, I had to add strips on the side. I faux stitched them using a black marker to conceal the seams and to add more interest to the card. I die cut the cookie sheet from charcoal gray cardstock and added simple shading around the inside edges to create depth in the pan. I added a rectangular piece of vellum and adhered to the interior area of the sheet. It looks like parchment liner paper used for baking. I also die cut the oven mitts using the die from the Apron: BBQ Add-On Grill die set from the Great Outdoors 6″ X 6″ pattern paper pad and the spatula from the Cookie Sheet Honey Cuts die set. I used some pattern paper from the Let’s Celebrate pad for a decorative handle on the spatula. The oven mitts also got sweet “Love” hearts from the Candy Shoppe Clay Bits mix and black faux stitching to match the background.

To create the cookies, I punched out 1-3/8″ circles from a light natural cardstock. You could simply hand cut these from cardstock. I used my scissors to make the circles imperfect by cutting small slivers out around the perimeter. I used Copics in the following colors to add depth and texture to these baked goodies: E59, E57, E55, E53, E51 and E50. These colors are great for cookies because they are a really warm brown with a golden tone. It’s almost like a caramel-colored brown. I love these for baked goods! The chocolate chips were added by creating triangular-like shapes using the E57 marker and adding a little E59 for a little shading. These are super fun to make because you can really make a flat circle look like a cookie! Note: I colored these cookies for demo purposes here, on white cardstock which makes a difference in the outcome. I highly recommend using a natural cardstock for the base. It makes the cookies look even better (see card photos to see the difference).
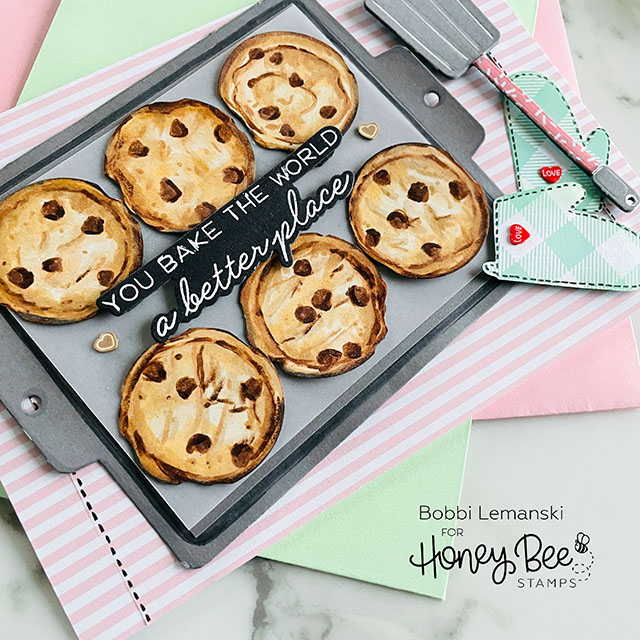
All the images were positioned into place and attached. I used a Scrapbook Adhesive 3D Self-Adhesive tab under the spatula for dimension. Lastly, I heat embossed in white, the phrase on black cardstock and added it to the cookie sheet using Scrapbook Adhesive 3D Self-Adhesive tab to finish this look.
Card 2: One Smart Cookie
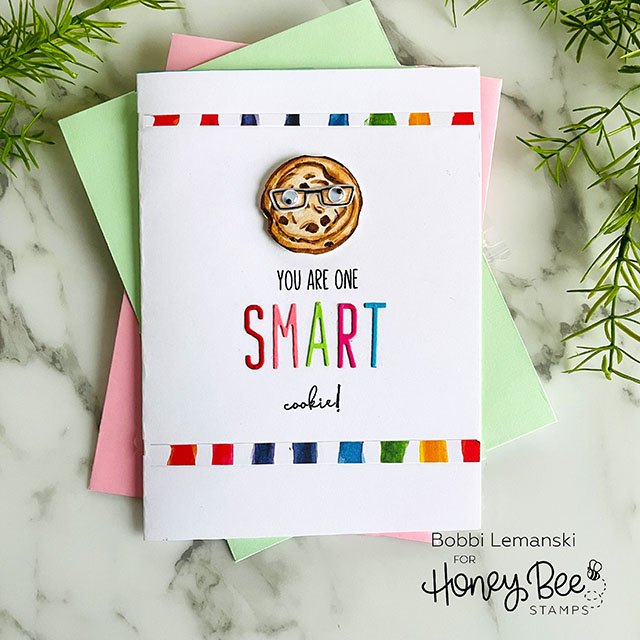
My next 5″ X 7″ card is a quick one. I happened to have one cookie left over from the first card so I made this quickie. I stamped and die cut the glass frames from the Mae the Mouse stamp and coordinating die set and added them to the chocolate chip cookie. I also added some moving eyes for fun. I attached them using the Bee Creative Precision Glue. I use the glue for attaching die cuts, layered die cuts, sequins and more. It’s fast drying, dries clear and provides a strong, permanent hold, too!

Once I knew where the cookie was going to be positioned, I stamped the words and attached the Tailgate Alphabet Letters. To create the phrase words, I used the “You are one tough cookie” phrase from the Baked with Love stamp set and masked off the words I did not want stamped. It takes a little time, but if you have a Misti tool, it’s super easy. The words have quite a bit of space around them to make this fast and easy with great results.
I wanted to keep this card super quick, easy and simple. While that is not my nature at all, I held back and allowed the card to breathe with lots of white space to let the cookie and the colorful “SMART” shine in the middle! I did add two strips of colored stripes from a pattern paper in the Team Tye-die 6″ X 6″ pattern paper pad. I like the added color strips to balance and frame the cookie a little more.
You can shop the entire Let’s Celebrate release here. If you decide to place an order, please use the links in this post so that Honey Bee knows which ideas inspired you! It also helps me know what you enjoy seeing, too, for future blog posts.
Thanks for stopping by today. If you want to see more ideas and inspiration from me, subscribe to my blog, BobbiHartDesign.com. I’ll send you updates on new posts! You can also find me on Instagram as @BobbiHartDesign and on Facebook as BobbiHartDesign.
2 responses to “One Smart Cookie”
Awesome cards!
Those “specs” on your cookie make it look super smart! I love this set. Thanks for the tip on the card stock. I think everyone looks edible!!!