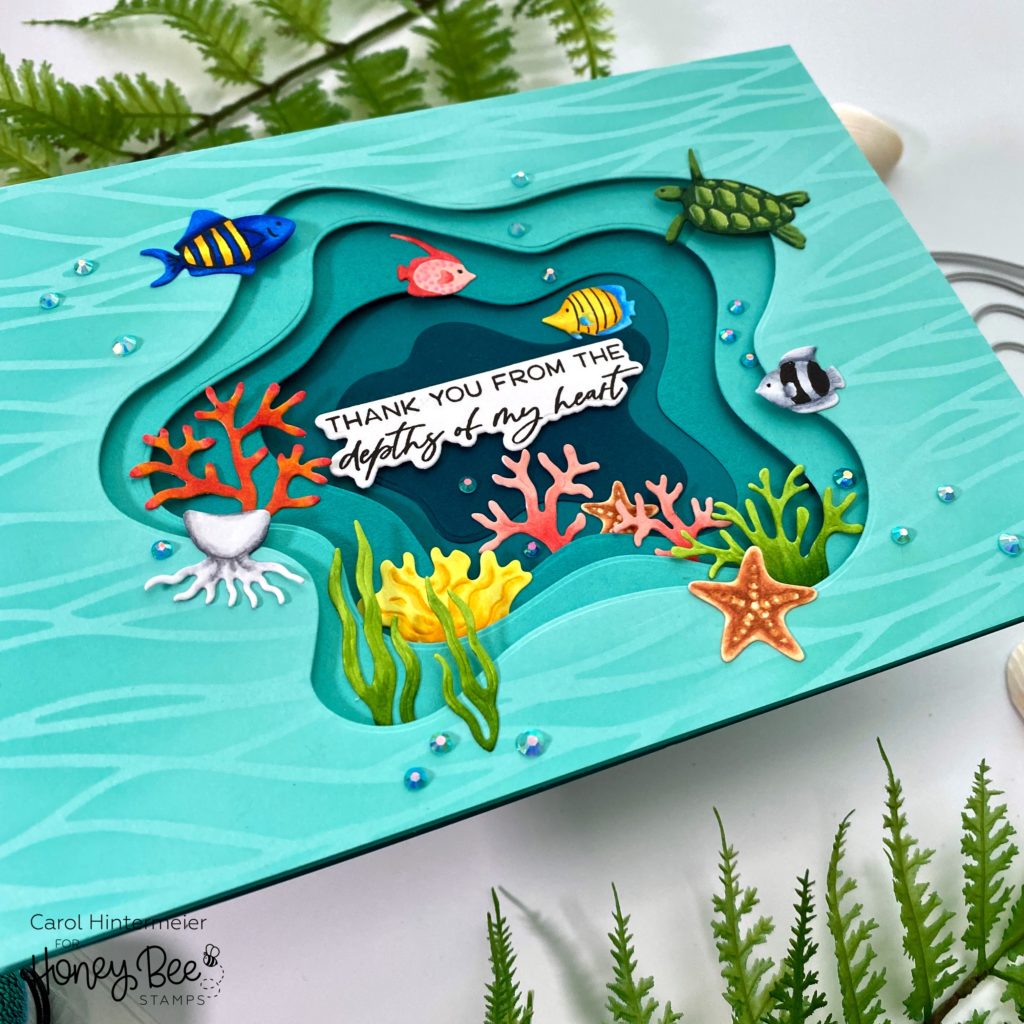
Hello Honey Bee Friends! Today I have this thank you card I made featuring the awesome Ocean Deep Scene Builder Honey Cuts. I used them in a different way by using the negative portion of the die cuts to make this dimensional, see-all-the-way-through, 5″ x 7″ card. Read on for the details!
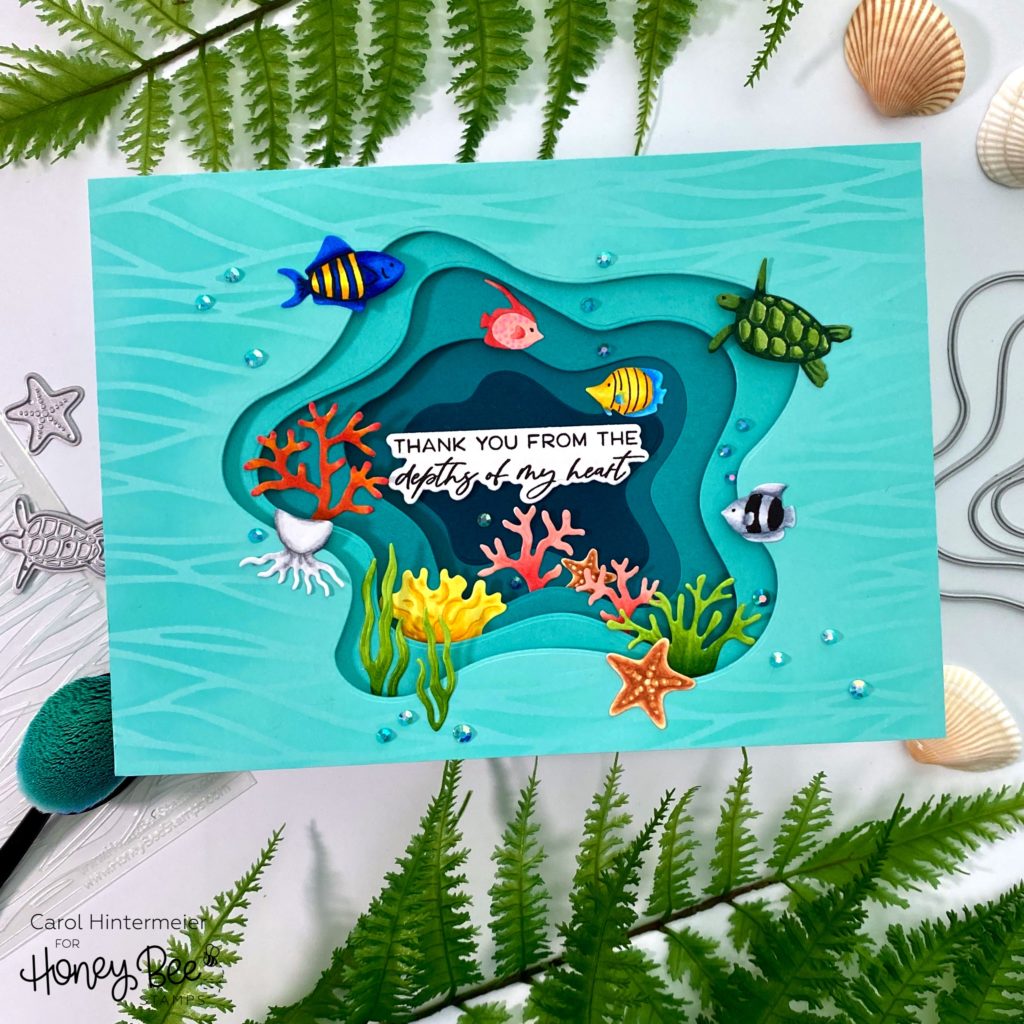
First I created the card base layers. I dove deep (get the pun? LOL!) into my cardstock stash and chose four ombré shades of turquoise cardstock. Then I cut each piece into a 5″ x 7″ rectangle–EXCEPT the second to darkest shade which was cut to 5-¼” x 7″. Use a score board to score it at ¼”. Then beginning with the lightest shade of cardstock, I die cut it with the largest of the Ocean Deep Scene Builder dies. (Set the die cut pieces aside to use on another card.) I placed the next shade of cardstock behind the one I just die cut in order to get the second to largest Ocean Deep die positioned. I repeated these steps for each subsequent layer.
Next I die cut the smallest Ocean Deep die with another piece of the darkest cardstock. To make that last piece stand out, I used an ink blender brush to add Uncharted Mariner Distress Ink over it.
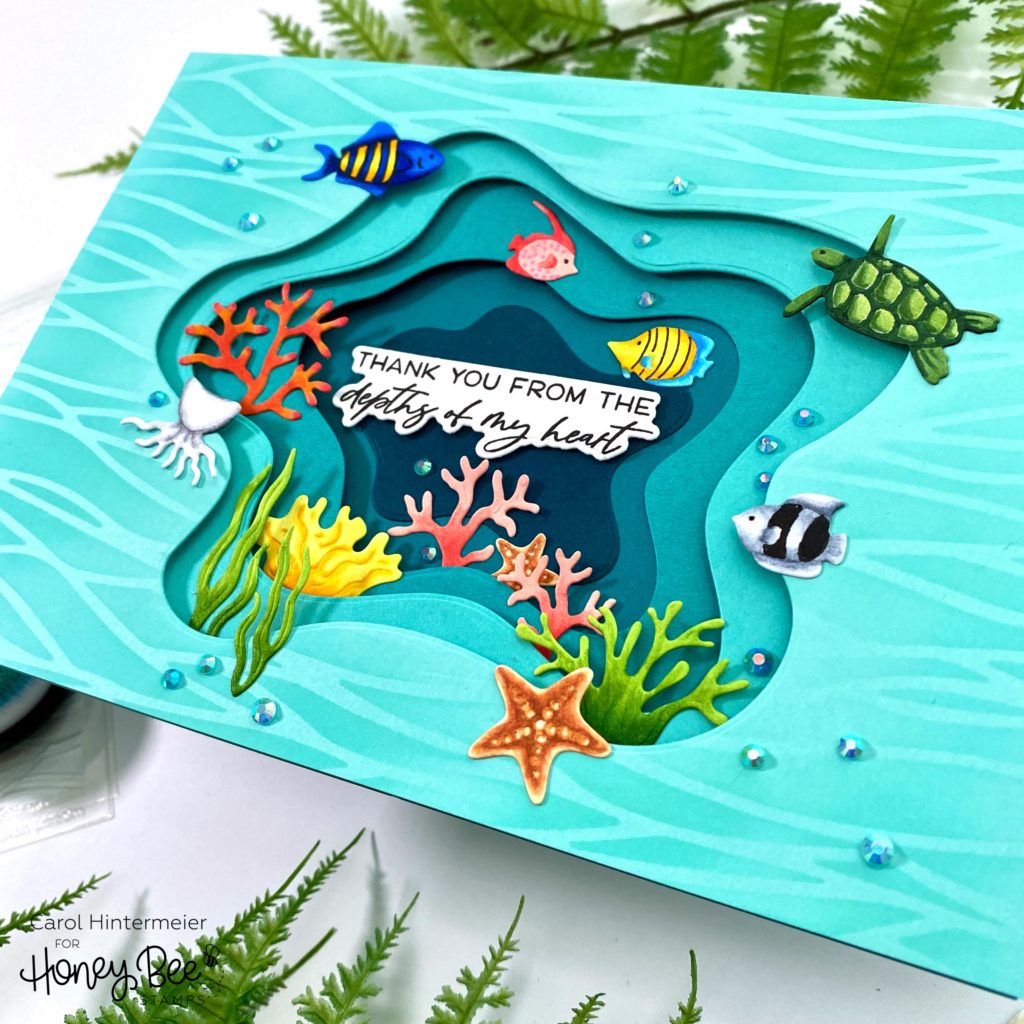
To assemble the card, first I took the scored layer and added Bee Creative glue just along the ¼” scored piece of the layer and folded it over the edge of the darkest cardstock to the back. While that was drying I added foam tape to the back of the top three layers and adhered them to the card, ending with the largest opening on top.
That’s the order I made this card in. However!! Notice the stenciling? It would be LOTS easier to stencil that layer with the top layer of the Layered Waves stencil set before adhering!! I managed to add the Salvaged Patina Distress Oxide ink without making a mess after I had adhered the layers. Whew! Haha!
Next I die cut all of the underwater elements also in the Ocean Deep Scene Builder set from 80# Neenah. I used (way too many to list here–LOL!) Copic markers to color each one. I added details such as the eyes of the fish and turtle with a black Micron 05 pen.
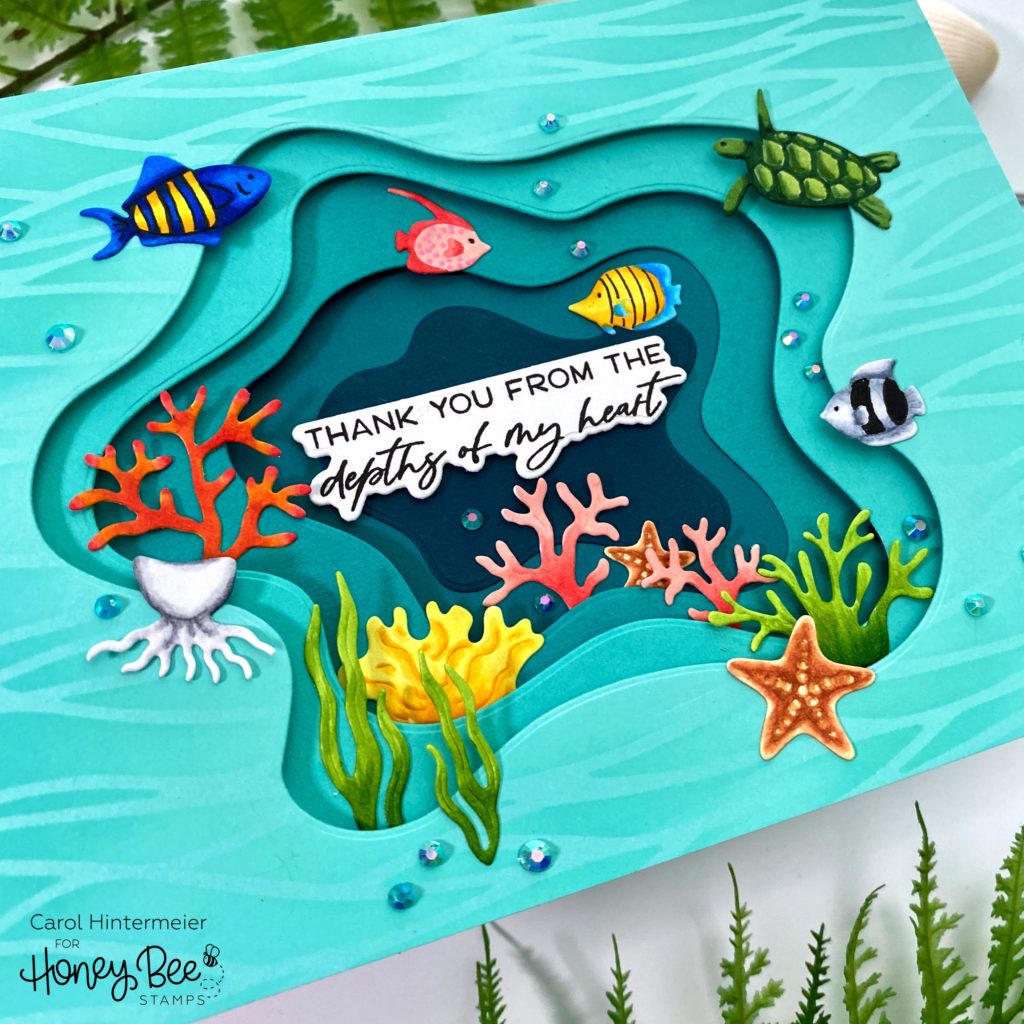
Then I had fun arranging the plants and animals on the card throughout the layers. I adhered each on with Bee Creative glue. Check out this next photo that shows what the card looks like when it’s open.
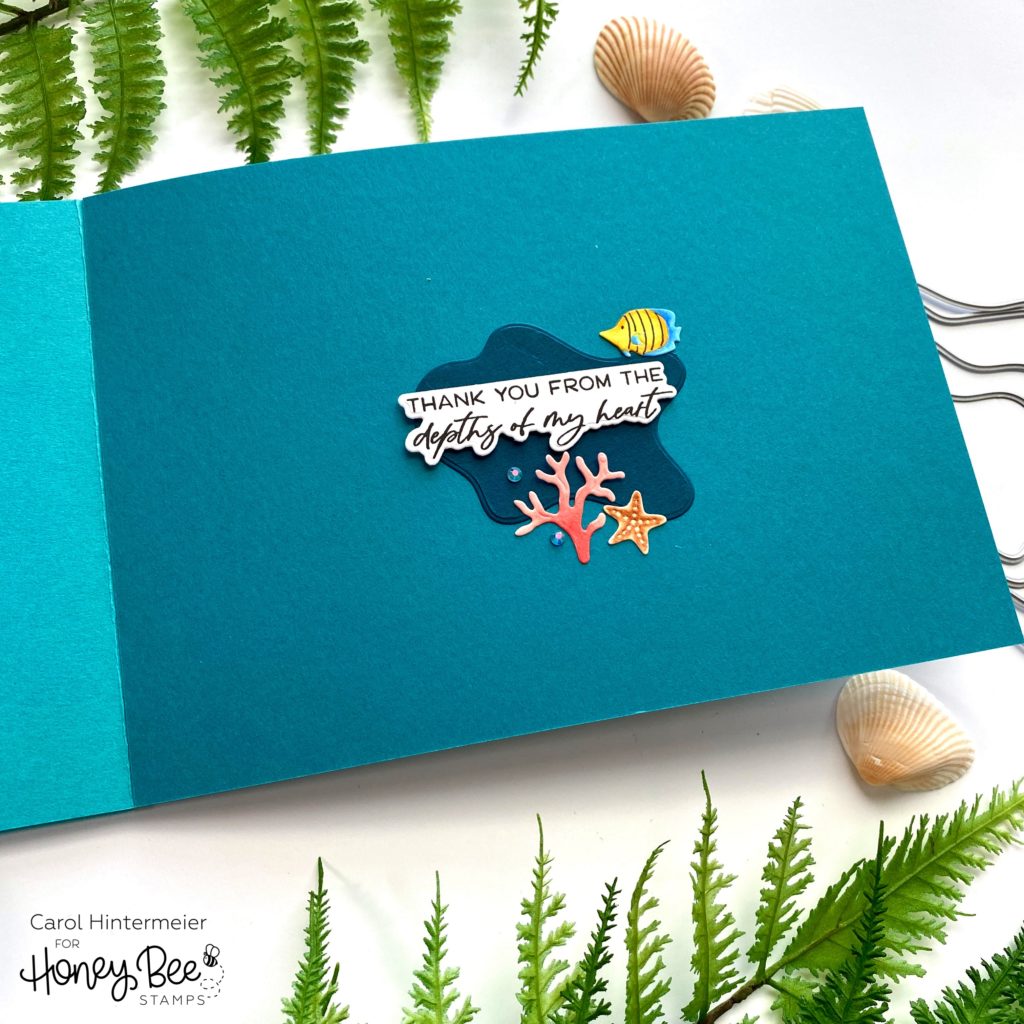
I stamped the sentiment from the Seas The Day stamp set with Intense Black ink and then used the coordinating Honey Cut to cut it out. I glued it to the inside of the card making sure it was centered when looking at the closed card.

Of course, I needed some bling on the card! There are two shades of gem stickers in the Bee Bliss Gem Sticker set that coordinating perfectly!
This card was so fun to make! It reminds me of snorkeling in clear blue waters and seeing the beautiful sea life deep in the waters! Thank you so much for stopping by!!
6 responses to “Ocean Deep Scene Builder Thank You Card”
Omg I love this so beautiful but I am a suckered for the ocean.
Thank you so much Jessica! If I could choose to live anywhere at all, it would be on the beach!!
I love this! I have so many under the sea kits, but the deep scene builder is brilliant! Thanks for the foam tape layer idea. I’ve seen this set glued in flat layers that are still great, but not as deep.
Thank you so much JoAnn! I do love my foam tape–LOL!
Love the colours, the technique, sentiments, the colouring, and the design. I especially appreciate the 5 x 7 card. This is the size of cards I make and it’s awesome to have inspiration in the same dimensions. Great card!
Thank you so very much Linda! Sometimes we just have to have a 5″ x 7″ card to get everything on it! Haha! I, too, enjoy this size!