
Hello “Hive” friends. When autumn rolls around, I “fall” all over autumn scenes. In Wisconsin, the leaves on the trees are changing colors and it is so beautiful around my neck of the woods. I love to capture those beautiful earthy, vibrant, tones in my cards. Today, I’m featuring the new quail dies from Honey Bee Stamps. These beautifully-colored feathered birds are very small in size, weighing in at just under six ounces on average. They are one of the “little things” we enjoy in nature. I’m using the following products from Honey Bee’s Heartfelt Harvest release:
Lovely Layers: Quail Honey Cuts
Lovely Layers: Barn Wood Fence Honey Cuts
Lovely Layers: Fall Bounty Honey Cuts
Lovely Layers: Autumn Bouquet Honey Cuts
Heartfelt Hello stamps and Honey Cuts dies
Prior Release Products used:
Lovely Layers: Seashore Honey Cuts
Birch A2 Cover Plate Base Die Honey Cuts
The featured project below is made from Neenah 80lb Solar White cardstock for the card base and card front panel. All of the black ink stamping was done using Honey Bee’s Bee Creative Intense Black Ink. I use Honey Bee Stamps Bee Creative Precision Glue to adhere my layers together and for when I want more dimension, Bee Creative Foam Dots With Tabs. My card is 5″ X 7″ in size.
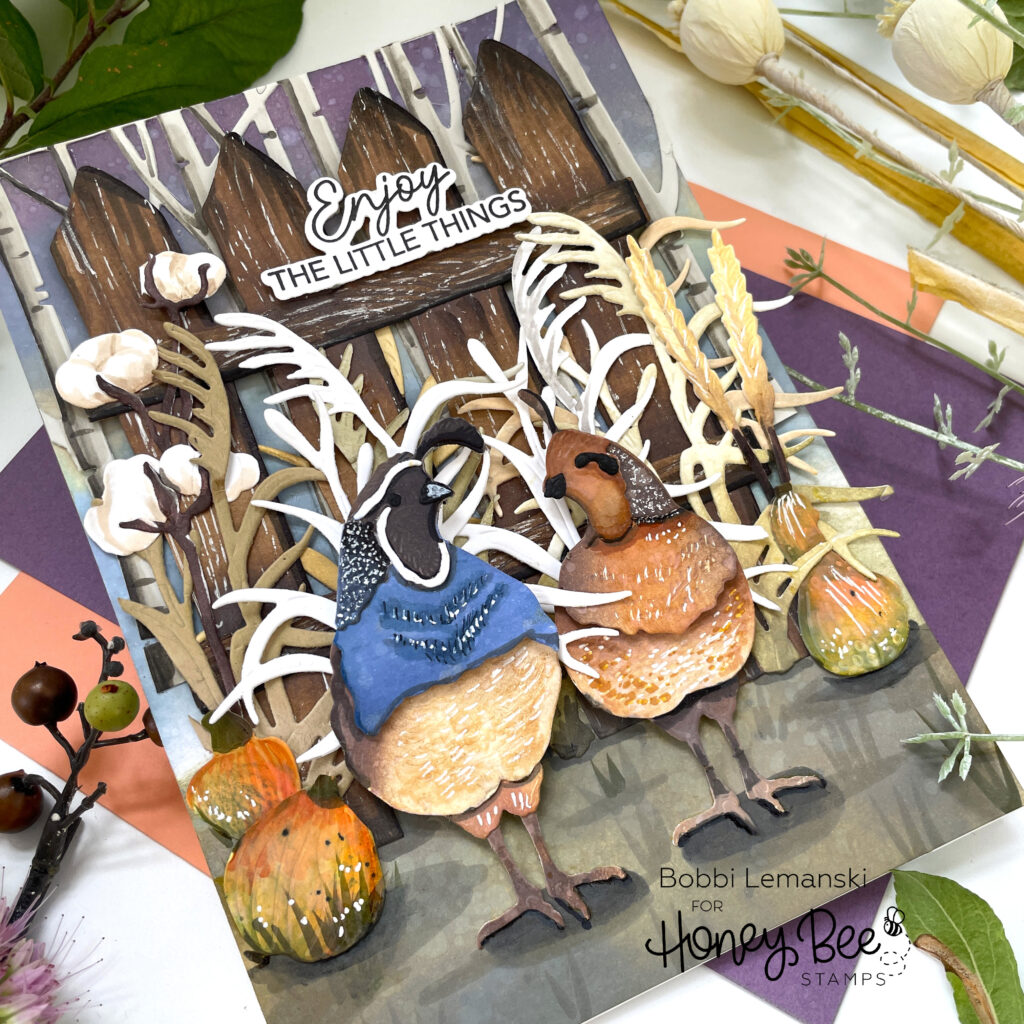
Making the Quail Birds
This male and female quail bird pair are just stunning when the layers of this Honey Cuts die set are put together. There is an instruction guide that helps guide the coloring and positioning of the layers. Not knowing a lot about quails, I did a quick search on the Internet to see the colors of these birds and I also followed the Honey Bee instruction guide for coloring the layers. I did very little coloring and more ink blending for these beauties. For the birds, I used the following Distress Oxide Inks: Stormy Sky, Black Soot, Rusty Hinge, Ground Espresso, Antique Linen, and Vintage Photo. I enhanced the edges with shadows using W4 and W2 Copic Markers. I added highlights using my white Gelly Roll Pen. Adding shadows and highlights really define the feathers and details on these dies.
TIP: When adhering the layers, I like to add a foam tab between the base layer and next layer to make the birds dimensional. The 3/4″ with 1/16″ depth tabs work really well. They are thin, but still give some dimension. This card has lots of layers so it’s good to keep it as thin as possible, while putting dimension in the right places!

Creating the Layers of the Card
To create this 5″ X 7″ card scene, I added the following layers to the card front:
Layer 1: I blended Distress Oxide Ink colors on a piece of 80lb white cardstock for the background. From top-to-bottom, I used these colors: Dusty Concord, Stormy Sky, Old Paper, Tumbled Glass, Forest Moss. I also die cut the birch trees using the Birch A2 Cover Plate Base Die Honey Cuts from a light warm gray cardstock. I used my Copic 100 black Sketch Marker to add indentions in the trunks and W7, W3 and W1 for shadowing all the trunks to add some dimension to the trees.
Tip: While not a lot of the trees show through in the layered scene, the trees add additional depth to the scene which makes it more interesting.
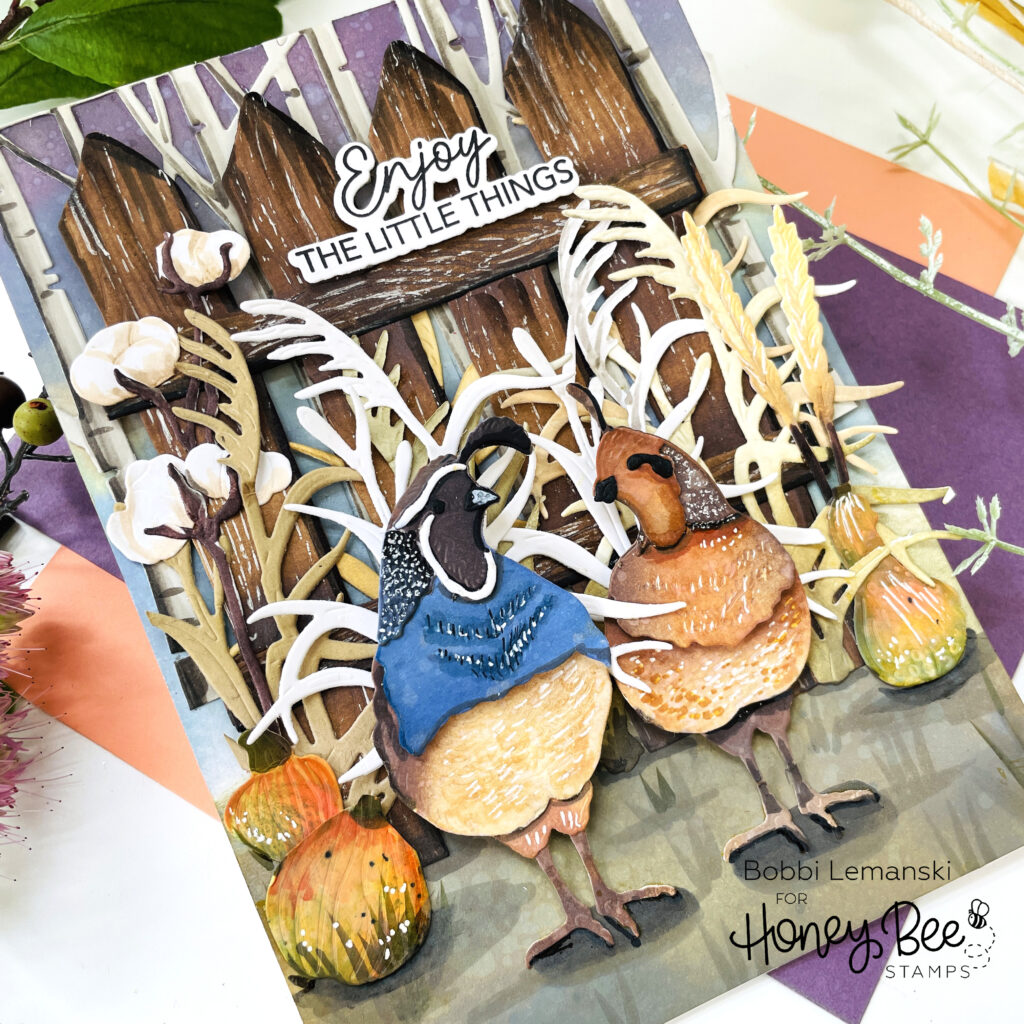
Layer 2: I cut the Barn Wood Fence pieces from kraft-colored cardstock and blended Walnut Stain, and Ground Espresso ink on it. I darkened the areas above and below the cross bars for shadows. I added Black Soot to the top and side edges of the wood and also used my Copic 100 to add a deeper shadow on the bottom of the cross bars and the right edges of the upright pieces. This adds depth to the wood pieces. Lastly, I used a very dry Gelly Roll White pen to add aged highlights to the top of the wood texture.
TIP: Keep your used, dry white gel pens for this purpose Simply drag across the textured cardstock to create imperfect highlights.
Layer 3: I added greenery / brush / weeds to the fence line using Lovely Layers: Seashore Honey Cuts and Lovely Layers: Autumn Bouquet Honey Cuts. I used Forest Moss, Antique Linen and Copics in E43, E42 and E44 to add extra color to the greenery. I glued the greenery behind and in front of the fence to finish this layer.
TIP: Notice that I left some of the front stalks lighter in color. This is so that the quail birds would really pop with the contrast. If you have a darker feature, such as my birds, they will look best on a lighter background.
Layer 4: I attached the quails in front of the fence line using glue and also added some pumpkins and gourds to the sides of the birds for more color in the scene. I used dies from the Lovely Layers: Fall Bounty Honey Cuts. I used Copic YG99 Marker to add some greenery in the foreground. I also used W8, W6 and W3 to the front ground area for shadows around the birds and vegetables. The gourds and pumpkins were colored using Copic Markers in yellow-orange, yellow-green and brown colors. I drew in some greenery in front of the left side greenery using YG99, too.
Tip: Ground shadows really help “ground/place” your foreground elements. Don’t forget to add them! They also help to add dimension to your flat surfaces.
Layer 5: Lastly, I stamped the sentiment, “Enjoy the little things” in black on white cardstock and attached it above the fence using foam tabs. The sentiment is from the Heartfelt Hello stamps and Honey Cuts dies. I love the reference to the “little things” since these birds are tiny!
You can shop the entire Honey Bee Stamps Heartfelt Harvest release here. If you decide to place an order, please use the links in this post so that Honey Bee knows which ideas inspired you!
Thanks for stopping by today. If you want to see more ideas and inspiration from me, subscribe to my blog, BobbiHartDesign.com. I’ll send you updates on new posts! You can also find me on Instagram as @BobbiHartDesign and on Facebook as BobbiHartDesign.
2 responses to “Lovely Layered Quaint Quail Scene”
Absolutely gorgeous design. The Quails are just too cute!
I love every single detail of this gorgeous card! I’ve been waiting for someone to post a design using the quail and this design is a real stunner. Also, I really appreciate the detailed instructions and helpful tips, very insightful!