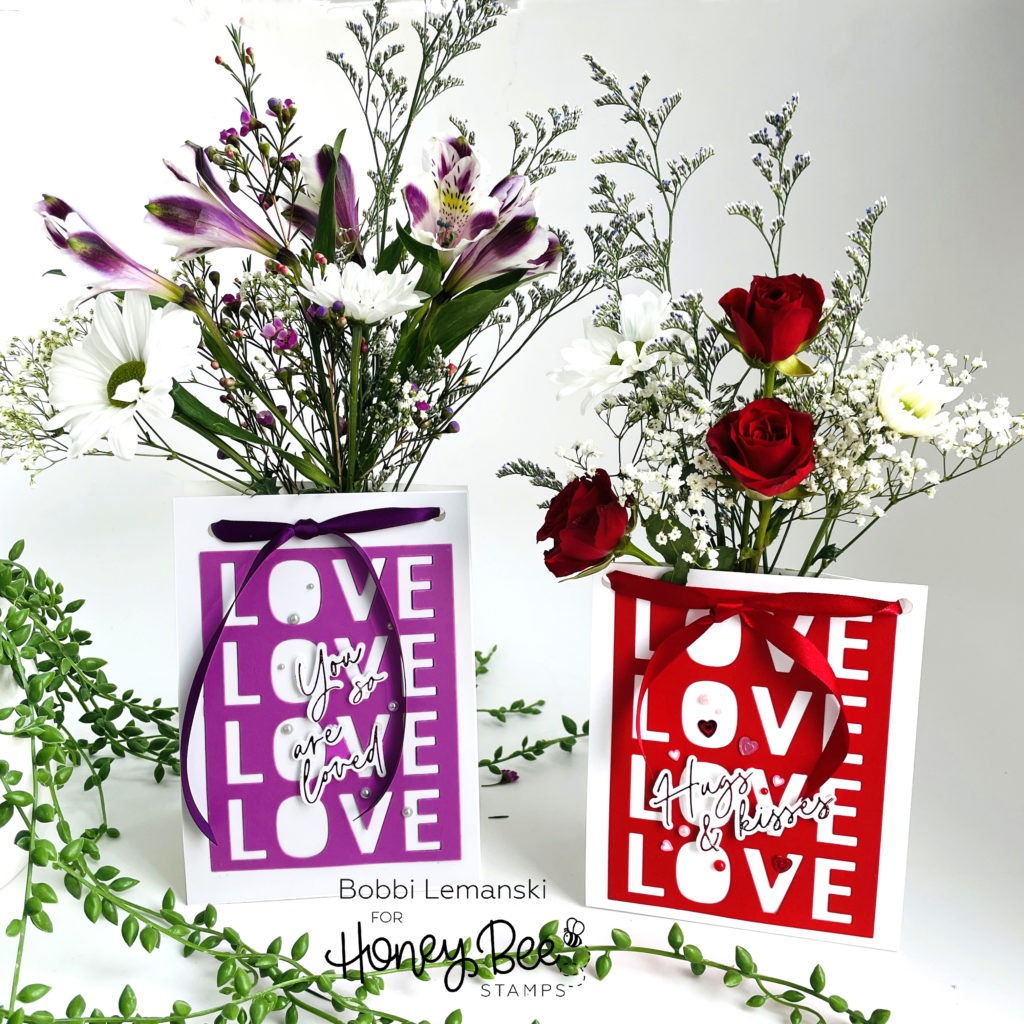
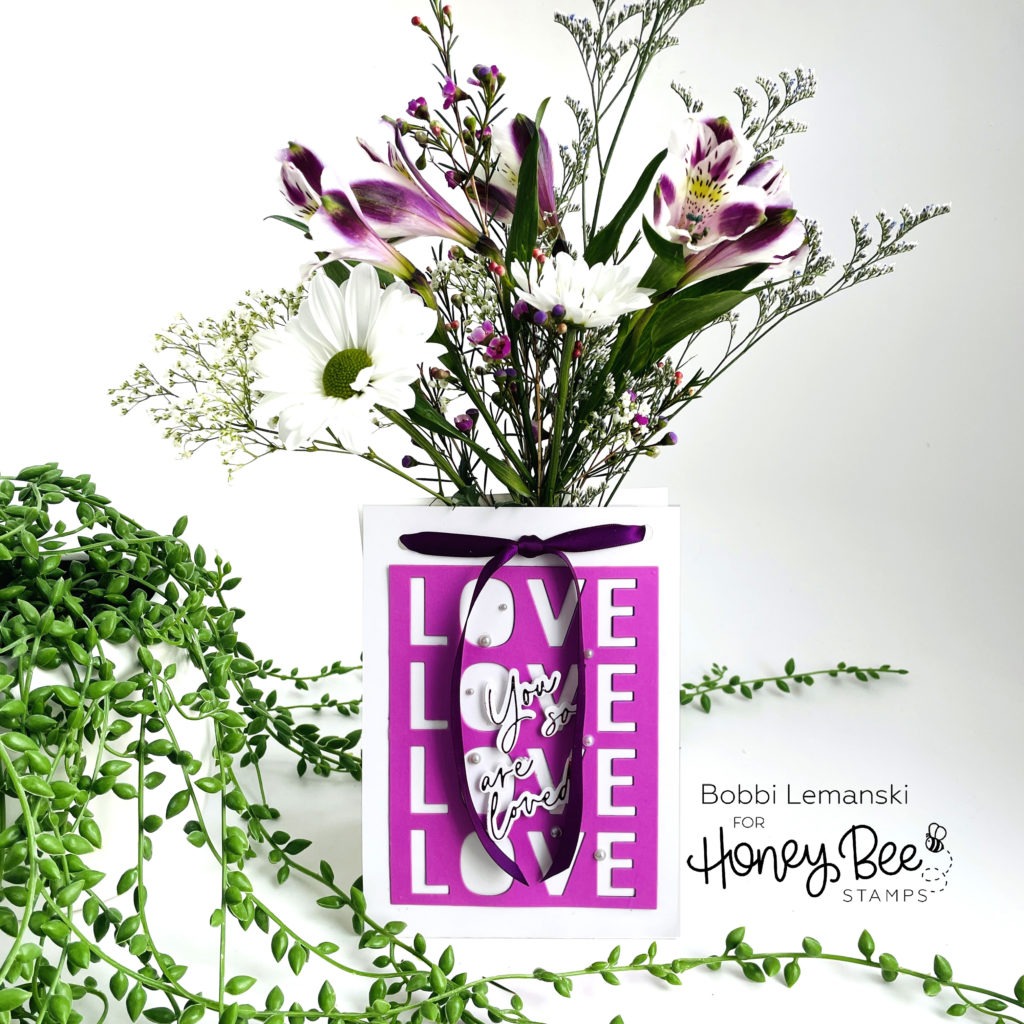
Need a quick and and inexpensive way to share some love and happiness on Valentine’s Day? I made these two bouquets in less than 30 mins for very little cost (less than $3 each) and few necessary supplies. These would be great to set on your co-workers’ desks, deliver to girlfriends, or surprise your roommates!
It’s Bobbi here, sharing this “valentine vase” idea for Valentine’s day! I’m sharing two sizes of Love Bouquet vases. The violet one is 5″ X 7″ and the red one is 5″ X 6″. In both cases, the valentine becomes a “vase” to hold pretty flowers. Just a few sprigs of flowers is all you need to fill these bold valentines. I’m using the following Honey Bee Stamps products:
Foil Script: Love Hot Foil Plate & Honey Cuts
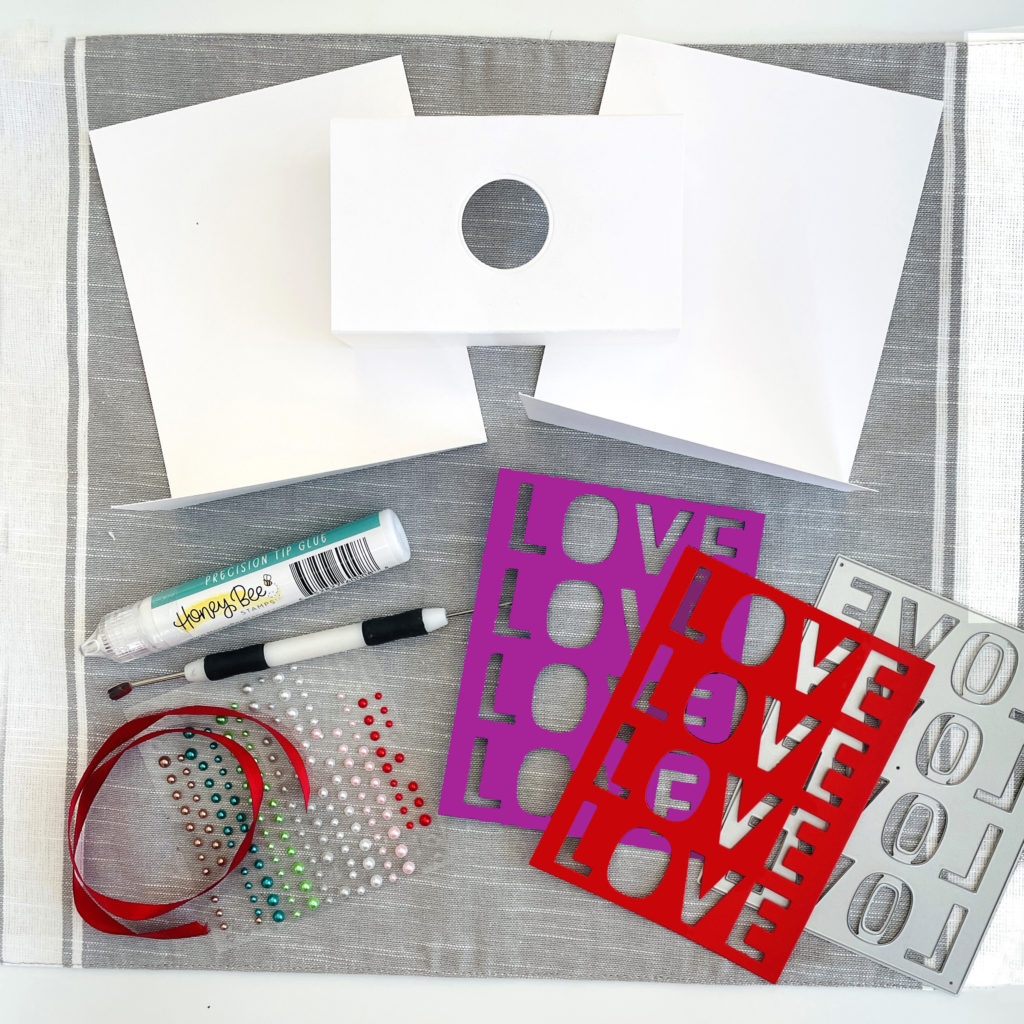
For supplies, I used the items in the photo above, a paper punch for the ribbon holes, fresh cut flowers and water vials/tubes. I got the flowers and water vials from my local florist. I used 110lb Neenah Solar White cardstock to make the valentine/vase. It’s important to use the heavier weight cardstock so it has strength to hold the flowers in place and keep its triangular, upright shape.
I cut the following pieces to make the valentine holders.
- For the smaller, red valentine:
- Two 5″ wide X 8-1/2″ long pieces, scored at 6″ leaving 2-1/2″ flap on each piece (to create the front and back panels and the base)
- For the larger, violet valentine:
- Two 5″ wide X 8-1/2″ long pieces, scored at 6″ (the front and back panels)
- One 5″ wide X 3″ long piece (the base)
- One 5″ wide X 5-1/2″ rectangle, scored at 1-1/2″ in from each side to make a 5″ wide X 2-1/2″ center. I die cut a whole large enough for my water tube to fit through. This piece will support the taller floral arrangement. (i.e., the internal tube stabilizer)
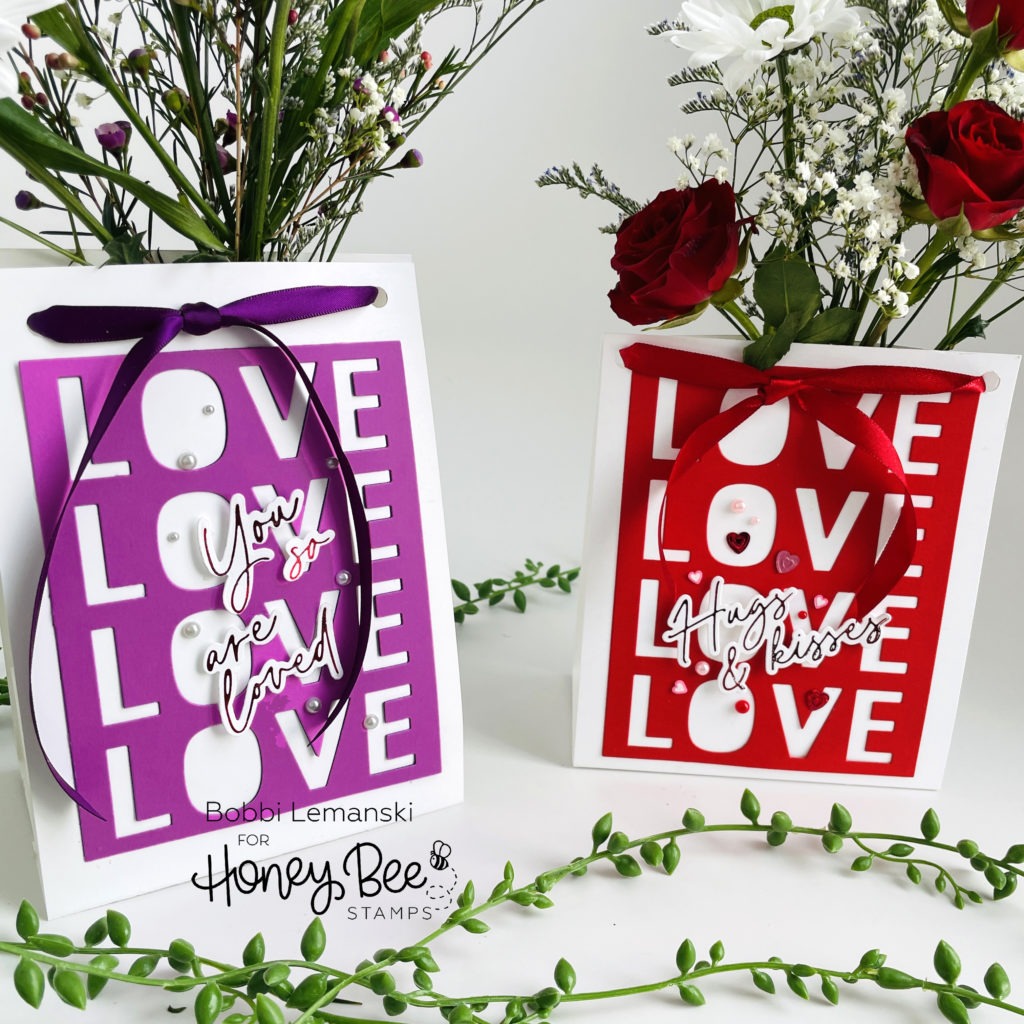
I die cut the A2 Love backgrounds from violet and red cardstock. I foiled the “You are so loved” and “Hugs and Kisses” phrases using my Spellbinder Glimmer Hot Foil System and Red Glimmer Foil. I die cut the sentiments using the coordinating dies included in the Foil Script: Love Hot Foil Plate and Honey Cuts set. Using Precision Glue I attached the Love backgrounds to the 5″ X 8-1/2″ front panels and attached the foiled scripted sentiments over the backgrounds using foam squares. A few gem stickers were added around the phrases.
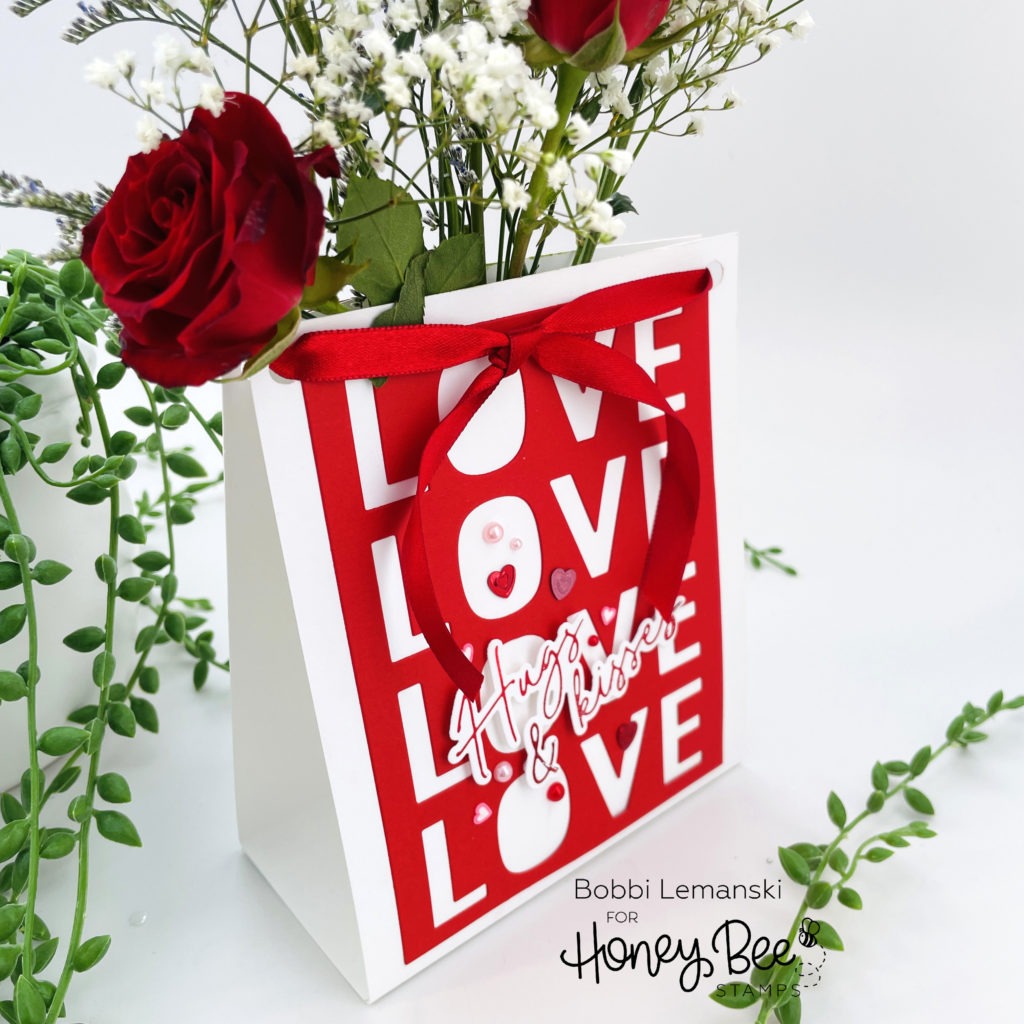
For the red valentine, I attached the front and back panel cardstock pieces by overlapping the scored flaps at the bottom to create the base. I glued them together. At the top, I punched holes in the upper corners, through both front and back panels for the ribbon to be strung through. The ribbon will keep the panels together and hold the flowers in place. Notice the pretty hearts and gem stickers attached to the front, too.
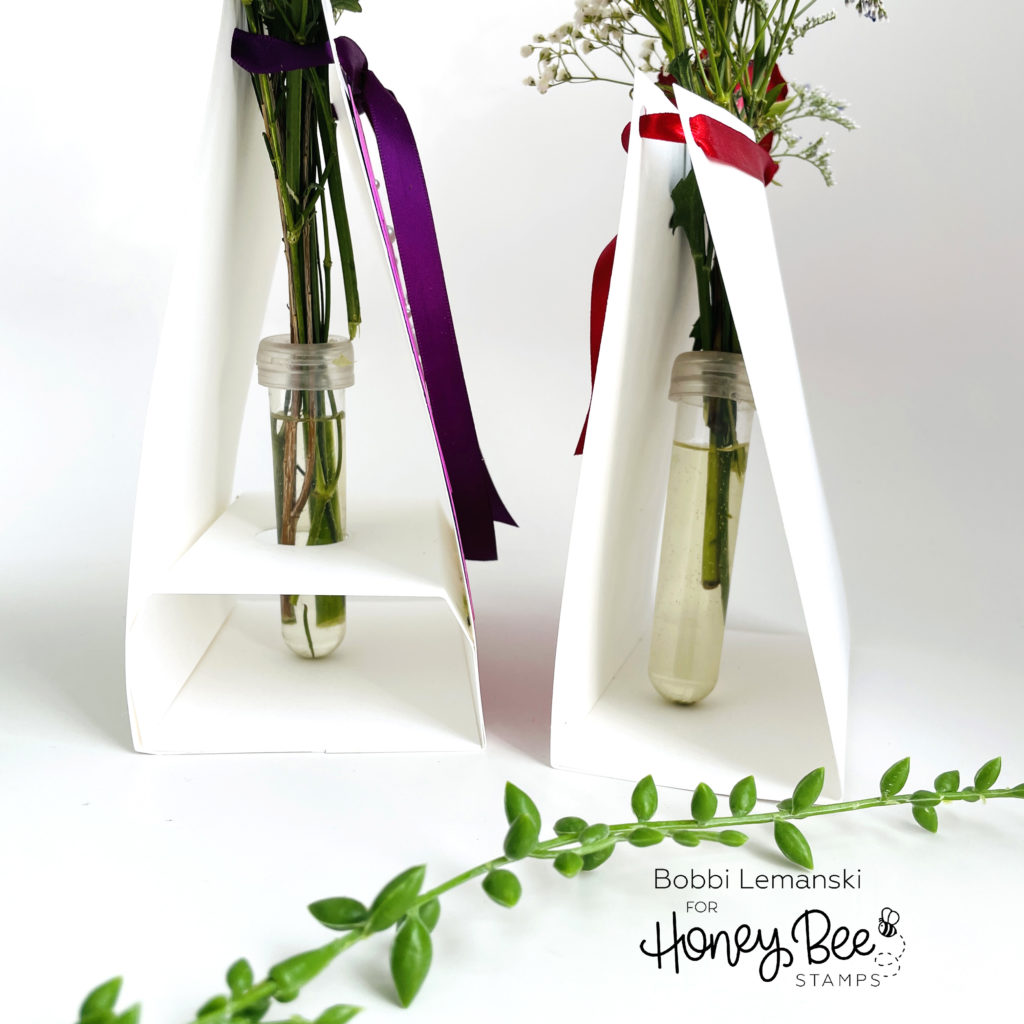
For the violet valentine with a larger bouquet of flowers, I added an additional piece inside the valentine to support the taller florals. The support stabilizes the water tube at the bottom. The picture above shows how it fits inside. I glued the side flaps to the back of the front and back panels, in a downward position. This keeps the support in place as shown above.
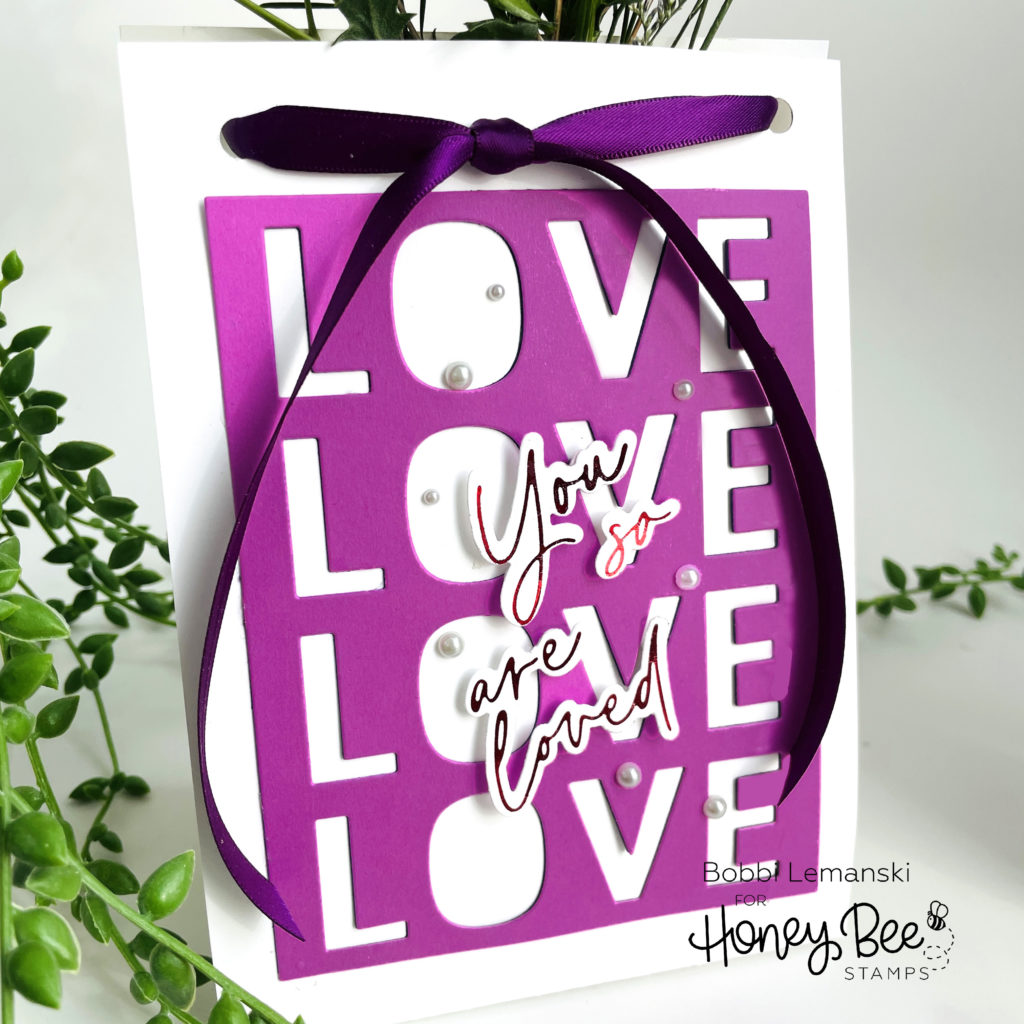
The violet valentine also has pretty silver and white pearls around the sentiment to accent the foiled words. You could also add cute animals using the Heart Hugs die set, too. How cute would that be?!
You can shop the entire Honey Bee Stamps Happy Hearts release here. If you decide to place an order, please use the links in this post so that Honey Bee knows which ideas inspired you!
Thanks for stopping by today. If you want to see more ideas and inspiration from me, subscribe to my blog, BobbiHartDesign.com. I’ll send you updates on new posts! You can also find me on Instagram as @BobbiHartDesign and on Facebook as BobbiHartDesign.