Hello! It’s Bobbi Lemanski here sharing two looks using one stamp set. I had two different ideas on the direction I wanted to go with the stamp set, Lost Without You by Honey Bee Stamps (no pun intended.:)) I decided to try both and see which one I liked better. I actually like how they both turned out and decided to share them with you. I used the following products:
- Lost Without You stamp and die sets
- Explore stamp and die sets
- Adventure stamp and die sets
- Neenah 80lb Solar White cardstock
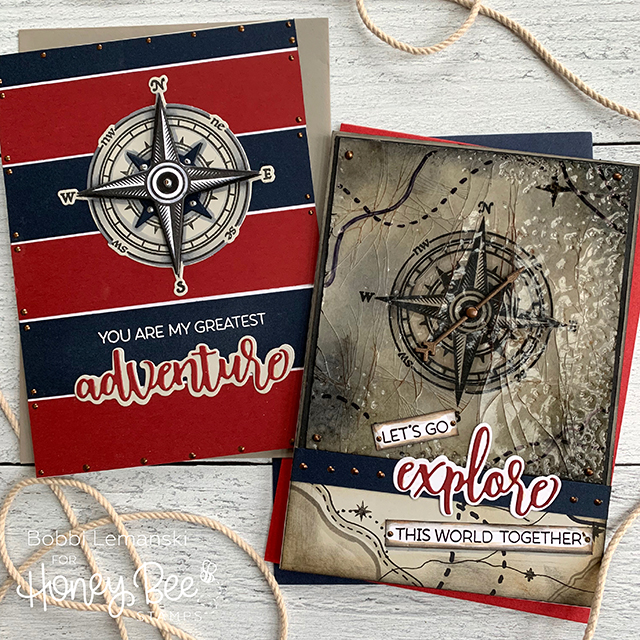
Nautical-themed Card
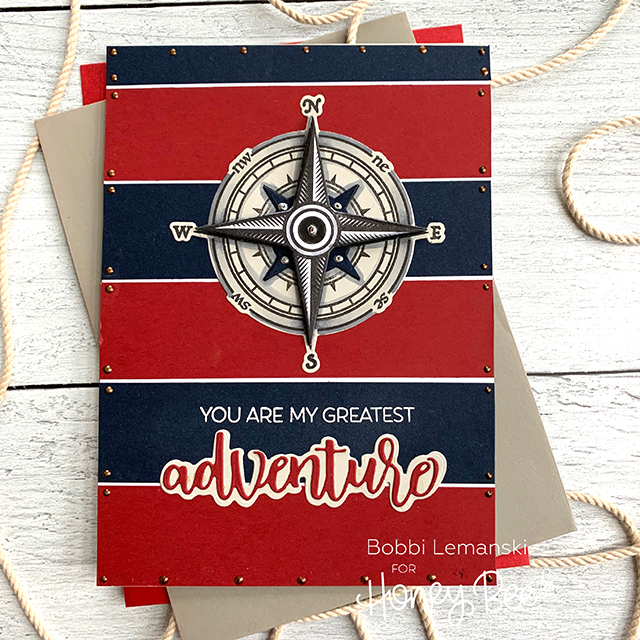
My first 5″ X 7″ card has a nautical theme. I started by stamping, coloring and die cutting the compass from two colors of cardstock. I stamped one on off-white and one on white cardstock so that I could die cut the elements to layer together. The center layer is die cut from navy cardstock. After some simple shading and layering/adhering the pieces together, I added Pearl Pen in silver for faux metal hardware on the compass.

For the card front, I cut strips of cardstock from navy and a deeper red color and adhered on white cardstock. The strips were placed so that a small white space shows through between them.
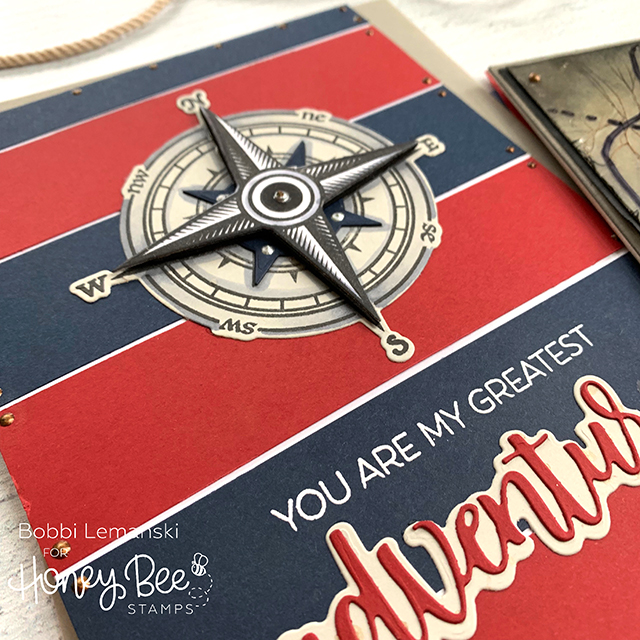
I die cut the word “adventure” in deep red and a warm gray and heat embossed in white, the phrase right above it. The entire card front was adhered to a warm gray card base. For added detail, I used Pearl Pen in Bronze to add Nail heads around the outer edge, as if they were holding the strips in place.
Vintage-Inspired Card
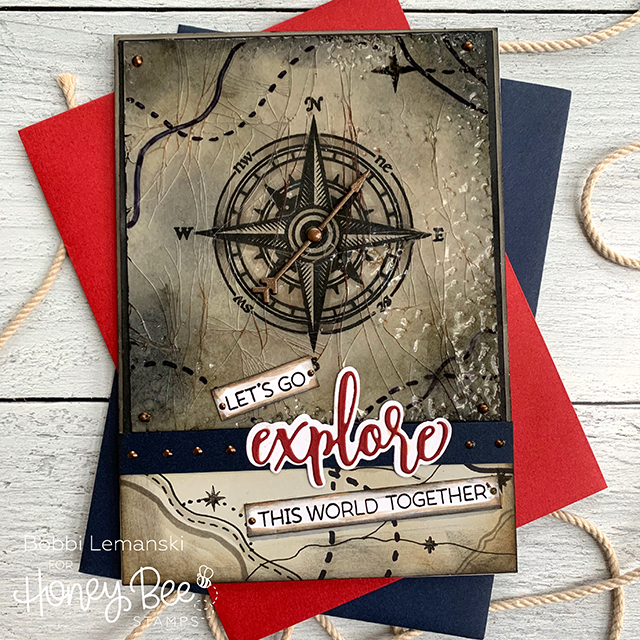
For my second card, I wanted to create an aged, vintage look. I started by stamping the compass image in black on a cream-colored cardstock square. I covered the entire area with Versamark by simply touching the pad directly to the cardstock. I added a layer of Ranger Ultra Thick Embossing Powder to the top. After I heat set the entire square, I repeated the steps again, adding three layers. Next, I put the square in my freezer and worked on the rest of the card.
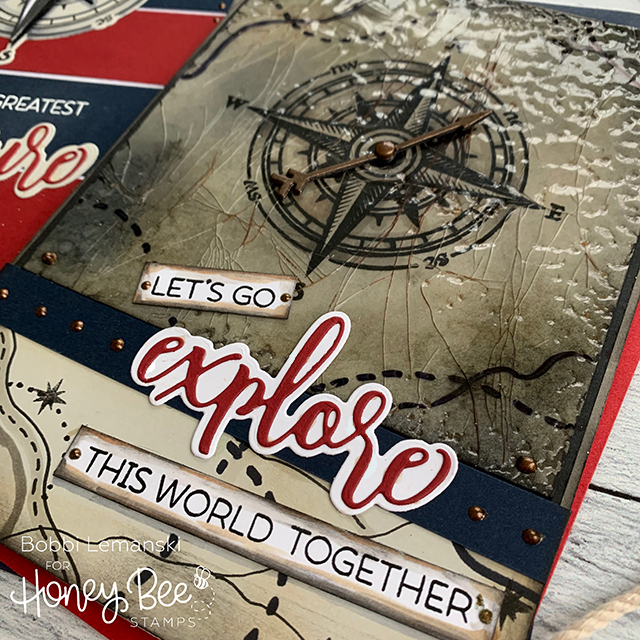
I cut my card front from a warm gray cardstock. I also die cut the word, “explore” in white and deep red cardstock and layered together. The phrases at the top and bottom were stamped on white cardstock and cut into strips. I edged the strips with black and brown inks to make them look aged. I also added some Copic coloring using W3 and W1 colors to the edges so that the white was not so stark.
Once the compass design was hardened completely in the freezer, I removed it and snapped it in a few places (lightly bend) to create the broken glass effect. I added Versafine permanent inks to the top to age it a bit more. The ink seeps into the cracks, creating a stronger look to the piece. All the square’s edges were inked, too. I die cut the arrow in the center of the compass out of copper cardstock and layered about five of them together to create a faux metal embellishment. I used a bronze tiny brad to adhere it in place. The arrow actually turns on the card!
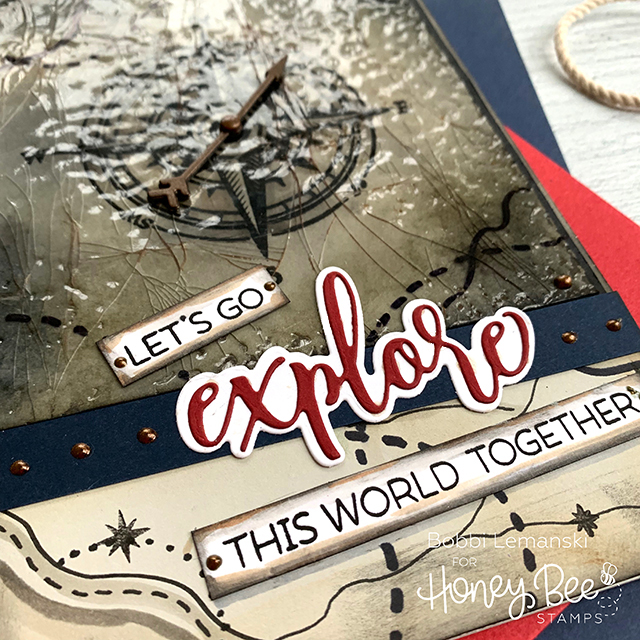
The compass piece was added to the card front. I added lines like a map to the front bottom that extended unto the broken glass piece. It’s important to use a permanent ink like a Sharpie Marker so the that lines do not smear on the embossed area. Thick and thin lines as well as dashed lines create some movement on the card front, similar to an old map. A navy strip and the phrases were added on the top. Using Bronze Pearl Pen, I also added nail heads to the navy strip and corners of the compass for added interest. The card front was attached to a deep red card base to finish it.
Two Unique Cards – One Stamp set
I like how both cards turned out. I think this stamp set is a nice set for a more masculine look. It could be used for a special someone in your life for an anniversary or upcoming event such as travel, marriage, etc. I also think it could be used for someone making a change in his/her life – heading in a new direction perhaps in life, relationship, career, schooling, etc.
Next time you’re crafting, look at your sets and challenge yourself to make two looks at the same time. It’s fun to see what your imagination will come up with in the process!
Thanks for stopping by today. You can find me everyday on my blog at BobbiHartDesign.com, Instagram as @BobbiHartDesign and on Facebook as BobbiHartDesign.
Bobbi Hartmann Lemanski, Bobbi Hart♥ Design, Adding h♥art into every design