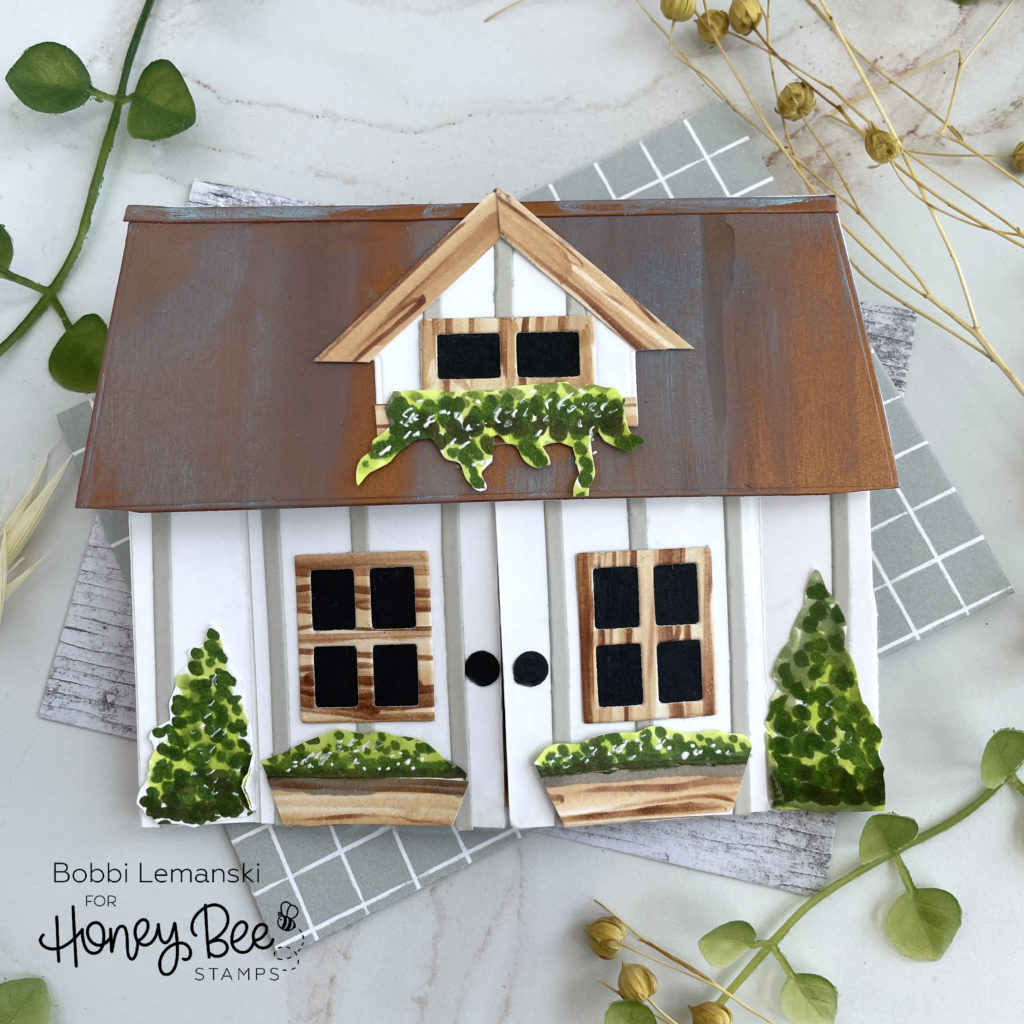
Hey there, friends! It’s Bobbi Lemanski here sharing a fun, interactive card idea for this sweet cottage. The design aesthetic, “cottagecore” has been popular for years. Cottagecore is inspired by a romanticized interpretation of western farm life. It is centered on ideas of simple living and harmony with nature. Generally, fresh florals, natural plants, simple farm fabric patterns (plaids and ginghams), vintage-inspired decor, simple whites and beiges and cozy looks are common to this aesthetic. I thought it would be fun to pair this aesthetic with the House Builder Add-on dies while incorporating a clever interactive element, too!
For this project, I’m using the following Honey Bee Stamps products:
Sweet Nursery stamps and coordinating dies set
Rooting For You stamps and coordinating die set
I am also using the retired set, House Builder Dies. If you don’t own this house set, you can make your own base and use the Farmhouse Add-On set (retiring soon and on sale) for the windows and the Coffee Shop Add-On for the rooftop. I will explain below.
The featured project below is made from Neenah 80lb Solar White cardstock for the card base and card components such as the doors. All of the black ink stamping was done using Honey Bee’s Bee Creative Intense Black Ink. I use Honey Bee Stamps Bee Creative Precision Glue for adhering my elements together.

How to Make the Card Base and Exterior Home
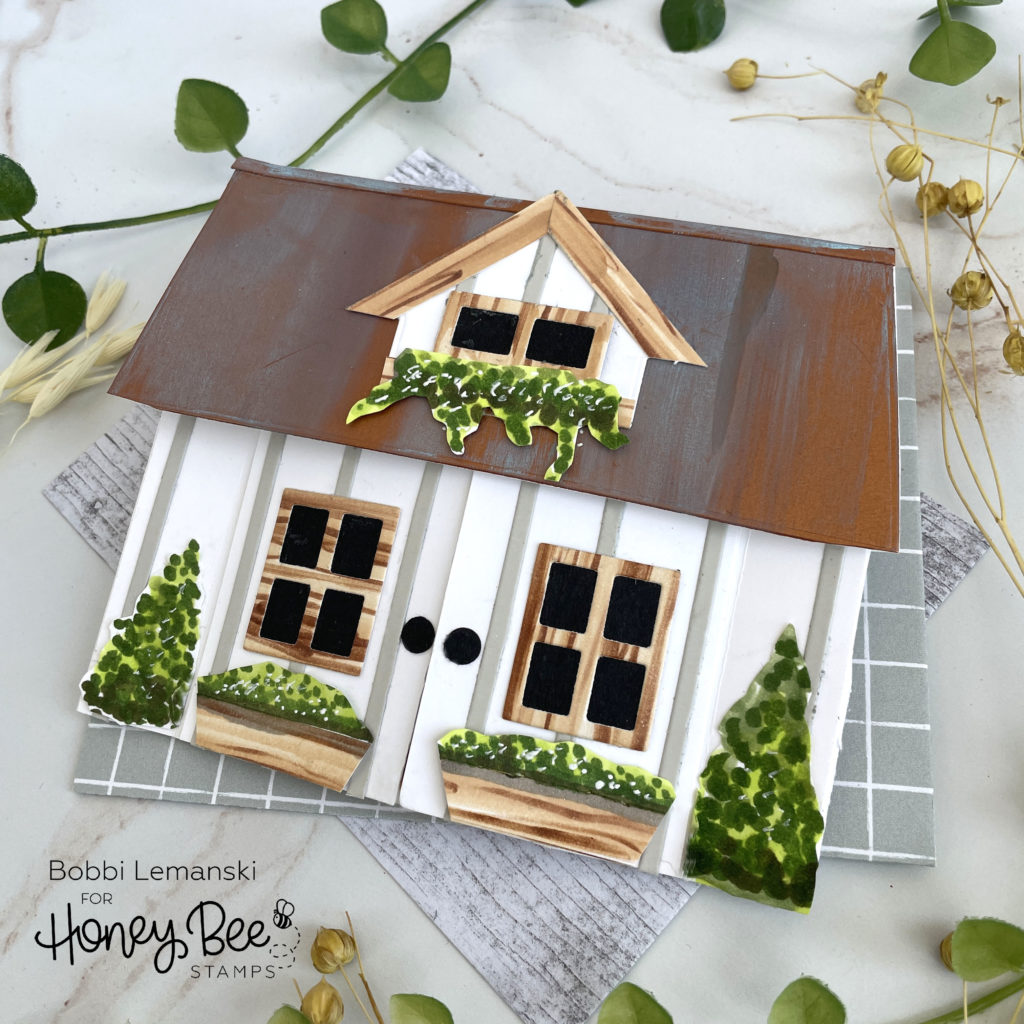
The fun in this interactive card is that when you lift the copper rooftop, the front doors automatically open up to reveal the interior space. It’s just a fun card to open with a surprise inside! To make this card, you have to create the house base. If you have the retired house builder die, great! Die cut it with a folded edge at the top. Note: The front fold only needs to cover the roof. You don’t need the entire house base on the front, only the back panel. If you don’t have the House Builder die, you can create your own simplified base and dress it up using the Coffee Shop Add-On set for the rooftop. Simply cut a rectangle measuring 5-1/4″ wide X 6-1/4″ tall, scored, 2″ down from the top. This 2″ “flap” will serve as the rooftop base. By die cutting the roof from the Coffee Shop set, you can create the perfect roof shape. Plus, the roof die in the Coffee Shop set has vertical lines. This is the perfect detail for a seamed metal roof! If you cut two – one from metallic copper and one from white cardstock, you can sandwich the 2″ flap between the two roofs.
To make the roof look tarnished/aged, I brushed on Salvaged Patina Distress Oxide Ink over the top. I simply rubbed the pad right over the copper cardstock. I love the look for this aged cottage! I did add an 1/8″ strip at the top for a faux metal seam, too.
The the Farmhouse Add-On set (retiring soon and on sale) has the perfect options for the windows and cottage elements for the front. I hand made the wood planter boxes and shrubs, but the She Shed Add-On die set also has nice windows and foliage to add to your design, too. There are so many ways to get creative with your adornments! Check out all the add-ons for the House Builder die set in the store.
The two front door openings measure 1-3/4″ wide X 3-1/2″ long. I cut two from white cardstock to match the cottage exterior and two slightly smaller out of gingham paper for the interior. These two pieces will hide the door hinges.
How to Make the Hinged Door Mechanism
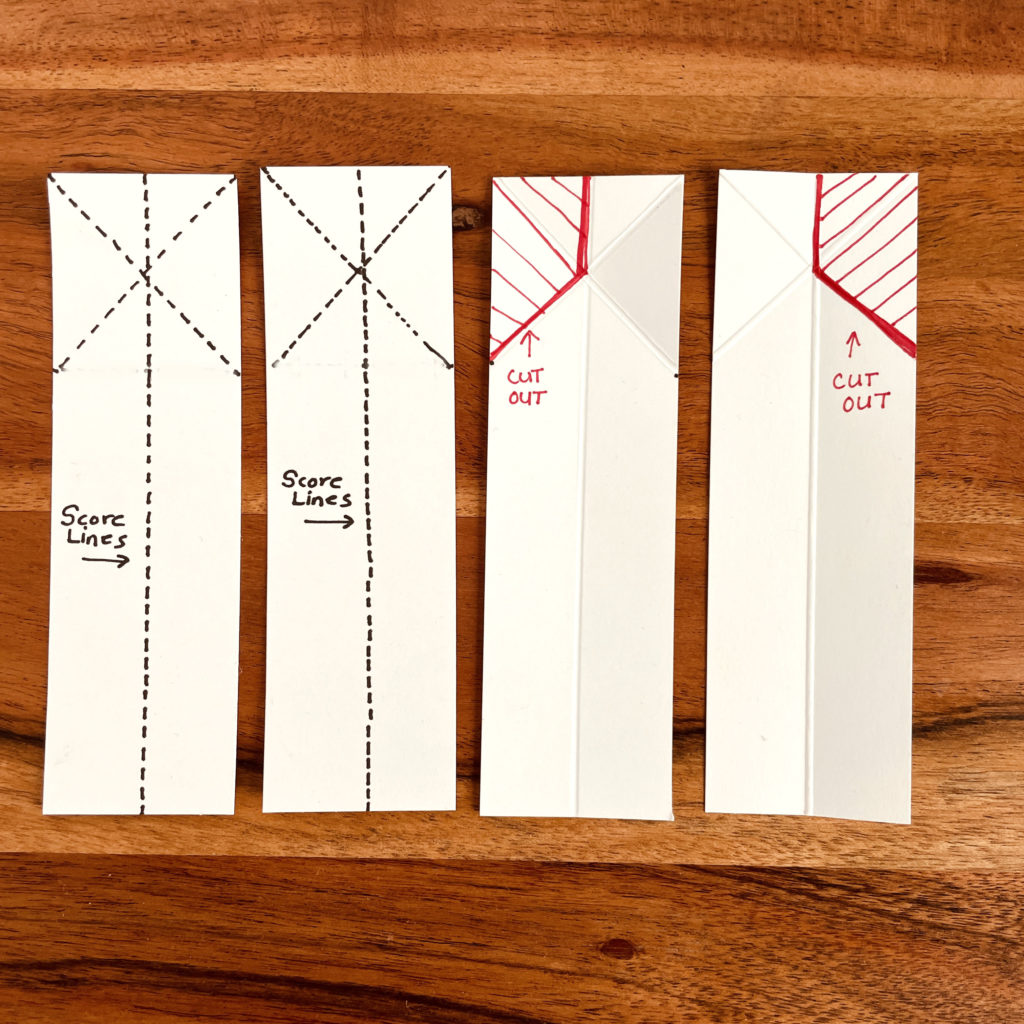
To make the door hinge mechanism that will allow the doors to automatically open when the rooftop is raised, I cut two hinges measuring 1-1/2″ wide X 5″ tall. I scored down the center, 3/4″ in from the side. Next, I measured 1-1/2″ down on each piece and scored from that point to the opposite top corner, creating a scored “X” at the top. Following the visual above, I cut out the red sections. and folded all the score lines. Ta-da! The hinges are done!
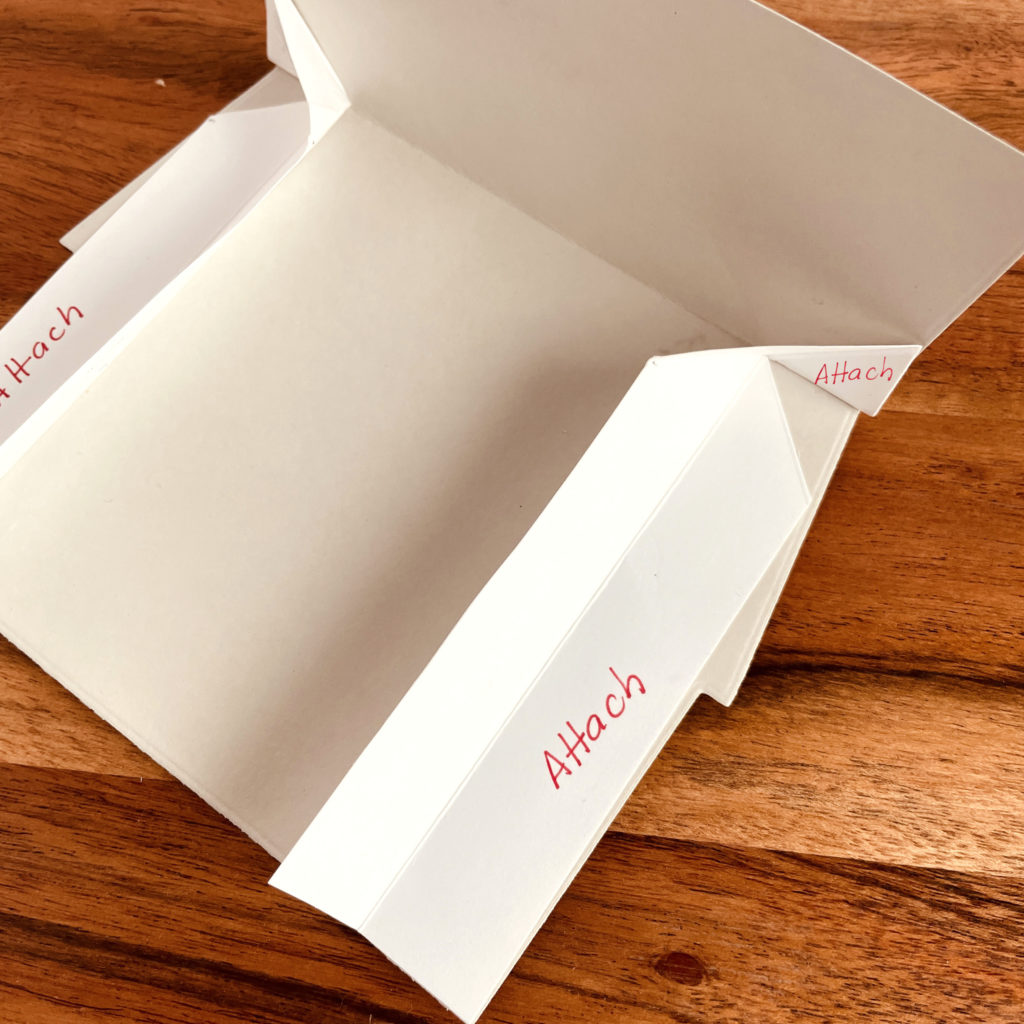
To install the hinges, each one is attached to the side of the house, gluing down the outer edges to the score line on each side. In addition, the top triangle is attached to the inside of the rooftop, allowing the “pop-up” feature.
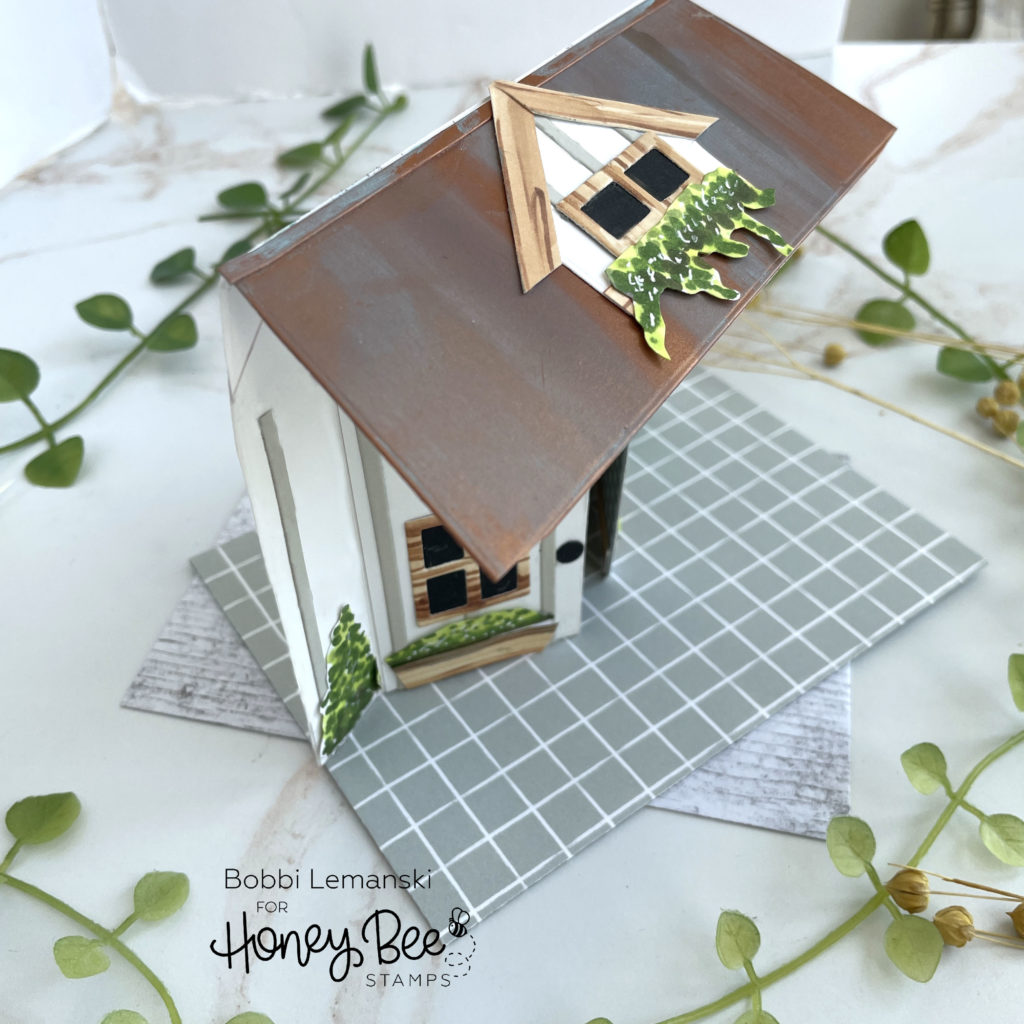
You can see here that not only the card can stand, but when the roof is slightly opened, the doors begin to open to peek inside. 🙂
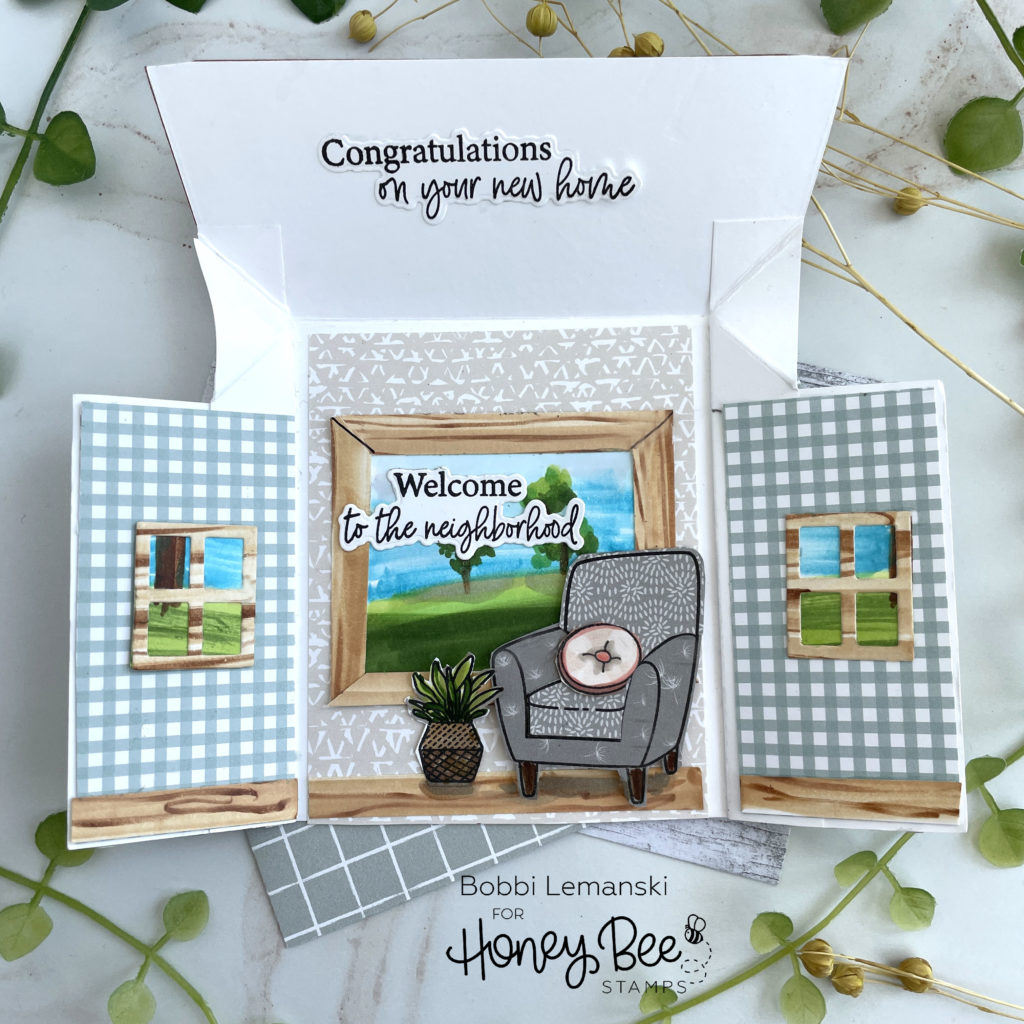
Inside, I added “wallpaper” and fabrics using pattern papers from the Modern Spring paper pad and Gingham Galore Holiday Paper Pad. I added more windows including a the big picture window on the main panel. The plant and vintage fabric-covered chair and pillow are from the Sweet Nursery stamps and coordinating die set. The phrases are from the Rooting For You stamps and coordinating die set. I hand colored the outdoor window scenes. I also drew wood for the trim moldings and floor, but you could easily use planks from the Home Essentials paper pad.
You can shop the entire Honey Bee Stamps Perfect Day release here. If you decide to place an order, please use the links in this post so that Honey Bee knows which ideas inspired you!
Thanks for stopping by today. If you want to see more ideas and inspiration from me, subscribe to my blog, BobbiHartDesign.com. I’ll send you updates on new posts! You can also find me on Instagram as @BobbiHartDesign and on Facebook as BobbiHartDesign.
3 responses to “Interactive Cottage Card”
What an absolutely wonderful card!!! I love it. I’m going to have to try to make it for my daughter who is buying a new home. Thank you so much for all the details!
This is so cool. Amazing creation! I was disappointed to read that the Honeybee house is being discontinued. It was unique and original and it was a key product that set Honeybee apart.
I love this idea! I am so sad that I missed out on buying the house builder card base. I am hoping they are coming out with something similar and even better! 😉