Hello, Honey Bee friends!! Happy February!! Where did January go?!?
I am soooo ready for spring!! Although we are supposed to have snow storms later this week, I am craving warmer weather!! I thought I would bring a little spring to my craft room with the Hello Sweetheart Stamp Set!!
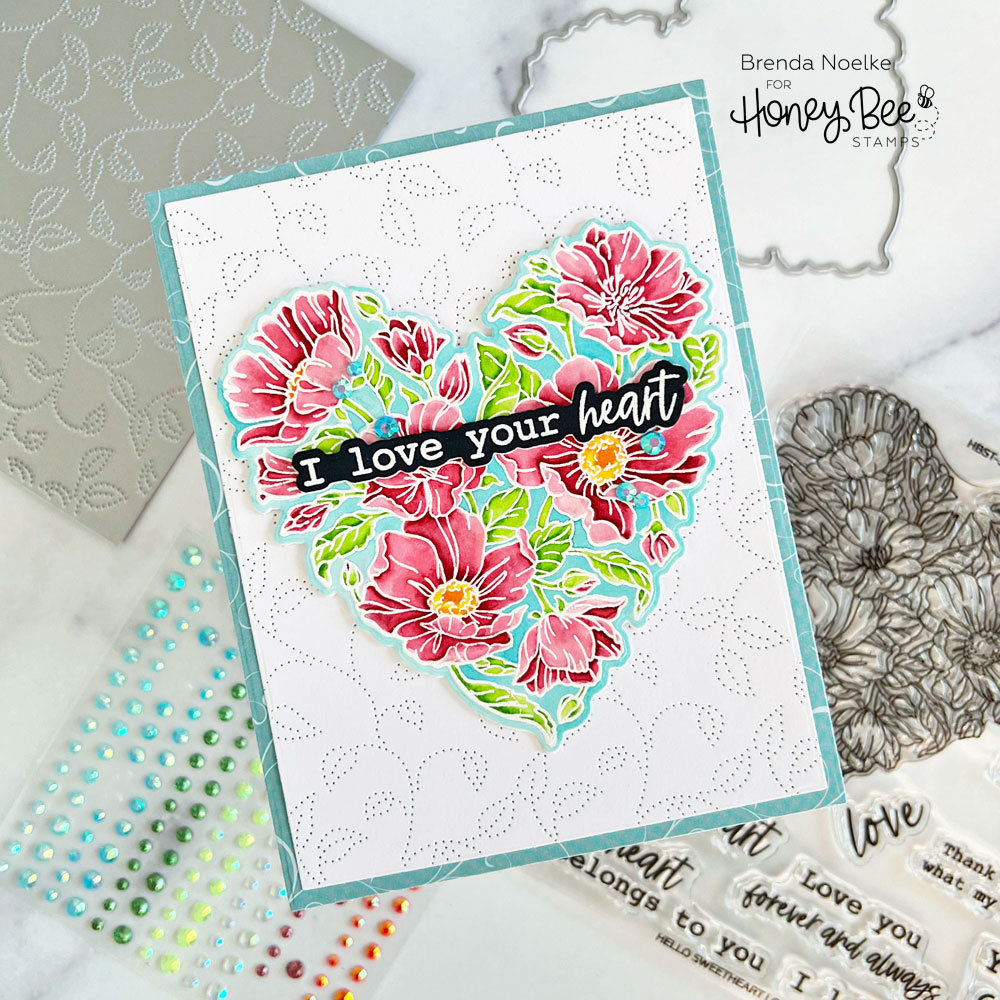
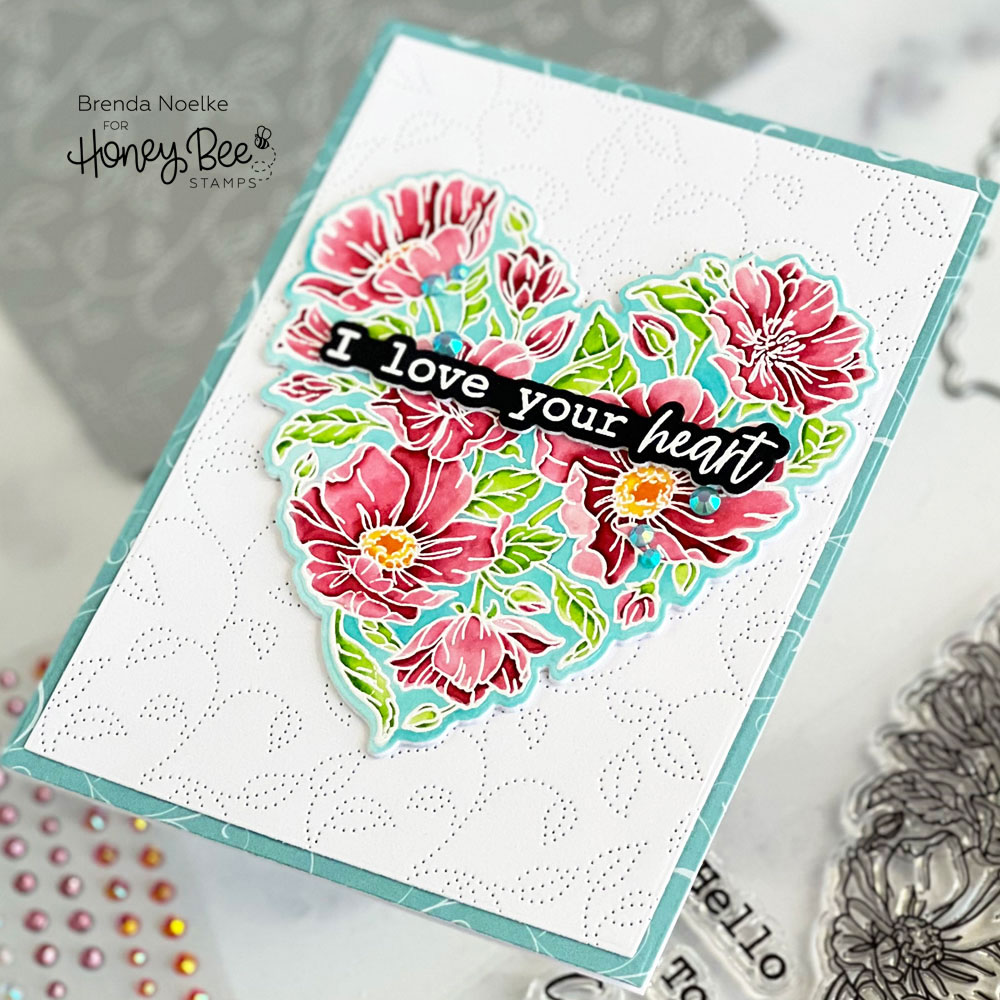
I began by stamping the Hello Sweetheart Stamp Set onto Bristol smooth cardstock with Bee Creative Embossing and Watermark Ink. I sprinkled on some white embossing powder and heated it until melted with my heat tool. I colored the image with Zig Clean Color Markers, then die-cut it with the Hello Sweetheart Coordinating Honey Cuts. The sentiment, also from Hello Sweetheart, was white heat embossed onto black cardstock and cut out with the Coordinating Die. I also cut two extra die-cuts of the heart and sentiment from heavyweight white cardstock and adhered it behind the heat embossed layer with Bee Creative Glue for dimension.
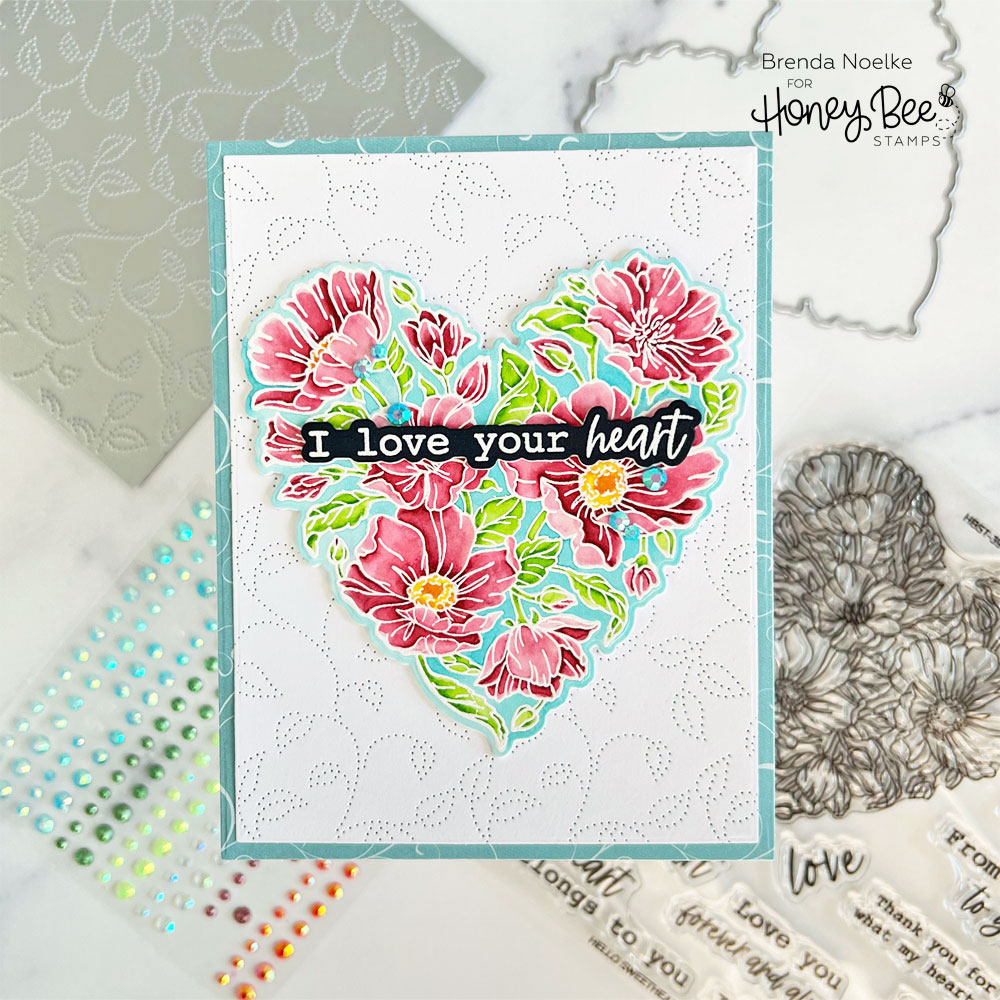
For the background, I die-cut the Swirling Leaves Pierced A2 Cover Plate Honey Cut from white cardstock. The pierced panel was die-cut with the second largest die in the Sweet Stacks: Rectangle Die Set. A piece of patterned paper from the Hugs and Kisses Paper Pad was die-cut with the largest die in the Sweet Stacks: Rectangle Set. The two panels were adhered together with Bee Creative Glue and then added to a white, top-folding card base.
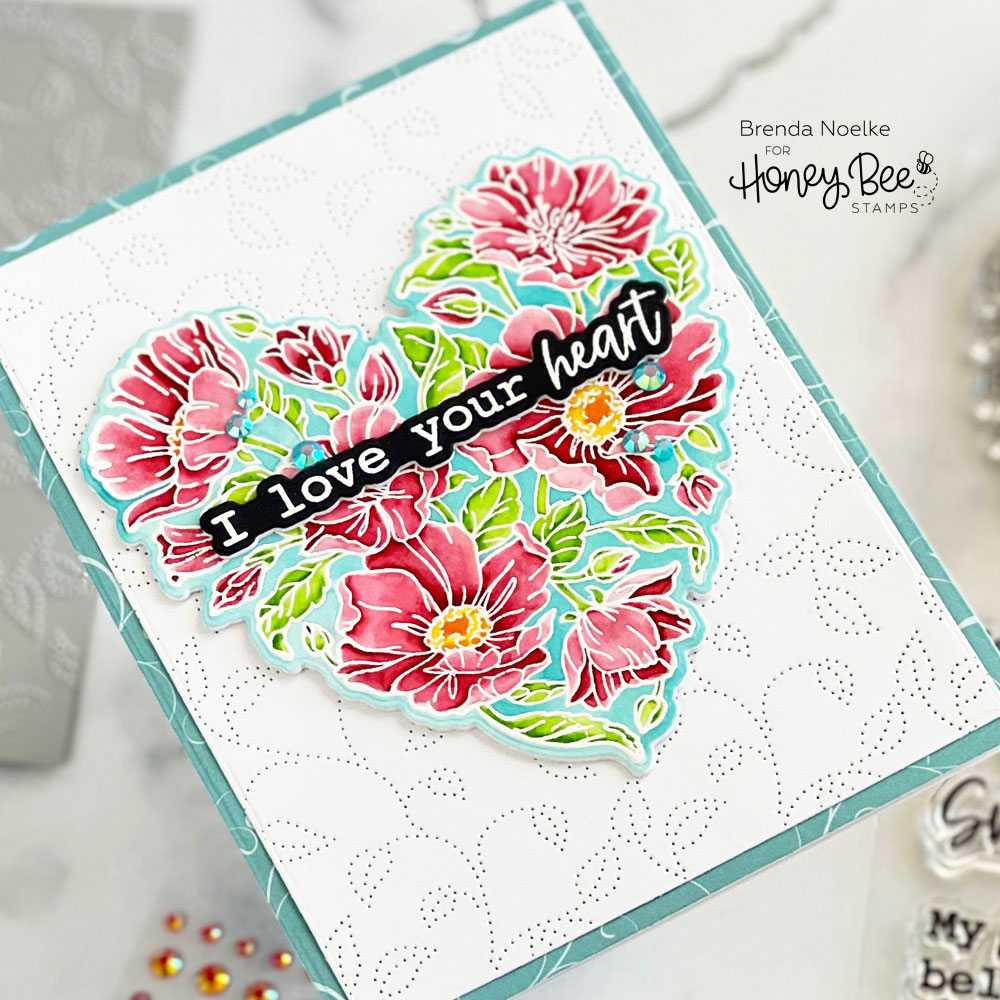
The heart and sentiment were adhered to the front of the card with Bee Creative Glue. I added a few blue rhinestones from the Hugs and Kisses Gem Sticker Pack and I was finished!
I hope this brings a bit of spring to your day!!
Have a wonderful week and I’ll see you next Tuesday!!