
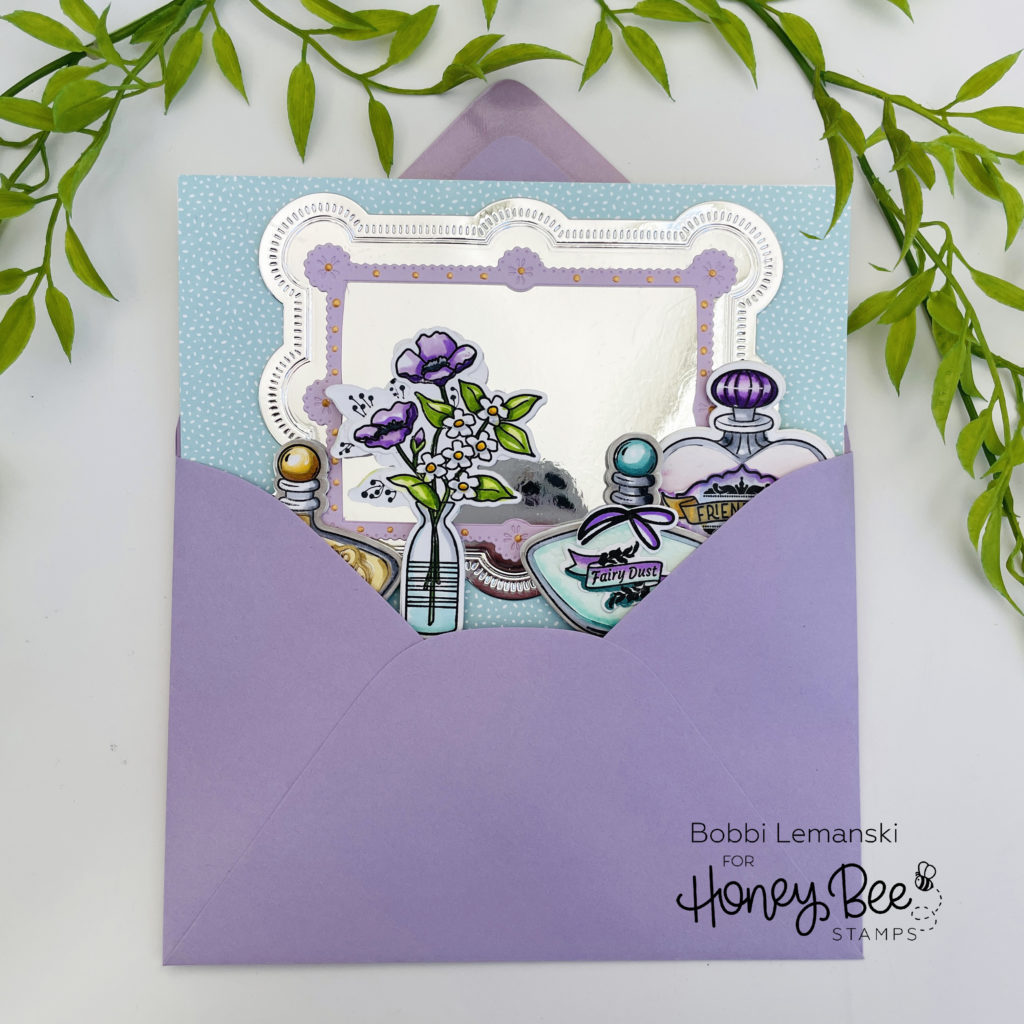
Hi there! It’s Bobbi with an interactive easel card for those beautiful women we know. It’s filled with an ornately framed mirror, several aromatic perfume bottles, springy flowers, colorful make-up and soft bristle brushes. If you are a girly-girl or know one, this card may be right up her alley! You know when you have an idea in your head and you hope it ends up as envisioned? Well this is even better than I originally imagined. With a little interactive element and a number of cute accessories, this one is ready for a beautiful friend, sister or mom. I’m using the following Honey Bee Stamps products:
Opulent Layering Frames Honey Cuts
Love & Luck Potion Jars stamps and coordinating dies
Love & Luck Potion Labels stamps and coordinating dies
Just for You stamps and coordinating dies
You’re a Keeper stamps and coordinating dies
Let’s Get Crafty stamps and coordinating dies
The featured project below is made from Neenah 80lb Solar White cardstock for the card base and card front panel. All of the black ink stamping was done using Honey Bee’s Bee Creative Intense Black Ink. I use Honey Bee Stamps Bee Creative Precision Glue for adhering my elements together. My card is 5″ X 7″ in size unless noted. I use the Bee Creative Clear Embossing and Watermark Ink Pad for all heat embossing.
Hey Beautiful Mirror Card
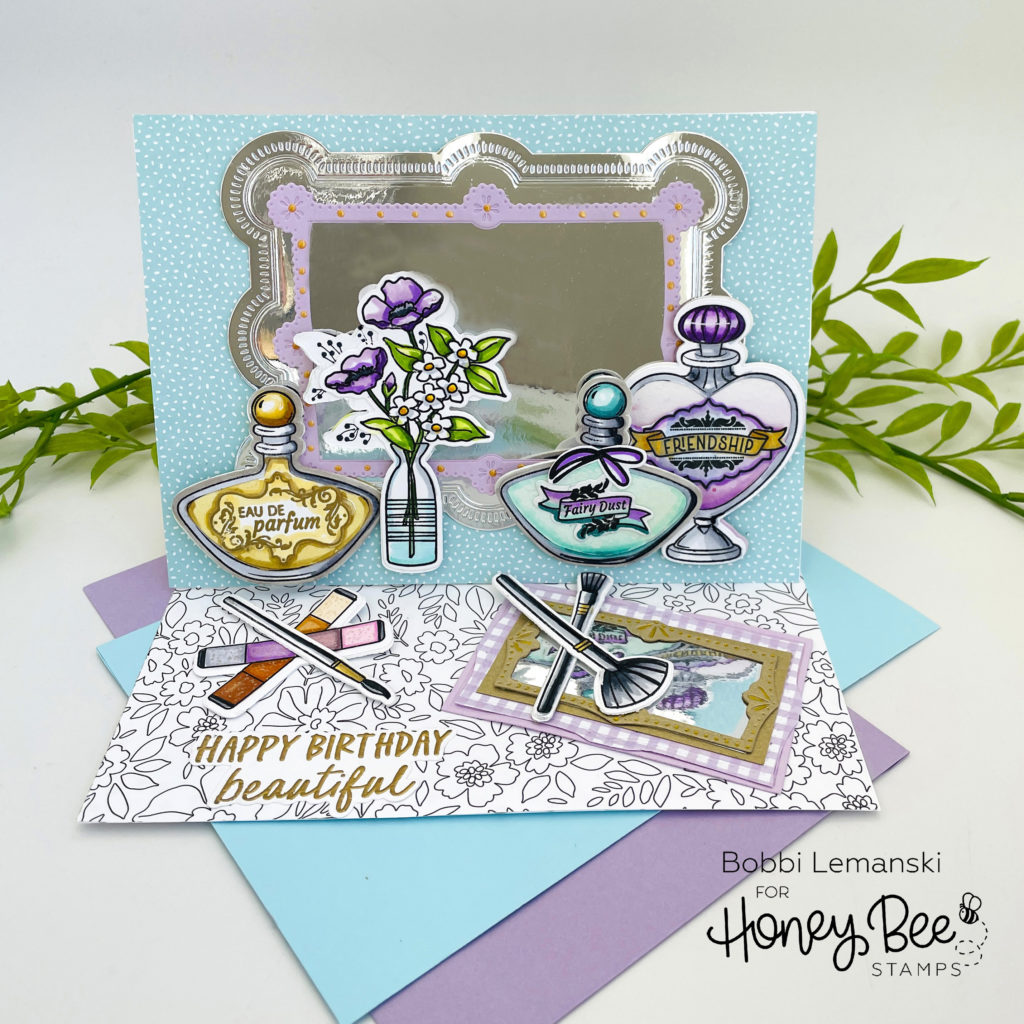
This 5″ X 7″ easel card, starts with a 10″ X 7″ card base made from white cardstock. From the short side, I scored at 5″ and 7-1/2″. I also cut a separate front panel measuring 5″ X 7″. Those are the only two pieces of cardstock needed to create this easel card design. I adhered a piece of dotted aqua blue patterned paper from the Happy Hearts paper pad to the front panel for the background. I picked something that looks like wallpaper for my mirror to eventually hang on. Inside my card base, I attached a black and white floral print for my vanity top. This piece is attached to the inside panel, positioning it from the middle 5″ score line to the edge of the base on the side with no score line.
I keep the front panel piece separate from the card base until I have all the items adhered in place. However, at any point the card front can be attached by simply laying the base flat, with the fold at the top and adhering the front panel in place from the 7-1/2″ score line on the card base down to the edge of the base. That is, the bottom half is adhered together, keeping the top half free.
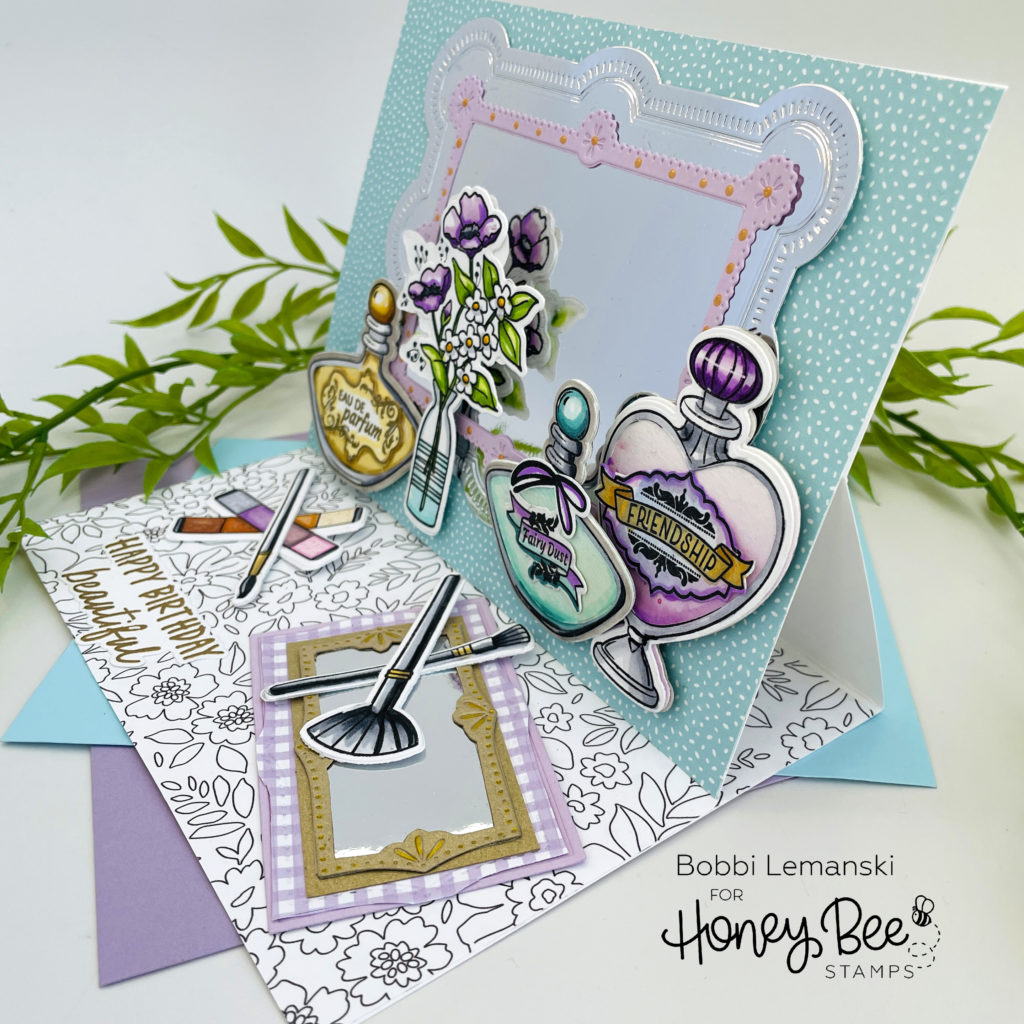
Next comes the mirrors and accessories. Using the Opulent Layering Frames Honey Cuts, I cut the largest frame from the set from mirror cardstock. I attached the second largest frame (cut out of lavender cardstock) to the mirror frame to make the wall-hung mirror. I used Nuvo Drops in Gold to accent the lavender for a stylish look. Using one of the smaller frames, I made a mirror tray from gold cardstock and mirror paper to set on the vanity top. I used a mid-size frame for the gingham and the lavender placemats underneath the mirror tray. Do you remember having a mirror tray on your vanity or bathroom counter? They were all the rage at one time. Am I dating myself?!
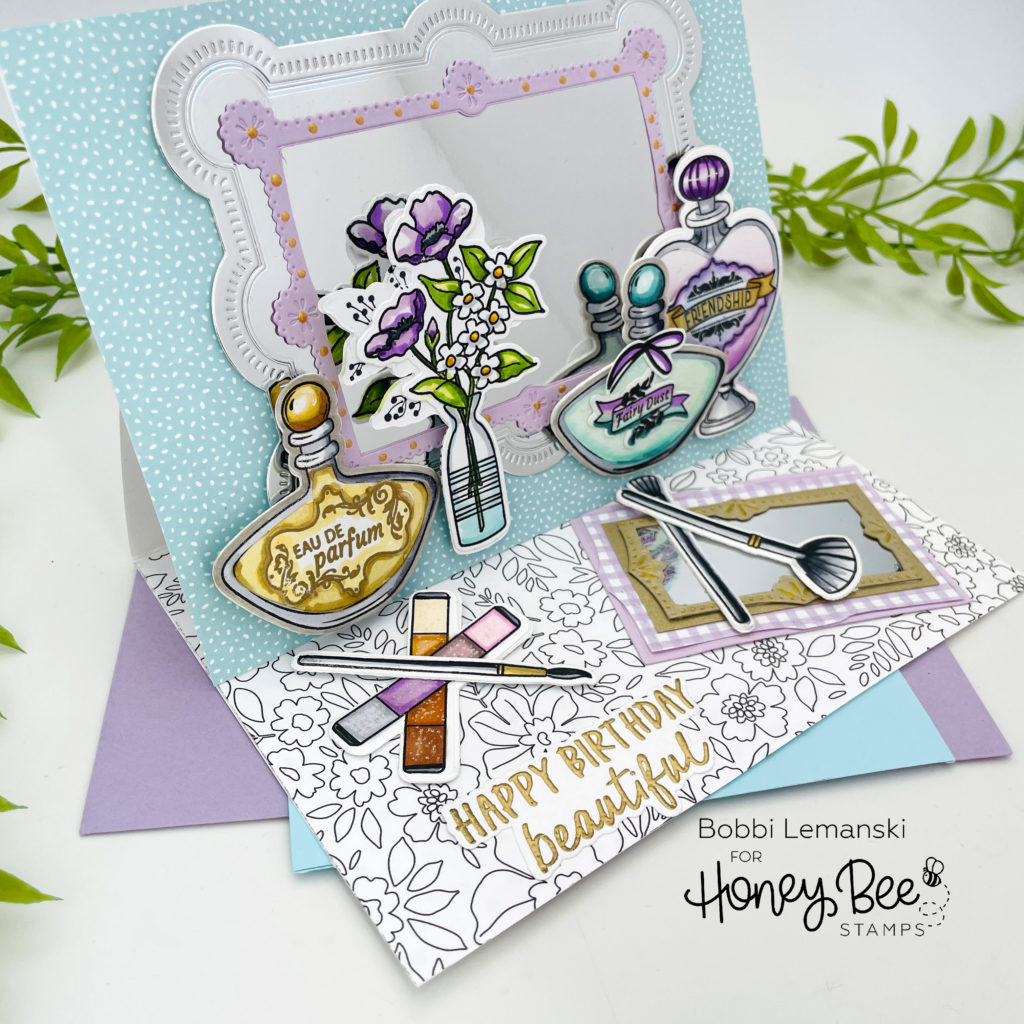
In addition to the mirrors. I added a vase of flowers using the Just for You stamps and coordinating dies and perfume bottles using the Love & Luck Potion Jars stamps and coordinating dies and the Love & Luck Potion Labels stamps and coordinating dies. For the perfume bottles and vase, I stamped, colored and die cut duplicates to finish the backside to match the front side. Why? If you look closely, you can see the backside view through the mirror. I wanted it to be pretty and realistic from all angles. Since the floral vase die is not symmetrical, I simply added additional stems to the vase arrangement on the front.
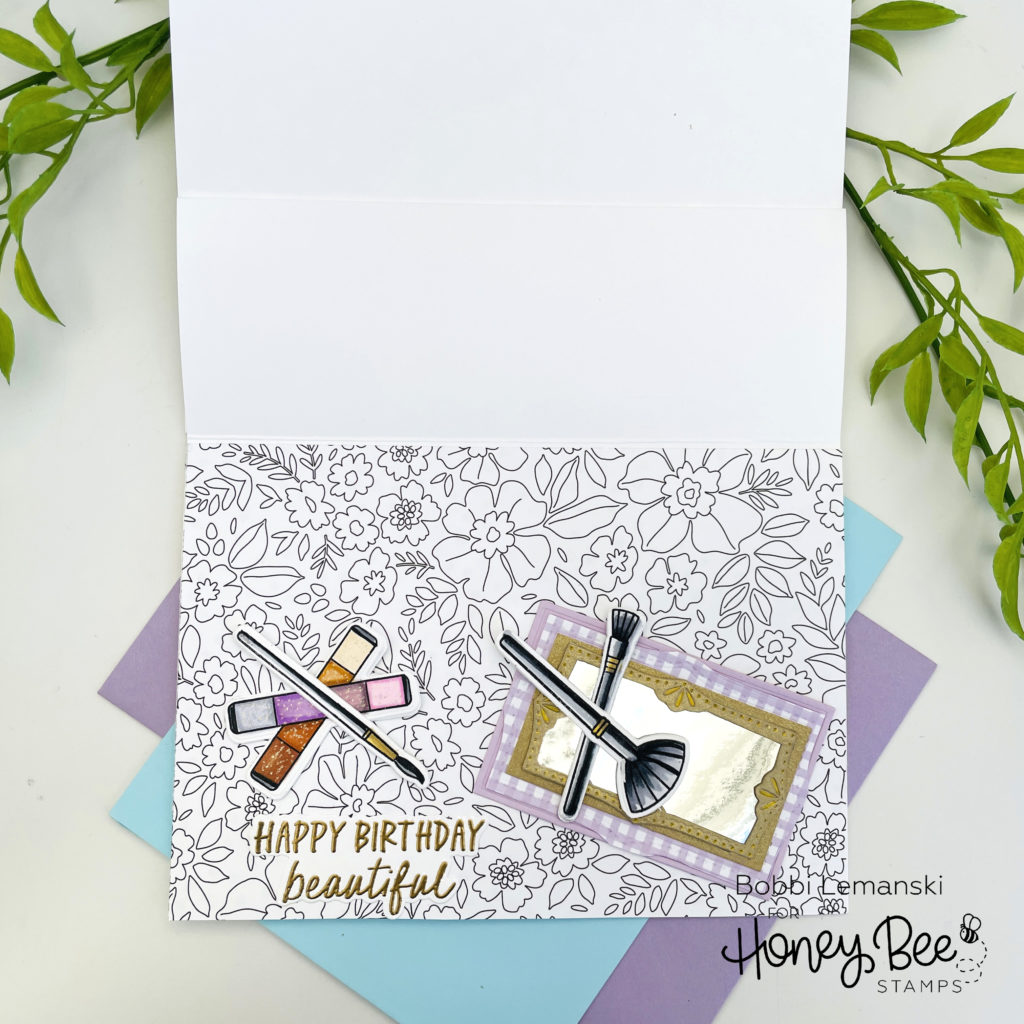
To add the makeup and brushes, I used images from the Let’s Get Crafty stamps and coordinating dies. I turned the watercolor paint trays into two eyeshadow palettes and craft brushes into makeup brushes. I was quite proud of myself for these dual purpose ideas. To make the eye makeup sparkle, I used my Gelly Roll Stardust pen to add sparkly dots over the palette colors.
I used the brush handles as “stoppers” for the easel to rest on. The stoppers hold the easel in place and in an upright position. To do this, I needed the brushes to be thick enough of a ledge. I layered a couple of die cuts together by die cutting several shapes and stacking them. I also used a small foam tab underneath.
Lastly, I added a phrase from the You’re a Keeper stamps and coordinating dies. I embossed it in gold metallic, die cut the phrase and attached it inside. The sentiment shows when the card is opened or in its upright, easel position.
This card fits inside an A7 envelope (7.25″ X 5.25″) and will require extra postage for mailing due to its thickness and weight.
You can shop the entire Honey Bee Stamps Happy Hearts release here. If you decide to place an order, please use the links in this post so that Honey Bee knows which ideas inspired you!
Thanks for stopping by today. If you want to see more ideas and inspiration from me, subscribe to my blog, BobbiHartDesign.com. I’ll send you updates on new posts! You can also find me on Instagram as @BobbiHartDesign and on Facebook as BobbiHartDesign.