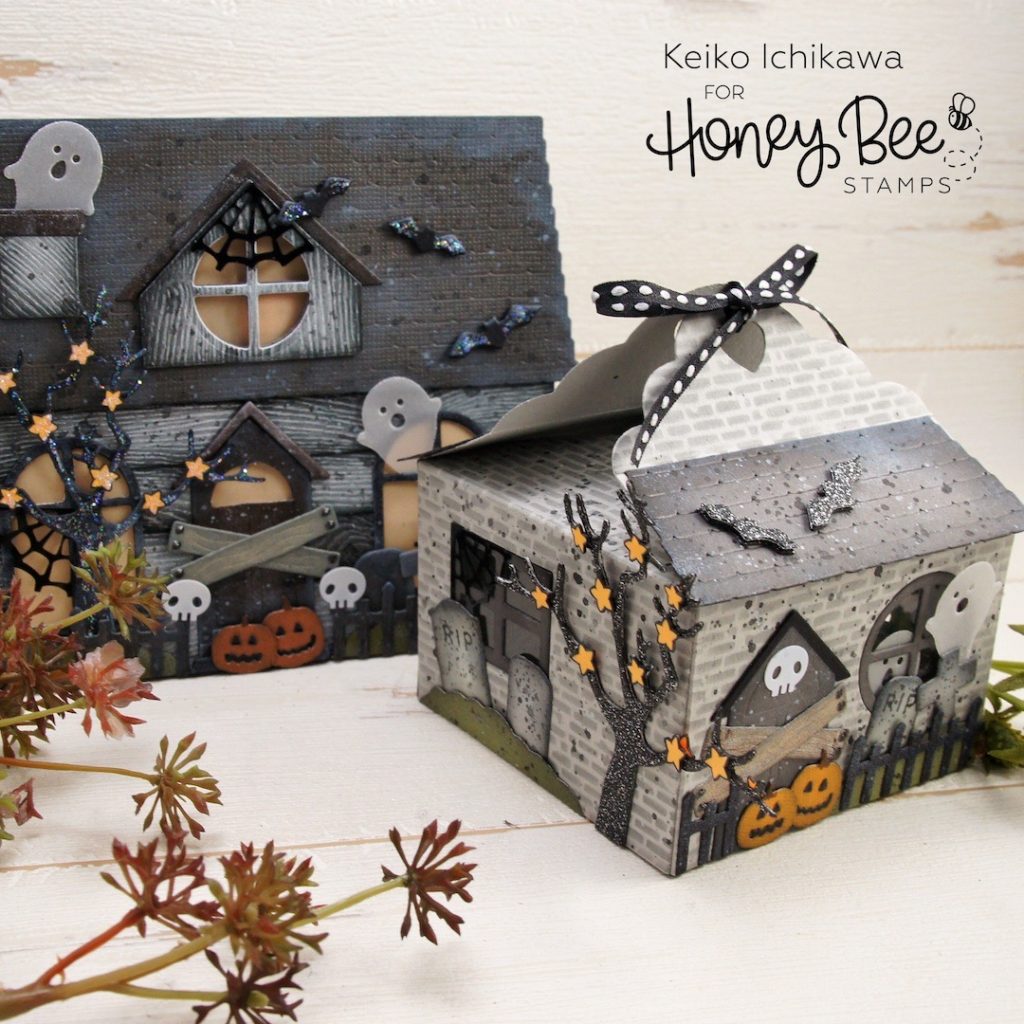
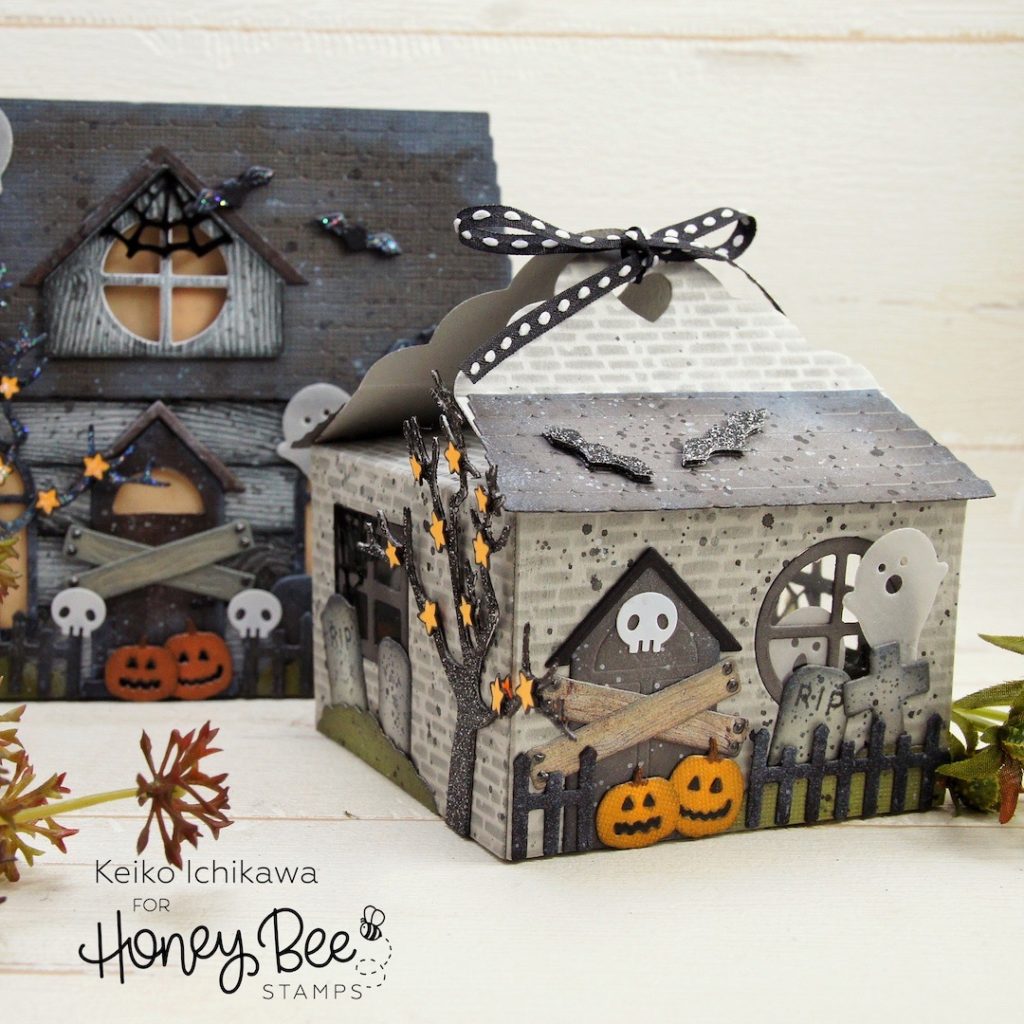
Hello friends, happy new week! It’s Keiko from Happy Tree Studio today and I have this super fun treat box to share with you all! Last year, I made a haunted house card and this treat box will go perfectly with it. After finishing the treat inside, the recipient can display the box (maybe put a tea light in)!!
To make the box, I used Sweet Treat Box die and cut all the base pieces from light gray card stock. I then added the cool brick pattern by applying dark gray ink over Salvaged Bricks stencil. TIP: It is easier to add all the decorative parts before assembling the box.
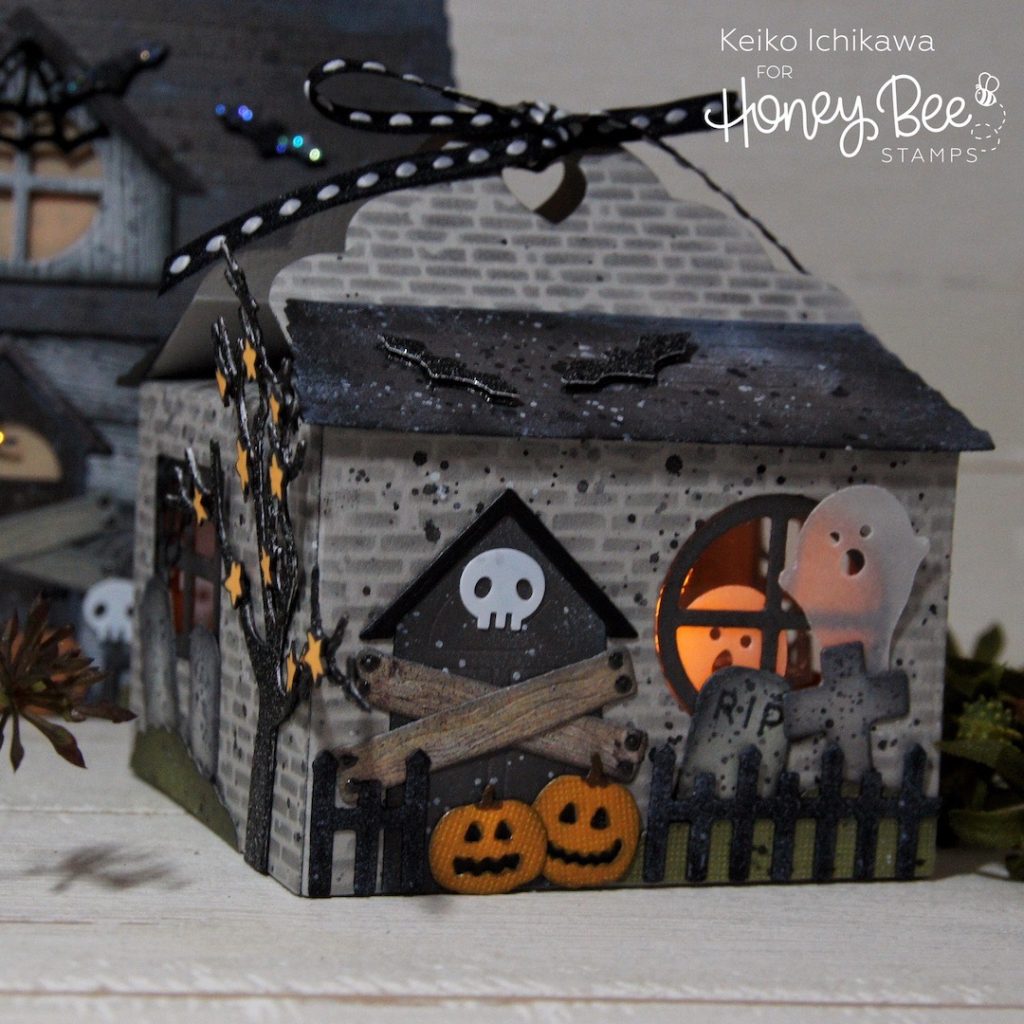
All of the die cut pieces except the windows on the side and the greenery pieces (these are from the original House Builder die set) are included in the Haunted House Add-On die set. I cut them out from various card stocks (the velum ghosts are my favorite!). For the roof, in order to keep the edge detail the roof die creates on the side, I ran the die cut through twice to cut each side. There are also embossed pattern on the roof, so I carefully lined up the pattern when I placed the die back on (yes, I can be very particular about these tiny details LOL). To make the house spookier, I distressed the die cuts by sponging on black and white inks, and also adding splatters. I added “RIP” to the tomb stones and the die cut pumpkins are backed with black card stock. The spooky tree was die cut twice (one from black glitter card stock and the another from the back of the same card stock) and adhered together since it sticks out from the side and you can see the back of the tree.
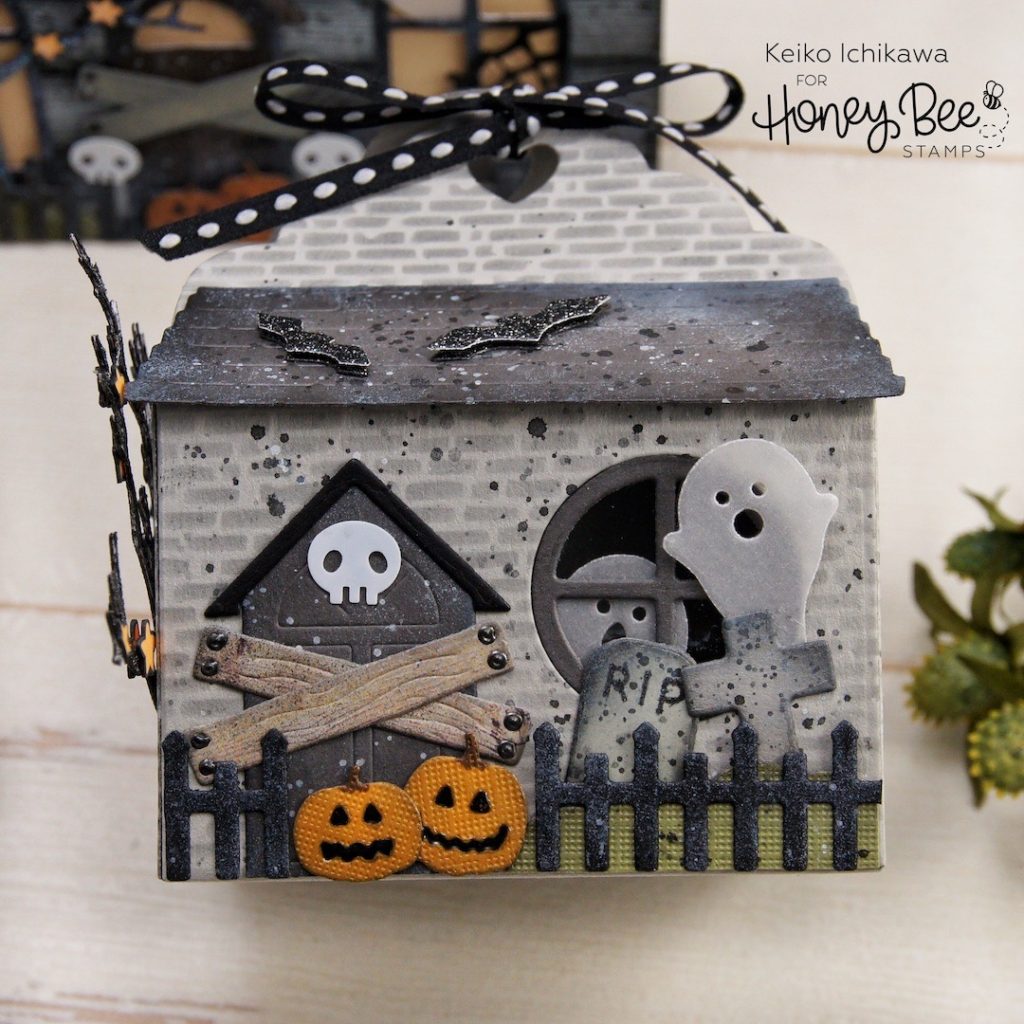
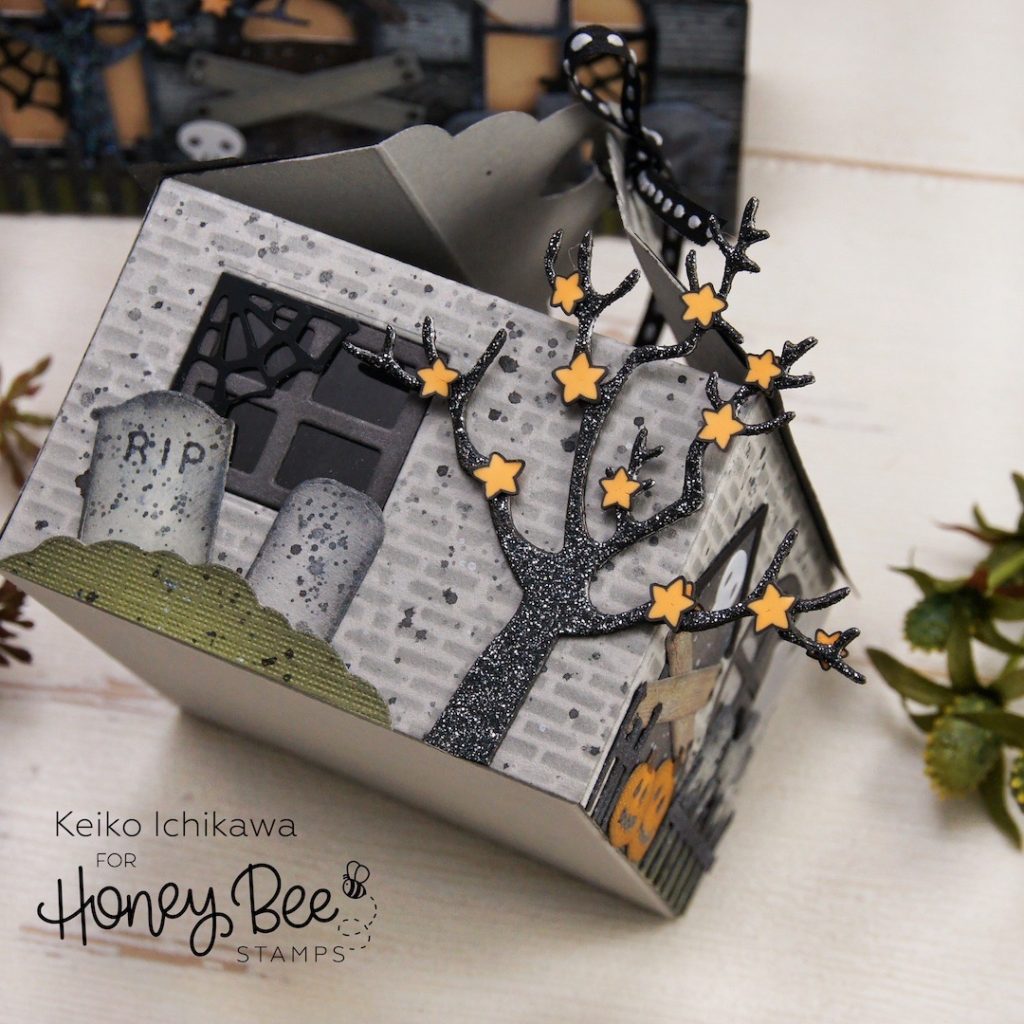
I then die cut out the window from all sides except the back (I plan to write messages on this panel) and backed them with clear acetate and glued the window frames on. Now you can decorate your treat box however you like! I added one of the velum ghost to inside of the window so he can peak out. The glittery bats are adhered with the foam tapes so they will stand out.
I assembled the box using the new precision tip glue (as I repeatedly mentioned before, I LOVE this glue!) and closed the box with a piece of black ribbon. As a finishing touch, I added Glossy Accents to the pumpkin and dark grey Liquid Pearl to the wooden boards on the door.
Thank you so much for stopping by!
Have a wonderful week!!

6 responses to “Haunted House Treat Box”
Love the treat box!!
Thank you Nancy!! I had sooo much fun putting together this box! I think I need to make a christmas one too!
Love the haunted house treat box. Putting a tea light in it to use as a display is a great idea.
Thank you Kit! I put an orange colored tea light in and it is sooo spooky!
Wow! Halloween is my absolute favorite and the inspirations are usually disappointing to me because I just don’t do cute!! In all the papercrafting world!! THIS is my favorite inspiration project EVER! Absolutely fabulous. THANK YOU for making cute spooky and not cutsie! Sadly…no video thay I can save forever. Thanks for the bootiful box!
WICKED COOL!!!