Hello, Bee Friends, It’s Bobbi Lemanski here with another bunny card to celebrate Spring and the Easter holiday. These four bunnies have the cutest fluffy tails in town. Roy Rogers may sing “happy trails to you”, but I say, “happy tails to you!” I’m using the following Honey Bee Stamps products from the Spring Bliss release for this card:
Easter Buddies stamp and coordinating die set
Horizons Slimline Borders die set
Oval Spotlight Stencils or Oval Thin Frames dies
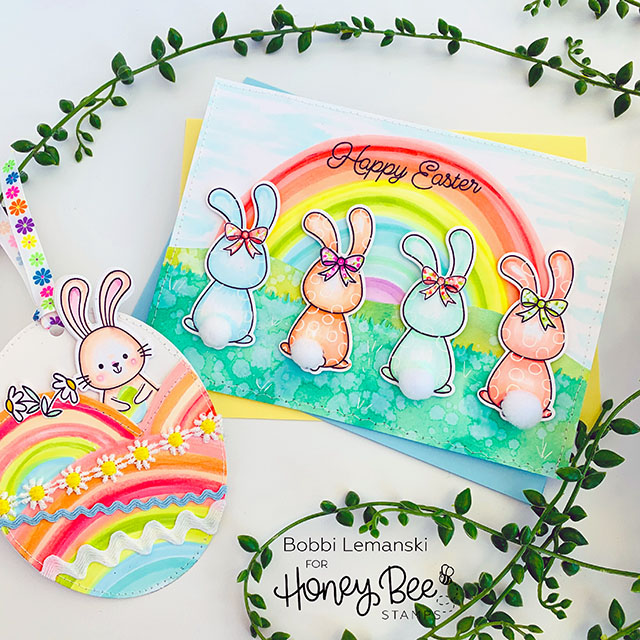
Happy Tails Card
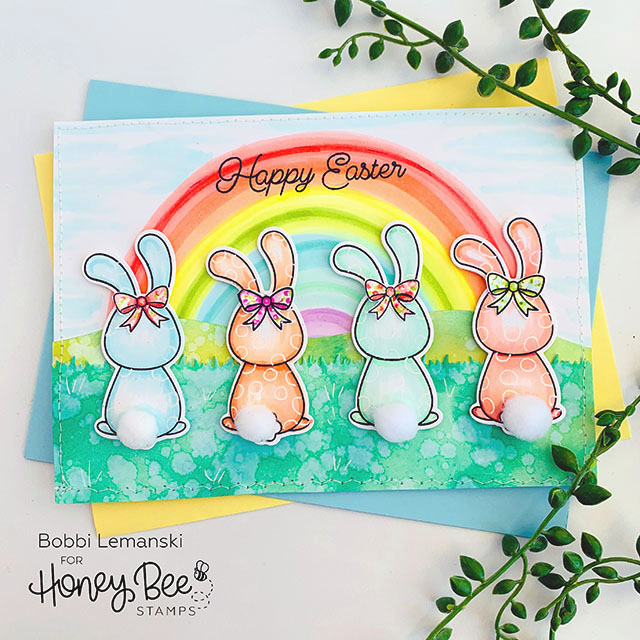
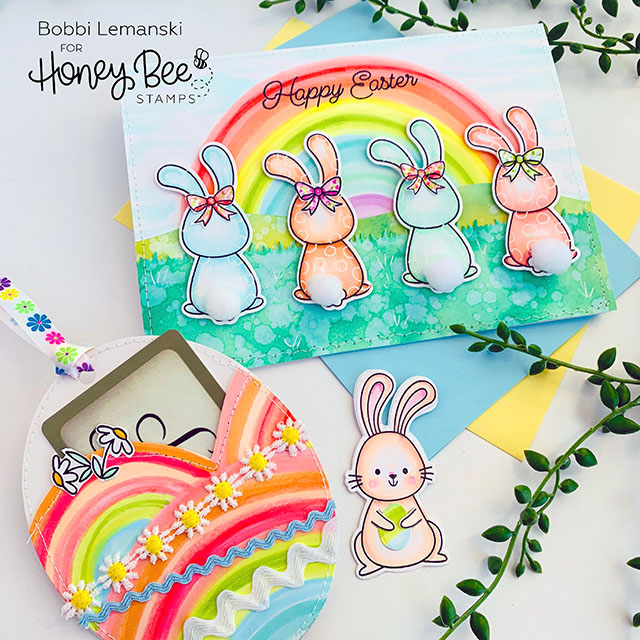
This 5″ X 7″ card features four bunnies dressed in their Sunday best bows, enjoying a rainbow view over the grassy hills in the background. To make this card, I stamped, colored and die cut the bunnies. I added a little circular design for interest on their bodies using a white gel pen and attached a white pompom to each tail using the Bee Creative Precision Glue. Little bows were added to each bunny. I hand drew little designs on each bow using coordinating colors. I used the following Copic markers to color the bunnies: YR65, YR00, YR000 B02, B00, B00, R22, R20, R10, YG41, G00, G000
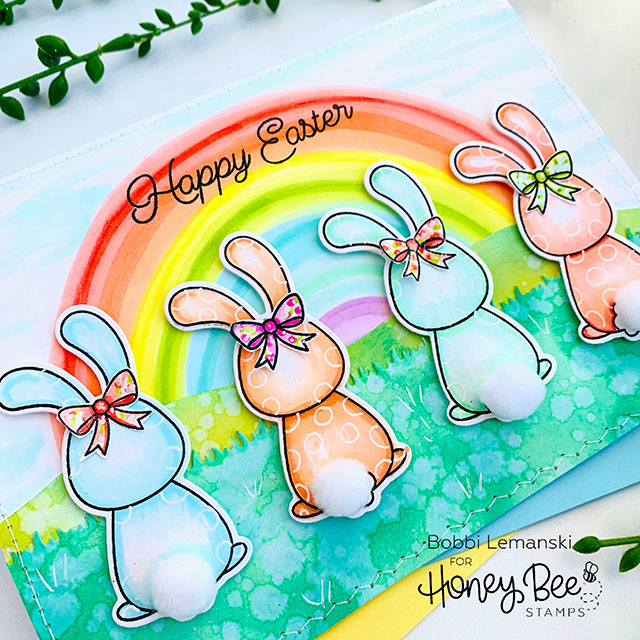
I hand drew the rainbow on the card front using the following Copic Colors: R20, R22, R14, YR04, YR00, YR65, Y15, Y06, YG03, YG00, BG000, BG01, B00, V04, V12. I added blue skies and clouds in the sky and stamped the phrase from the set at the top of the rainbow.
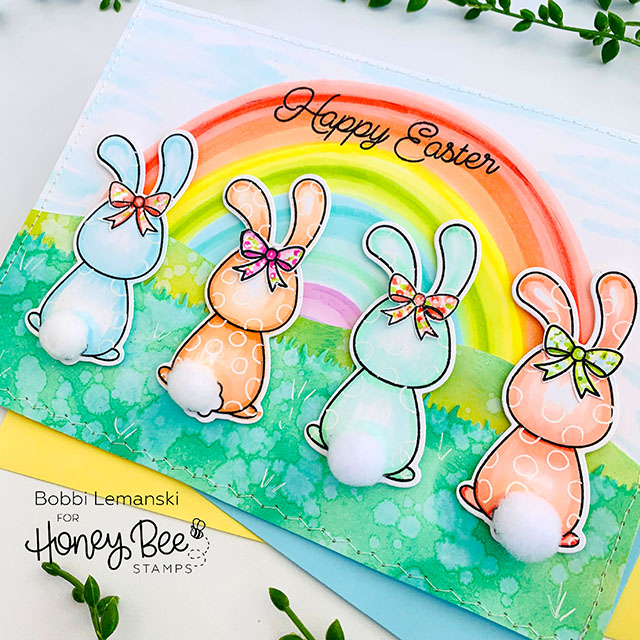
Using my Blender Buddies, I blended Ranger Distressed Inks in Lucky Clover, Tumbled Glass, and Mustard Seed on 80lb Neenah Solar White cardstock, splattered the ink with water and blotted it dry to get the splotchy look. I cut the hills and the grassy landscape using the Horizons Slimline Borders die set. I layered them together on the bottom of the card front and attached the bunnies to the forefront using 3D White Adhesive Foam. I stitched the card front to the card base around the perimeter to complete the card.
Bunny Gift Card
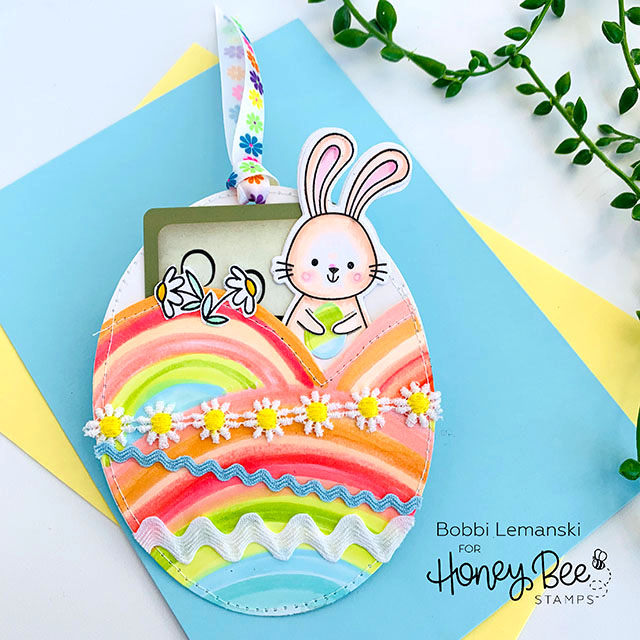
I created a coordinating bunny gift card holder that could be tied to an Easter basket or tucked inside an envelope. I used an oval shape to look like an Easter egg. You can die cut it using an oval die or trace an oval shape using the Oval Spotlight Stencils or Oval Thin Frames dies and cut two out. I hand drew three rainbows using Copic Markers. I cut out around the rainbows to create an opening and stitched the front and backs together with my sewing machine. TIP: You can also glue the front and back together and add faux white stitches using a gel pen. Bits of laces and trims were glued to the front. I punched a hole at the top and added a ribbon to use for tying to a basket.
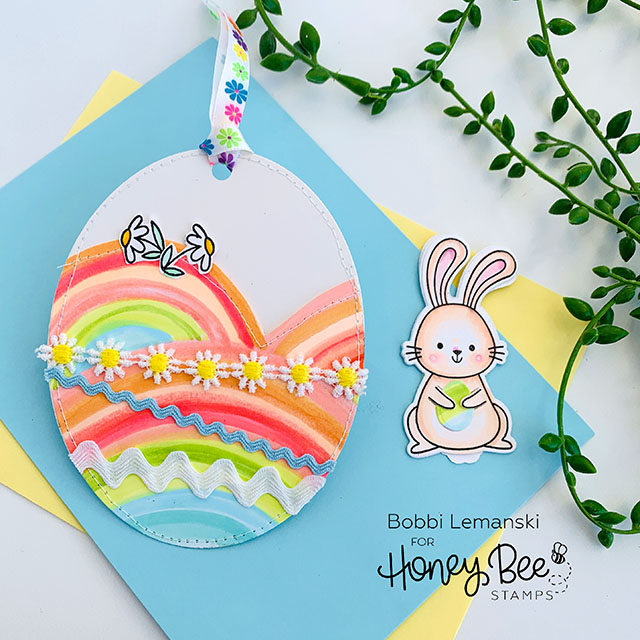
Little daisies were stamped, die cut and added to the front. I also stamped and die cut a bunny using the Easter Buddies stamp and coordinating die sets. I colored the bunny using light shades of YR and RV02 and RV00 for the ears and cheeks. I added a little egg in between the paws to hold using the Itty Bitty Egg dies.
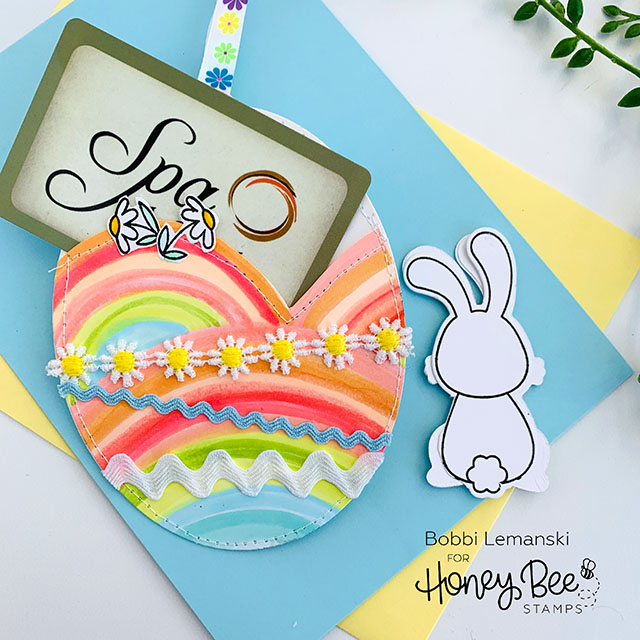
To finish the back of the bunny, I stamped the back side image and attached it to the back of the front. While they are not identical shapes, I think it looks cute to finish the back side like this. I left mine white so I could write a personal message on the back side. 🙂
You can shop the entire Honey Bee Stamps Spring Bliss release here. If you decide to place an order, please use my links in this post so that Honey Bee knows how you found these products and what inspired you today. Happy tails to you…
Thanks for stopping by today. If you want to see more ideas and inspiration from me, subscribe to my blog, BobbiHartDesign.com. I’ll send you updates on new posts! You can also find me on Instagram as @BobbiHartDesign and on Facebook as BobbiHartDesign.
Bobbi Hartmann Lemanski, Bobbi Hart♥ Design, Adding h♥art into every design
One response to “Happy Tails to You!”
Very cute projects. ????