Happy Wednesday Honey Bee friends! Today I’m sharing a card I made featuring the adorable Riding By… Holiday Style stamps and coordinating Honey Cuts. This is a super fun add-on for the Bicycle Builder Honey Cuts that lets you decorate your bicycle in many different ways for the holidays. How fun! Read on to see how I built this sweet ride for the adorable pup!
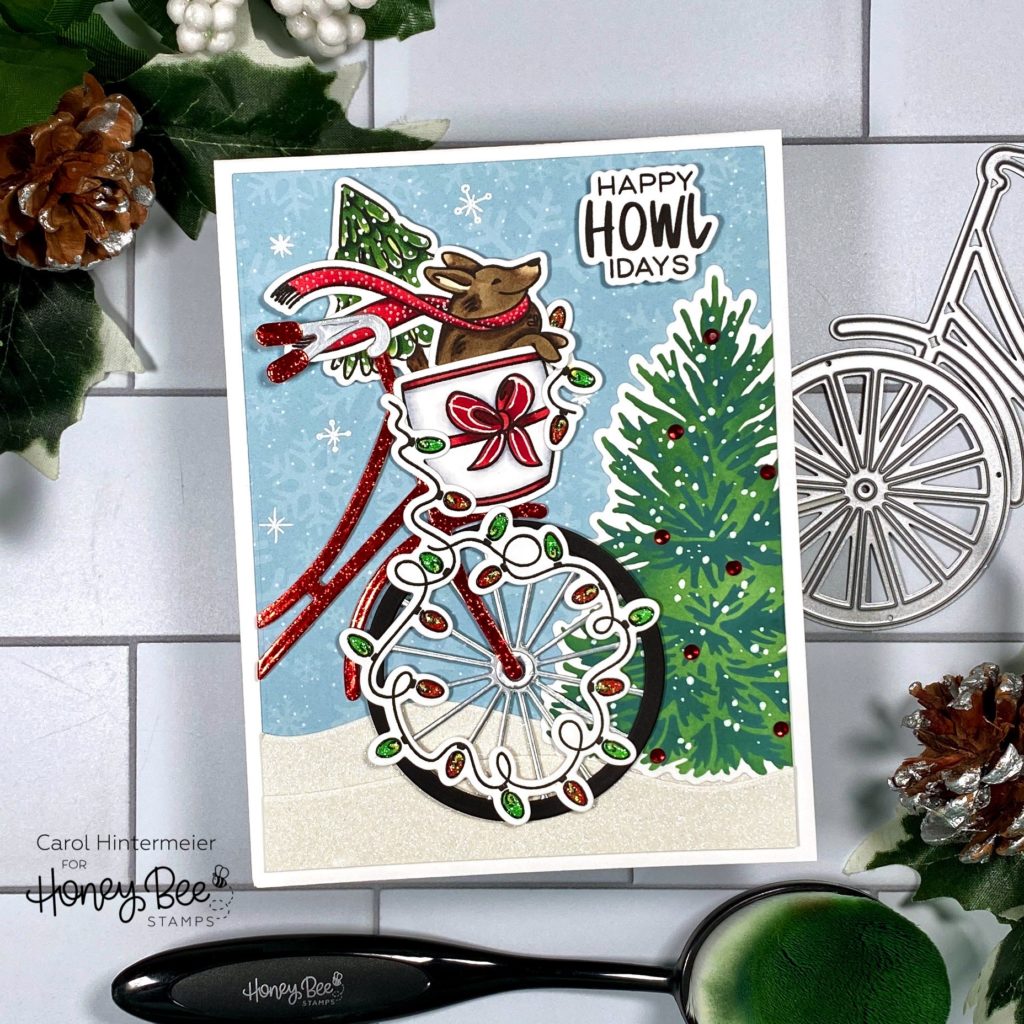
First I worked on my background layer. I used a piece of patterned paper from the current “free BEE”, a beautiful vintage holiday paper pack that’s free with your qualifying purchase. I die cut it with the second largest Sweet Stacks: Rectangles. Then I die cut some white glitter paper with the hill die from the Horizon Slimline Borders Honey Cuts. I trimmed it into two 4″ hills and adhered them to the patterned paper with Bee Creative glue.
I made the evergreen tree by stenciling the tree using the Farmhouse Tree Details stencil. I first stenciled the base layer lightly with Rustic Wilderness Distress Oxide ink and my Background Blender brush. I positioned the second layer of the tree over the first and applied a heavier layer of Rustic Wilderness ink. Then I used the tree die from the Farmhouse Tree Builder Honey Cuts to die cut it. I added white dots to the tree with my white gel pen and adhered the tree to the card. I trimmed off the overhanging part of the tree and then I adhered the piece to a top-folding A2 card base.

I die cut the Bicycle Builder pieces from some red glitter paper, silver matte, and black card stock. I adhered the pieces together with Bee Creative glue.
Next I stamped the images and sentiment from the Riding By… Holiday Style stamp set with Intense Black ink. I colored all the images with my Copic markers and used the coordinating Honey Cuts to cut them out. After I adhered the images to the bicycle I added very small pieces of thin foam tape to the back. Then I decided to stamp the tiny snowflakes that are also in the Riding By…Holiday Style set. I put the card in my MISTI, positioned the bicycle (without adhering) and then placed the snowflake stamps where I wanted them. I removed the bicycle, patted on my anti-static pouch, inked up the stamps with Versamark and stamped them. I added some white embossing powder and heat set it. and then added it to my card. Here’s a super close-up photo for you to see the details:
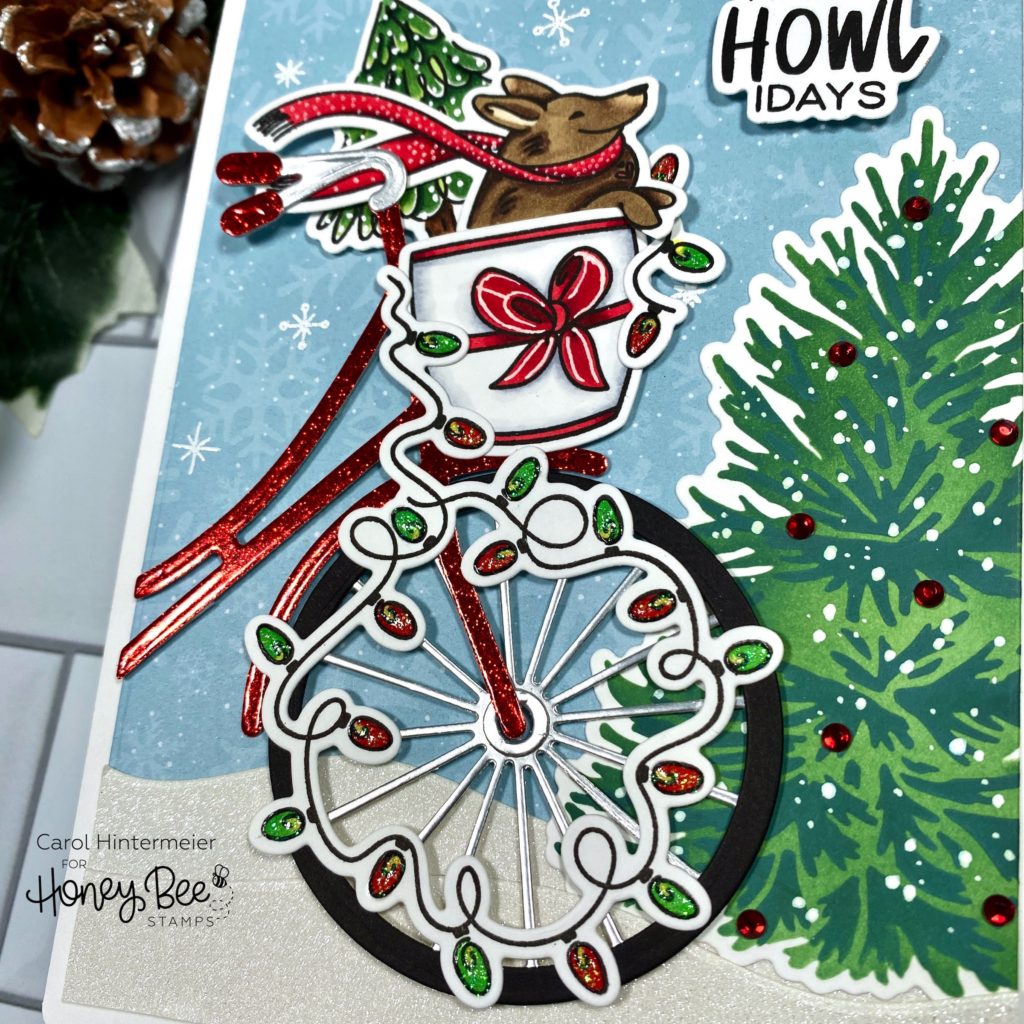
I added some fun details to the dog’s scarf, the little tree, and the bow with a white gel pen. Then I added some sparkle to the lights by dotting on Nuvo White Blizzard glitter drops. The sparkle on the large tree are some red gems I added from the Vintage Holiday Gem Stickers set.
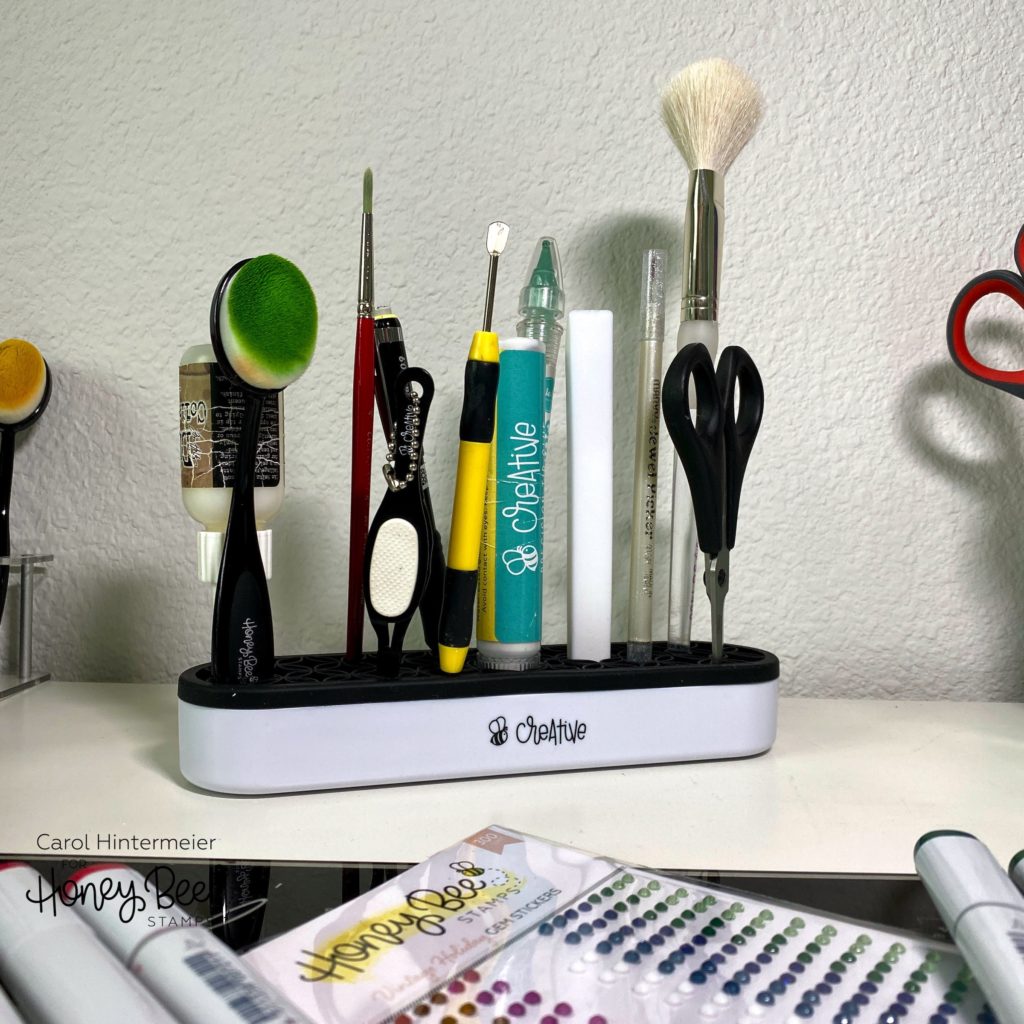
Before I finish my blog post I wanted to share with you this awesome new Bee Creative Tool Caddy from Honey Bee! I am really enjoying using it to keep my most-used tools right in from of me. Honey Bee has a lot of new products from this tool caddy to foam tape. If you type “bee creative” in the search bar, you will find lots of awesome new products for your everyday card making.
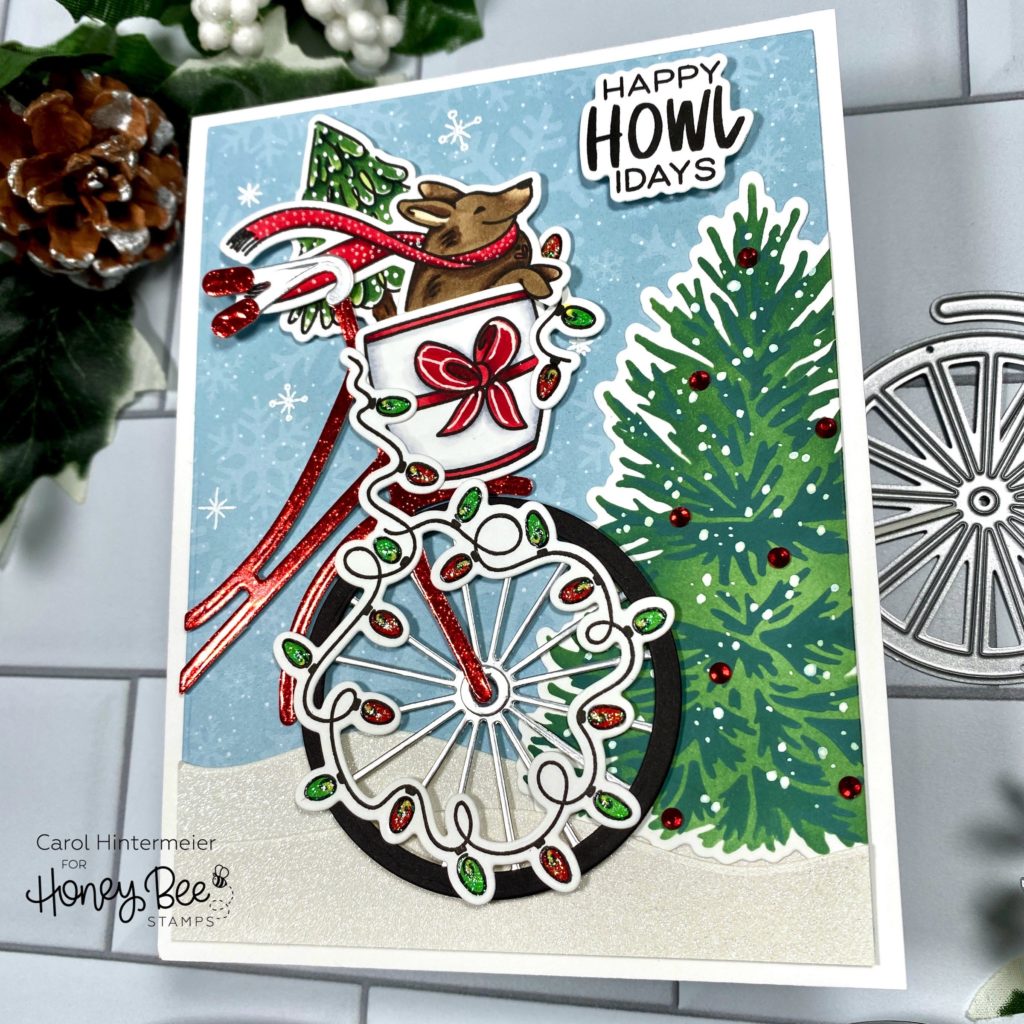
This is such a fun card to make and I think it’s perfect to send to a dog-loving friend or family member! Thank you so much for stopping by and I hope you have a wonderful, and crafty, day!