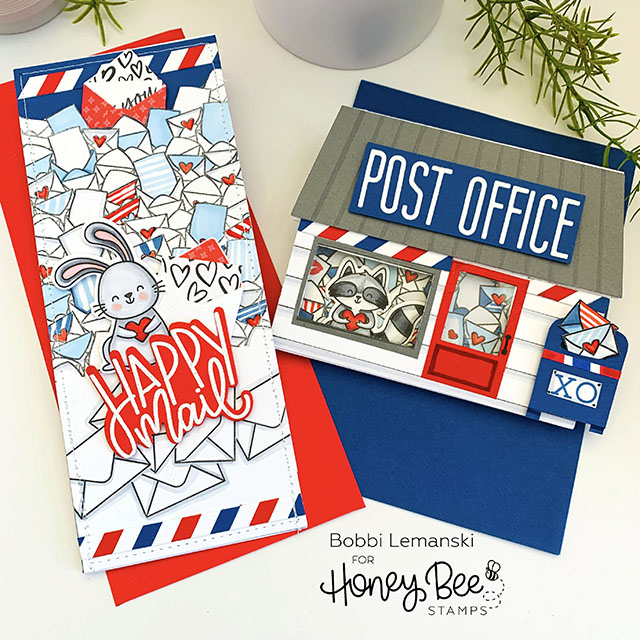
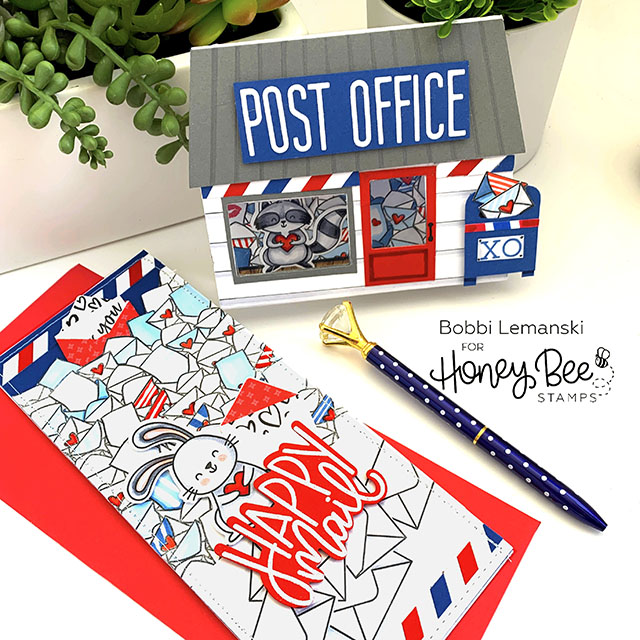
Hello, Bee Friends! It’s Bobbi Lemanski here with more Valentine ideas using products from the Love Letters release by Honey Bee Stamps. I’m in love with the new Hugs Enclosed stamp and die sets so I made two cards with the theme of “happy mail.” Both include a few hearts for Valentine’s Day, too. 🙂 I’m using the following Honey Bee Stamps products from the Love Letters release:
Hugs Enclosed stamp and die sets
Slimline Sentiments: Stitched die set
Stolen My Heart stamp and die sets (for the raccoon on the post office card)
Honey Bunnies stamp and die sets (for the bunny on the slimline card)
Love Letters 6″ X 6″ paper pad
I’m also using these sets from prior releases:
Coffee Shop House Builder- Add On Die Set
Love Enclosed stamp and die sets
Slimline Happy Mail Card

For my 3-1/2″ wide X 8-1/2″ tall slimline card, I die cut two card fronts – one blue and one white – using the Slimline Sentiments: Stitched die. I stamped the white one using the Hugs Enclosed stamp set, positioning the image at the top of the slimline panel. Since the slimline card is taller than the 6″ stamp, I also stamped larger envelopes below using the envelope image from the Love Enclosed stamp set. These two sets work great together! Tip: I created a sticky note mask and stamped the images, creating overlapping envies on the card. I fussy cut the stamped heap at the top of the white panel, creating a “pocket” opening at the top. I adhered the two slimline panels together. I actually sewed them together using my sewing machine, but you can simply adhere them together using 3/8″ Scor-Tape around the perimeter, by the faux stitches. I added a red/white/blue diagonal strip at the top for decoration. Tip: I created the decorative strip by cutting 1/4″ red, white and blue strips and adhering them on a scratch piece of cardstock and then cutting the piece in strips, at a diagonal.
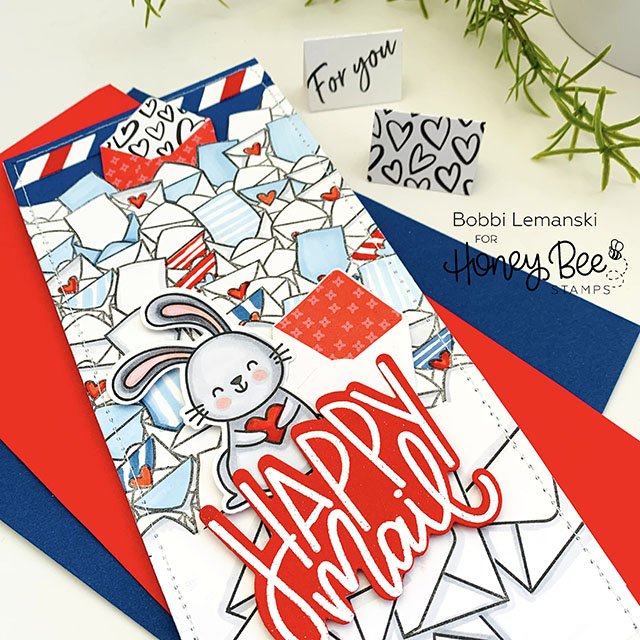
For the bottom half, I heat embossed in white the “Happy Mail” phrase on red cardstock and attached to the front using Scrapbook Adhesives .25 Foam Squares in white. I also stamped, colored and die cut the bunny and attached it to the front.
Using pattern papers and Love Enclosed stamp and die sets, I die cut two mini envelopes and lined them. To me, this set is a staple! I love these mini notecards. I added a stamped “for you” on the note card and placed inside the top envelope. I tucked the pair inside the top opening. You could also tuck money or a personal letter in this long pocket, too. I tucked the other mini notecard and envelope by the bunny.
To add more space for writing a message, I attached the entire layered front panel to a 3-1/2″ wide X 8-1/2″ tall slimline card base made from Neenah 80lb Solar White cardstock. You could just leave it as a slimline notecard, too.
Post Office Card

For my Post Office-shaped card, I started by creating the card base and two white panels using the House Builder Die Set. Tip: Die cut the base from a folded piece of cardstock with the top roof edge of the die positioned slightly off the fold line so that it does not cut at the top. I added straight lines and shading to the front to create the look of siding. The “post office” letters were die cut using the Tailgate Alphabet dies and attached to a 3-5/8″ wide X 1-1/4″ tall blue rectangle background to create the sign at the top. I added the gray metal roof, window opening, frame and door using the dies from the Coffee Shop House Builder- Add On Die Set. Tip: Die cut the window and door openings from the front panel and card base at the same time (i.e., run through your die cutting machine together) so that they line up perfectly when assembling the card. I also created blue/white/red strip design and added it under the overhang for a “USPS” mail look (See prior card for instructions on how I made it.)
For the mailbox, I cut a 1-1/4″ wide X 1-1/2″ tall rectangle, used a corner punch to round the top corners. I added two legs, the XO sign, the striped strip and a slit for the mail. I added the cute little envelopes/mail using the Hugs Enclosed stamp and die sets.
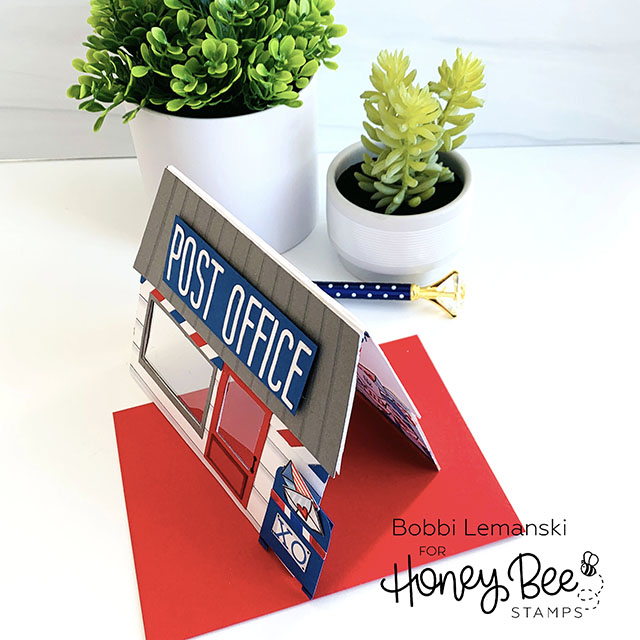
Before attaching the front panel to the shaped card, I added clear acetate between the layers for the glass windows.
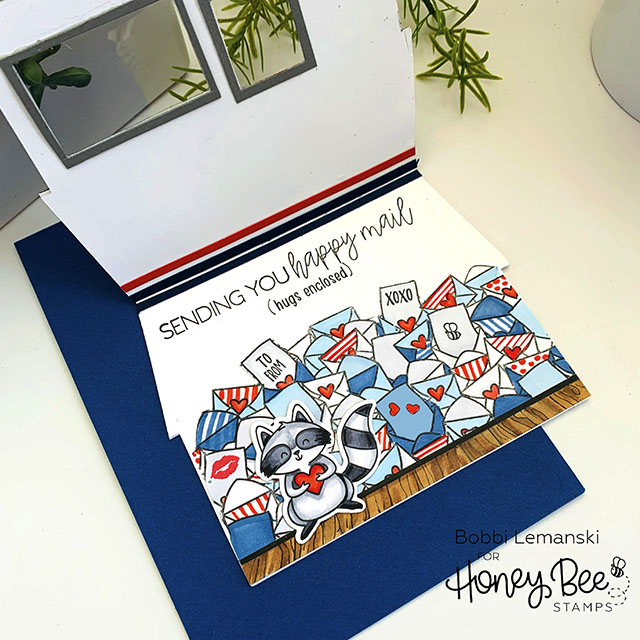
For the inside panel, I stamped the Hugs Enclosed stamp about 3/4″ from the bottom. I hand drew a wood floor at the bottom and stamped, colored and die cut the raccoon to attach inside. I added the phrase and additional words to the envelopes to complete the look. I added a few strips of blue and red at the top of the phrases for added color and to complete the look.
You can shop the entire Love Letters release here. If you decide to place an order, please use the links in this post so that Honey Bee knows which ideas inspired you!
Thanks for stopping by today. If you want to see more ideas and inspiration from me, subscribe to my blog, BobbiHartDesign.com. I’ll send you updates on new posts! You can also find me on Instagram as @BobbiHartDesign and on Facebook as BobbiHartDesign.
Bobbi Hartmann Lemanski, Bobbi Hart♥ Design, Adding h♥art into every design
2 responses to “Happy Heart Mail”
Oh my gosh! Why aren’t you doing videos? Your work is always amaaaaazing, adorable! I follow you on IG and always purchase the items you use to create, but would love to see videos on YT.
Thanks so much, Jimeca. Videos are on my list! I do plan to do tutorial videos soon! Stay tuned. 🙂 Hugs, Bobbi