Hello Honey Bee friends!! Today I’m sharing my fun shaker card I made using the awesome Fright Night Circlescape Honey Cuts! This set is really easy to create with, so don’t let the pieces of the die put you off. When I was looking at just the die, I could really envision this as a beautiful winter scene too! Hmm, I guess I need to add that to my idea list!
First I’ll share the steps for creating the shaker/card base:
- First, I chose paper from the Spooktacular 6″ x 8-½” paper pad and trimmed it to A2 size.
- Then I used an ink blender brush to add some Black Soot Distress ink around the edges of the paper.
- Next I placed it into an A2 Shaker Creator shaker pocket, removed the adhesive liners from the sides and bottom flaps, and folded them over onto the back of the paper.
- I poured in some of the so very pretty Black Opal Confetti Mix and sealed the top flap.
- I used Bee Creative glue to adhere the shaker to a top folding A2 card base.
Next I created the details for the front of the card:
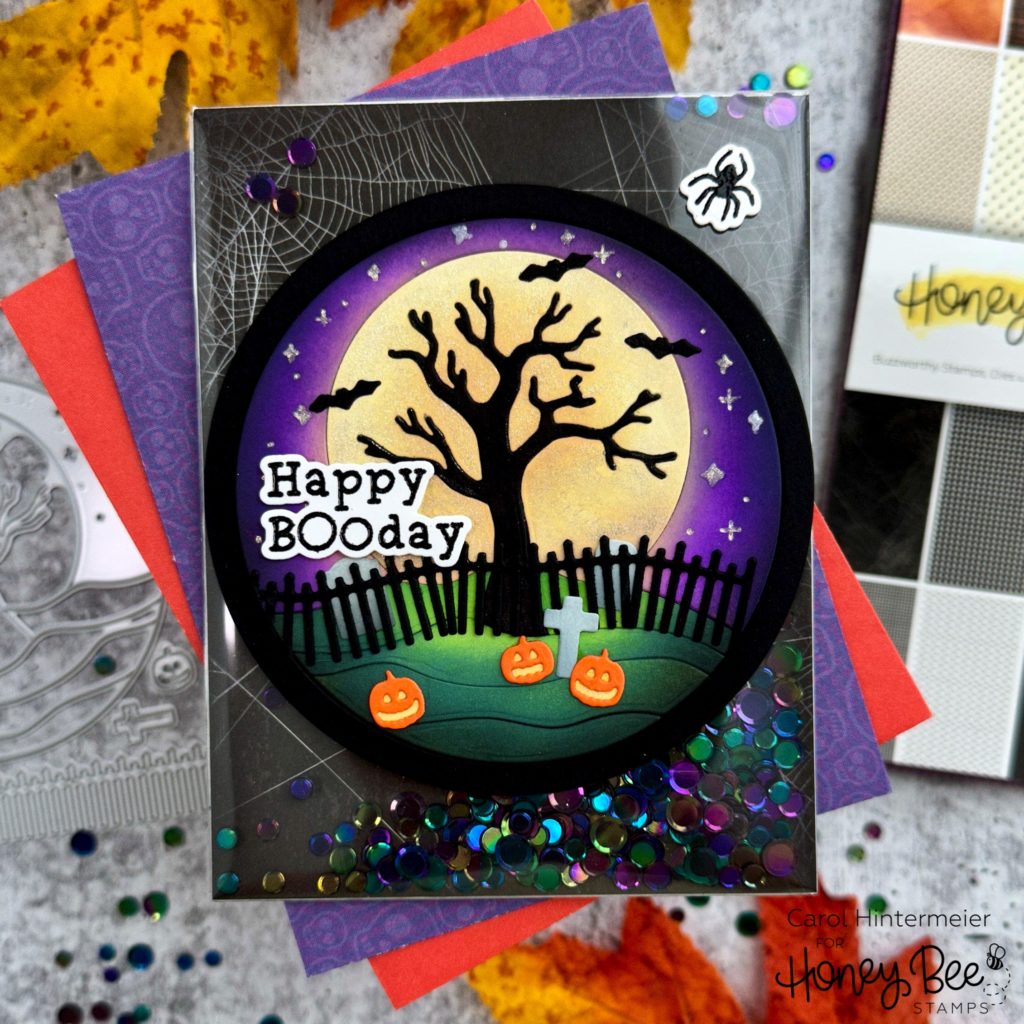
- First I die cut the largest Circlescape Shaker Frames from black cardstock. I saved the frame and the circle from this die cut as we will be using both.
- Also from black cardstock, I die cut the fence, bat (x 3), and the tree from the Fright Night Circlescape Honey Cuts. (I used a scrap of black cardstock that just fit the tree for that part.)
- I die cut the entire Fright Night Circlescape die from 80# Neenah.
- I used ink blender brushes and Distress Oxide inks for all of the coloring of the die cut pieces.
- Moon: Antique Linen, Scattered Straw
- Sky: Villanous Potion, Wilted Violet, and a touch of Antique Linen
- Grassy hills: Rustic Wilderness, Mowed Lawn
- Tree: Black Soot (this will go under the black die cut tree)
- Cross/headstones: Weathered Wood
- I die cut the pumpkins from a scrap of orange card stock.
- For the yellow behind the pumpkins, I inked a scrap of cardstock with Scattered Straw Distress Oxide. One at a time, I glued the pumpkins to it, and then cut them off of the yellow piece just under the edge of the pumpkins on top. Goodness, I hope that makes sense! LOL!
Let’s finish this fun card!
- I adhered the colored pieces of the Fright Night Circlescape to the reserved black die cut circle with Bee Creative glue.
- Adhere the black die cut tree onto the image.
- The cool thing about the fence is that the die cut is bendable since the pickets are only joined by the top fence rail! I shaped the fence and glued that in place along with the other small images.
- Next I adhered the Circlescape frame to the front of the card with glue. Then I glued the main image inside the frame.
- I used black embossing powder and clear embossing ink to stamp and emboss the sentiment and spider from the Happy Halloween stamp set. After I used the coordinating dies, I used a bit of foam tape strips to adhere them to the card.
What a fun card this was to make!! I hope I’ve inspired you to give this awesome Fright Night Circlescape a try and hope to see your creation! Thank you so much for stopping by!!