
Hello! Happy new week friends! It’s Keiko from Happy Tree Studio and I have this adorable Gingerbread village card to share with you. Have you seen the brand new Make It Merry release from Honey Bee? Click HERE to see the entire release!) There are so many great must haves for holiday card making and beyond! I’m showcasing a few today.
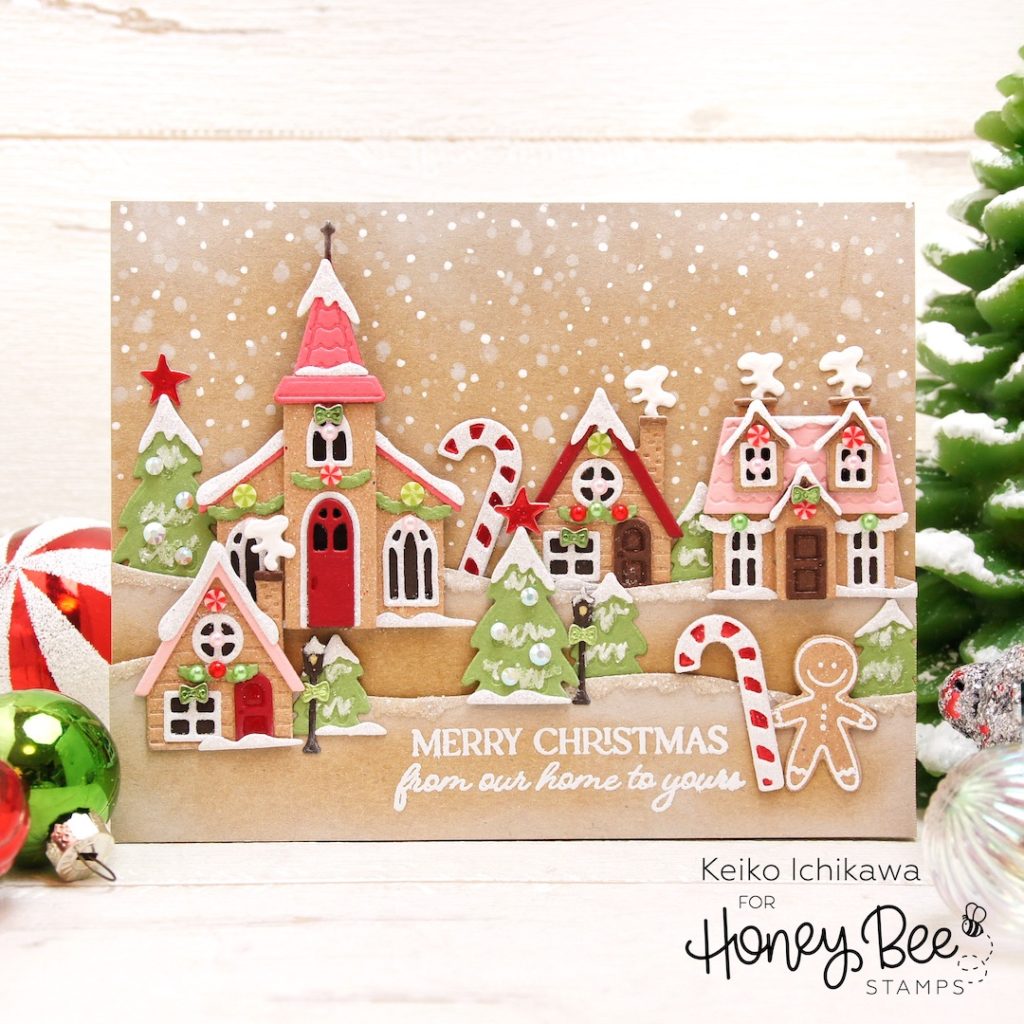
The background is a piece of A2 sized Kraft card stock and I stenciled the snow using Winter Wonder Background stencils with brand new white pigment ink and also added the same ink with a brush mainly to the top edge. I also added more snow using a white gel pen to add depth. The two snowy hills are made from the same Kraft card stock using Horizon Slimline Borders. The sentiment from Home For the Holidays was white heat embossed on one of the hill borders. I added the white pigment ink to these two borders as well. I then adhered both borders with foam tapes.

I then die cut all the elements I need to create the scene. Here are the dies I used:
Winter Village (die): Church, houses, trees, lights
Country Christmas Wreath (stamp & die): Gingerbread
Mugs & Kisses (die): Candy cane

I pulled out the layering guide for the Winter Village set (you can see it HERE) and it made it so easy to put them all together. TIP: I used foam tapes for some big enough parts and layered several die cuts for the thin/tiny pieces to add dimension.
After arrange all the elements on the card panel, I adhered them with glue and foam tapes. To finish off the card, I added some confetti, Holiday Pearl stickers, and Winter Wonder gem stickers to decorate the houses and trees. To add snowy texture to the ground, I added Glossy Accents and clear glitter to the edge of the hill borders.

Thank you so much for stopping by today. Have a wonderful week!
