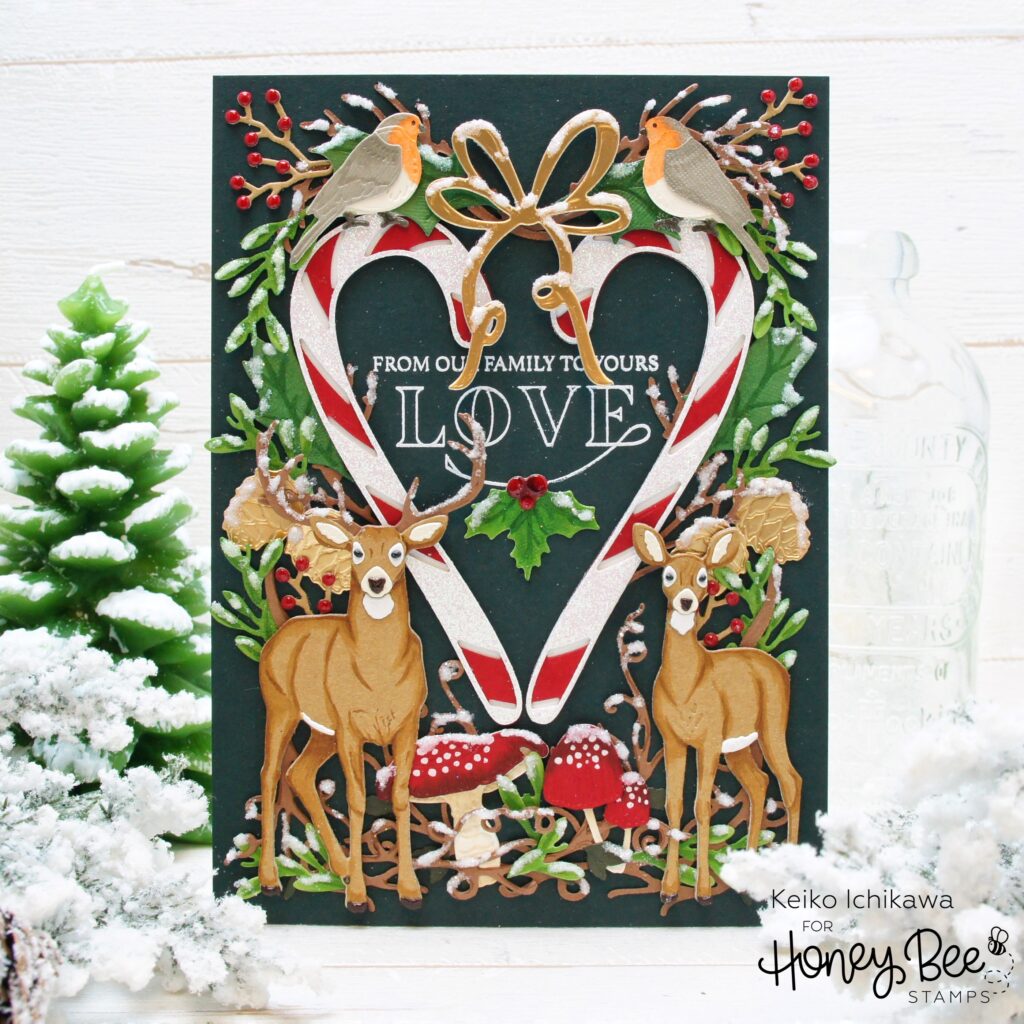
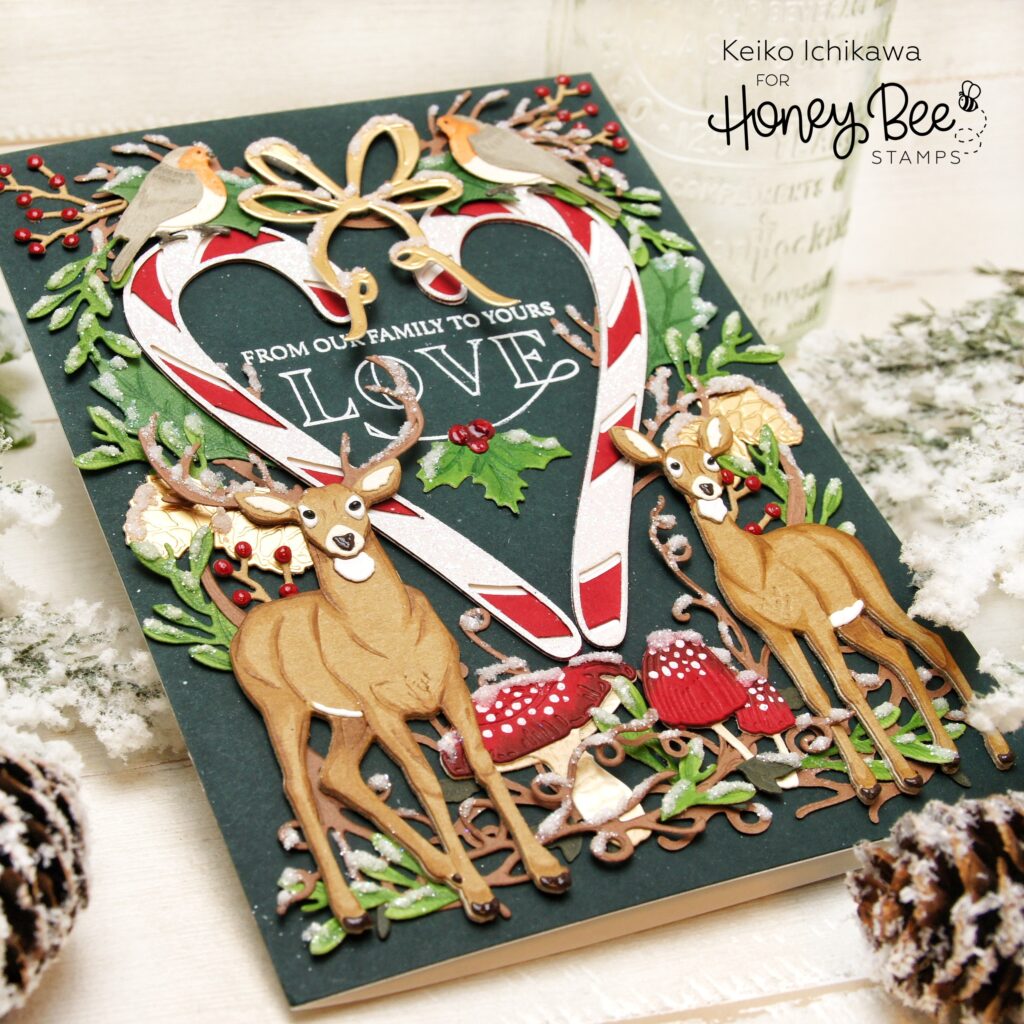
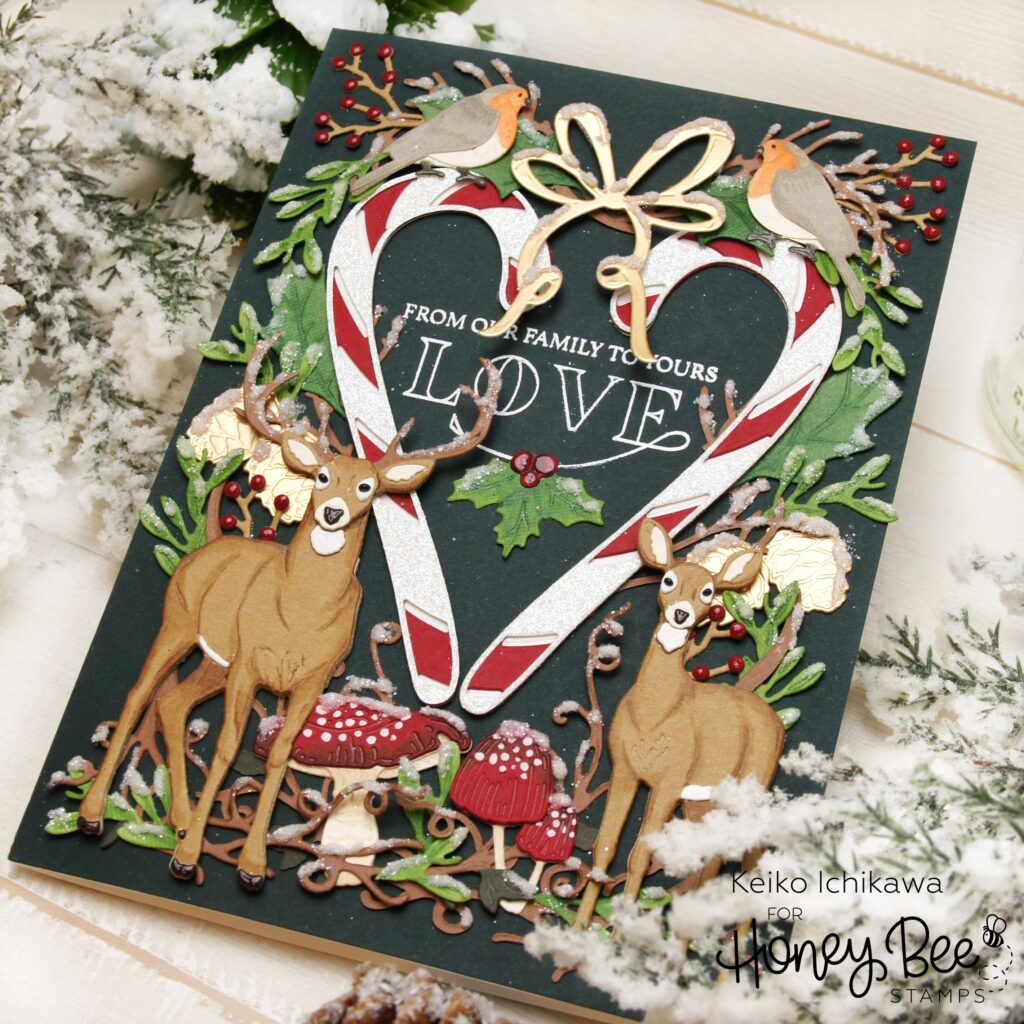
Hello friends! Happy new week! It’s Keiko from Happy Tree Studio and today, I have this nearly all die cut (except the sentiment) card to share with you. This may be the last Christmas card for the season! I saw a love themed illustration online with deers, mushrooms and red heart and used that for my inspiration today. This may look like a rather intimidating card to make simply because there are a lot of die cuts. But there is actually not a lot of special techniques to put together this type of card. You just need to die cut the elements you need, color them if necessary, and glue them together. I will share some tips below!
First of all, here are the die sets I used for your reference:
Lovely Layers: Deer
Lovely Layers: Candy Canes (candy canes and bow)
Lovely Layers: Seasonal Frame (bird, pinecones, green branches, twigs)
Christmas Market Cart Add-On (holly & berries)
Lovely Layers: Winter Greenery (holly leaves)
Lovely Layers: Mushrooms
Lovely Layers: Doves (berry branches)
Once I figure out the rough design, I usually lay out the dies on the card panel to see what I can fit and how many. I decided to make an A7 (5″ x 7″) card today since there are many elements I want to include. Then I die cut them from various colors of card stock including white glitter and gold foil. After putting together the layering die cuts, I added some color with my Copic markers and white gel pen.
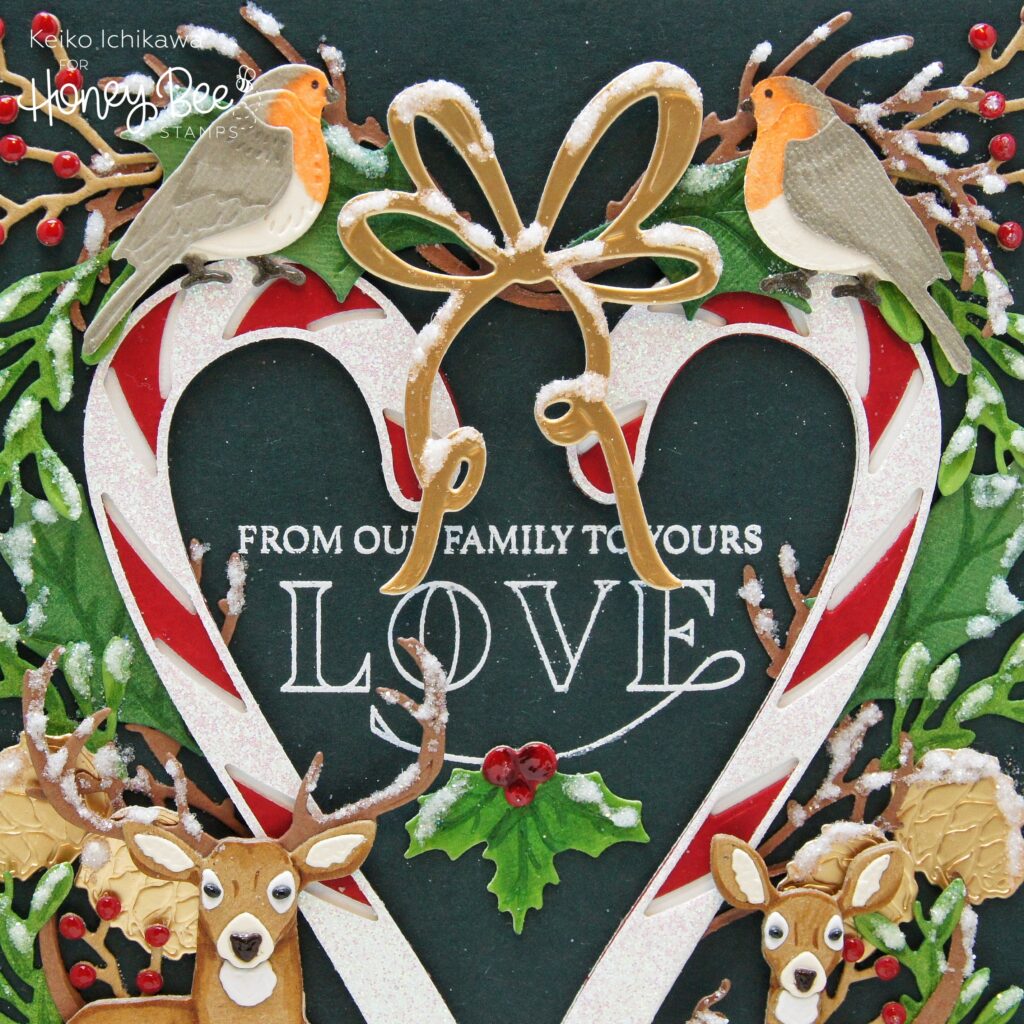
Before start adhering the elements, I lay out the die cuts to see if they go together, or if I need more. You can choose to add more once you glue the ones you cut. Once I am happy, I white heat embossed the sentiments from Peace, Love, Joy set. Then all you need to do is adhere the elements you created. Here are some TIPS:
* Figure out which elements are on the bottom layer and adhere them first.
* For the greenery and branches, avoid applying the glue all over. Instead, only apply it on the base and few dots here and there so they can look dimensional and also you can tuck something underneath if necessary.
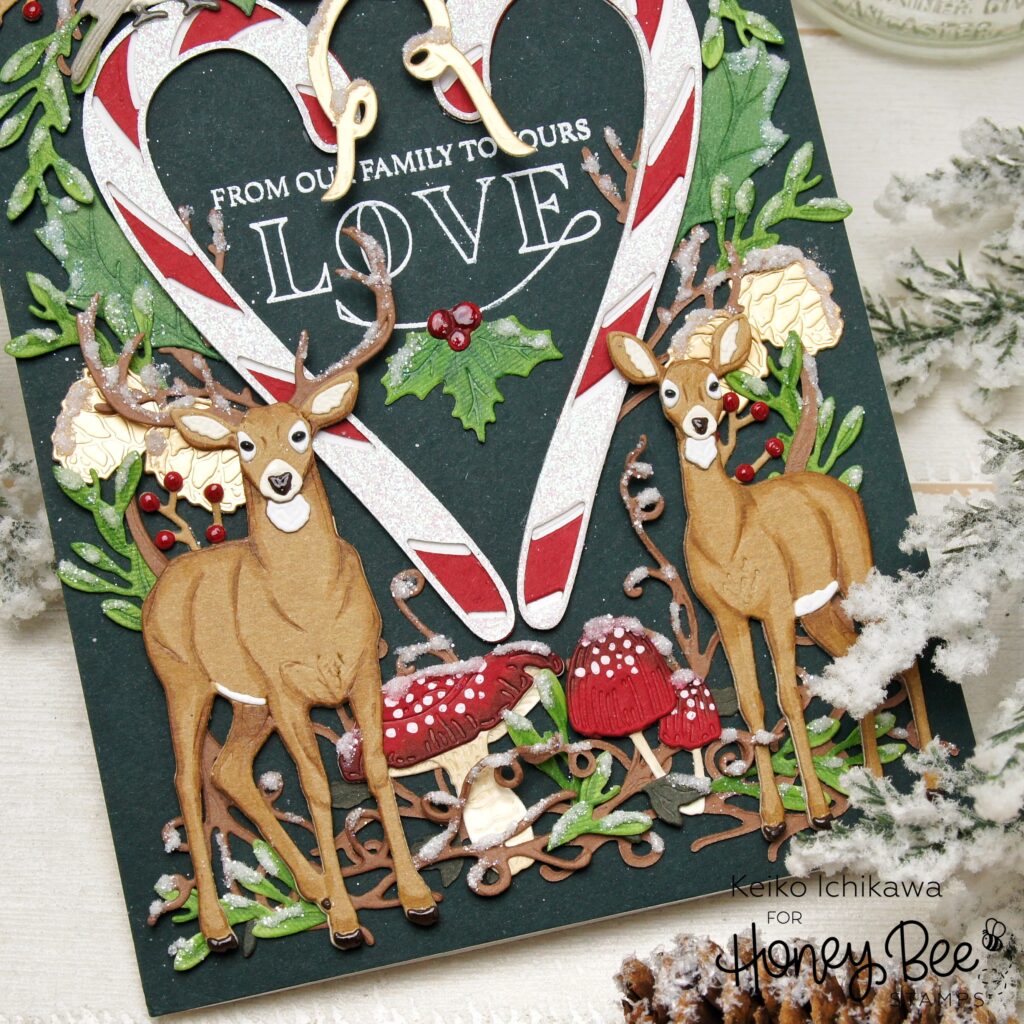
* For the large elements that layer on top of the other, use foam adhesives where necessary so they lay nicely and also look dimensional. For the deers, I die cut three extras and layer them on the back instead of foam adhesives because their legs are pretty thin and difficult to cut the adhesives to the size. Since their head layer on top of other elements you don’t need the extra layers.
* In order to make the finished card design not too busy, I used very limited color palette.
* Overlapping the elements is a key to make the design flow.

To finish off the card, I added Glossy Accents to the berries, and added glitter on many of the elements so the scene look snowy.
Thank you so much for stopping by. Have a wonderful week!!

One response to “Forest Themed Die Cut Card”
Oh my goodness this card is so cute, I have the deer set but none of the other dies. Would love to receive a card like this in the mail.