Happy Thursday Honey Bee friends! Today I have a one-for-three cards post here. I’ve used the Fluttering Hearts Cover Plate Die, along with the Fluttering Hearts Pierced Cover Plate die, and have made three cards from my first die cut! I didn’t plan to make three cards, but hey, it’s always a good thing to have extras on hand!
To make it easier to follow, I’ve made a list of the steps for this card.
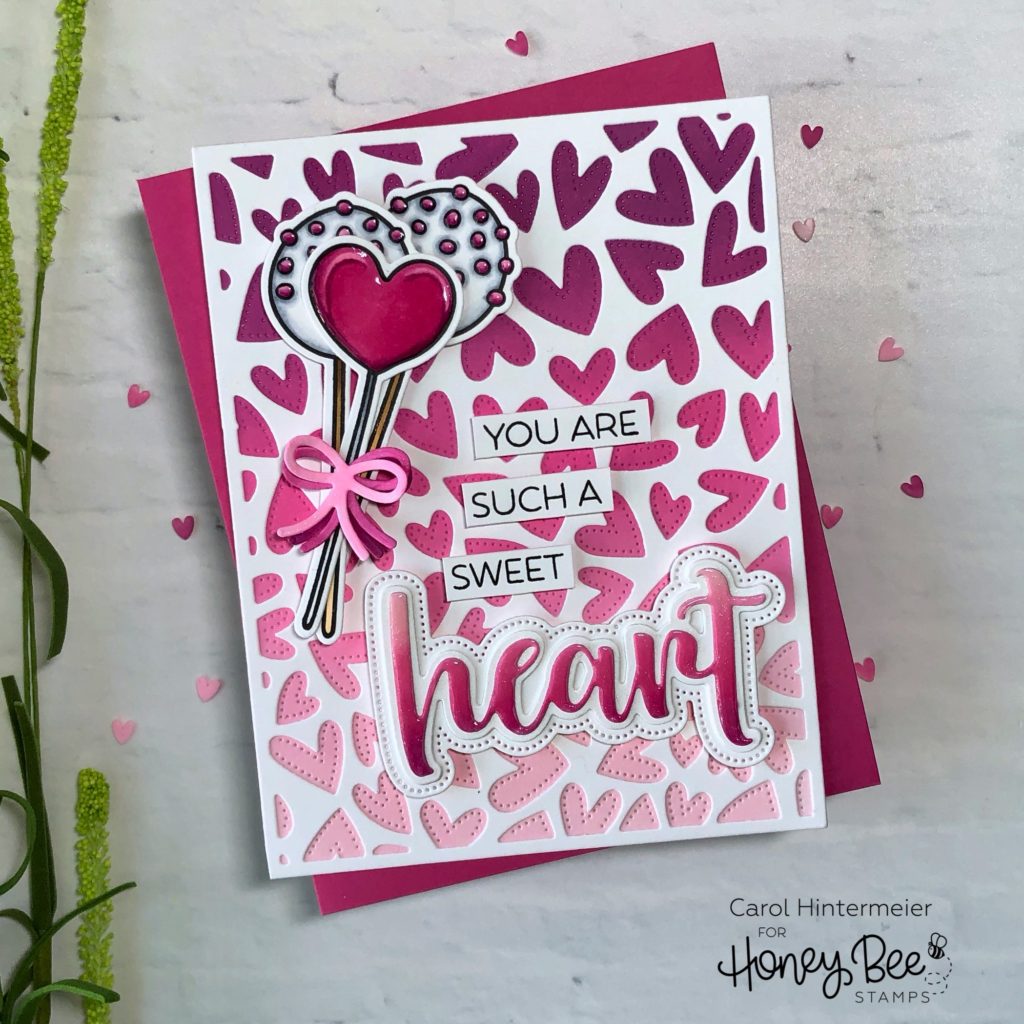
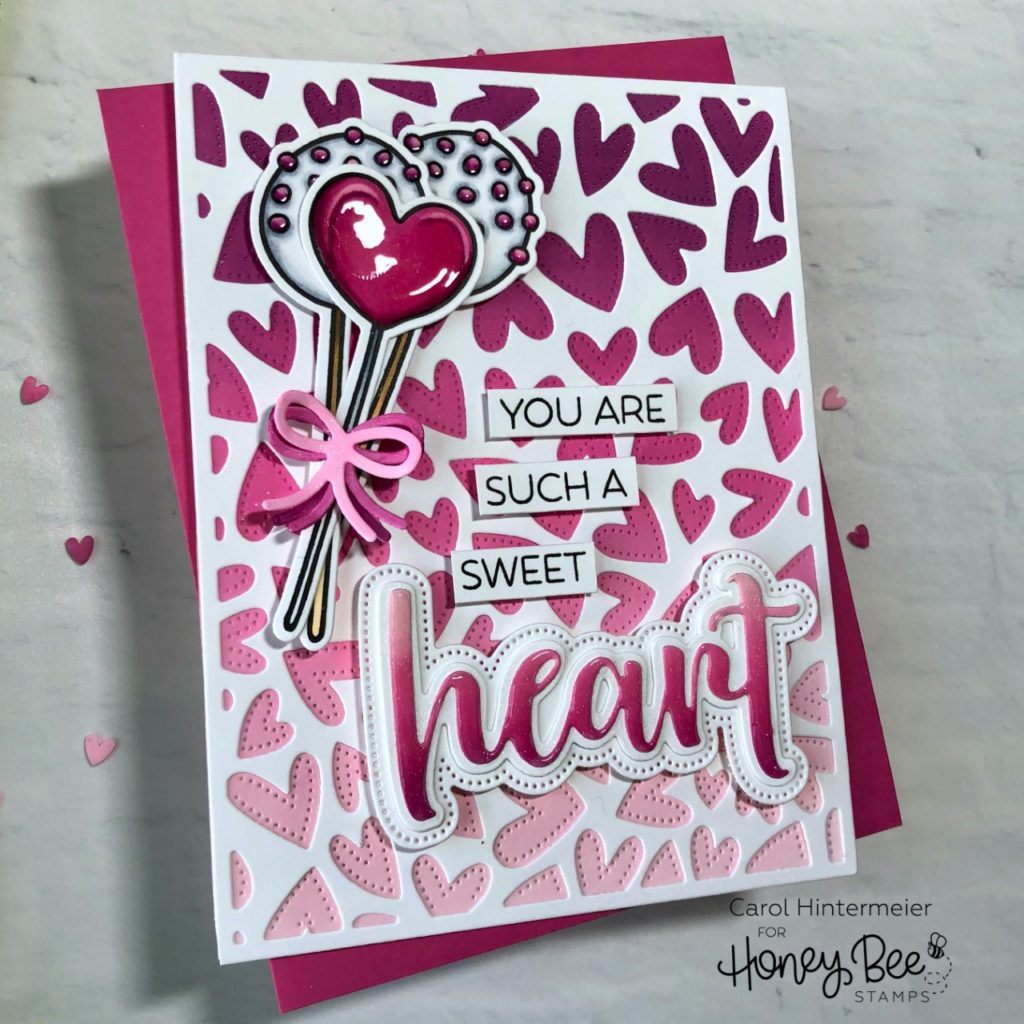
- Using a Background Blender Brush, blend Seedless Preserves, Picked Raspberry, and Spun Sugar Distress Oxides onto an A2 sized white card panel. Die cut this piece with the Fluttering Hearts Pierced Cover Plate die.
- Die cut 80# Neenah Solar White card stock with the Fluttering Hearts Cover Plate die. NOTE: While this is still on the cutting plate, place a piece of Press N Seal over the entire piece to keep all of the hearts in place. Press firmly, then carefully remove the die cut, leaving the hearts on the Press N Seal.
- Adhere the Fluttering Hearts die cut onto the inked Fluttering Hearts Pierced layer.
- Ink a small piece of white card stock in the same Distress Oxides, then die cut the top layer from the Heart Honey Cuts. I cut the middle and bottom layers from 80# Neenah. I added some clear Wink of Stella to the middle layer and adhered all three layers with liquid glue. Stamp the rest of the sentiment from the Heart stamp set with Versafine Onyx Black ink and cut into strips. Add foam tape to the back.
- Die cut three bows (from the Mason Jar Card Honey Cuts.) Ink one in each of the Distress Oxides used able. I clued them together, slightly offset.
- Stamp, color and die cut the lollipop and cake pops from the Sweet Treats stamp and Honey Cuts. Arrange them and adhere together, then glue on the bow. Add a few small foam strips/squares to the back. I added some Glossy Accents to the lollipop and candy bits for some shine!
To finish, I arranged the elements and adhered to the card base. I love how beautiful the Fluttering Hearts are!
This next card is where I used all the little hearts leftover from the first card.
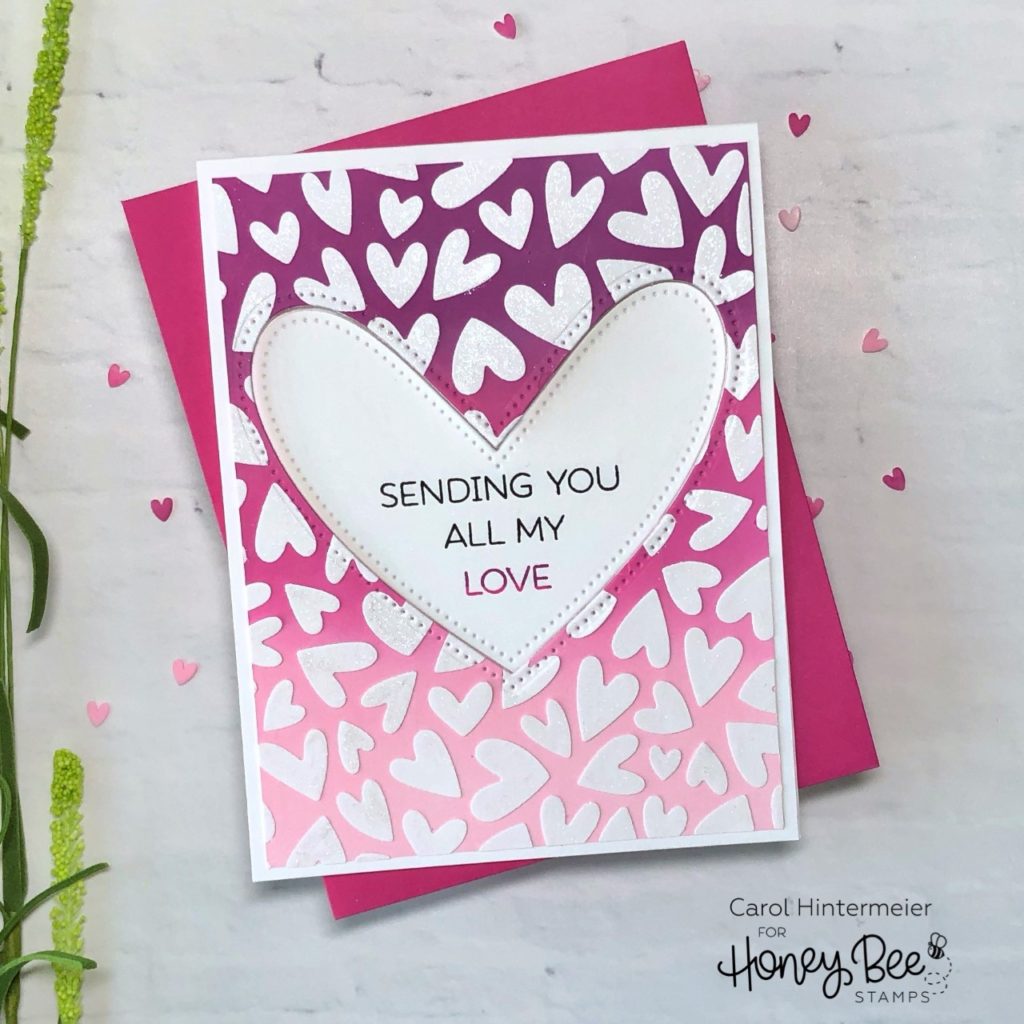
Using a Blender Brush, I inked up another panel with the same Distress Oxides and adhered all the hearts. This was easy as the hearts were still on the Press N Seal. I just added dots of liquid glue to each one and ten flipped it over onto the card layer. As pretty as this was, I decided to die cut a heart window. I had already adhered the panel to an A2 card base though. I used the smallest heart from the Pierced XOXO Hearts Honey Cuts, and I did need to run it through my machine several times for it to cut all the way through.
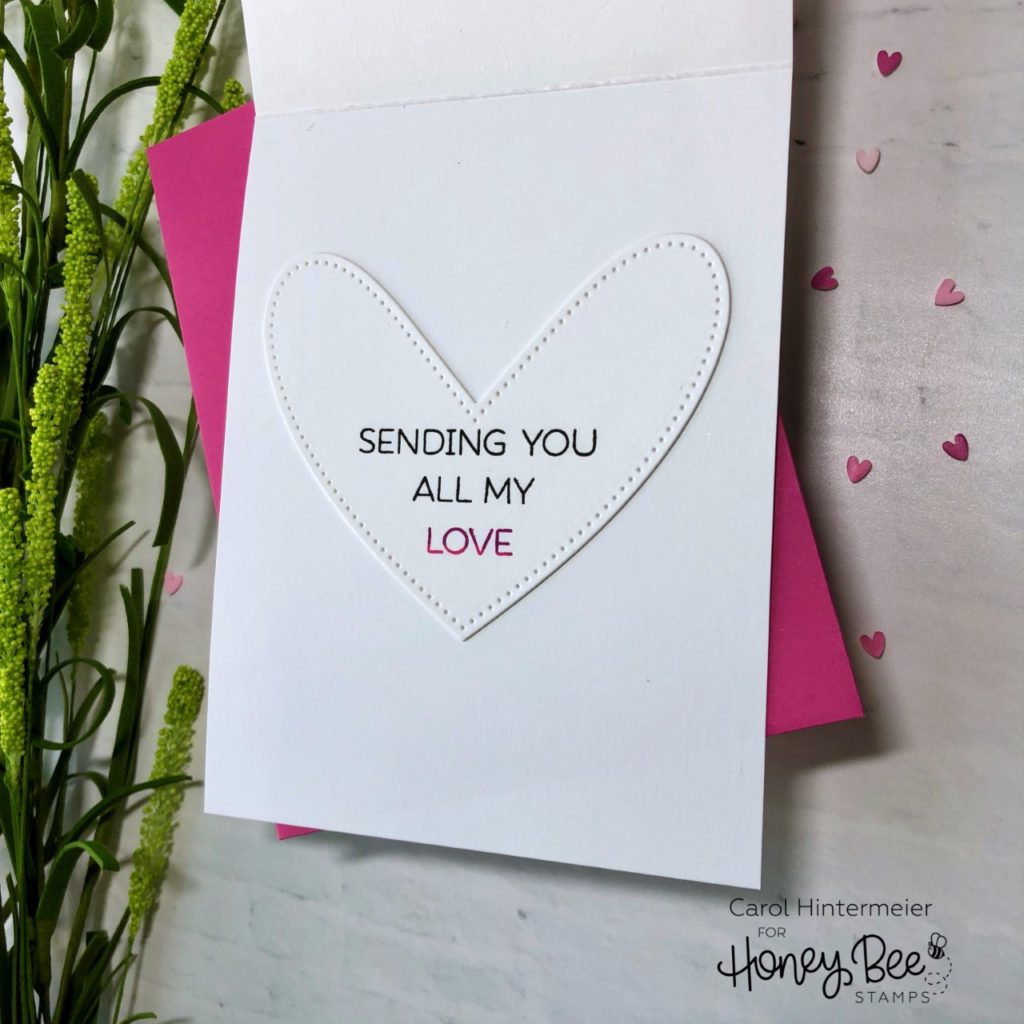
I die cut another Pierced Heart from Neenah Solar White and stamped the sentiments from the Kisses stamp set in Onyx Black ink. For the “Love”, I used a bit of Seedless Preserves and Picked Raspberry Distress Oxide. With the card closed, I adhered this heart through the window onto the inside of the card.

I love how this adds so much to the inside of the card while leaving plenty of room to write a personal note inside.
Of course, I couldn’t let the die cut heart from the previous card go to waste! Here is the final card I made that began from the one die cut of the Fluttering Hearts Cover Plate.
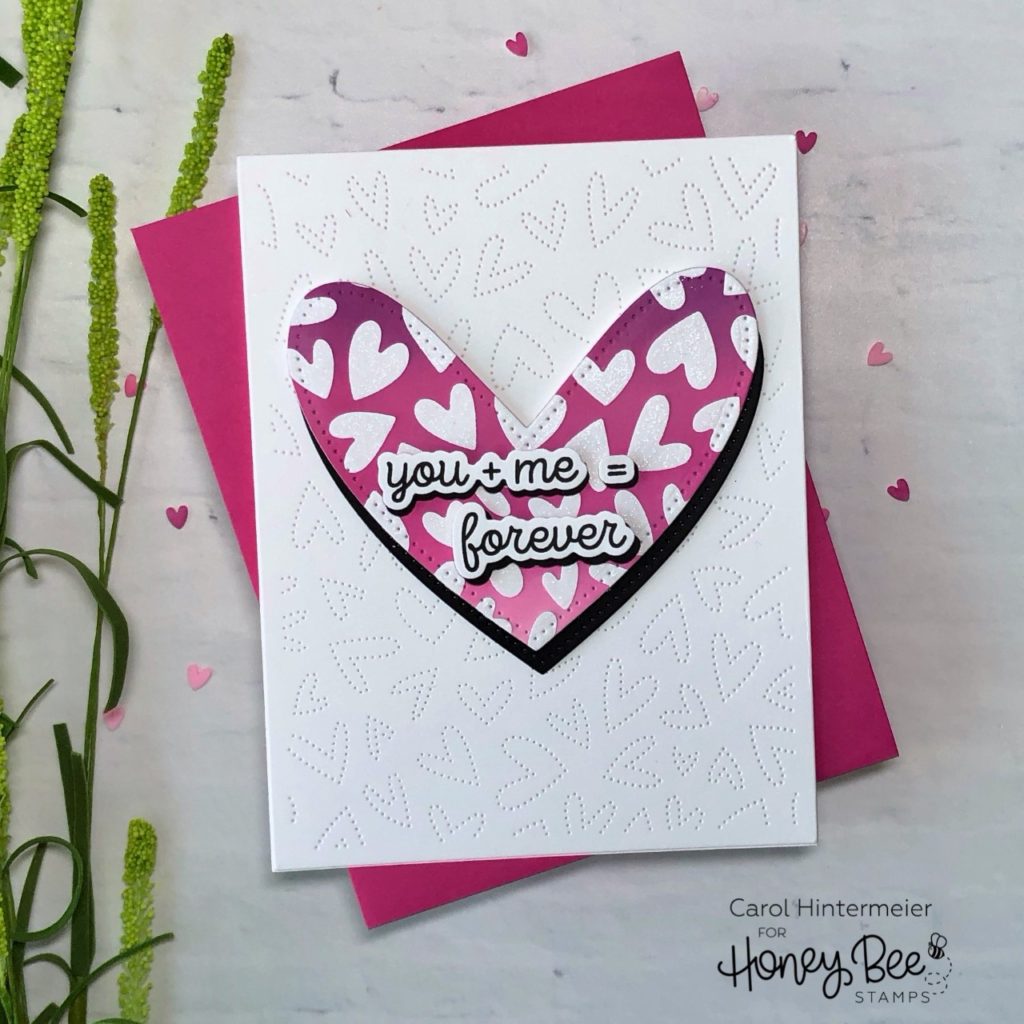
This was very quick to make. I die cut one Fluttering Hearts Pierced Cover Plate from a piece of 80# Neenah. Attach that to an A2 top-folding card base. Die cut one more heart from black card stock and glue it to the back of the heart, slightly offset. I added some thin foam tape to the back of the heart and attached it to the card. I like how the black offset helps the heart to stand out better from the white background.
I stamped the sentiments from the XOXO stamp set and cut them with the coordinating Honey Cuts. Use the dies and cut some black card stock, adhere these to the sentiments, again, offset. I added some foam strips to the back and attached them to the heart. Done!

I hope I’ve inspired you to use a special die and see how far you can make it go! Thank you so much for stopping by today. Have a wonderful, crafty day! Carol