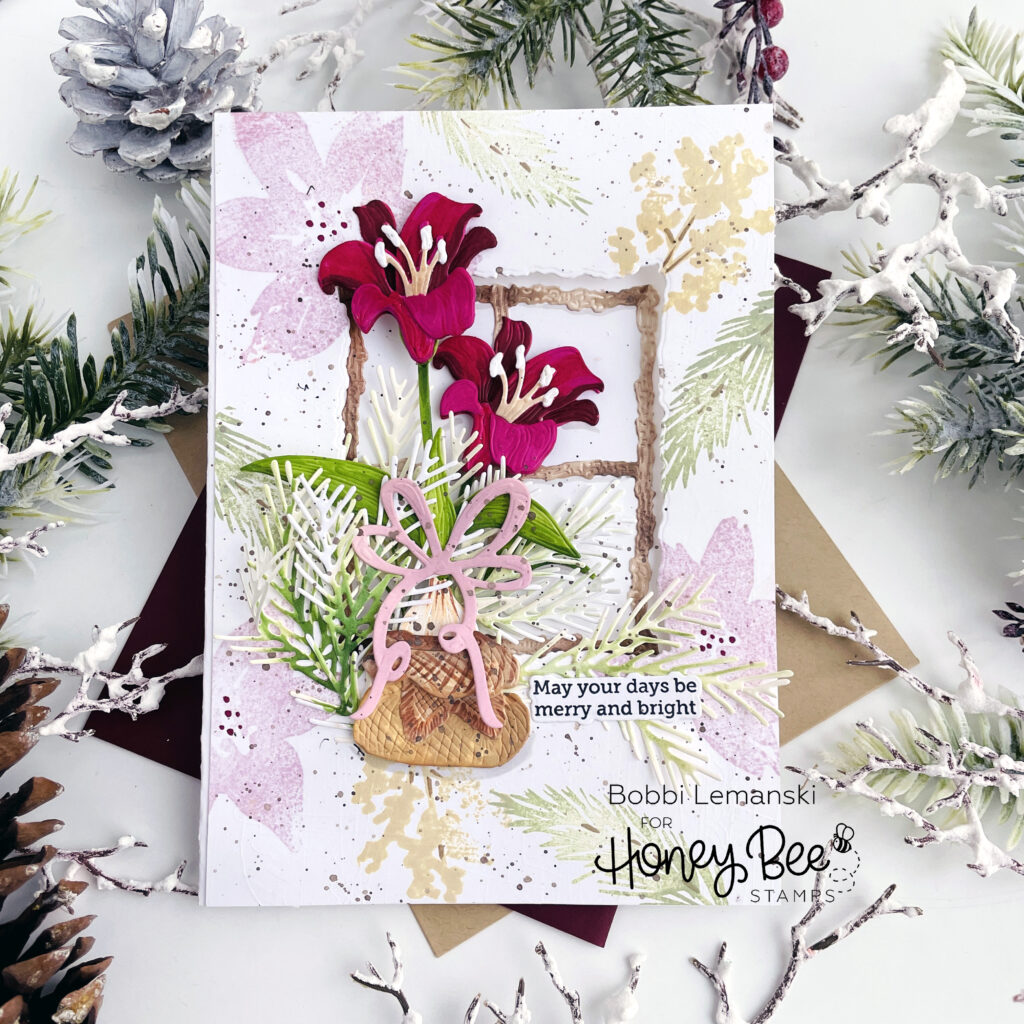
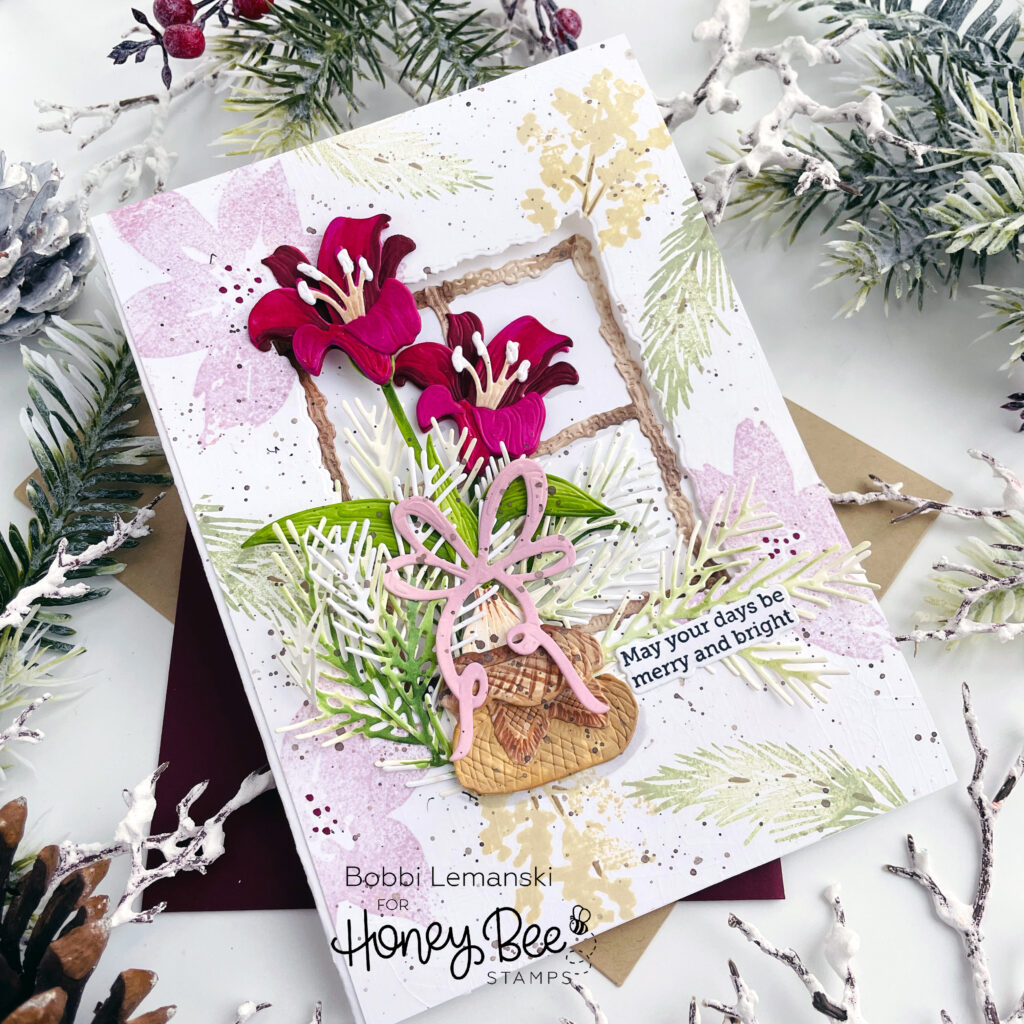
Hello Bee friends. It’s Bobbi here sharing layers of merry and bright today! I’ve got beautiful layered florals, a see-through window and lots of evergreens to bring on the merry and bright in this handmade greeting card. I’m using the following Honey Bee Stamps products:
Lovely Layers: Amaryllis Honey Cuts dies
Lovely Layers: Seasonal Frame – Honey Cuts dies
Lovely Layers: Candy Cane – Honey Cuts dies (for the bow and evergreen sprigs, only)
Heart Be Light stamp set and coordinating Honey Cuts dies
The featured project below is made from Neenah 80lb Solar White cardstock for the card base and card front panel. All of the black ink stamping was done using Honey Bee’s Bee Creative Intense Black Ink. I use Honey Bee Stamps Bee Creative Precision Glue and for when I want more dimension, Bee Creative Foam Dots With Tab for adhering my elements together. My card is 5″ X 7″ in size.
To make this handmade holiday card, I started with Neenah 80lb Solar White cardstock and cut two 5″ wide X 7″ tall pieces and one 5-1/2″ wide X 7″ tall piece. I scored 1/2″ in from the left long side of this piece. This will be the card’s back with a flap for the hinge. I cut the seasonal frame out of the two 5″ X 7″ pieces stacked together. TIP: Stacking the layers and diecutting the window together, ensures a perfect matched pair when assembled. These two pieces will create the “sandwich” to conceal the back’s 1/2″ flap.
I stamped the florals and foliage from the Winter Watercolor stamp set on the card’s front. I used Distress Oxide Ink ink in Milled Lavender for the poinsettias, Antique Linen for the leafy branches, and Bundled Sage for the evergreen branches. I also splattered dark brown watercolor paint over the inked images for a more imperfect, organic look.
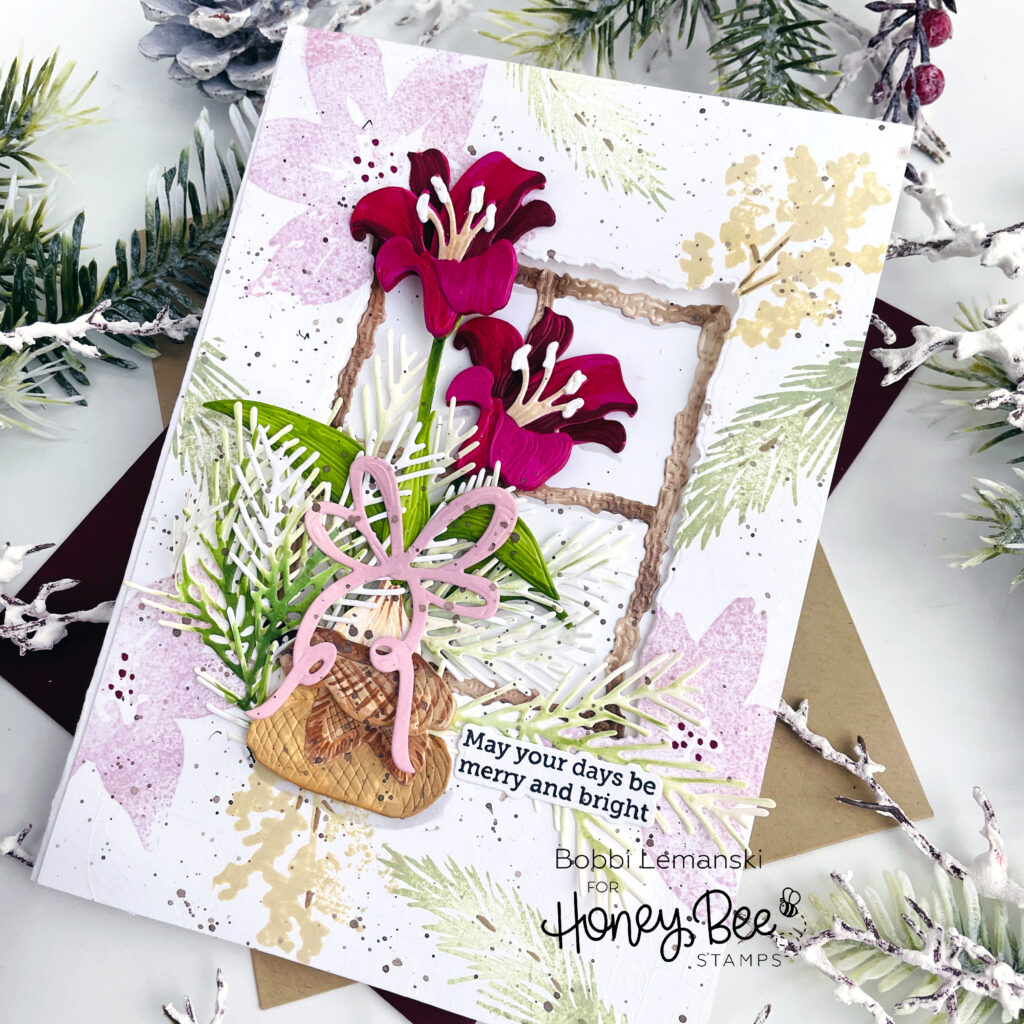
I cut the layers for two amaryllis blossoms, two stems, a set of leaves, a bulb, and the burlap sack. I shaded each layer in the areas that show using red-violet Copic Marker colors and attached the layers together, following the set’s illustration guide. I placed a foam tab between the bottom and next layer to make the blossoms even more dimensional looking. I used Honey Bee Stamps Bee Creative Precision Glue for the other levels. I attached the elements to make one complete blossoming bulb in burlap and then a second blossom, I just added a stem and leaf to the second one. I also colored the seasonal frame in browns. I used Copic Sketch Markers in E43, E44 and E47 to color it.
To assemble the card, I attached the colored seasonal frame to the inside panel of the card, matching it up with the opening on the front panel. I attached the blossoming amaryllis bulb to the front panel, gluing the blossom to the panel, above and below the window opening to secure it. This helps support the tall bulb over the opening. I added a “Milled Lavender” colored bow to the flower’s stem.
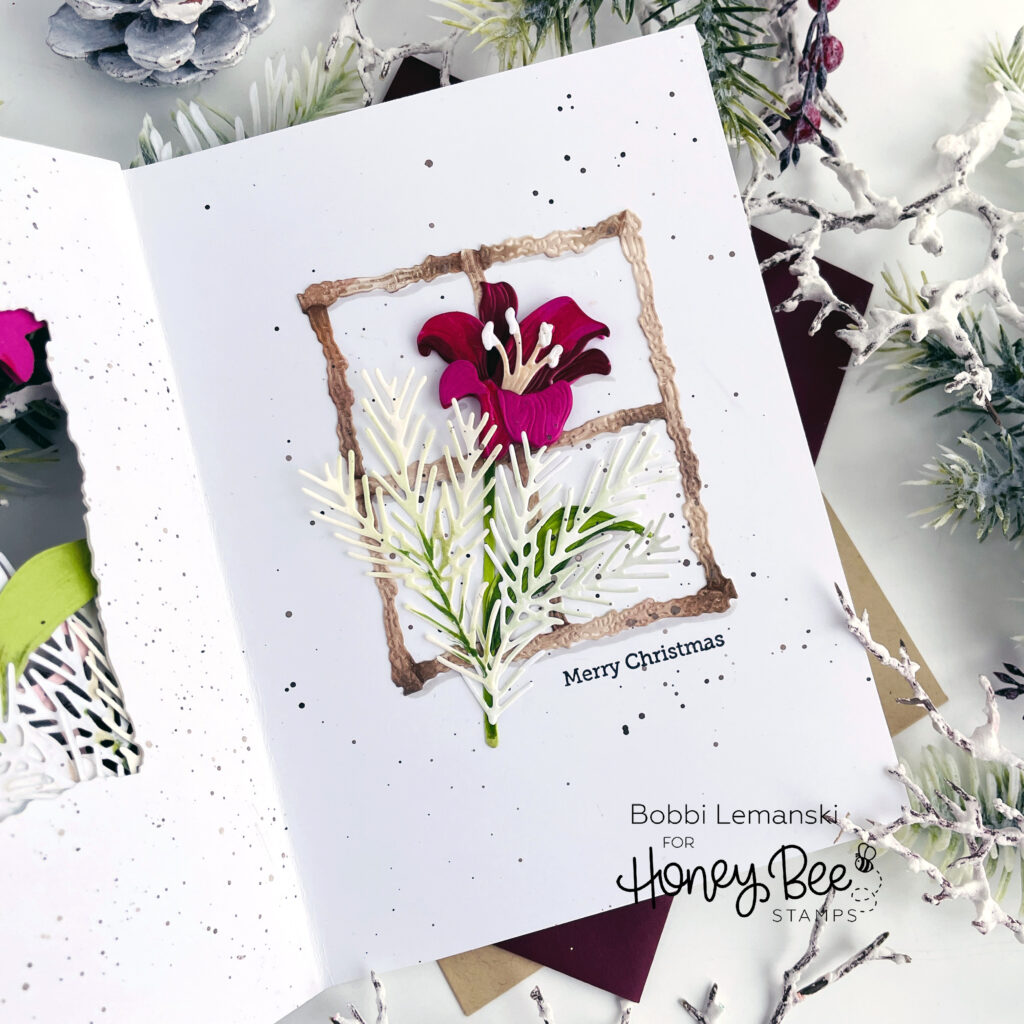
Inside the card, I added the other blossom, positioning it so that it shows through the window when closed. I die cut evergreen branches, colored them using Copics: YG67, YG63, YG61 and YG91 and placed them around the inside stem. I decided I wanted more foliage so I attached more stems around the bulb on the front panel and inside the frame on the inside panel. I splattered watercolor paint on the inside of the card, too.
I stamped “Merry Christmas” underneath the seasonal frame, inside the card. I also stamped the phrase, “May your days be merry and bright” on white cardstock and cut it out using the coordinating die. I attached the sentiment to the front panel. I also attached the front and back together by sliding the hinge flap between the front panel cuts. I attached the flap using double-sided tap on both sides of the flap to secure the back panel.
You can shop the entire Honey Bee Stamps Holiday Wishes Release here. If you decide to place an order, please use the links in this post so that Honey Bee knows which ideas inspired you!
Thanks for stopping by today. If you want to see more ideas and inspiration from me, subscribe to my blog, BobbiHartDesign.com. I’ll send you updates on new posts! You can also find me on Instagram as @BobbiHartDesign and on Facebook as BobbiHartDesign.
One response to “Flowering Amaryllis in the Window”
Simply stunning! ❤️