Hi there! Emily Midgett here with you today, and I have a bit more holiday inspiration for you! I have always loved the book Santa Mouse. It was one of my favorites as a child, and my kiddos love to read it at Christmas, too! As soon as I saw the Merry Little Mice stamp set, I knew that I needed to use it to create a Santa Mouse-themed card. The book is so sweet; a little mouse realizes that Santa might not receive any gifts himself, so he gives him the piece of cheese that he’s been saving for himself all year. So precious, and such a lovely lesson about the spirit of giving! I am loving these flat shaker cards right now, but I decided to change mine up just a tad to incorporate the darling Snow Globe Shaker dies. Let’s get started with the details!

I began by die cutting the components for the Snow Globe Shaker from some white cardstock. I backed the topper with some spare clear stamp packaging. You know, the kind that we normally throw away? I love how light and thin it is for shaker cards… makes the finished card feel so much less bulky! I stamped a tree from Merry Little Mice on the white snow globe base using Honey Bee Stamps’ No Line Coloring Ink and colored it using Copic markers. I also blended a little aqua blue ink around the edges using a blending tool, then added some snowflakes from Merry Little Mice to add some more interest to the background of my snow globe.

Next, I stamped several of the images (including some cheese wedges to create a little tower of cheese to put under the tree!) from Merry Little Mice on some white cardstock using Honey Bee Stamps’ No Line Coloring Ink. I colored the images using my Copic markers. I die cut the colored images using the coordinating Honey Cuts.
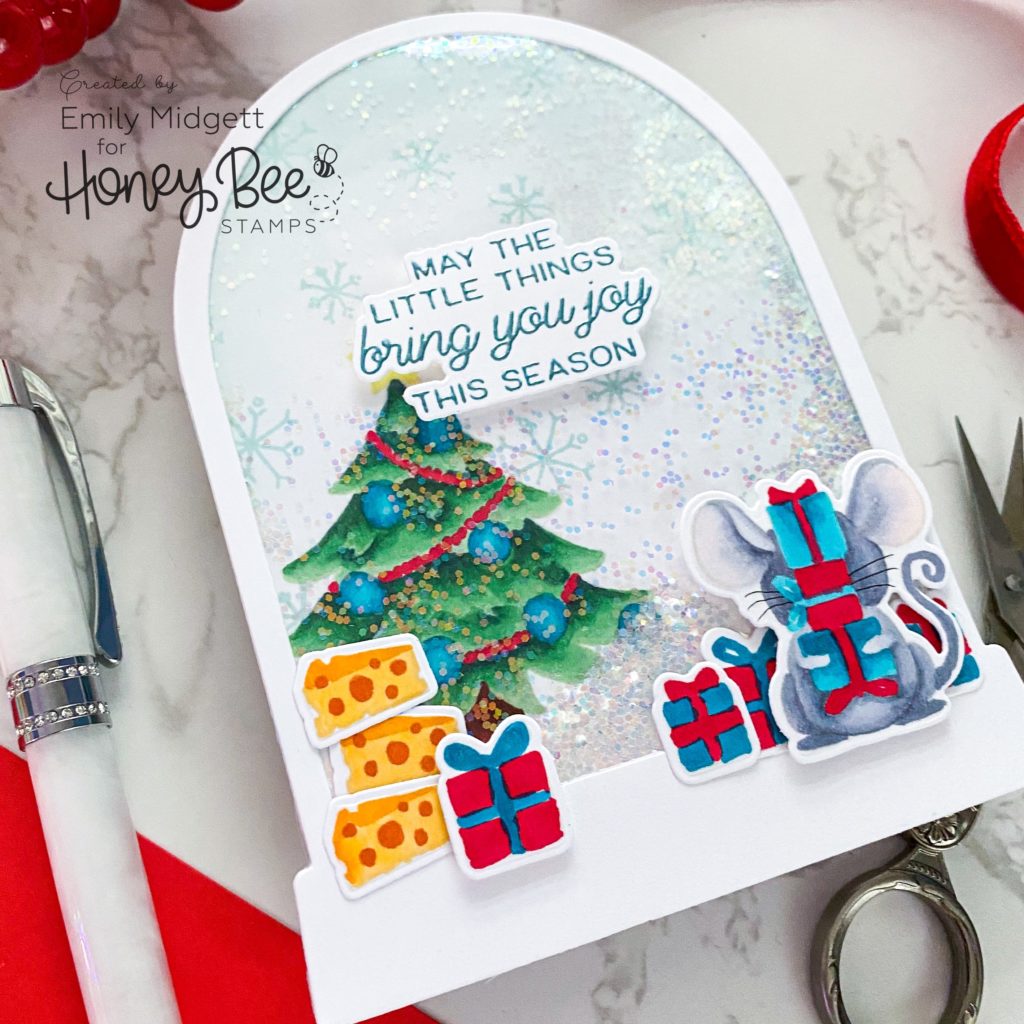
I added strong adhesive tape all around the window of my shaker and removed the release paper everywhere but at the bottom so that I could fill my shaker with sparkly glitter. Once my shaker was filled, I removed the final piece of release paper and sealed it up, then added my colored die cuts (including a teeter-tottery tower of cheese for Santa!) to the front using both liquid and foam adhesive for some extra dimension. Using the strong adhesive tape instead of foam tape makes the card nice and flat and much easier to mail. I added the darling greeting from Merry Christmouse that I stamped with teal pigment ink and embossed with white pearl embossing powder, then die cut using the coordinating Honey Cuts. Finally, I adhered the card front to a shaped card that I created by die cutting a top-folding A2 card using the base of the Snow Globe Shaker die set.
Well, that’s all for my project today! I hope you’ve enjoyed my little trip down memory lane! Santa Mouse is such a sweet book, and if you haven’t read it, I highly encourage you to find a copy. My kiddos always leave a piece of cheese for Santa Mouse when we leave out cookies for Santa, and I love the added magic it adds to Christmas Eve night! Thanks so much for reading, and have a marvelous day.