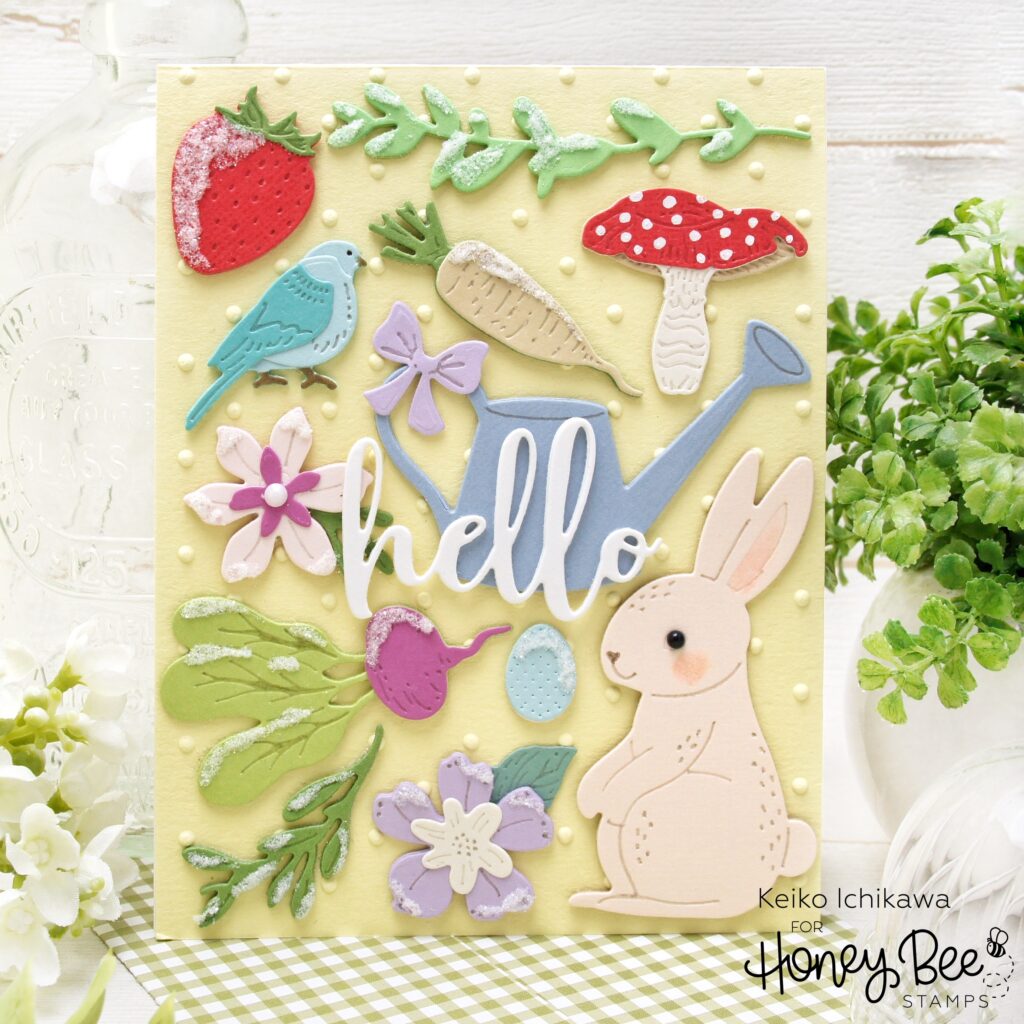
Hello friends! Happy new week! It’s Keiko from Happy Tree Studio and today, I have this die cut only card to share with you all. It is very easy and simple card to put together. All you need to do is die cut and glue! I of course made things little more time consuming by adding details to the die cuts, but they are totally optional!
For the background, I chose pale yellow card stock and used the new Eyelet Lace 3D embossing folder to add these cute polka dots. This embossing folder is perfect to add some subtle texture to your background.
Now the fun part! I went through my entire die collection to pull all the dies that fit the spring theme. I then laid down the dies on my back ground panel to figure out what I need. TIP: I always take a quick picture with my phone so I can easily recreate the layout once all the die cutting is done. Now you can work out these arm muscles by die cutting all the elements. TIP: I chose to do three layers for each die cut but you can always do just one.

You can use absolutely any dies for this design (it would be fun to make a birthday or wedding themed!), but here are the list of the die sets I used:
Bunny Basket (bunny & bow)
Lovely Layers: Garden Veggies (radish)
Lovely Layers: Carrots
Lovely Layers: Strawberries
Lovely Layers: Mushroom
Lovely Layers: Seasonal Frame (bird & greenery)
Lovely Layers: Spring Greenery (long greenery piece)
Whimsical Spring Flowers
Apron Garden Tools Add On (watering can)
Itty Bitty Eggs
Bitty Buzzwords (hello sentiment)
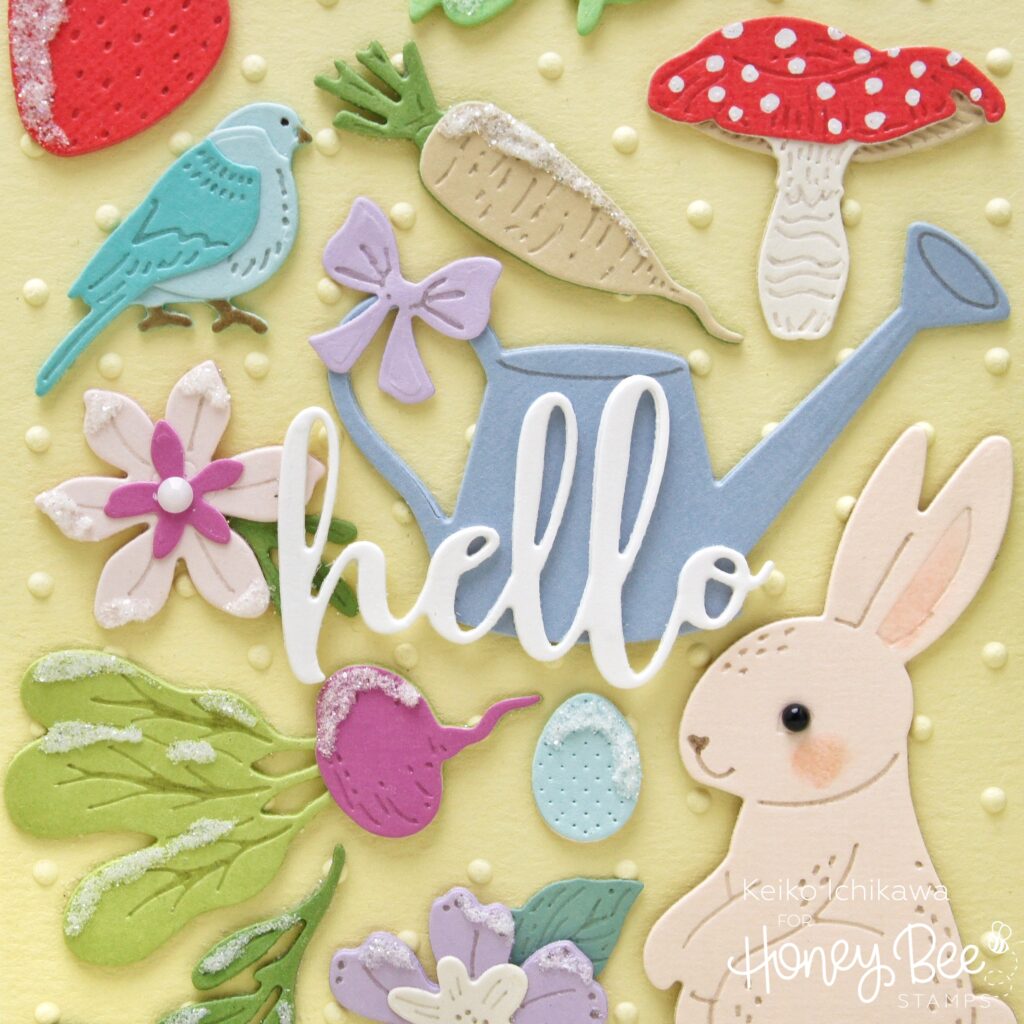
Now you can adhere these die cuts to the panel. TIP: If you use embossing folder for the background, make sure you use strong liquid glue or foam tapes to make sure they won’t come off. The card can be done here but I decided to add some texture and details.
1. Add clear glitter to many of the elements
2. Make the embossed detail stand out by tracing them with a thin gray marker
3. Add white gel pen dots to the mushroom
4. Add a black pearl to the bunny’s eye and white gem to the flower center
These are all pretty simple steps, but I love how these add so much to the finished design!
Thank you so much for stopping by today. Have a wonderful week!
