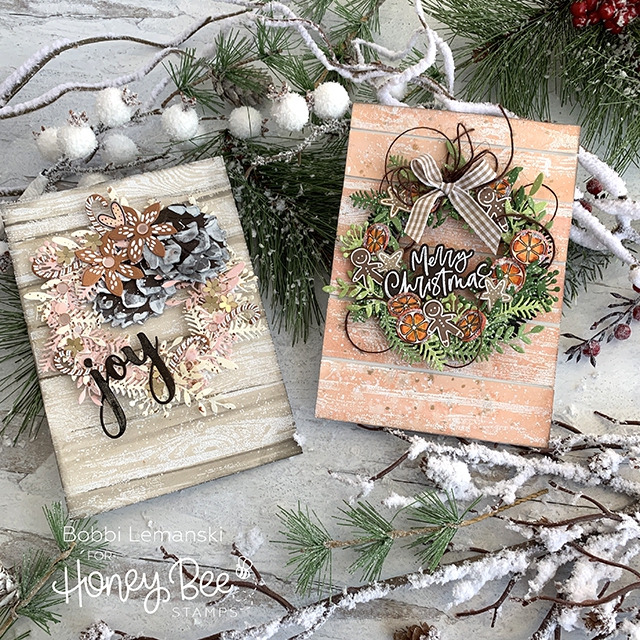
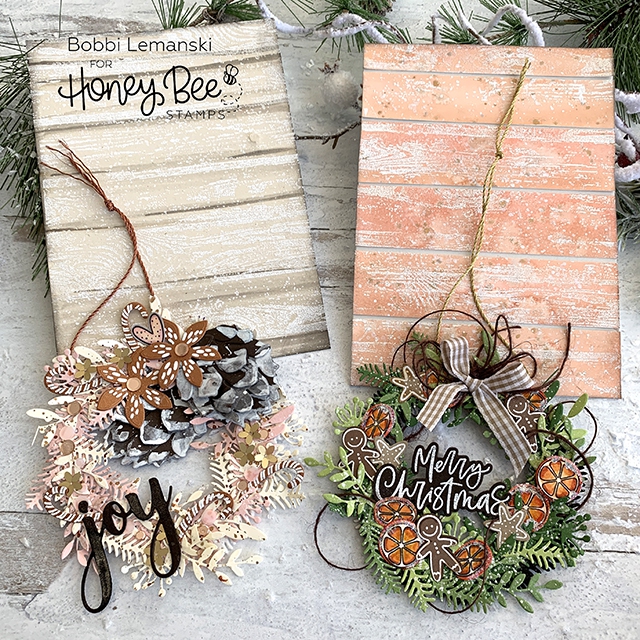
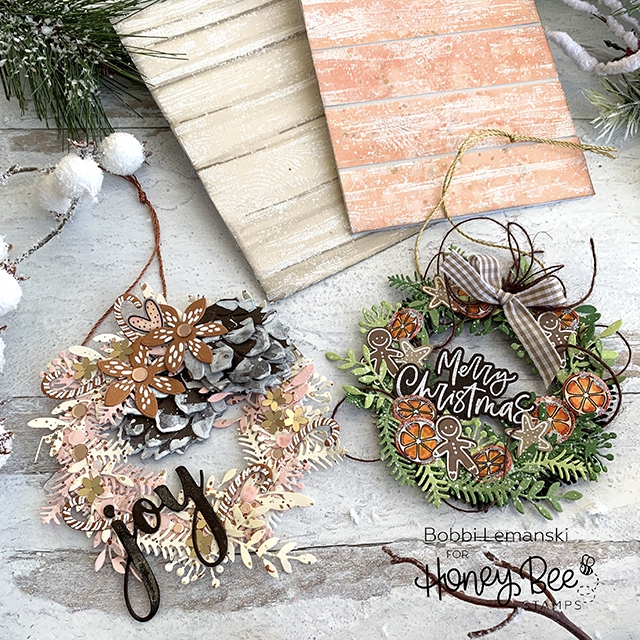
Hey Bee friends, it’s Bobbi Lemanski here with two holiday cards to share using Honey Bee Stamps products from the Holiday Cheer release. What makes these cards unique is that they are convertible. You send them as a card and the recipient can convert them into a tree ornament or holiday gift tag and love them all over again! It makes cardmaking more special when your handmade creations can be reused again instead of being thrown away. This convertible option is easy to do and makes the cards more special. I’m trying out some unconventional color schemes for Christmas. Let me know what you think. 🙂 I’ll be using the following products:
Country Christmas Wreath stamp and die sets
Lovely Layers Pinecone die set
Christmas Dried Orange Wreath
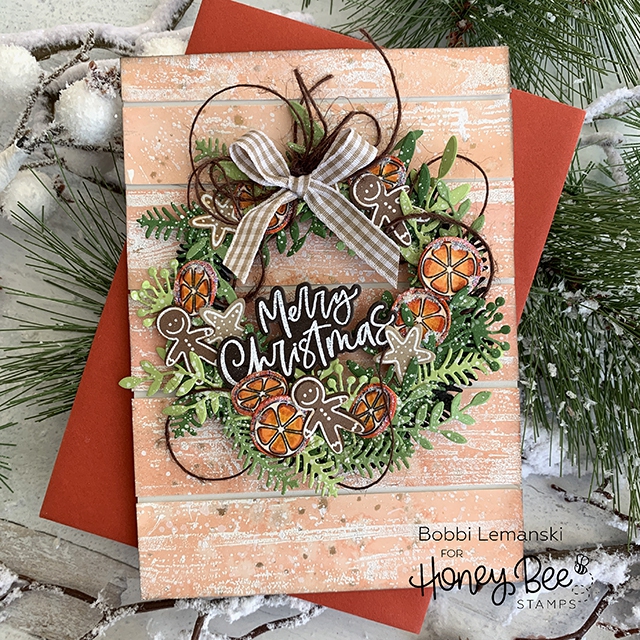
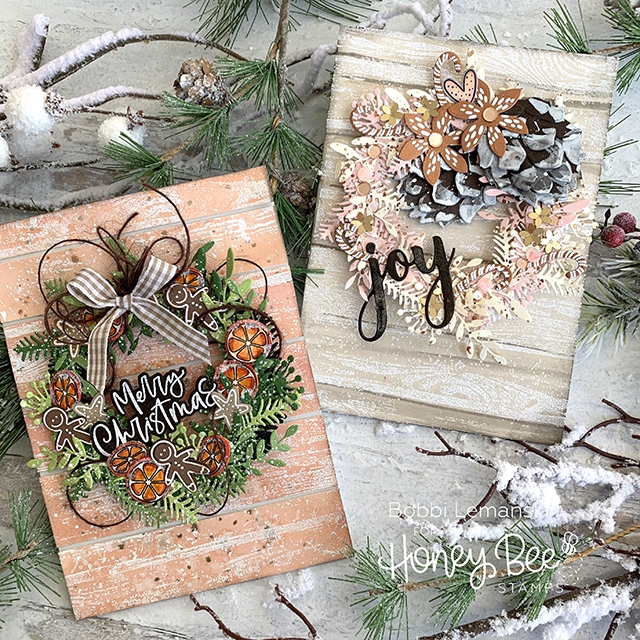
For my first 5″ X 7″ card, the Christmas Country wreath is decorated with dried orange slices, gingerbread and star cookies. I used all the available leafy dies in the set and splattered them with Dr. Marten’s Bleed Proof white paint. The orange slices were stamped, colored using Copics YR09, YR68, YR23 and E51. The gingerbread, star cookies and the “Merry Christmas” were stamped, heat embossed in white on brown and tan cardstock and attached using Precision Glue. I also added glitter to the oranges. I added brown twine and a gingham bow to complete the wreath.
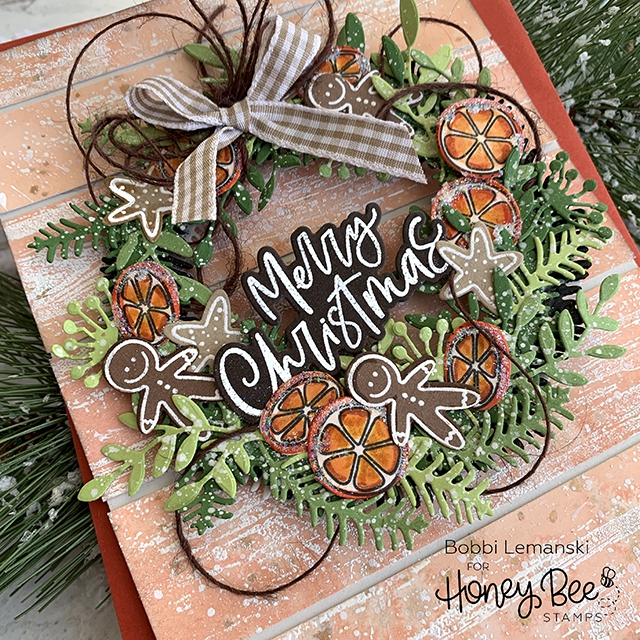
When the wreath was done, I added a 4mm foam wreath base die cut to the back and then layered it with another die cut of white cardstock to create a clean back to add a to/from or message. This allows the wreath to be removed and used as a tag or tree ornament. I think this is a huge differentiator from other wreath sets on the market. You have a full base to work with to do this. It makes it easy to do and creates a nice clean finish. Gold cording was added to the wreath and tucked behind when attached to the card base. This allows the wreath to be hung and/or attached to a gift as a tag.
For the background of my dried orange wreath card, I started by colorwashing the background with watercolor paint on a 5″ X 7″ piece of Canson XL Watercolor paper. I used Kuretake Gansai Tambi watercolor paint in reds and oranges diluted to create this soft orange color. While wet, I splattered water drops on it and then some gold paint to make it splotchy and extra cool! After it dried, I stamped the Barn Wood Background Stamp over the top and embossed in white. I loved the look when it was done. Next, I cut my 5″ X 7″ watercolor sheet into 1-1/4″ tall X 7″ wide strips and adhered them to a warm gray cardstock front panel, allowing a 1/4″ gap between the planks to finish my rustic background. This card front panel was attached to a white card base and the wreath was attached to the rustic card front panel with two simple glue dots to hold it in place. The wreath can be removed easily to use, but stays in place nicely!
Joyful Pinecone Wreath
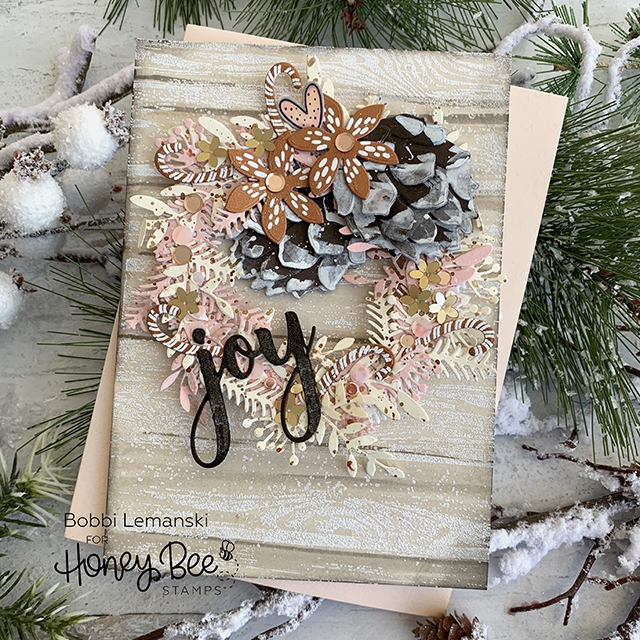
My second card is very similar. I simply used different elements from the Country Christmas Wreath stamp and die sets to accessorize the wreath. The leaves were die cut in ivory and pinks and splattered with copper watercolor paint. The flowers and candy canes were stamped and heat embossed in white on copper metallic cardstock.

Pink Ballet Slippers Confetti Mix pieces were adhered to the front for sparkle. I also added two of the layered pinecones in brown with white painted tips (using Dr. Marten’s Bleed Proof white paint). The Joy word was added and coated in glitter with a Wink of Stella clear brush pen for sparkle.
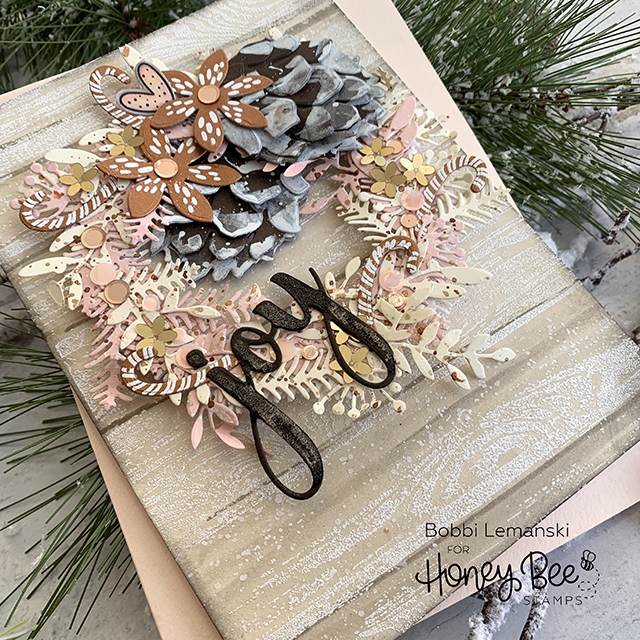
I added the foam and white backing as well as a cording to the wreath and tucked the cording to the back. The wreath was attached to the background using glue dots so it could be removed.
The create the background for the Joy card, I used a natural ivory cardstock and heat embossed the Barn Wood Background Stamp in white. I added additional coloring to the graining using my Copics in W6, W4, W3 and W1. to create the look. I love how it turned out. The added color adds even more interest and dimension to the look.
I hope you enjoyed these convertible cards. Try this idea out today. Head to Honey Bee Stamps and get the supplies to make these fun wreaths! Make sure to add a note inside your card so your recipient knows to detach and reuse the wreath again!
Thanks for stopping by today. If you want to see more ideas and inspiration from me, subscribe to my blog, BobbiHartDesign.com. I’ll send you updates on new posts! You can also find me on Instagram as @BobbiHartDesign and on Facebook as BobbiHartDesign.
Bobbi Hartmann Lemanski, Bobbi Hart♥ Design, Adding h♥art into every design
6 responses to “More to Love With Convertible Holiday Cards”
Love the idea of an ornament/card
— Dalis
What a great idea and such beautiful cards!
Love these cards! So talented and inspirational! ♡♡
The wreaths are gorgeous, and so are the backgrounds! Thank you for sharing how you made these.
These are really beautiful cards. There is so much to see when you look at them.
These cards are amazing. I love the textures, the colors, and the warm vibes they create.