Hello!! Brenda here sharing a fun shaker card with you today!! I am always drawn to the lantern snow globes that are found in the stores at this time every year!! When I saw the goodies from the new Holiday Cheer Release, this idea immediately popped into my head!! I’ll create a lantern snow globe for the front of a card!! I LOVE it when inspiration strikes, don’t you? Let’s get started!!
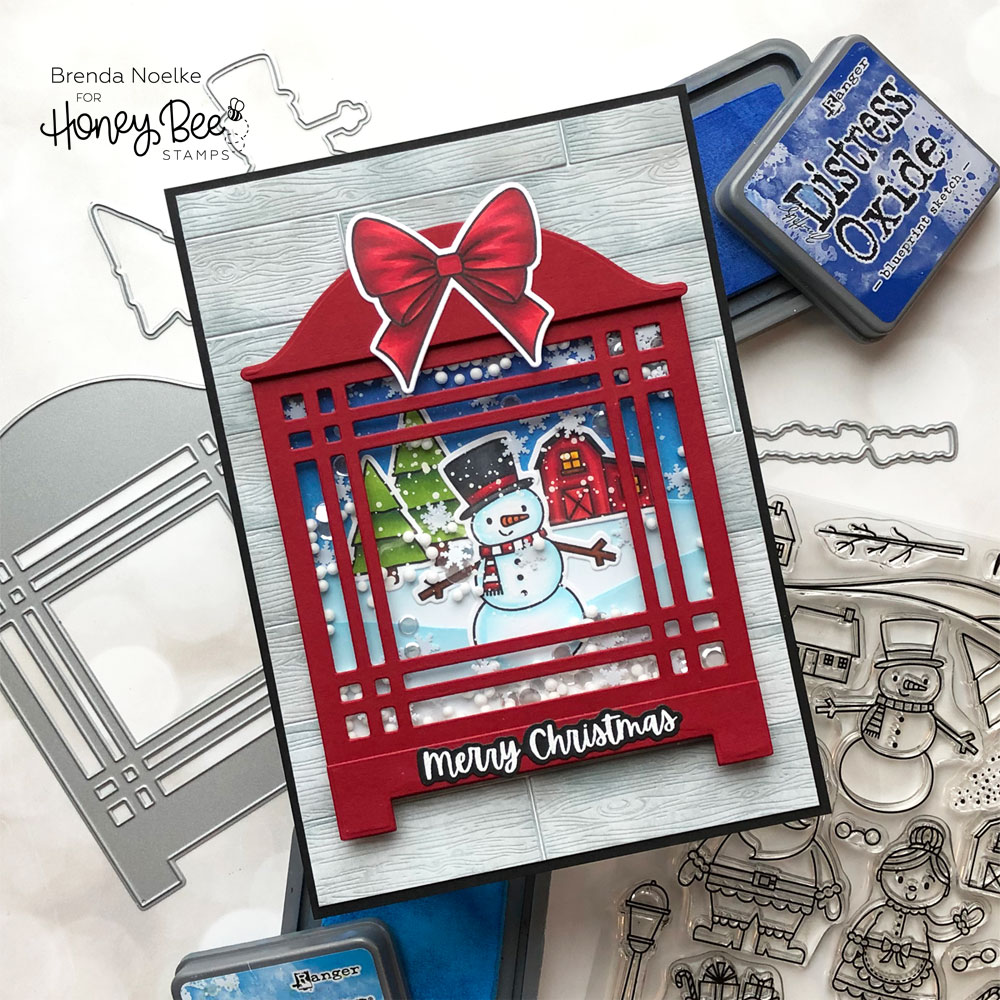
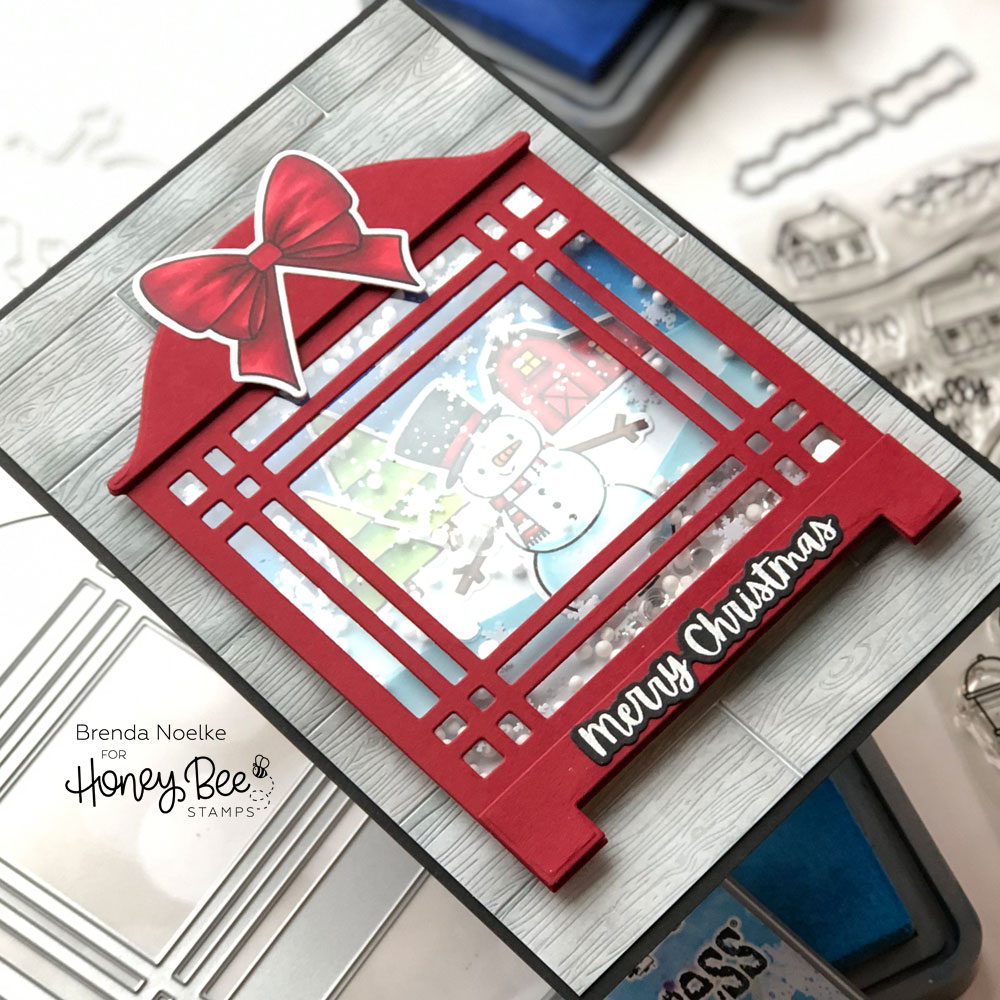
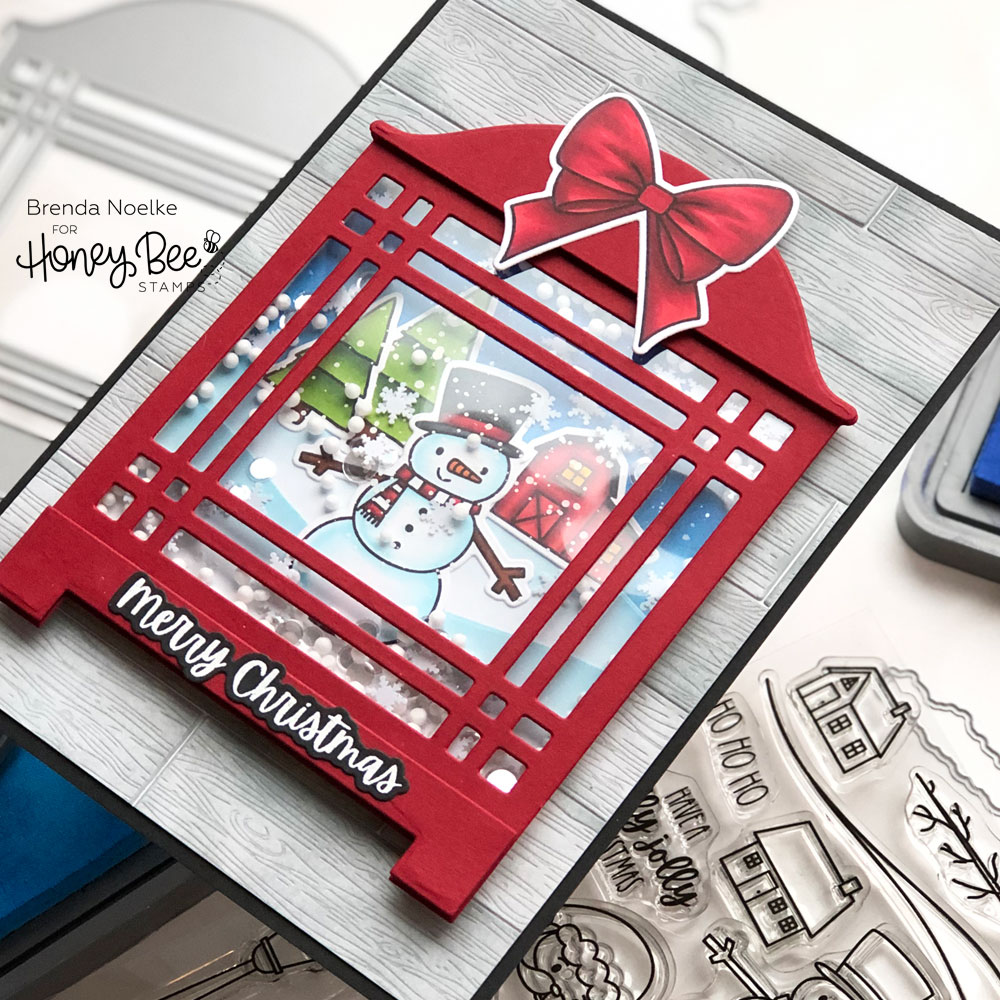
I began by working on the background of the shaker. I used the Lantern Builder A2 Honey Cuts, traced around the outside onto a panel of bristol cardstock and cut it out by hand. I ink blended Salty Ocean and Blueprint Sketch Distress Oxide Inks onto the panel, then splattered it with Perfect Pearls and diluted white gouache. I used the hill dies in the Santa’s Village Dies to cut two snowbanks from white cardstock and blended some Tumbled Glass Distress Oxide Ink onto the top edges. Next, the Lantern Builder A2 Dies were used to die-cut the elements of the lantern from red cardstock.

The snowman, barn & trees are from the Santa’s Village stamp set. They were stamped onto white cardstock with InkOn3 Blackout Ink, colored with Copics and cut out with the Coordinating Dies. I also splattered these with white gouache to resemble snowfall. All of the die-cuts were adhered to the background.
I adhered an acetate sheet to the back of the lantern die-cut with Score Tape, then added a double layer of foam adhesive. Snowball Shaker Bits, Snowflakes Confetti ( sorry, these were discontinued) and Bokeh Lights Confetti mixes were added for the shaker element and the background was adhered. I added the additional pieces of the lantern with foam tape.
The Lantern Builder A2 Dies are perfectly sized to fit into an A2 size envelope. However, I wanted to add it to a larger 5″ x7″ card. I cut the Barn Wood Planks Honey Cuts from white cardstock, then blended Weathered Wood and Hickory Smoke Distress Inks onto them with Blending Brushes. I placed them on white cardstock, leaving a tiny bit of space between them. I trimmed the panel slightly smaller than 5″ x 7′ and adhered it to a 5″ x 7″ panel of black cardstock, before adding it to a white cardbase. The lantern was adhered to the front of the wood planked panel.
The sentiment, also from Santa’s Village, was white heat embossed onto black cardstock, cut out with the Coordinating Dies, then adhered to the bottom of the lantern. To finish off the top of the lantern, I stamped a bow from the No Peeking stamp set, colored it with Copics and cut it out with the Coordinating Honey Cut.
I am IN LOVE with how this turned out!! Although there are quite a few steps involved, I think it was totally worth it!! How about you?!?
Thanks for stopping by today!! Have a great week and I’ll see you soon!!
2 responses to “Christmas Lantern Snow Globe”
Love this Christmas Lantern Snow Globe! Awesome card and die! Lots of possibilities with this!
The size of the lantern is so great. I can think of many ways to make this festive…