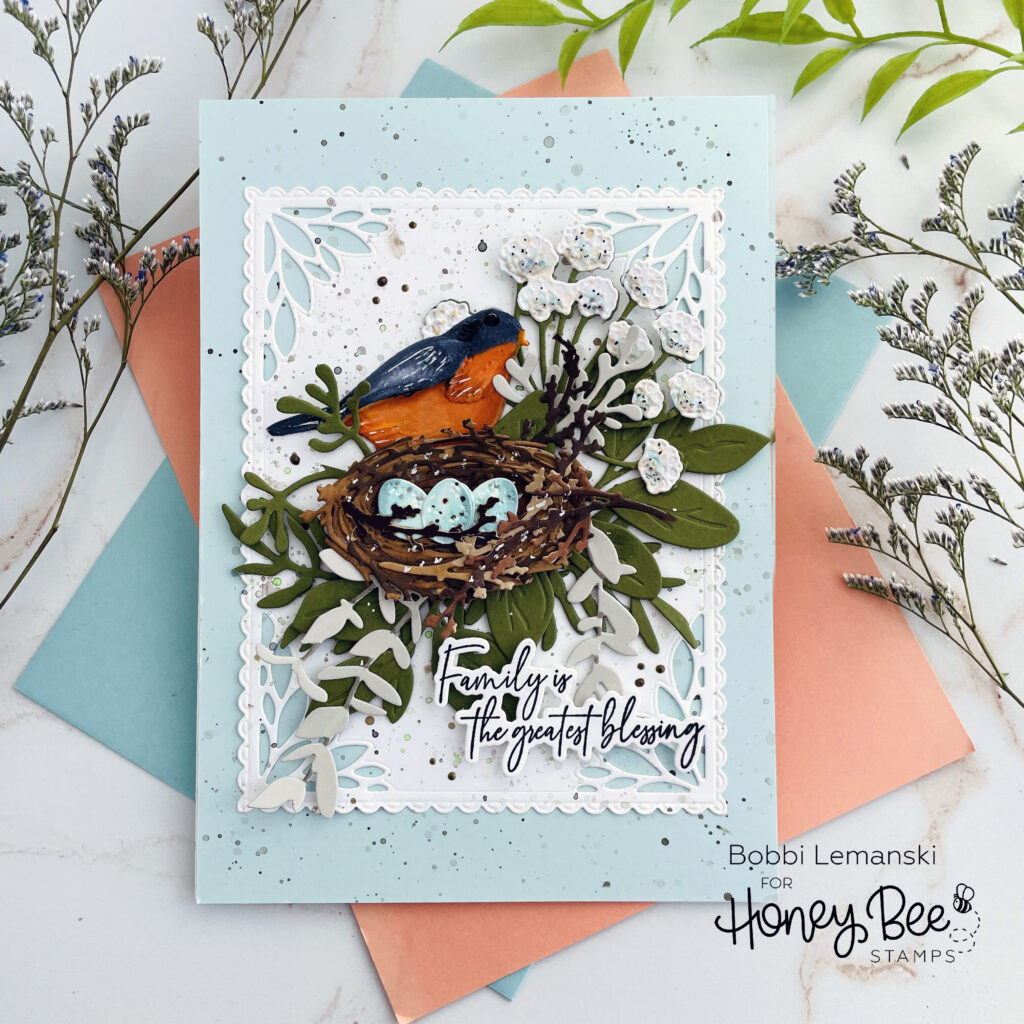
Hello Bee friends. It’s Bobbi Lemanski here with a card featuring several Lovely Layers products in the Honey Bee Stamps products lineup. I love this bird and cute nest. Both are intricately designed with layers of textural cuts. They become beautiful elements for any papercrafting project. I have a quick reel to show how I made my bird’s nest on Instagram here. My card features the following Honey Bee Stamps products:
Lovely Layers: Nest Honey Cuts dies
Lovely Layers: Spring Birds Honey Cuts dies
Lovely Layers: Spring Greenery Honey Cuts dies
No Place Like Home stamp set and coordinating dies
Spring Vine Layering Frames Honey Cuts dies
The featured project below is made from Neenah 80lb Solar White cardstock for the card base. All of the black ink stamping was done using Honey Bee’s Bee Creative Intense Black Ink. I use Honey Bee Stamps Bee Creative Precision Glue and for when I want more dimension, Bee Creative Foam Dots With Tab for adhering my elements together. My card is 5″ X 7″ in size.
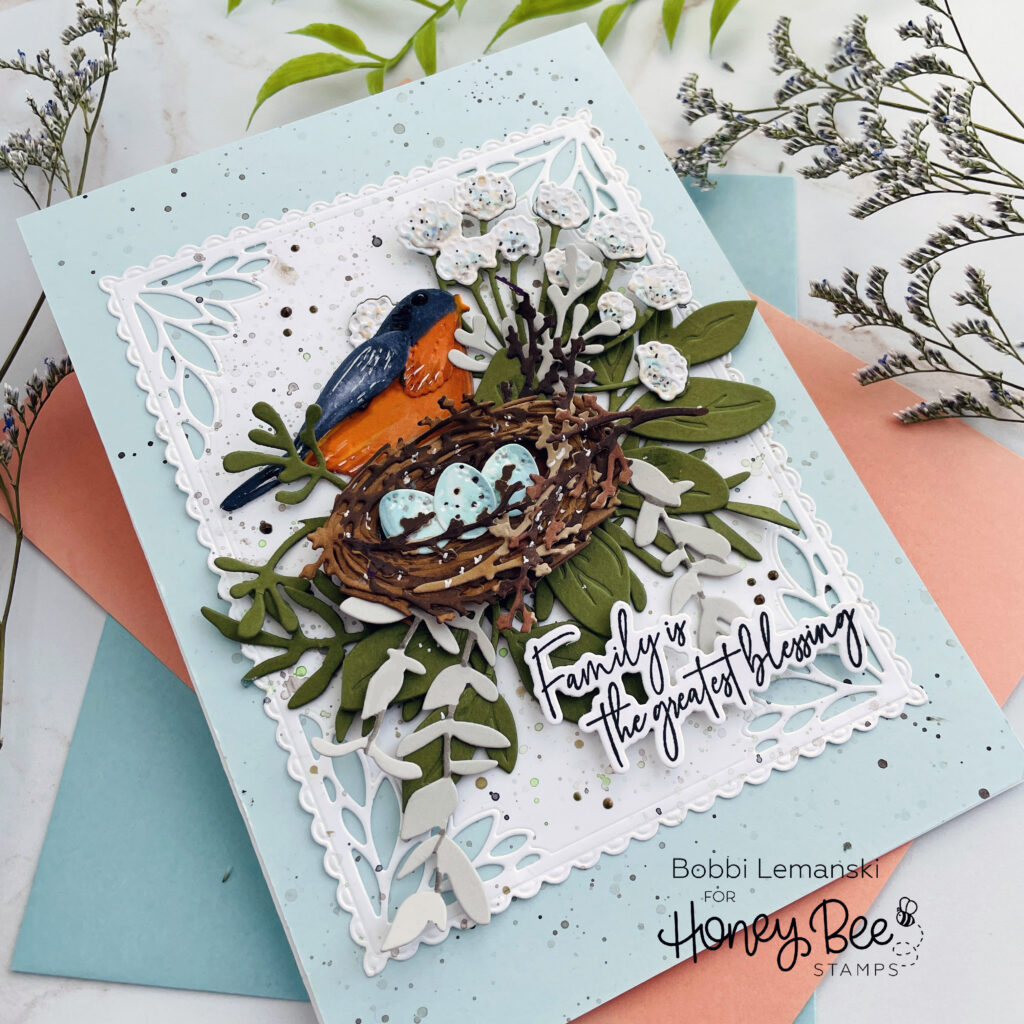
To make this 5″ X 7″ card, I cut the leafy corner design layer from white cardstock using the Spring Vine Layering Frames Honey Cuts dies I also cut a front panel from a light powder blue cardstock. I splattered both layers with black watercolor paint for a speckled look to match a robin’s eggs.
Next, I cut the layers of the nest, bird and the greeneries. This nest is really fun to make. Here’s a link to my 90 second reel where I make the nest. The bird and greens complement the nest perfectly. I added a little color to all of them using Copic Markers. Here’s the list of colors I used:
- Nest: E57, E55, E43 (speckled with white ink and black watercolor paint)
- Robin: 100, C9, C7, C5, C1, YR07, YR68, YR 61, Y38 and white Gelly Roll pen
- Flowers/Greens: B00, W4, W2, W1 and a black fine-tip marker
- Eggs: B00, B000 (speckled with white ink and black watercolor paint)
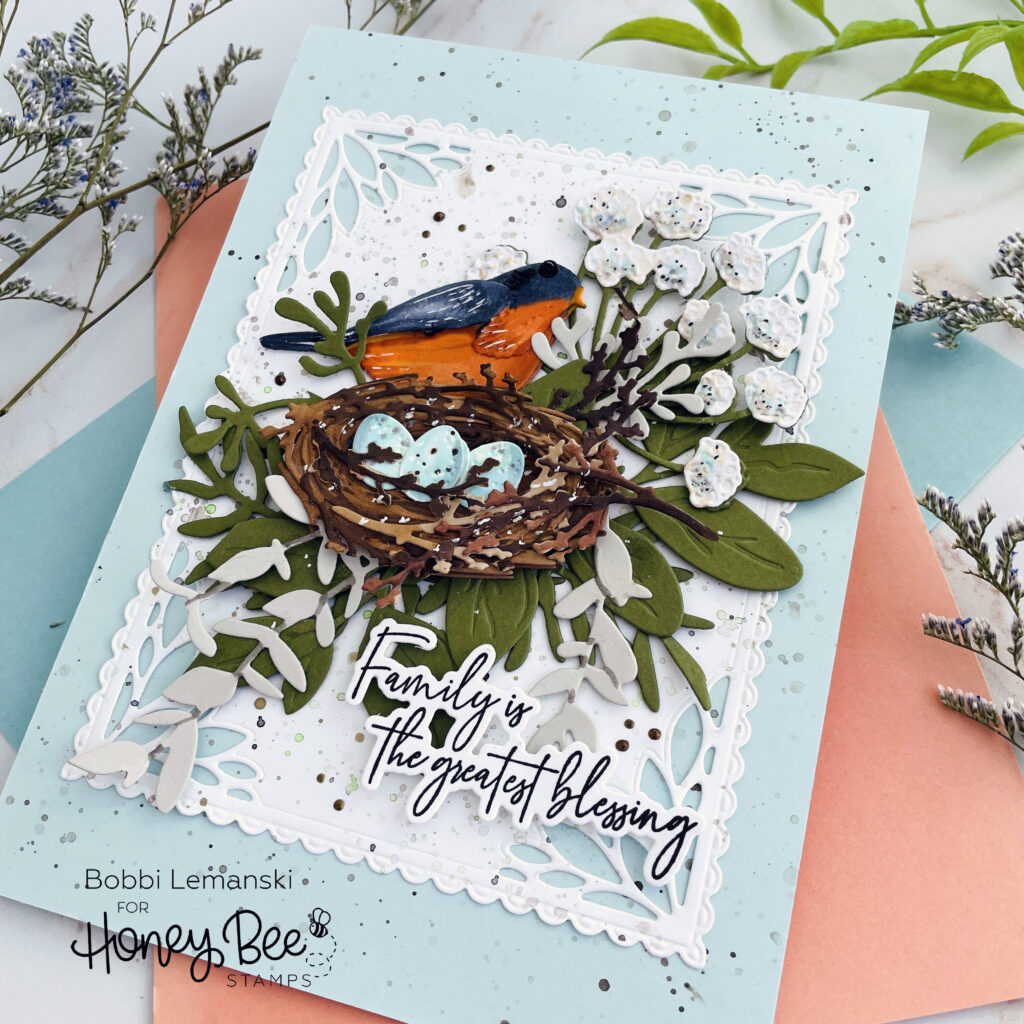
I assembled the nest, bird and greens, and arranged them over the blue front panel and white frame layer. The nest and eggs are three-dimensional. I used foam tabs to piece the layers together to make them stand out. Lastly, I stamped and cut the sentiment and attached it using foam tabs.
Thanks for stopping by today. If you want to see more ideas and inspiration from me, subscribe to my blog, BobbiHartDesign.com. I’ll send you updates on new posts! You can also find me on Instagram as @BobbiHartDesign and on Facebook as BobbiHartDesign.