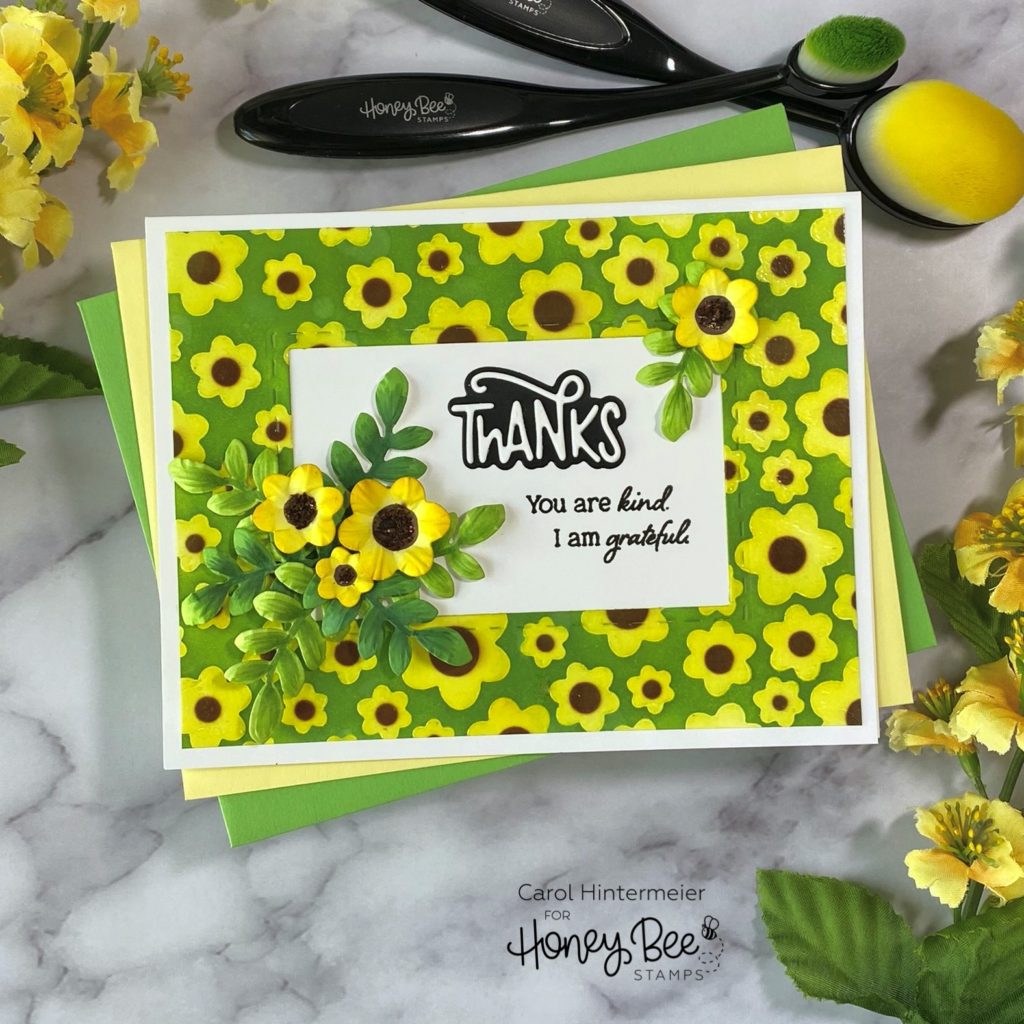
Hello Honey Bee friends! If you don’t know, I love bright colors, stenciling, and texture paste and this cheerful card sure covers all of that! I’ve used the awesome Flower Builder background stencils for my card, along with a few other stamp and die sets.
Here are the steps for the stenciled background:
- First, I sprayed the back of both stencils from the Flower Builder background stencil set with Pixie Spray. This makes stenciling SO easy–no taping needed!
- Then I put the flower petal stencil onto a piece of Neenah Solar White card stock and blended Squeezed Lemonade Distress Oxide with a Background Blender brush.
- Next I lined up the flower center stencil. These stencils have etched lines on them that are A2 sized and make it very easy to line up the layers. I inked Ground Espresso Distress Oxide with a blender brush.
- The next step is to put the flower petal stencil over the flowers and then spread some clear glossy texture paste through the stencil. I used some that I’ve had in my stash forever!
- Set this aside to dry.
- When the piece was dry, I used a blender brush and green ink from my stash to color the background. How fun is it that the clear texture paste resists the ink?! Once I finished the inking, I used a dry clean towel to buff the green ink off of the flowers.
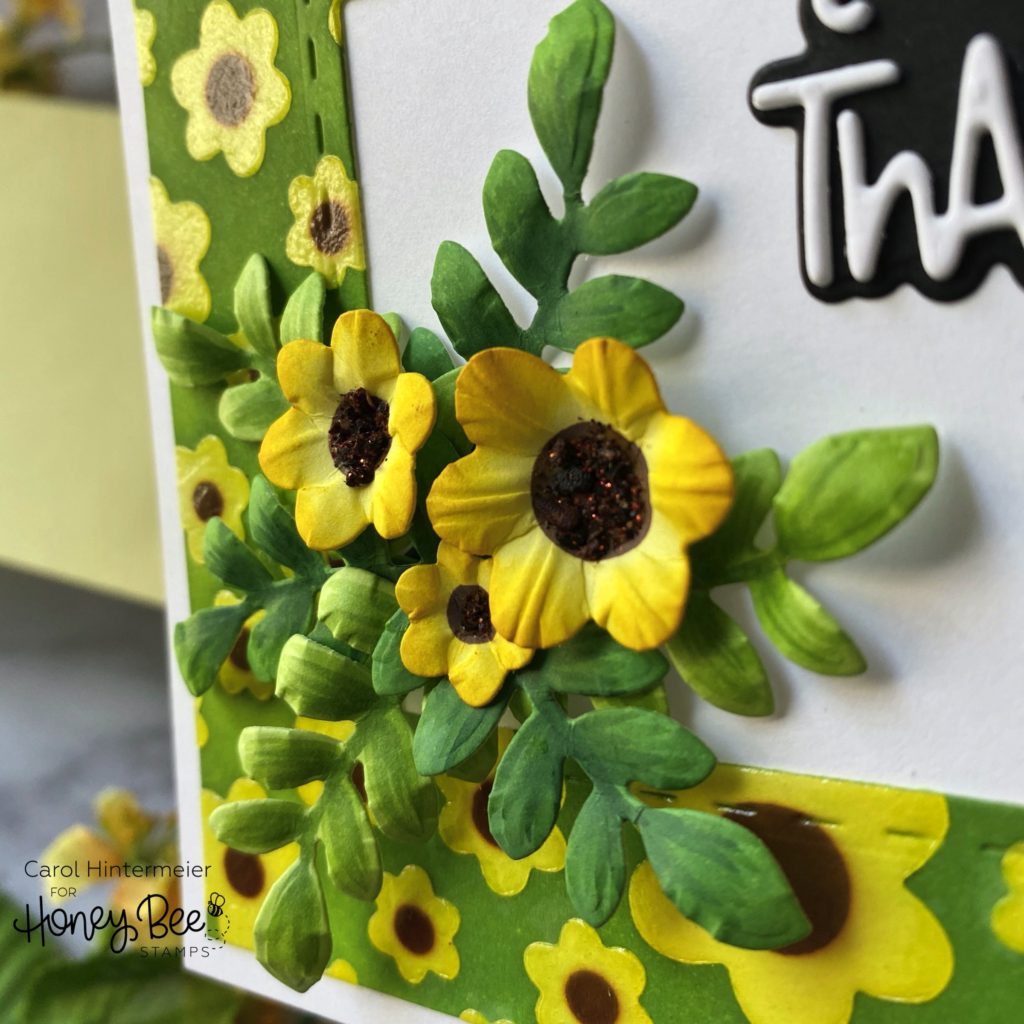
For the dimensional flowers, I repeated the stenciling steps above with the Distress Oxide inks, but no texture paste this time. I lined up the Flower Petal Cover Plate Honey Cut with the flowers and ran it through my die cutting machine. I picked out a few flowers to use and inked up the edges of them with Mustard Seed Distress Oxide for some dimension. Then I used some flower shaping tools to form them into a cupped shape. I used a leafy branch die from the Spring Bouquets Honey Cuts to die cut several branches from white card stock. I used my Copics to color them to coordinate and shaped them with the flower shaping tools. I found some brown sparkly stuff in my stash and added it to the centers for a touch of sparkle. (Apologies that I have no idea where this came from!)
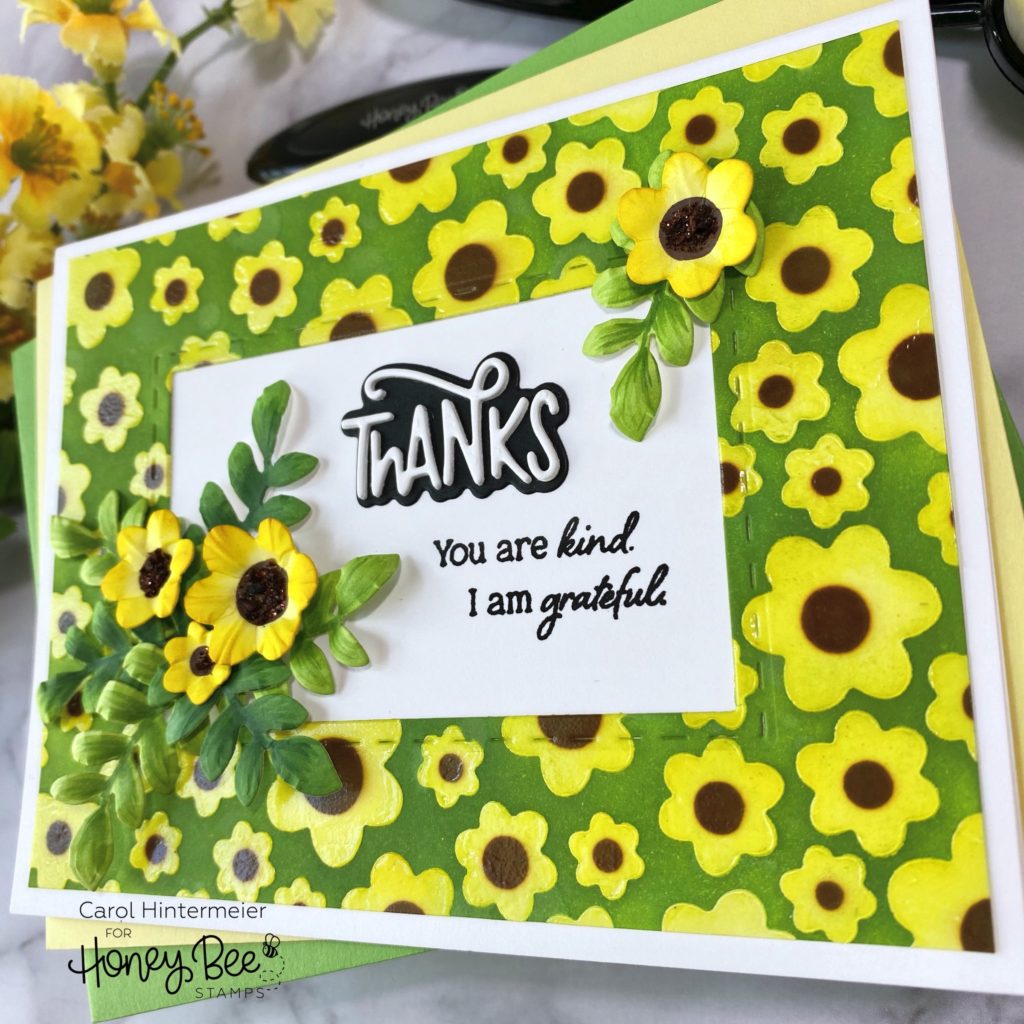
To assemble the card, I trimmed the stenciled piece to a 5-¼” x 4″ and die cut a rectangle in the center of it with an A2 Double Stitched Frames Honey Cut. Adhere this to a top folding card base. I die cut a sentiment from the Grateful Heart Honey Cuts cutting the “thanks” three times from white card stock and adhered the layers together. I die cut the shadow from black card stock and adhered the letters to it. I love this die and the beautiful font! Before I adhered the leaves, flowers and Thanks, I needed to position them all so I could decide where to stamp the rest of the sentiment. After I arranged them, without gluing, I took a photo of my arrangement to remember it. Then I did “stamp surgery” on the sentiment from the Grateful Heart stamp set and positioned those. I set the card in my MISTI, removed the floral pieces, and picked up the stamps with the MISTI door. I used Versafine Onyx Black ink to stamp it.
Now it’s just a matter of using the photo and adhering the flowers, leaves, and Thanks into place–I could have fiddled with this for a long time–LOL! I was happy I remembered to take a photo and need to remember to do this more often!
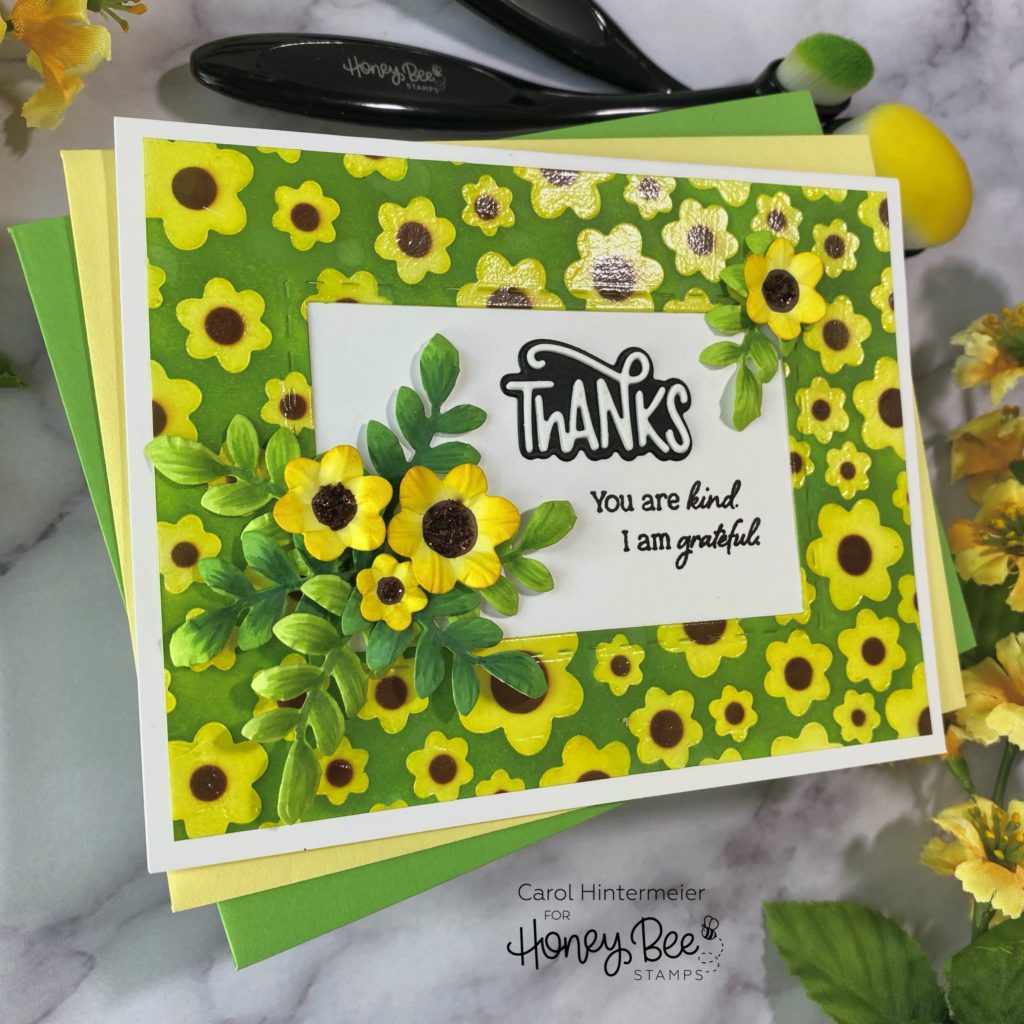
I hope you’ve enjoyed my bright and cheerful card today and that you will give these fabulous stencils a try! Thank you for stopping by today–stay safe, and crafty!!
One response to “Bright and Cheery Thank You!”
I love the idea to use the clear glossy texture paste! I always use it to adere sequins never really wanted to need around with it. Always think it’s messy. I love how bright and cheery this is.