Happy Mother’s Day! It’s Bobbi Lemanski here wishing all of you who care for others, a very happy and relaxing day! I’m sending out a box full of happiness to all of you, hoping it will make your day even brighter! My card includes a pop-out feature using the Surprise Box die. I’m using the following Honey Bee Stamps products:
A2 Surprise Box Card Base die set
Love Enclosed stamp and die sets
Flower Petal Cover Plate (for the flower die cuts, only)
Rainbow Wishes stamp and die sets
Birthday Bash 6″ X 6″ pattern paper pad
Spring Bouquets die set (for the leaves, only)
Let’s make this card!
Card Front: Envelope and Card
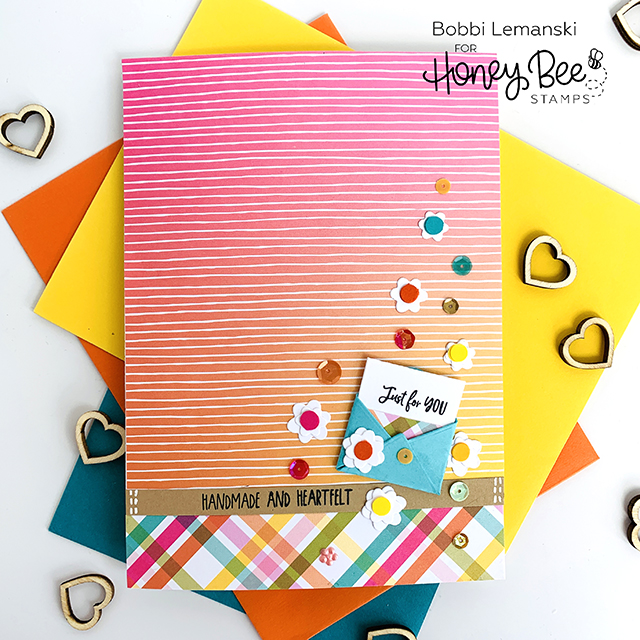
First, we’ll start with the card front. I kept this simple, using 6″ X 6″ pattern papers from the Birthday Bash paper pad. This is a 5″ X 7″ card size so one sheet will not cover the entire front panel. I used two coordinating prints instead. I also added a strip of kraft-colored cardstock to unite the front with the box inside.
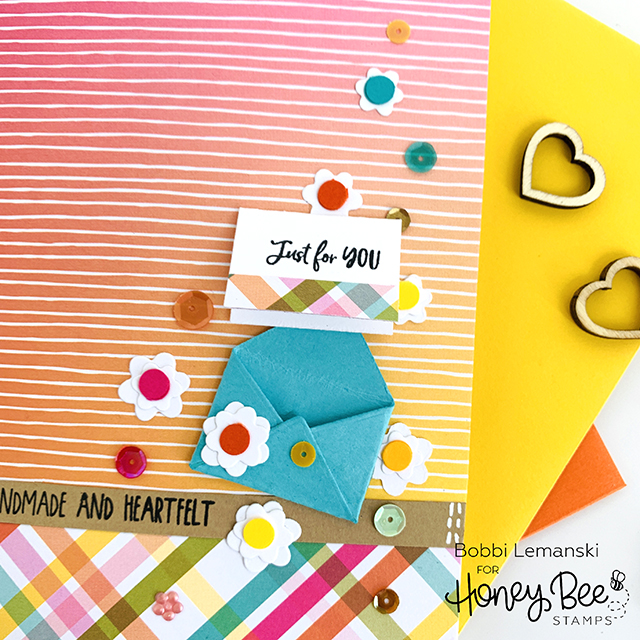
The sweet envelope and card set from the Love Enclosed die set was added to the front. Notice my little note card inside also uses the plaid paper, too. 🙂 I stamped a message on the kraft strip, and in the inside and outside of the note card using the Angel Policy stamp set. I love this set for these tiny little messages. 🙂
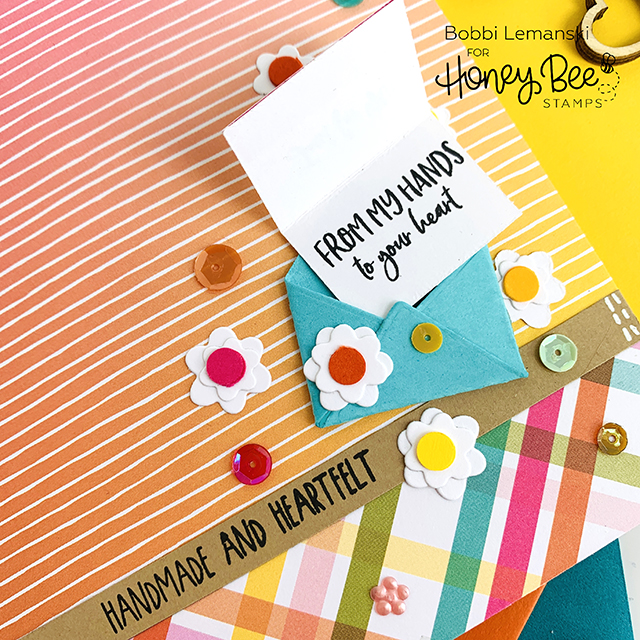
I needed a lot of die cut flowers for inside and outside this card so the Flower Petal Cover Plate works perfectly for die cutting lots of flowers in varied sizes with one swoosh through the die cutting machine! I added color centers using a hand paper punch tool and sequins from the Harvest Festival Sequin Mix (sold out). I added some white accent stitching to the kraft strip to make it look even more “handmade and heartfelt.”
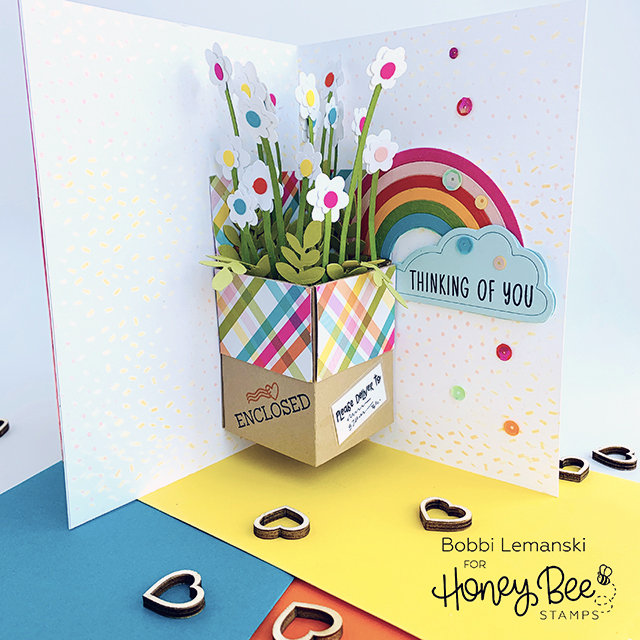
Inside: Pop-Up Bouquet Box
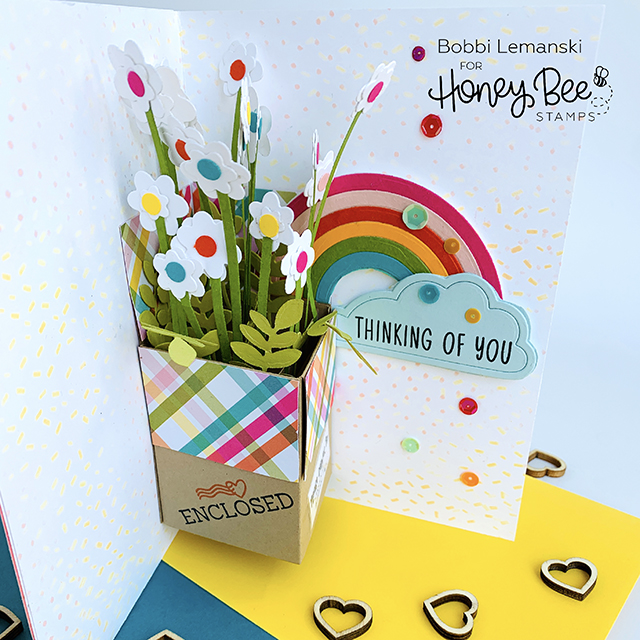
To create the box pop out feature, I started by die cutting two pieces of the Surprise Box and adhered the pieces together with a strong adhesive to form the box. I cut the box top flaps down to 1-1/2″ tall so that the box would fit inside this 5″ X 7″ card. The flaps were covered with the plaid paper cut 2-1/8″ wide X 1-1/2″ tall. The two front flaps were adhered to the box sides. I used elements of the Love Enclosed stamp set to stamp on the outside of the box. I also stamped a shipping tag, “Please deliver to:” on white cardstock and used actual shipping tape to adhere it to the other side of the box.

I added cardstock strips to the inside of the box to adhere my stems in order to fill the box full in the inside hollow area. Use strong glue or adhesive strips for this part.

I cut 1/8″ wide stems from green cardstock and glued them to the strips inside. I added the flowers to the tops of the stems, snipping the stems at different heights. I added a flower and a colored center on each side of the stems to cover (sandwich) the stems at the top. I added the colorful centers to both sides of the daisy so that no matter what angle you looked at the bouquet, you could see fun color. Leaves from the Spring Bouquets die set were tucked in to fill up the box. I also added the rainbow and cloud design from the Rainbow Wishes stamp and die sets and attached it to the back flap of the box, as if the rainbow was pouring out of the open box.
I used the Confetti Background stencil set, my blender brushes and Picked Raspberry and Mustard Seed Distressed Oxide inks to quickly create the design on the interior panels of the 5″ X 7″ card. The box was attached to the inside using strong strip adhesive and sequins were added to finish this card. The card fits in a standard A7 envelope.
Want to see more ideas and inspiration from me? Subscribe to my blog, BobbiHartDesign.com. I’ll send you updates on new posts! You can also find me on Instagram as @BobbiHartDesign and on Facebook as BobbiHartDesign.
Bobbi Hartmann Lemanski, Bobbi Hart♥ Design, Adding h♥art into every design
3 responses to “Bouquet in a Box Greeting”
This is so cute and imaginative! Lots of work, I’m sure, but well worth it. Thank you for sharing this piece of sunshine. Happy Mother’s Day to all!
This has to be one of the cutest cards I have ever seen! I really want to make one!!
Beautiful. What a work of art!