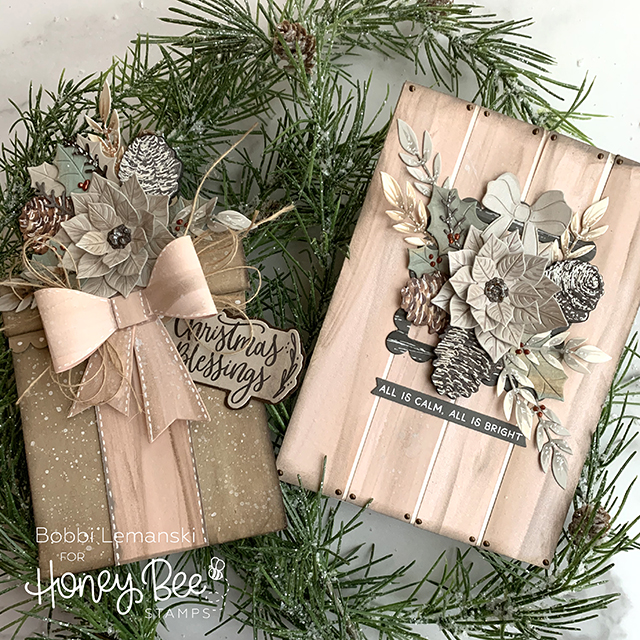
Hi there! It’s Bobbi Lemanski here kicking off the Twelve Designers Event on the Honey Bee Blog. Today, I’m sharing two projects featuring botanicals with a flair of chic elegance. The colors are soft and subtle, with rich tones, layered textures and sparkly finishes, perfect for sharing your holiday spirit.
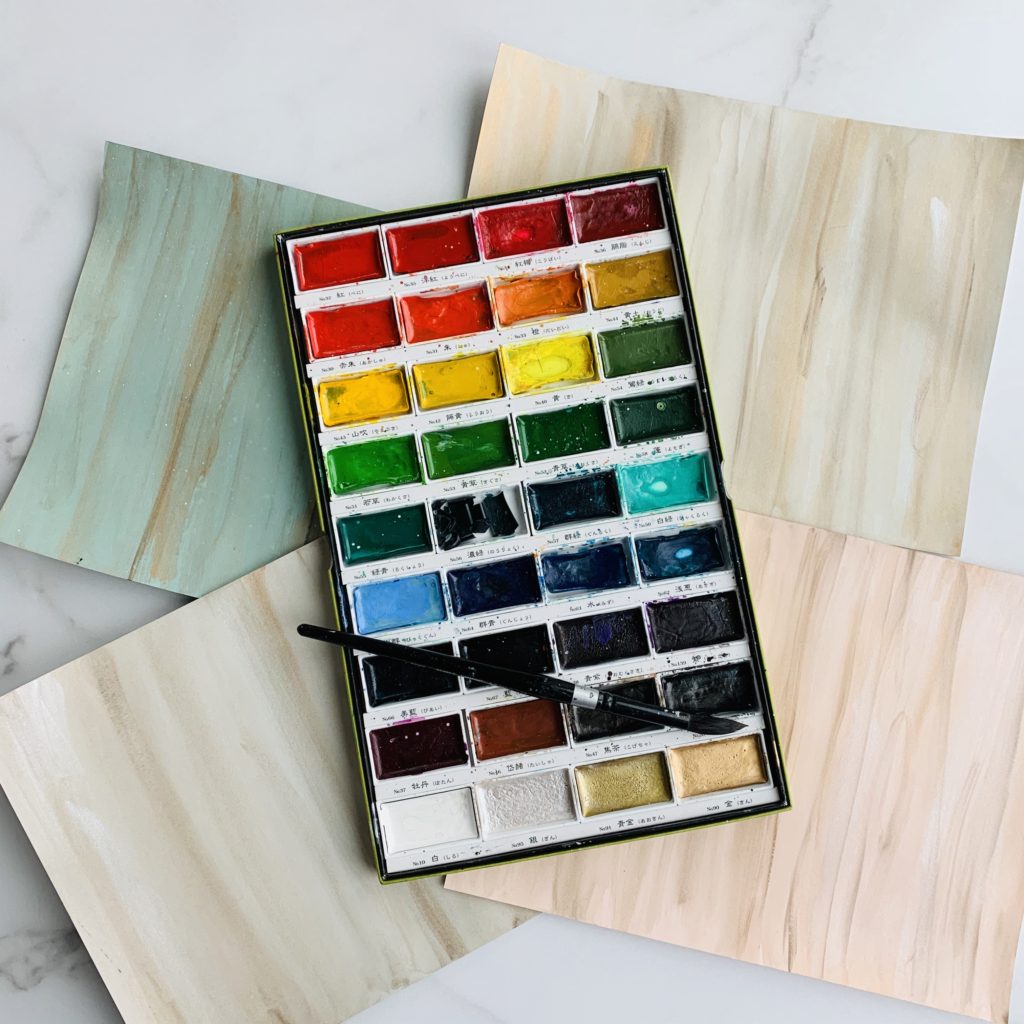
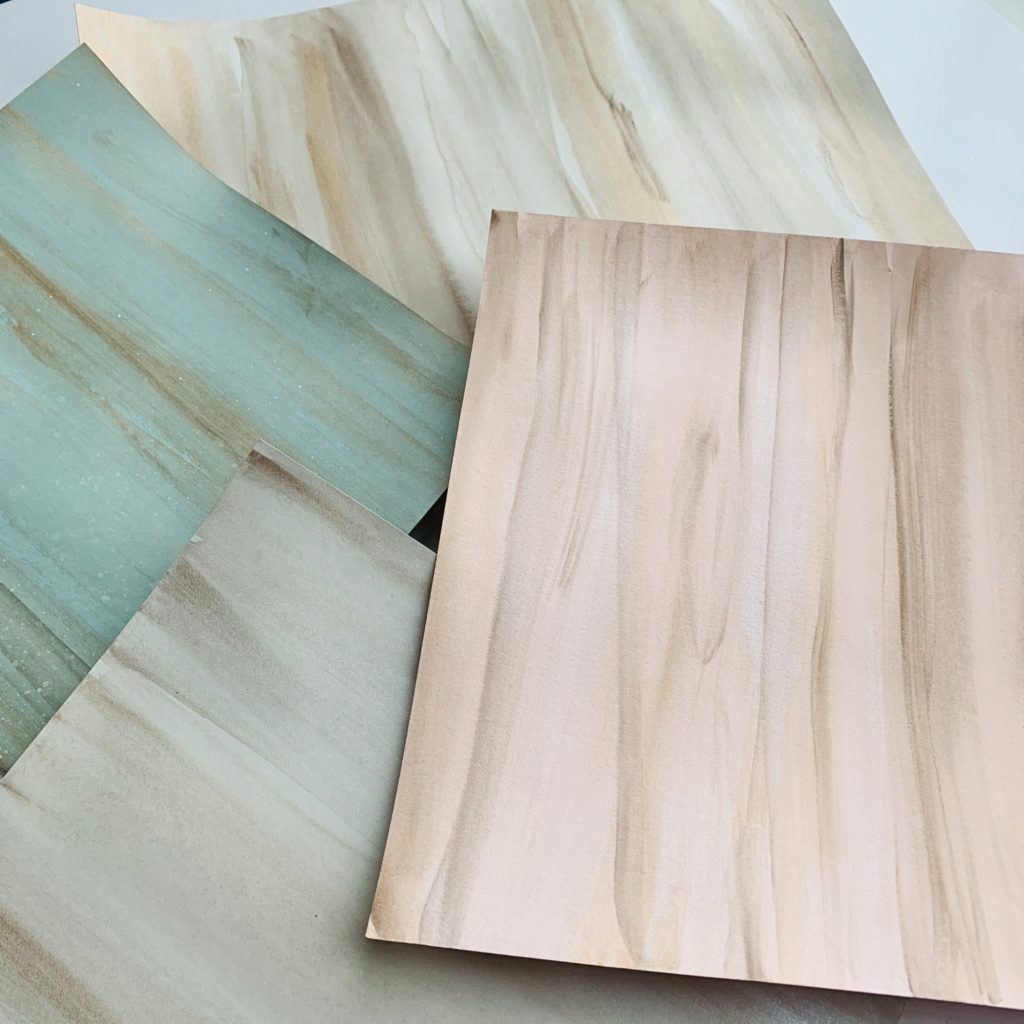
To start, I added basic vertical strokes of metallic watercolor paint (using the bottom row of paint trays) to colored cardstock. I used one piece each of a very light pink, grayish-green, soft warm gray and white cardstock. I used these to die cut my stems and greens for both projects. My watercolor paints shown here are Zig Kuretake Gansi Tambi, but the Prima Metallic Accents Semi Watercolor Paint set available at Honey Bee would work for this technique, too. The metallic paints add a beautiful, yet subtle metallic, sparkly finish to the elements.
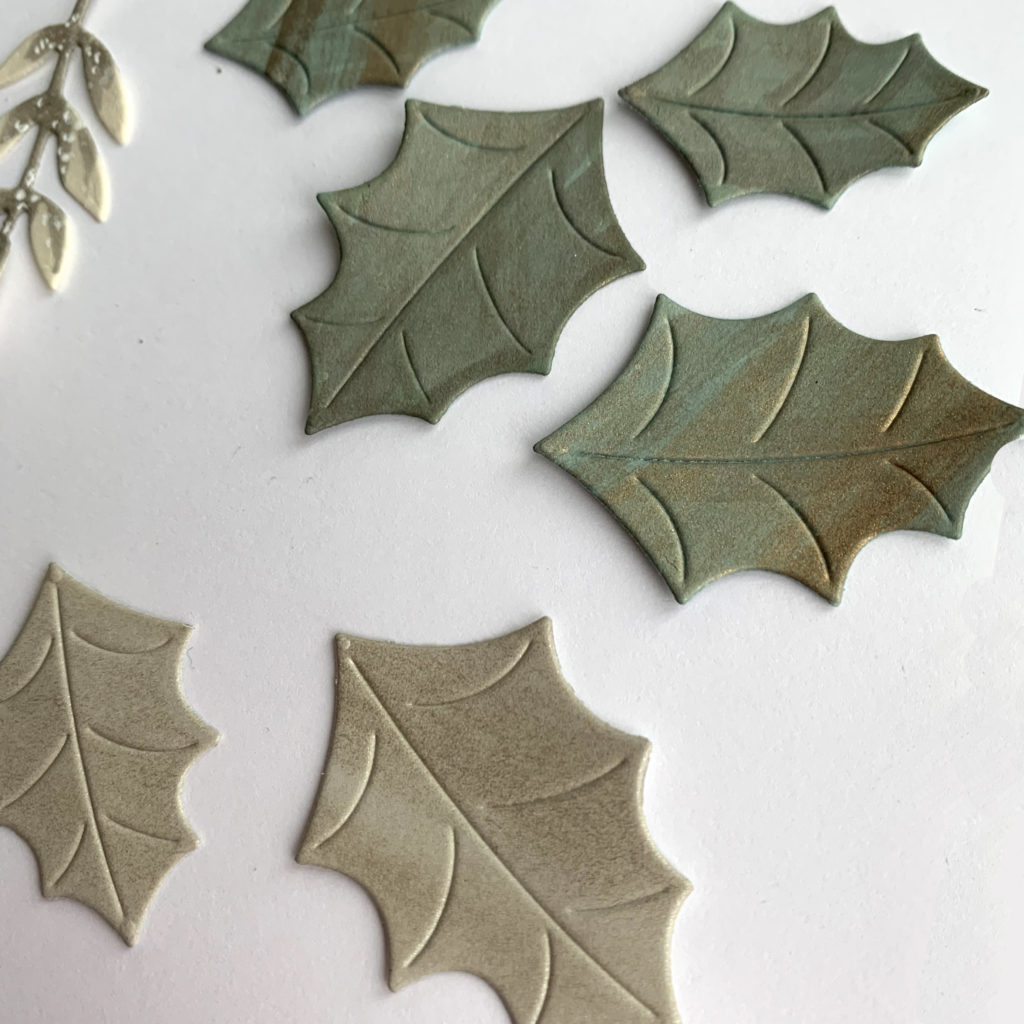
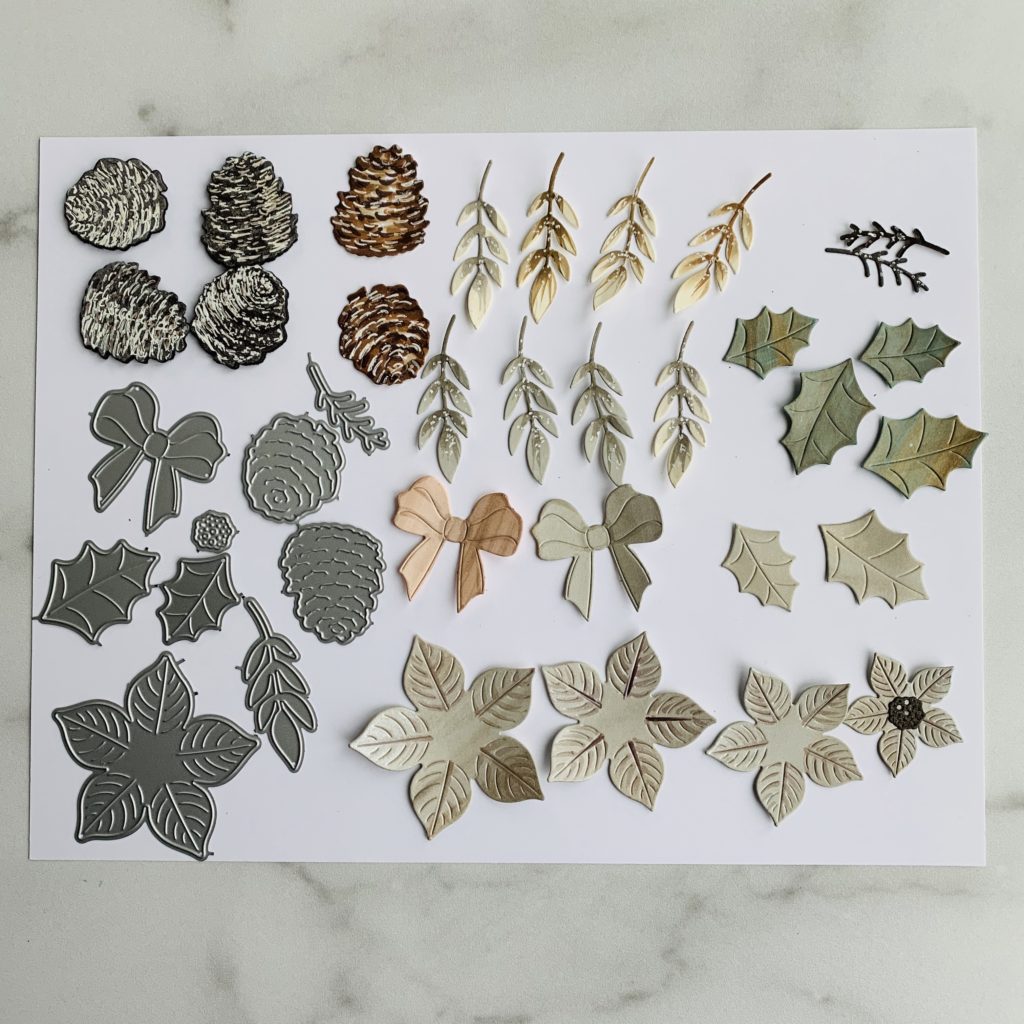
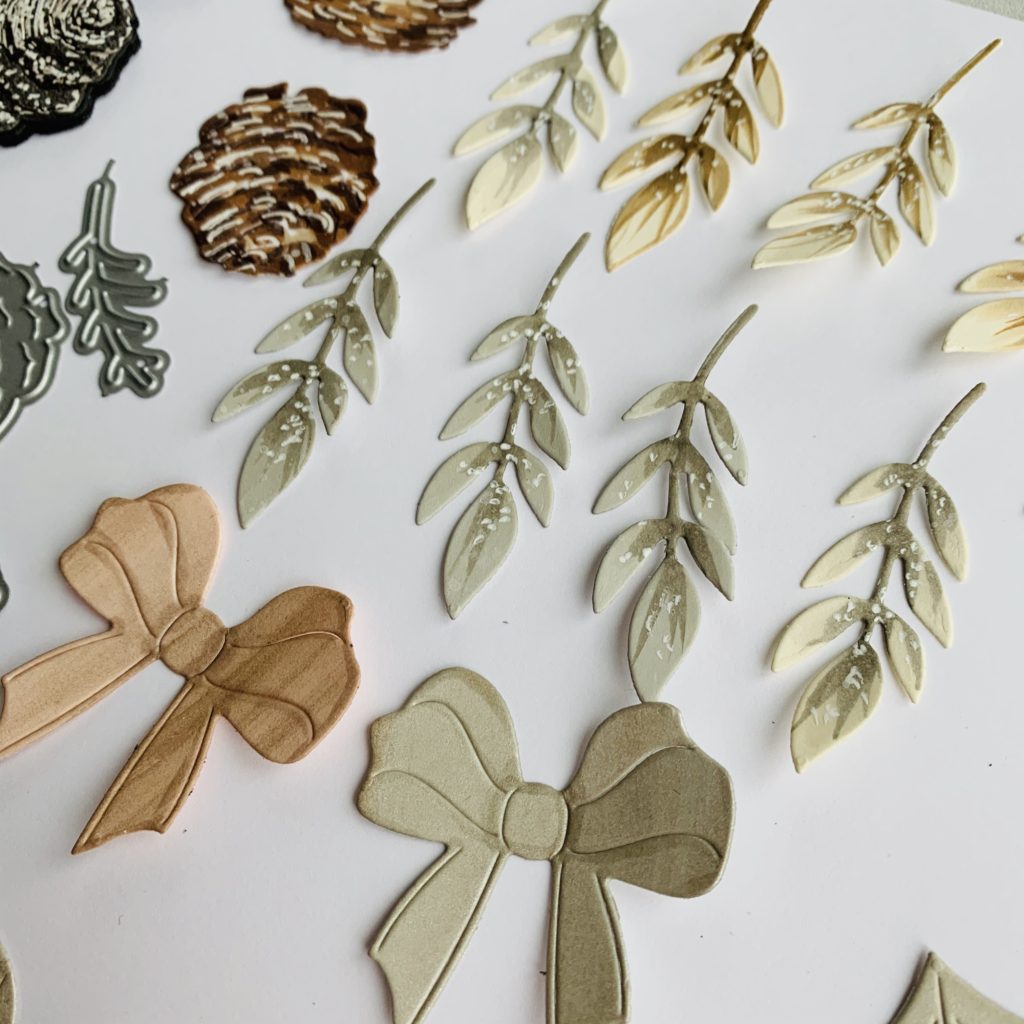
I also used a brown cardstock for the pine cones, bare branches and the poinsettia center. Additional color was added to the greenery and poinsettia using Copics in BG91, 93, W7, W3, W1, E71 and E72. These colors are all grayish tones of blues, browns and pinks. They are really beautiful together. Now it’s time to create the two projects!
Botanical Greeting Card
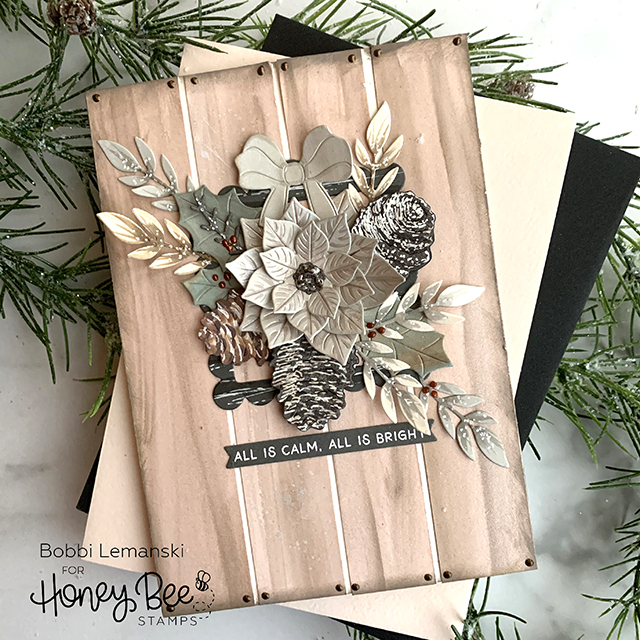
To make this 5″ X 7″ greeting card, I used the following Honey Bee Stamps products:
Scallop Square Gift Tag die set
Christmas Blessings Stamp and die sets
I cut 1-1/4″ strips of the pink metallic washed cardstock to create the background. They were adhered to an ivory card base. I die cut a dark gray scallop frame using the Scallop Square Gift Tag Die set. I added some darker lines using a W7 Copic marker and added white lines to it for a woodgrain effect. I layered and arranged the scallop frame and painted greenery, poinsettia, holly and pine cones as shown.
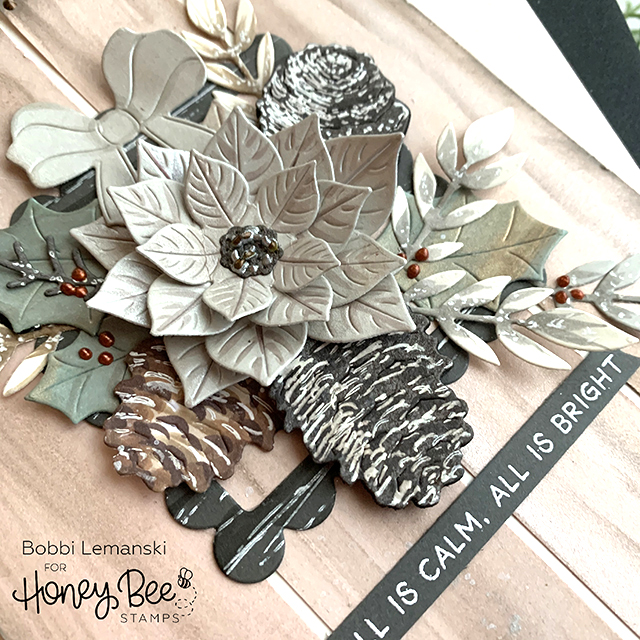
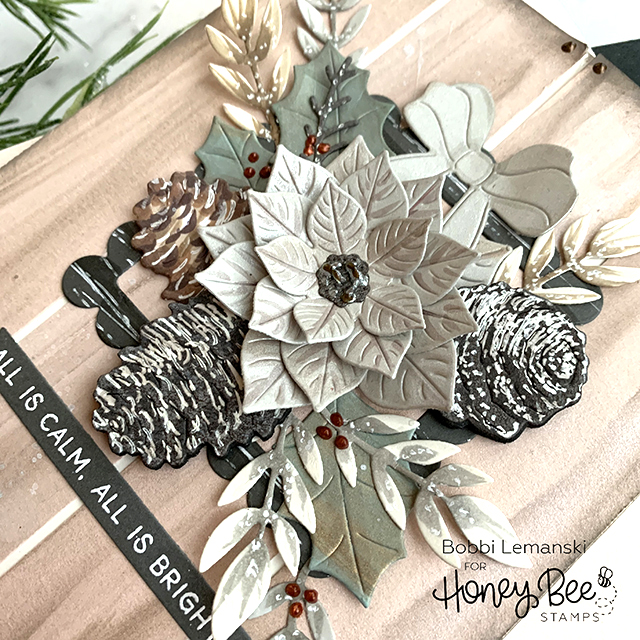
I added random white dots using a Uni-Ball Impact Bold White Gel Pen for the look of snow on the greens and added snow on the pine cones. Nuvo Drops in copper and silver were used for berries and a bronze was used for the nail heads on the pink faux wood vertical planks, one in each corner. The phrase from the Christmas Blessings Stamp set was embossed in white on the dark gray cardstock used for the frame, die cut out and attached to the card front to complete the card.
Present Box Gift Card Holder
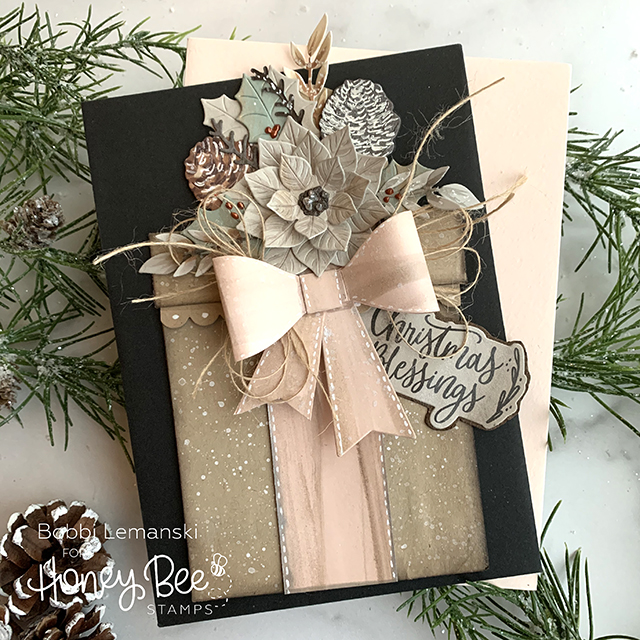
To make this present box gift card holder, I used the following Honey Bee Stamps products:
Christmas Blessings stamp and die sets
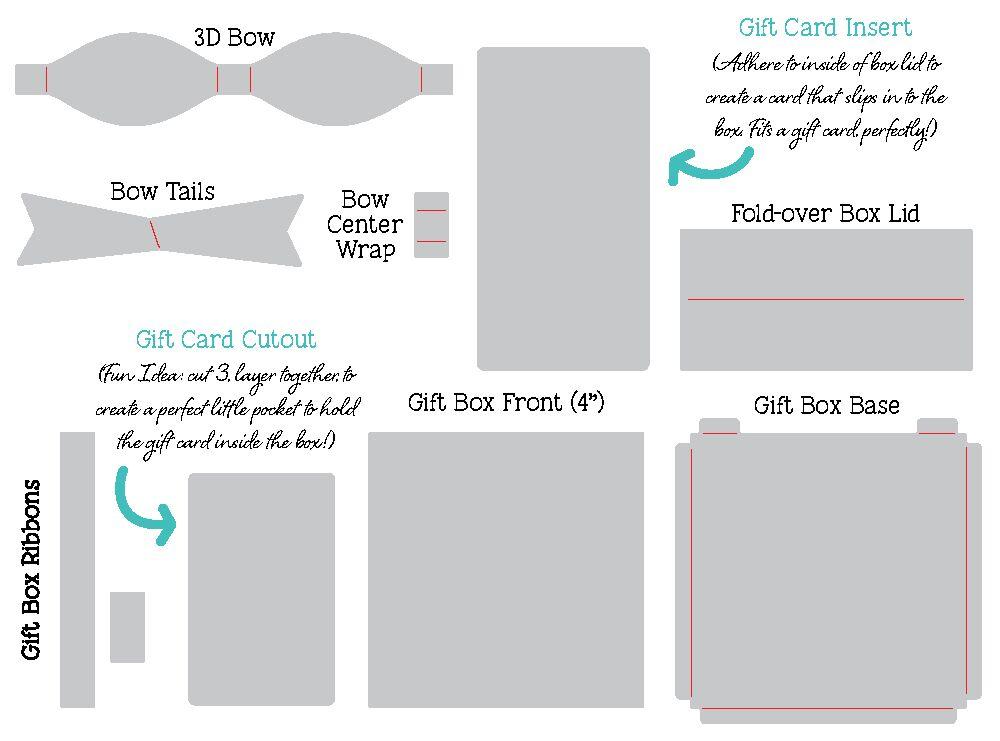
To create the gift card holder, I used a kraft cardstock splattered with some white paint for the box elements. I constructed the box using the instructions below. The base, front and lid were die cut from the splattered cardstock. A wide faux ribbon was added to the front of the box using the metallic pink washed paper. I did not use the die for this. I wanted my ribbon wider so I cut my own strip. I added white stitching to the edges of the ribbon and the bow components. The bow was glued together.
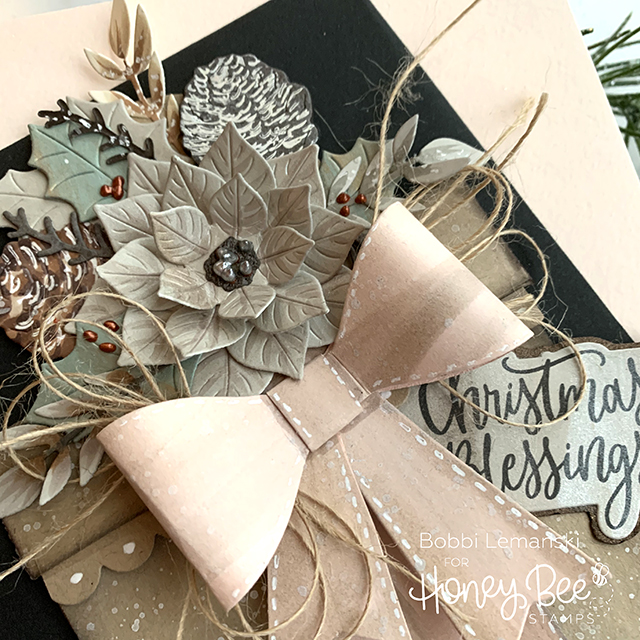
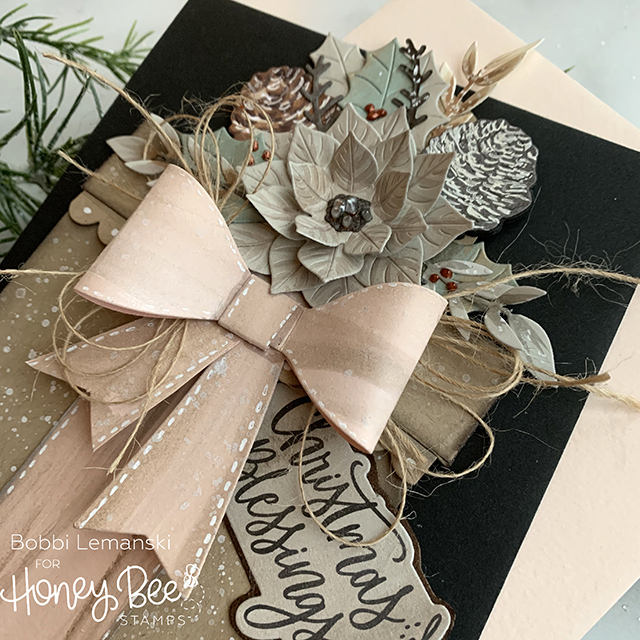
The botanicals were layered and attached to a circle that I punched out and attached to the top. The Christmas Blessing tag was stamped in black on the white washed cardstock and die cut. I layered bronze cardstock behind it and fussy cut it out to make it stand out and be more sturdy. Natural twine was glued in behind the paper bow for interest.
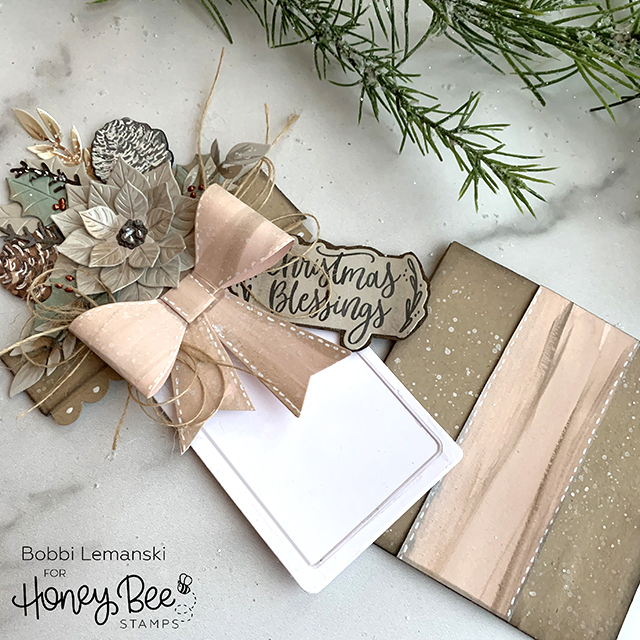
The inside gift card holder was made from white cardstock and layered/glued together to make a “frame for the card to sit inside and stay in place. I also added a scallop edge in kraft and adhered it inside the lid edge for extra style. I cut this out using the scallop frame die, (used in the card project) using two sides of the frame to make the width of the lid. Little white dots were added to it.
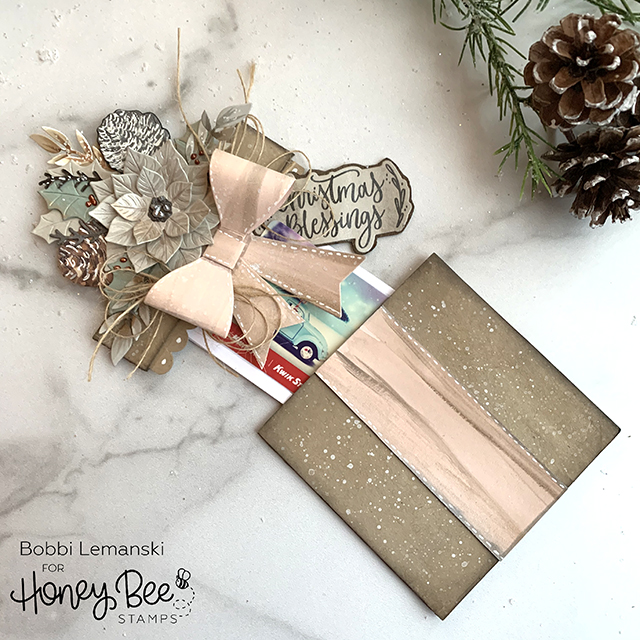
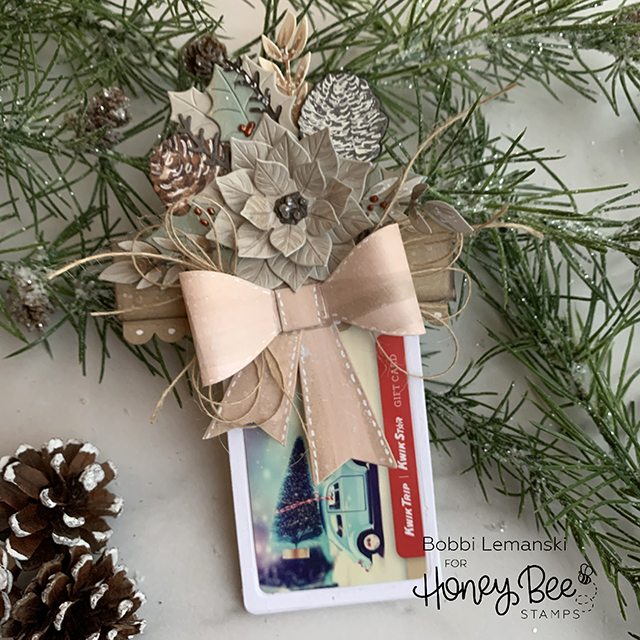
NOTE: The gift card sits in the framed area. To make this, you have to die cut three full inserts and then die cut the smaller credit card sized die cutout of two of the big inserts. Layer all three together, putting the full insert to the back to create the frame for the card to sit in.
Thanks for stopping by today. You can find me on my blog at BobbiHartDesign.com, Instagram as @BobbiHartDesign and on Facebook as BobbiHartDesign.
Bobbi Hartmann Lemanski, Bobbi Hart♥ Design, Adding h♥art into every design
21 responses to “Botanicals Offering Chic Elegance for the Holidays”
These are just lovely. So unique. Thank you so much for sharing.
Thank you, Beverly! They were fun to make. It’s a different color palette for me, but I like how they turned out. Have a wonderful day! Bobbi
beautiful!! love those soft colors1
Thank you, Betty! I really like how they turned out. It’s fun to try a new color combination. Bobbi
Your creations are absolutely gorgeous! So many pretty details.
Thank you, Renee. I always think the fun in creating is always in the details. 🙂 Thanks for sharing your comment! Bobbi
These are gorgeous!
Thanks so much, Kelsey!
The palettes on your projects are so soft and elegant, so refreshing for holiday crafts. Thanks for sharing this inspiration with these fun products.
Thank you, Andre. That’s so nice to hear. It’s definitely a break from the bold colors of the season. I’m happy with how they turned out.
Bobbie these are cards are amazing, I just love them, the beautiful subtle colours and the die cut arrangements are fabulous… inspiring me to make a gift card hold for a present myself, thank you…. happy Christmas Robyn
I’m so glad you like them. They are even prettier in person because you can see the shimmer and sparkle. Sometimes that’s hard to photograph. I’m glad that I’ve inspired you to make a gift card holder! Bobbi
So beautiful
Thanks so much, Margaret! Bobbi
Wow! This is gorgeous! So very elegant!
Thank you, Hanh! If you’re looking for something less traditional, it’s a very pretty color story for the holidays!
DELIGHTFUL projects!
WOW – your background panels are BEAUTIFUL and your metallic accents on the botanicals GORGEOUS!
Thank You for sharing and INSPIRING 🙂
Thank you so much, TracyM! The metallic accents are even prettier in person. I’m so glad you like them. Have a wonderful day.
Gorgeous. I like the botanical theme.
Oh my, I am swooning over these colors and your projects. You did a fabulous job. Thank you.
Thank you, Marie! I appreciate reading that. I like how they turned out, too!