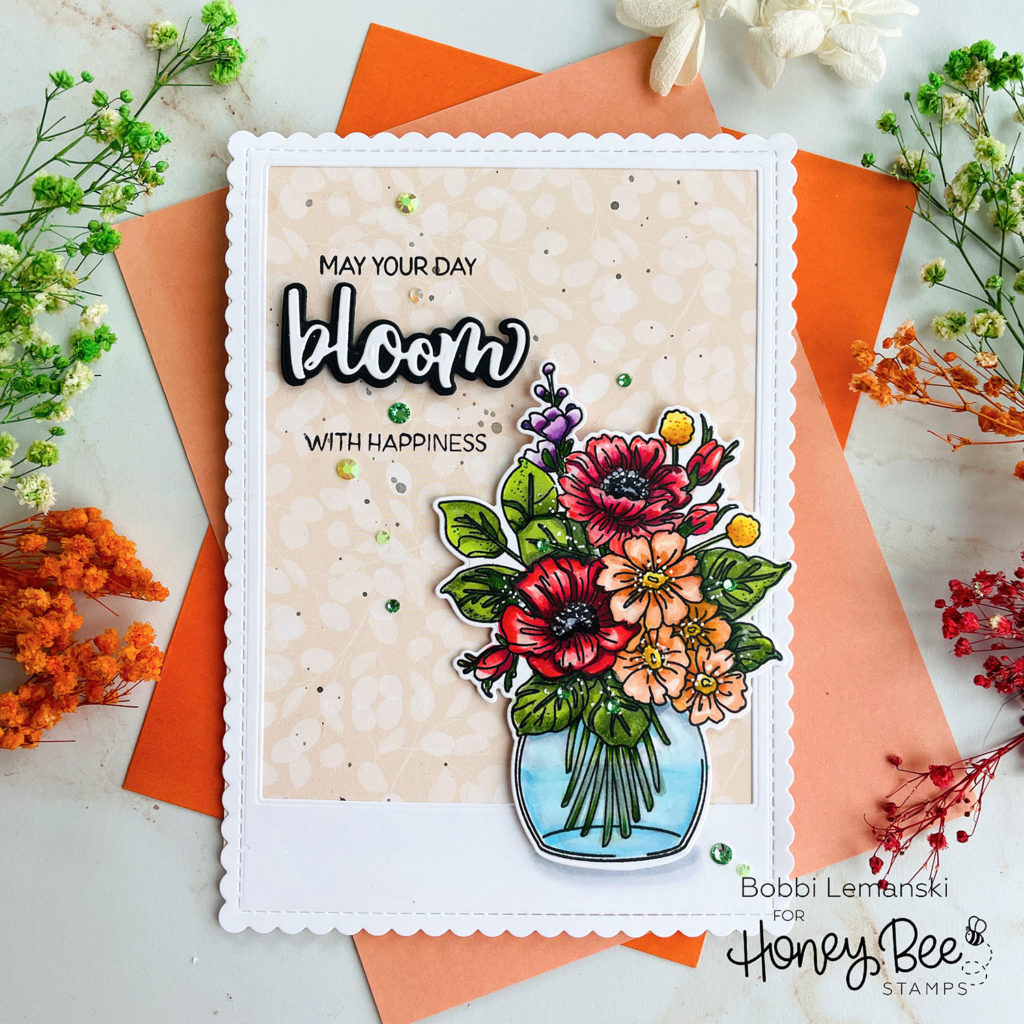
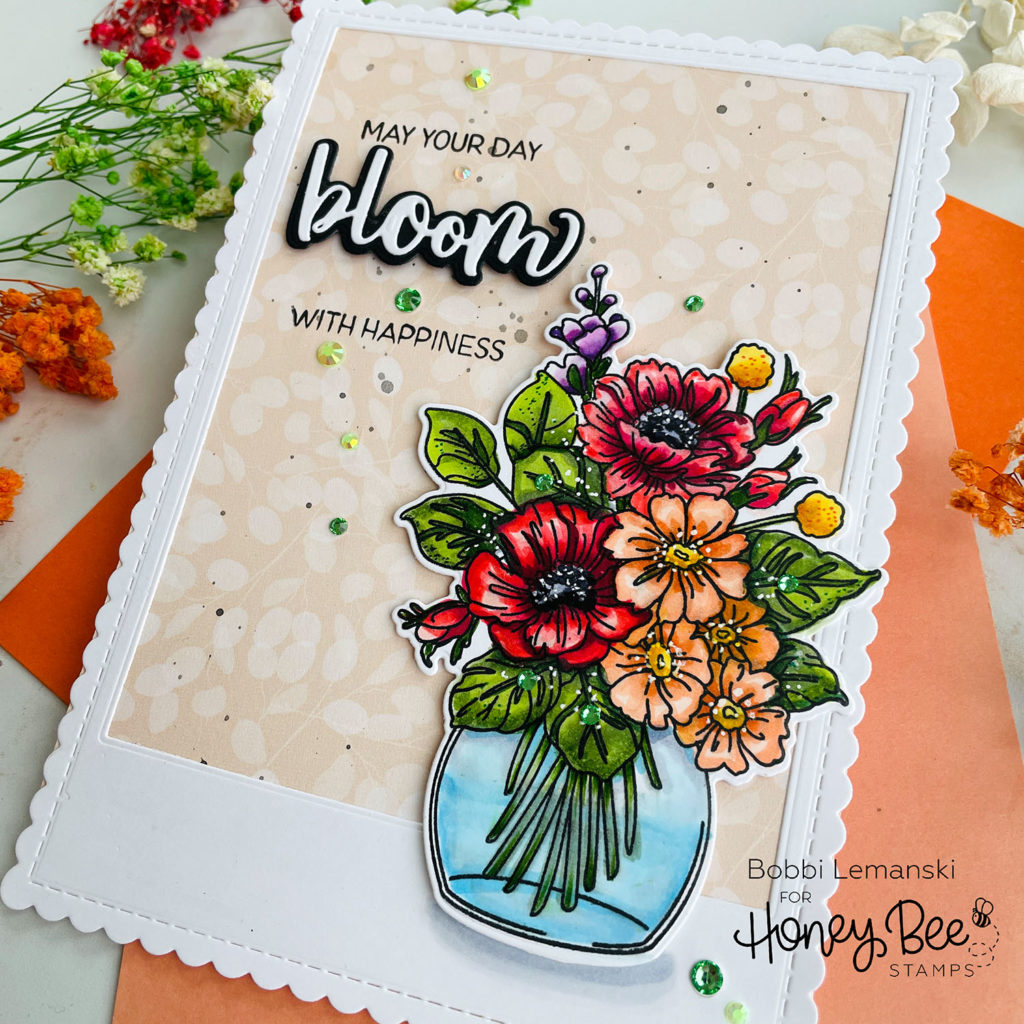
Happy spring, Bee friends! It’s Bobbi Lemanski here with a vase of blooms to bring you a little happiness today. 🙂 I pulled out some of my new products from the Modern Spring release. I’m using the following Honey Bee Stamps products:
Floral Vase stamp set and coordinating die set
Bitty Buzzwords: Bloom stamp set and coordinating die set
Modern Spring 6″ X 6″ Paper Pad
Inside: Birthday Sentiments stamp set
The featured project below is made from Neenah 80lb Solar White cardstock for the card base and the scalloped card front panel. All of the black ink stamping was done using Honey Bee’s Bee Creative Intense Black Ink. I use the Honey Bee Stamps Bee Creative Precision Glue for adhering my elements together. My card is a 5″ X 7″ size.
To make the card front panel, I started by die cutting the scallop frame from white cardstock. I also die cut a rectangle window (using the largest die in the Sweet Stacks set ) from the center, allowing more white space at the bottom. This will be the “resting” spot for my vase. I backed the open window using a pattern paper from the Modern Spring 6″ X 6″ Paper Pad. Before I attached the paper to the back of the opening, I flicked on some black watercolor paint on the peachy pattern paper. To do this, I use a watercolor paintbrush and simply tap the brush with my finger from my other hand.
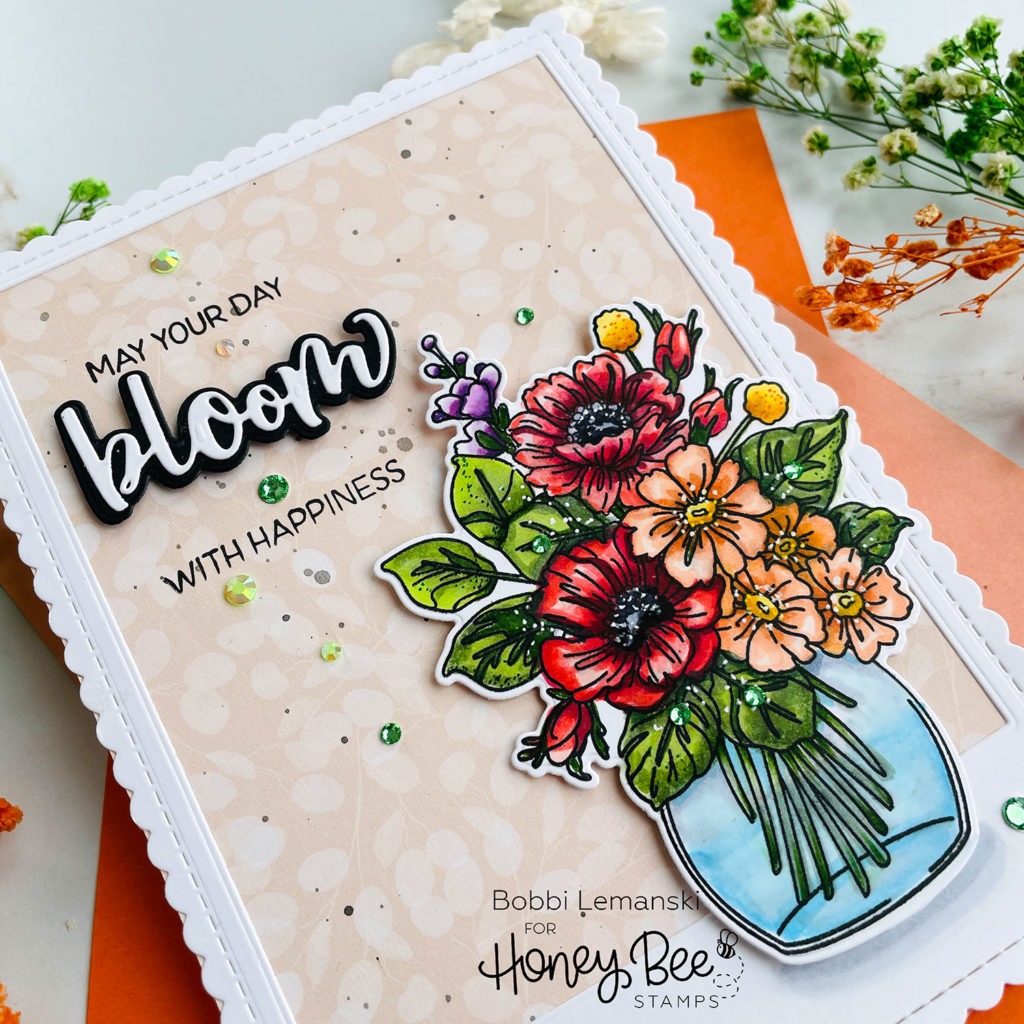
To color the stamped vase image, I used the following Copic Marker colors:
- Blues: B000, B00, BG01, BV23, BV29
- Reds: R89, R56, R46, R29, R24, R17, R14, R20
- Greens: G29, YG67, YG63, YG61, YG03
- Yellow-Reds: YR01, YR00, YR02, YR07, YR16, YR18
- Browns: E00, E000, E01
- Black/Grays: 100, C3, C2, C1, C0
The vase was attached to the card front using foam tabs. I also shaded the bottom around the vase using the cool gray colors.
I stamped two phrases on the front and attached the two-layer “bloom” word (made from black and white cardstock) using black foam tabs. I added sparkly gem stickers around the sentiments and in the lower corner. I used two shades of green to match the leaves in the bouquet. I added white dots to the centers of some of the flowers using my white gel pen. The completed card front was attached to an A7 top-scored card base.
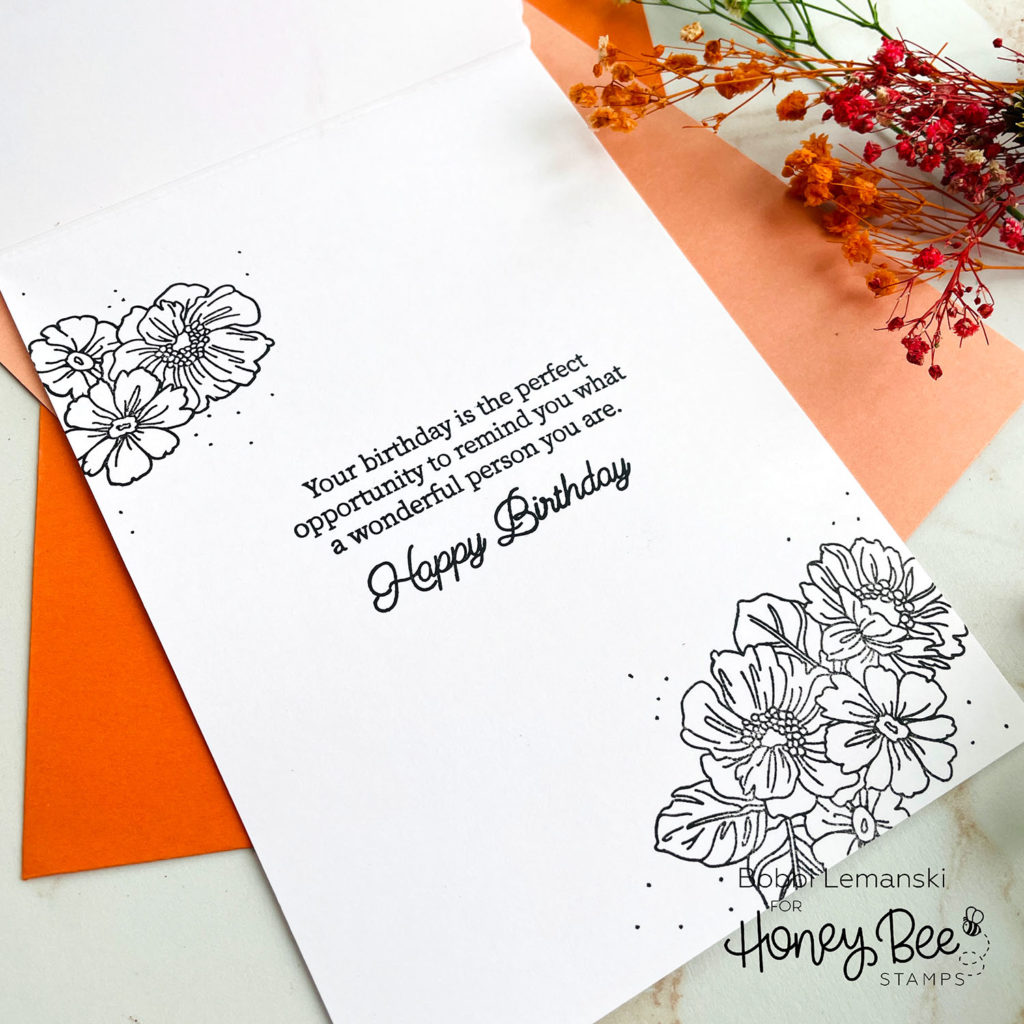
To finish my card inside, I stamped in black, the two remaining floral designs from the Floral Vase set. I also stamped two sentiments from the Inside: Birthday Sentiments stamp set and added a few black accent dots around the blooms to finish this card.
You can shop the entire Honey Bee Stamps Modern Spring release here. If you decide to place an order, please use the links in this post so that Honey Bee knows which ideas inspired you!
Thanks for stopping by today. If you want to see more ideas and inspiration from me, subscribe to my blog, BobbiHartDesign.com. I’ll send you updates on new posts! You can also find me on Instagram as @BobbiHartDesign and on Facebook as BobbiHartDesign.