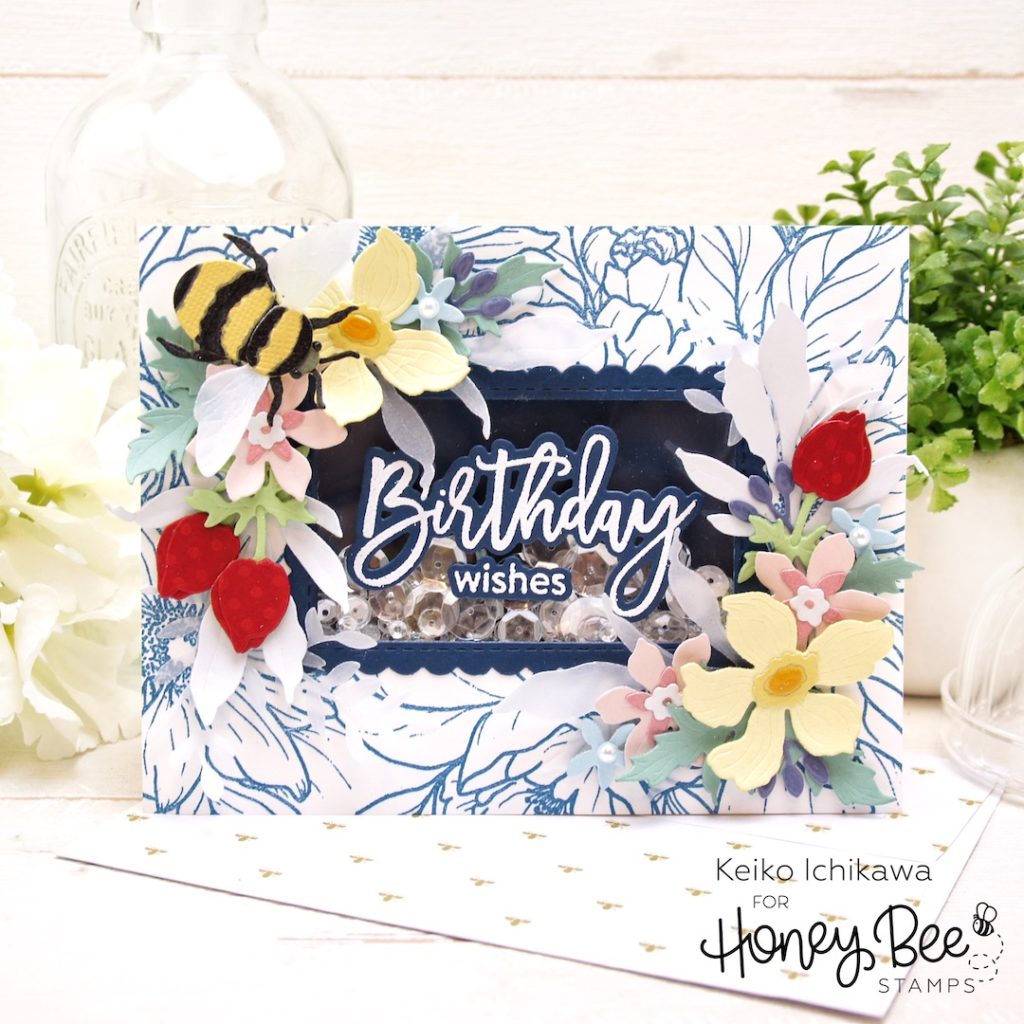
Hello friends! It’s Keiko from Happy Tree Studio and today, I have this fun shaker card with lots of die cuts for you all! It’s a pretty simple design but by adding these die cuts makes this card a special one! You can go through your die collection and use whatever floral dies you have. In fact, it really doesn’t have to be florals! I think die cut fruits, birds or seashells will look beautiful too!
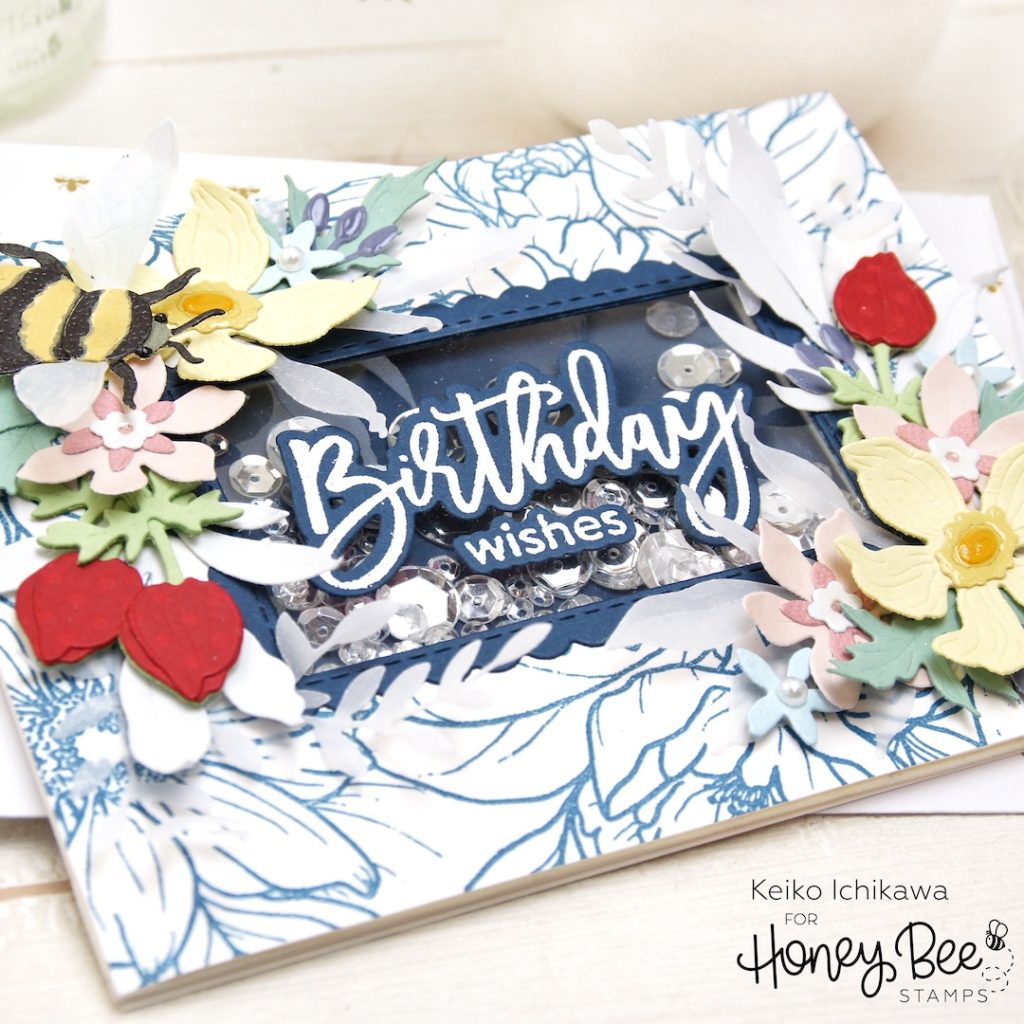
To make a card panel, I stamped the A2 sized white card stock with beautiful Spring Blooms Background stamp using navy ink. The window was cut using one of the dies from Sweet Stacks: Rectangles die and I added a piece of clear acetate on the back. To dress up the window a little, I die cut a scallop frame from navy card stock using the same die I used to make the window together with one of the die from Scallop A2 die set.
For the sentiments, I used the brand new Birthday Wishes stamp set and white heat embossed both words on the same navy card stock and die cut them with the coordinating dies. I then simply adhered them on the acetate window. I could have heat embossed them directly on the window since I was using the heat resistant acetate, but it was much easier this way. Plus, I love the way they look!
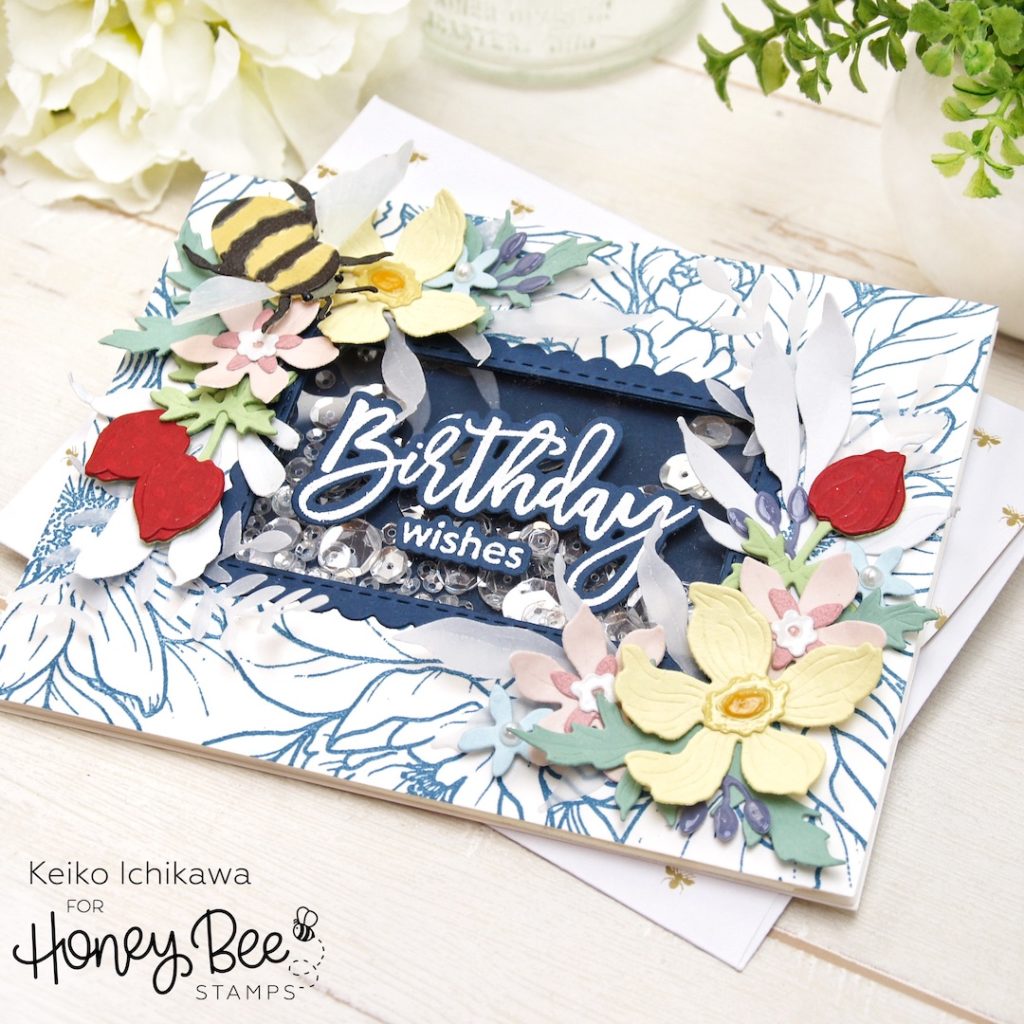
To make the shaker, I applied two layers of foam tapes on the back of the panel and placed some sequins before adhering a piece of navy card stock.
I then die cut all the elements to decorate around the shaker frame. You can use whatever you have, but here are the list of the dies I used:
Lovely Layers: Wildflowers (yellow flowers and leaves)
Lovely Layers: Bugs (bee)
Lovely Layers: Anemone (red buds)
Lovely Layers: Peony (large leaves)
Whimsical Spring Flowers (blue and pink flowers)
Country Christmas Wreath (purple berries and leaves)

I used various colors of card stocks and some velum for the bee’s wings and some of the leaves. I die cut the bee from yellow card stock and colored the black part with markers (that is the only coloring I did!). To make these floral look dimensional, I gently shaped them with my fingers and shaping tools. I then adhered most of them flat to the panel using Precision Tip Glue and pop some of them up with foam dots. TIP: You can die cut more elements as you go. I always start with whatever I think I definitely need, and usually add more if necessary.
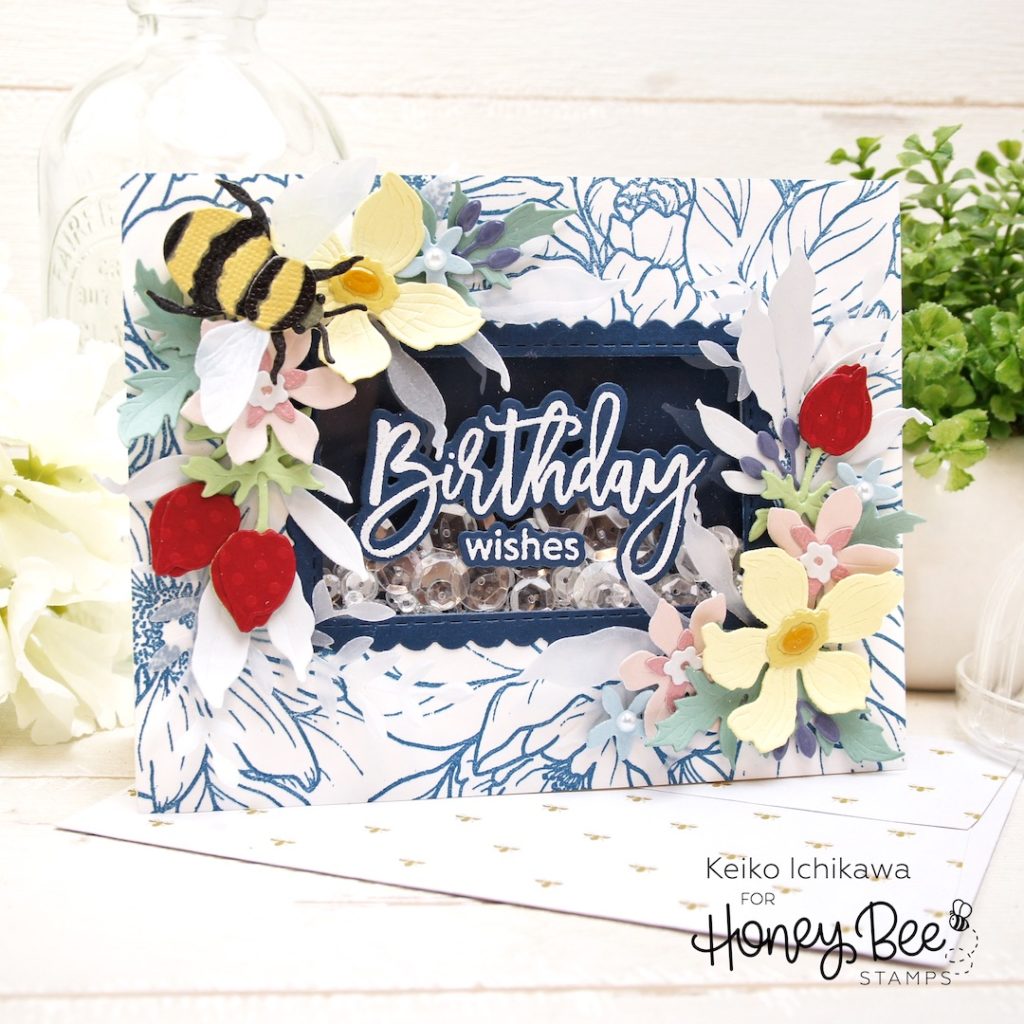
To finish off the card, I added some Glossy Accents and True Pearls. Thank you so much for stopping by today! Have a wonderful week!!
