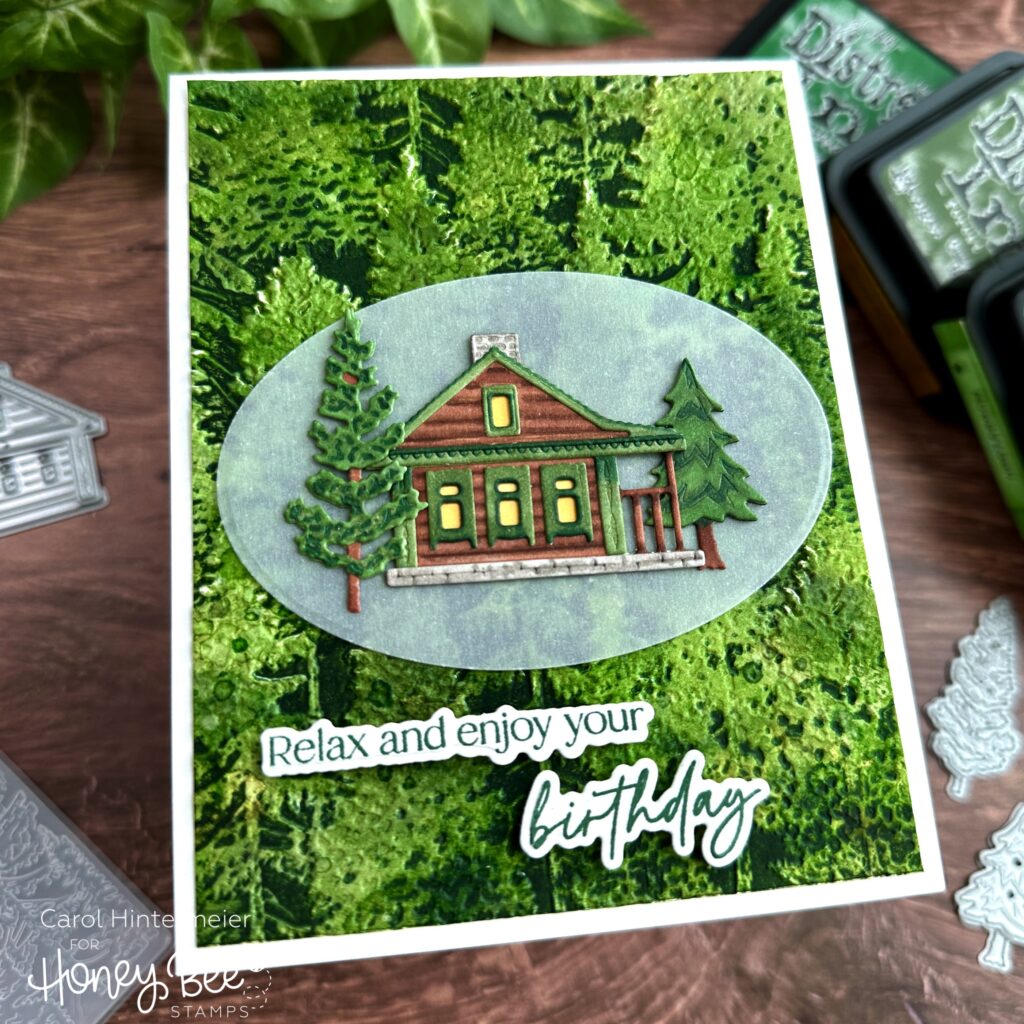
Hello Honey Bee friends!! I love ink smooshing watercolor panels anytime. But when you emboss that panel with an awesome embossing folder like the Into The Woods 3D embossing folder, it takes it to the next level!! Check out the details of how I made this woodsy card with the Summer Cabins that’s great for a guy’s birthday, but I know I’d love to get one like this too!
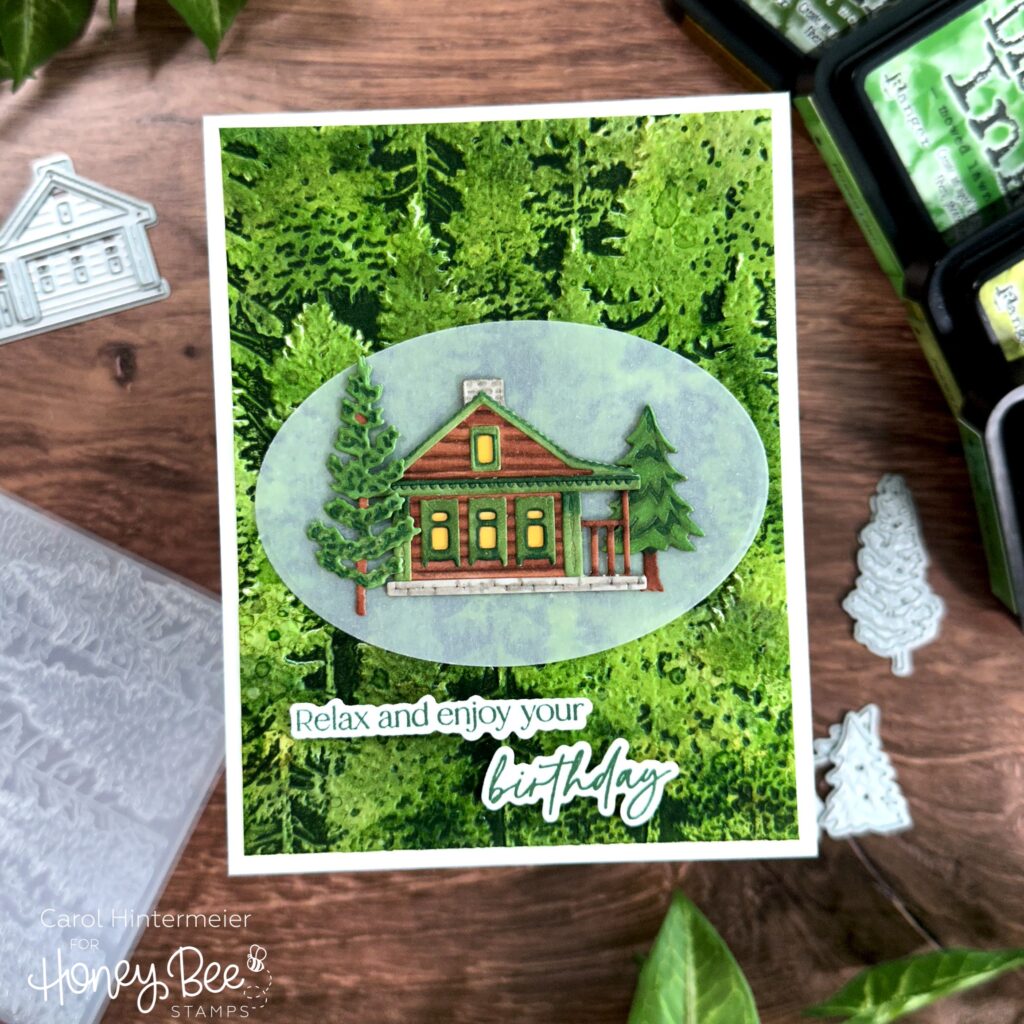
For the inky panel I used these Distress Inks: Mowed Lawn, Rustic Wilderness, Peeled Paint, and Forest Moss. I used a silicone mat and smooshed Peeled Paint and Forest Moss first. Just press each ink pad 3-4 times onto the mat. Then I used a water sprayer and spritzed water 4-5 times over the ink. I took a panel of watercolor cardstock and began to dip it.
Note: If you don’t want ink to stain your fingers, be sure to use gloves. For the first layer, just press the cardstock into the ink two or three times. Use your heat tool to dry the ink. Then press it into the remaining ink and dry again. I repeated these steps with Mowed Lawn and Rustic Wilderness. As long as you dry between each dip into the ink, you will get beautiful layers.
Don’t worry if you don’t think it’s perfect! Because with this next step it will turn into WOW! Take the Into The Woods embossing folder and use a brayer to roll on a dark green ink (whatever you have in your stash will work). Be sure to brayer the ink onto the side of the embossing folder that is the recessed area behind the trees.
Place your inky cardstock onto the non-inked side of the embossing folder. Carefully close the embossing folder and run it through your die cut machine with the suggested layers for embossing folders. I was totally amazed at the dimension this adds! Trim this to 4″ x 5-¼” and adhere to an A2 card base.
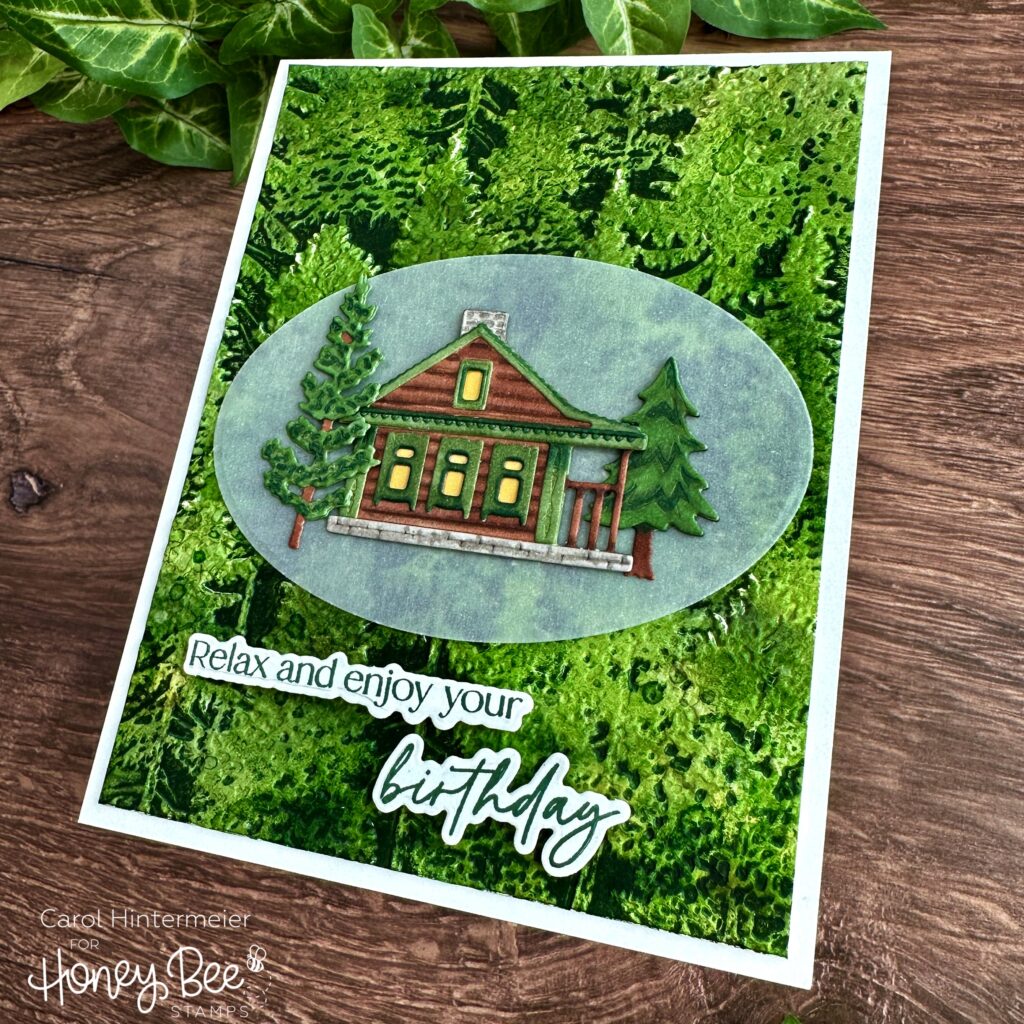
Next I die cut one of the cabins in the Summer Cabins Honey Cuts from 80# Neenah. I used Copic markers to color all of the pieces. Here’s a list of the colors I used:
- Green pieces: G29, G28, G94, G24
- Browns: E59, E57, E25
- Chimney and stone foundation: W5, W3
- Window lights: YR31
I used Bee Creative glue to adhere the layers together. If you need some help, be sure to check out the graphics in the product link. Then I used an oval from the new Sweets Stacks: Oval to cut a piece of vellum. I used tape runner and some dots of glue on the cabin and trees to adhere them to the oval. Now it’s easy to hide the glue by adding tape runner on the back of the oval behind the cabin to adhere it to your card!
I stamped the sentiments from the Be Still stamp set with the dark green ink. Then I cut them out with the coordinating Honey Cuts. I used thin foam strips to pop them up onto the card.
I hope I’ve inspired you to give this embossing folder technique a try. It’s so fun! Thank you for stopping by today! I hope you have a fabulous, and crafty, day!
2 responses to “Birthday Card with A Fun Embossing Folder Technique”
This card is totally amazing!! Can’t wait to try out your embossing technique. Gorgeous. I have these dyes and inks. However, I wish HoneyBee would restock this release. As I had to buy it it in-portions. Due to my financial ability. By the time I was able to buy some of it they were sold out.
Thank you so very much Beverlee! I’m so sorry you’ve had to wait for the items to be restocked. But I know that they do have all items that are out on order. Thank you for your patience and understanding. It’s such a fun technique and I hope to see what you create!