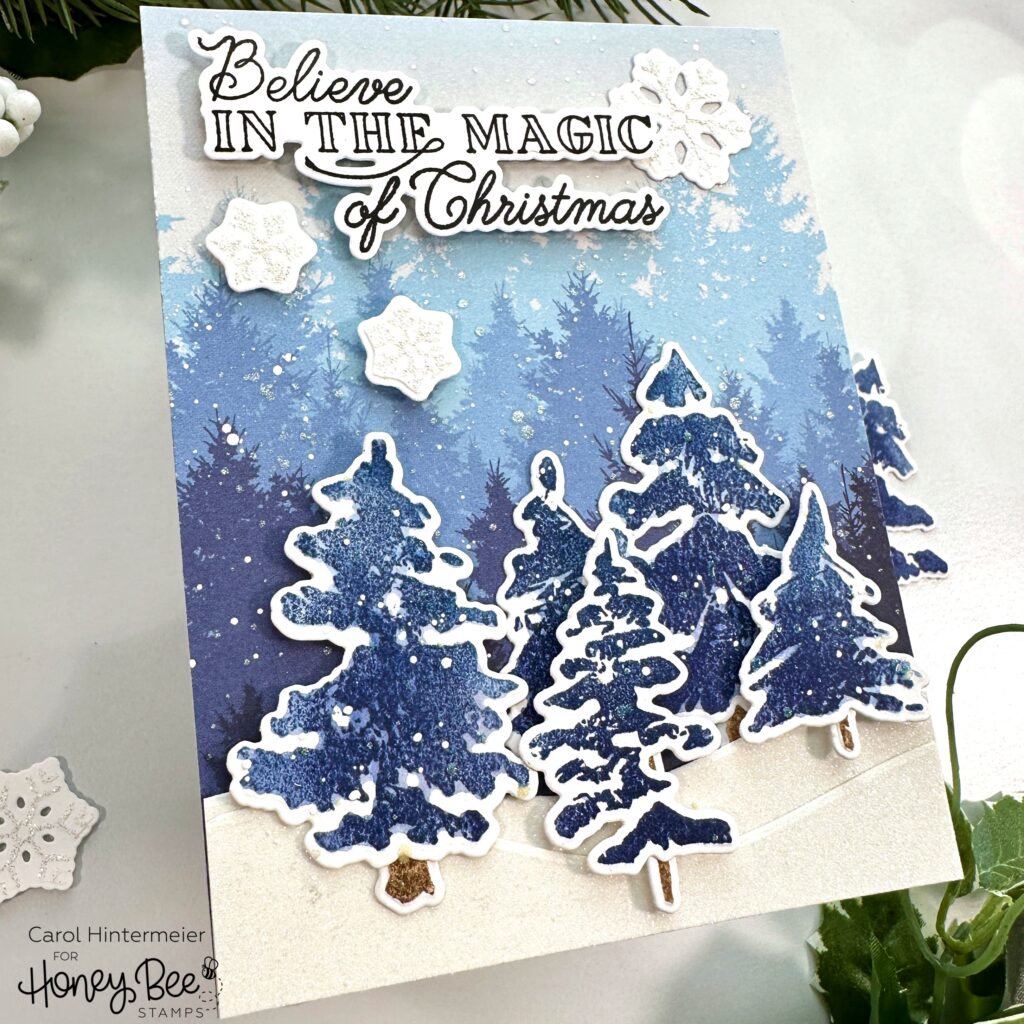
Hello Honey Bee friends! Today I’m sharing my winter scene Christmas card that features the beautiful Watercolor Pines stamps and the coordinating Honey Cuts! Using the gorgeous paper from the Winter Wonder paper pad makes this card super quick and easy to make! I’ll also tell you how to get this pretty watercolored look for your trees!

I truly think that Honey Bee has the most gorgeous paper pads! For this card I chose the beautiful blue piece with the varying shades of blue trees found in the Winter Wonder paper pad. I used the paper for my color cues when I stamped the Watercolor Pines stamps. The technique I used to ink up these stamps is best when used with a stamp positioning tool such as the MISTI as it usually requires a few repeats of the stamping.
I used blending brushes to add some Distress Inks to the Watercolor Pines stamps. I used Chipped Sapphire, Stormy Sky, Faded Jeans, and Walnut Stain for the tree trunks. I used blending brushes to add the ink to the stamps because I can blend the colors and also get a very light layer of ink onto the stamp.
Next I misted the stamps very lightly with water and stamped them onto Bristol Smooth cardstock. This is a smooth heavy weight cardstock that is able to withstand some water. These mini misters are great for easily getting a very fine mist of water!
I dried each ink layer with my heat tool, and then repeated the stamping a few times until I was happy with the results. This is a very imprecise technique, so just have fun with it. Vary the amounts of water you spray to get different results! Now you have beautiful pine trees that look watercolored!
I cut the trees out with the coordinating Watercolor Pines dies and set them aside to create the background layers. Next I trimmed the paper from the Winter Wonder paper pad to 4-¼” x 5-½”. Then I used Bee Creative glue to adhere it to an A2 card base.
Next I used the hill die found in the Horizon Slimline Borders dies to cut a piece of glitter cardstock I have in my stash. The piece I had was 8-½” long so I just cut the strip with one hill die, then I cut it into two 4-¼” pieces. I adhered the layers together with glue then added them to the card.
Next I stamped a few snowflakes from the Let It Snow stamp set with clear embossing ink onto 80# Neenah. Then I sprinkled on White Puff Twinkle embossing powder and used my heat tool to set it. This embossing powder has a bit of dimension when heated with a very pretty sparkle! I cut the snowflakes out with the coordinating Honey Cuts.
I stamped the sentiment also in the Let It Snow stamp set with black ink and then cut it out with the coordinating die. After I decided on an arrangement for the trees, I used glue and foam dots to adhere them, the snowflakes and the sentiment to the card.
And lastly, I decided to add white splatters! So I just covered the sentiment with some removable tape before I added the splatters. Then I also decided to add a bit of sparkle with some Bee Shimmery liquid shimmer watercolor. I put a drop of it onto my craft mat, diluted it with a tiny bit of water, then splattered drops with a paint brush.

If you didn’t want this to be a Christmas card, this design would work with a variety of holiday or winter sentiments. I hope you’ve enjoyed my process for making this card and have been inspired to try this yourself!
At this time of year, I am always so thankful for many things, and YOU are one of those things I’m thankful for. I so appreciate your visits, and kind comments too! Have a wonderful Thanksgiving day tomorrow (if you celebrate that) and otherwise, have a wonderful day no matter what!