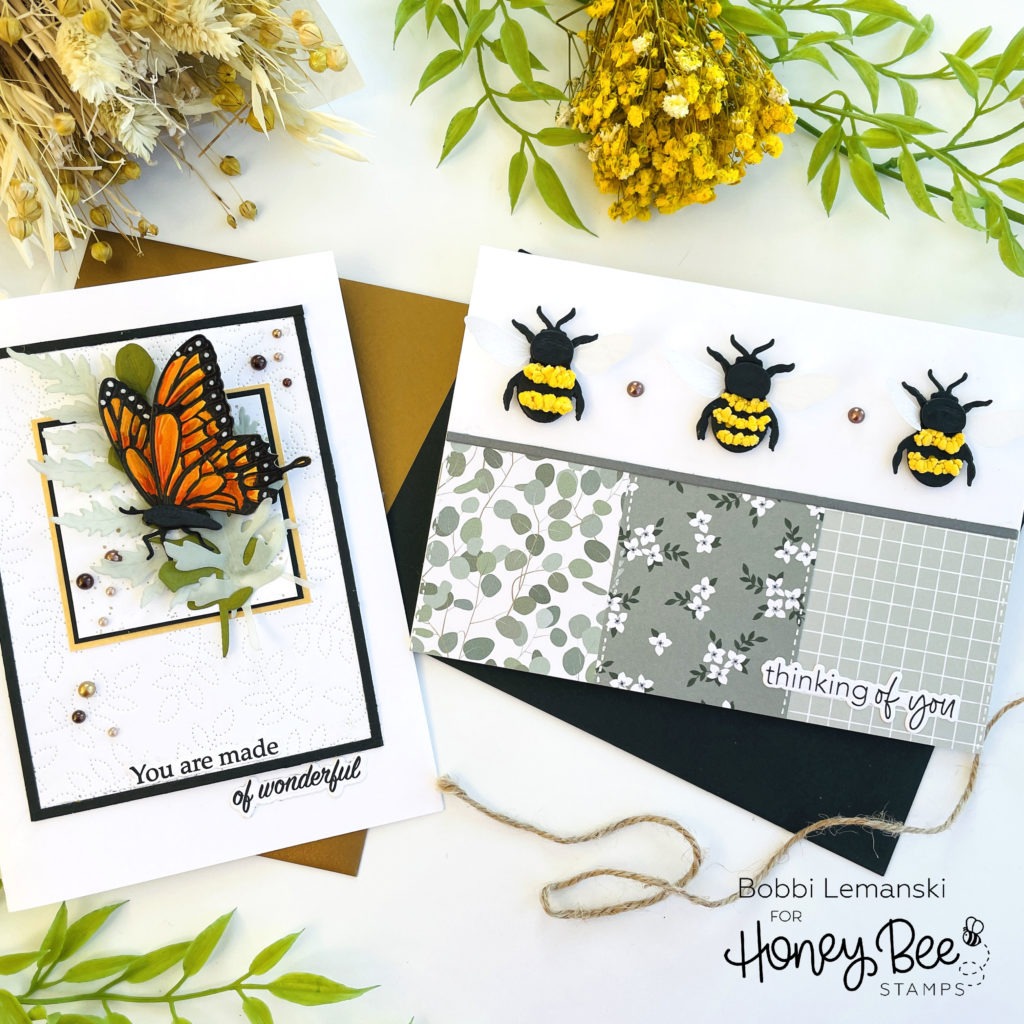
Hello, Honey Bee friends. It’s Bobbi Lemanski here with a couple of cards to share featuring new products from the Modern Spring release by Honey Bee Stamps. Both cards feature the new Lovely Layers: Bugs die set. Today, I’m using the following products:
Lovely Layers: Greenery die set
Spring Leaves A2 Pierced Cover Plate die
Small Card Big Hug stamp set and coordinating die set
Get Well Soon stamp set and coordinating die set
Modern Spring 6″ X 6″ paper pad
The featured projects below are made from Neenah 80lb Solar White cardstock for the card base and card front panels. All of the black ink stamping was done using Honey Bee’s Bee Creative Intense Black Ink. I used the Honey Bee Stamps Bee Creative Precision Glue for adhering my elements together. Both cards are 5″ X 7″ size.
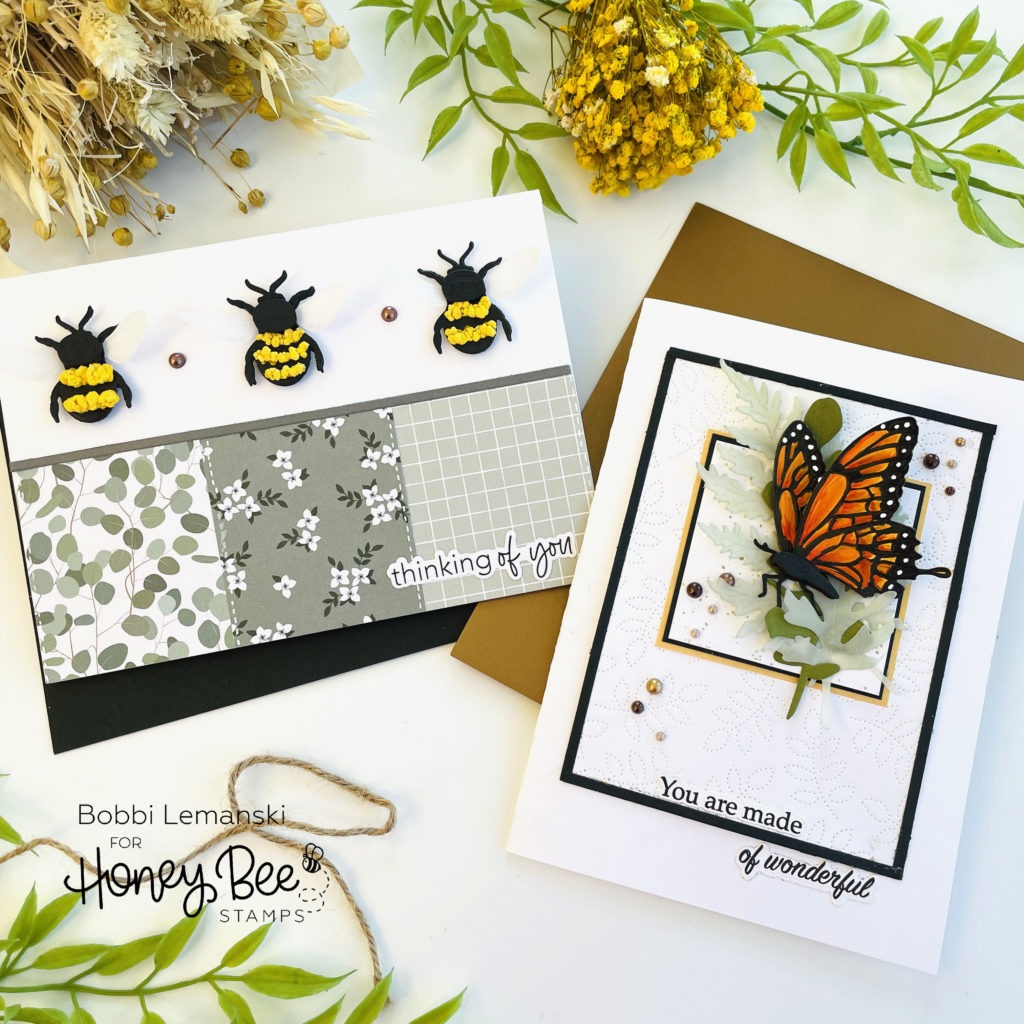
Butterfly Wishes
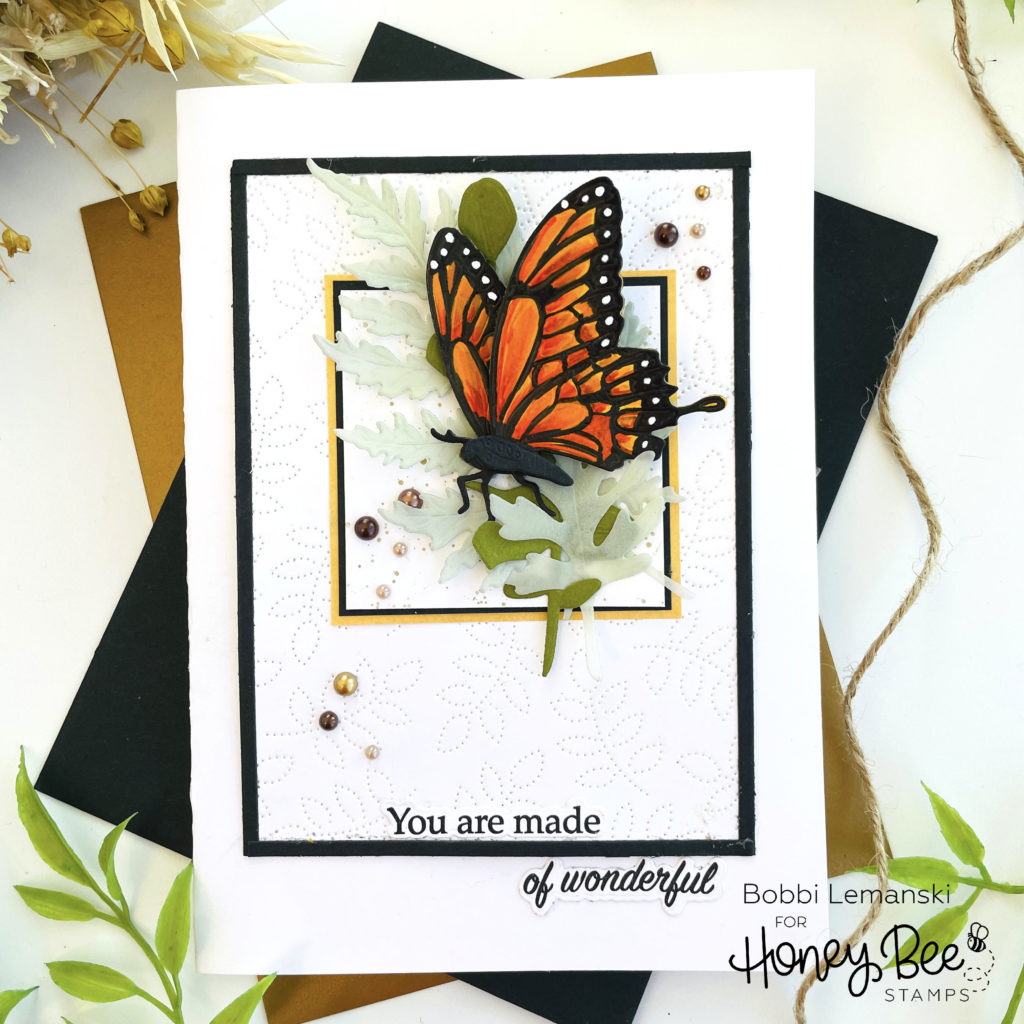
For my first card, I die cut the butterfly components from yellow cardstock. I colored the wings using Copics in Y19, Y38 and YR68. I used my Copic 100 black marker to color in the outline and exterior areas. I wanted this butterfly to resemble a monarch butterfly. Once the wings were colored, I used my Gelly Roll white gel pens to add the white dot accents on the wings. The entire body and legs was colored in black. I attached the two wings using black foam tabs and added the body top layer, too.
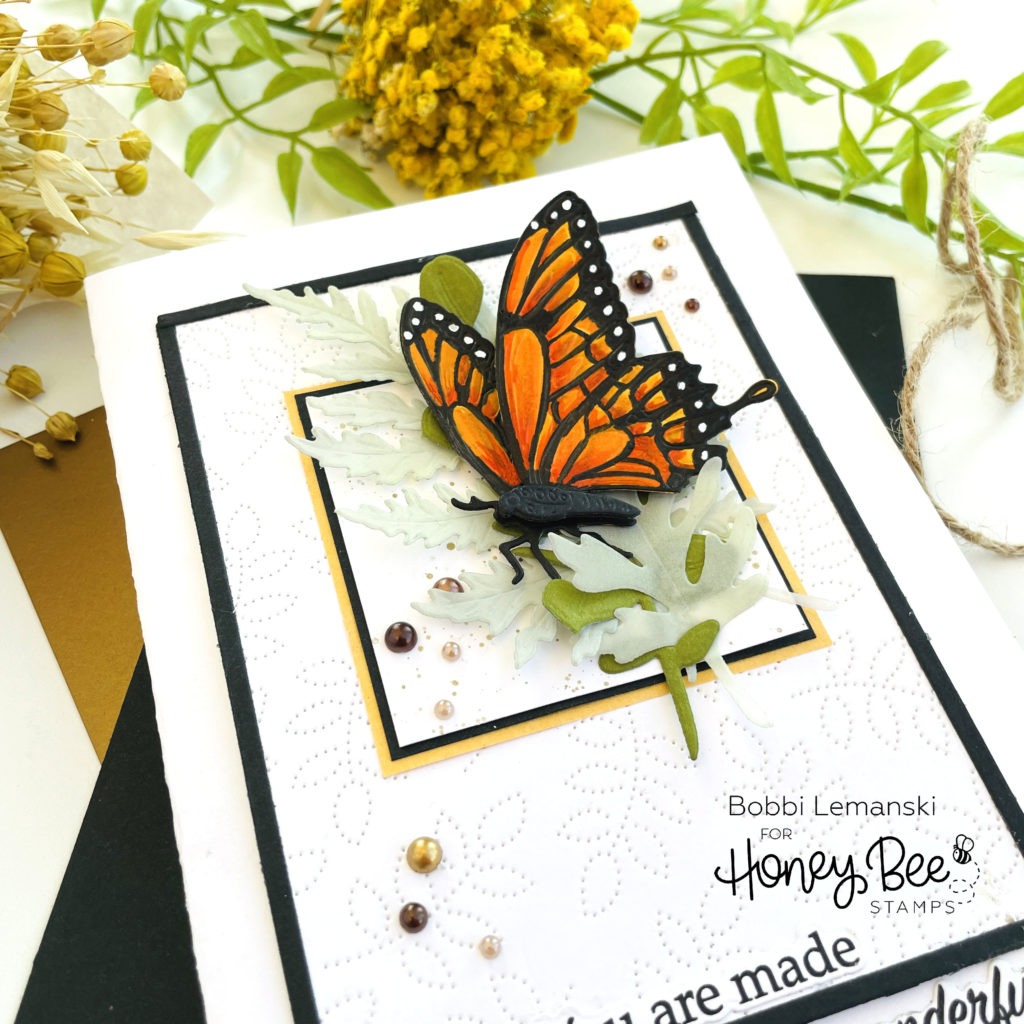
Next, I die cut the greenery stems from a blue/green-colored cardstock and a vellum using the Lovely Layers: Greenery die set. To color the vellum leaves, I applied Weathered Wood and Iced Spruce Distress Oxide ink on the vellum paper. I also cut a few squares from white, black and metallic gold cardstock to create the focal matted squares. Before attaching them together, I splattered gold metallic watercolor paint over the white cardstock.
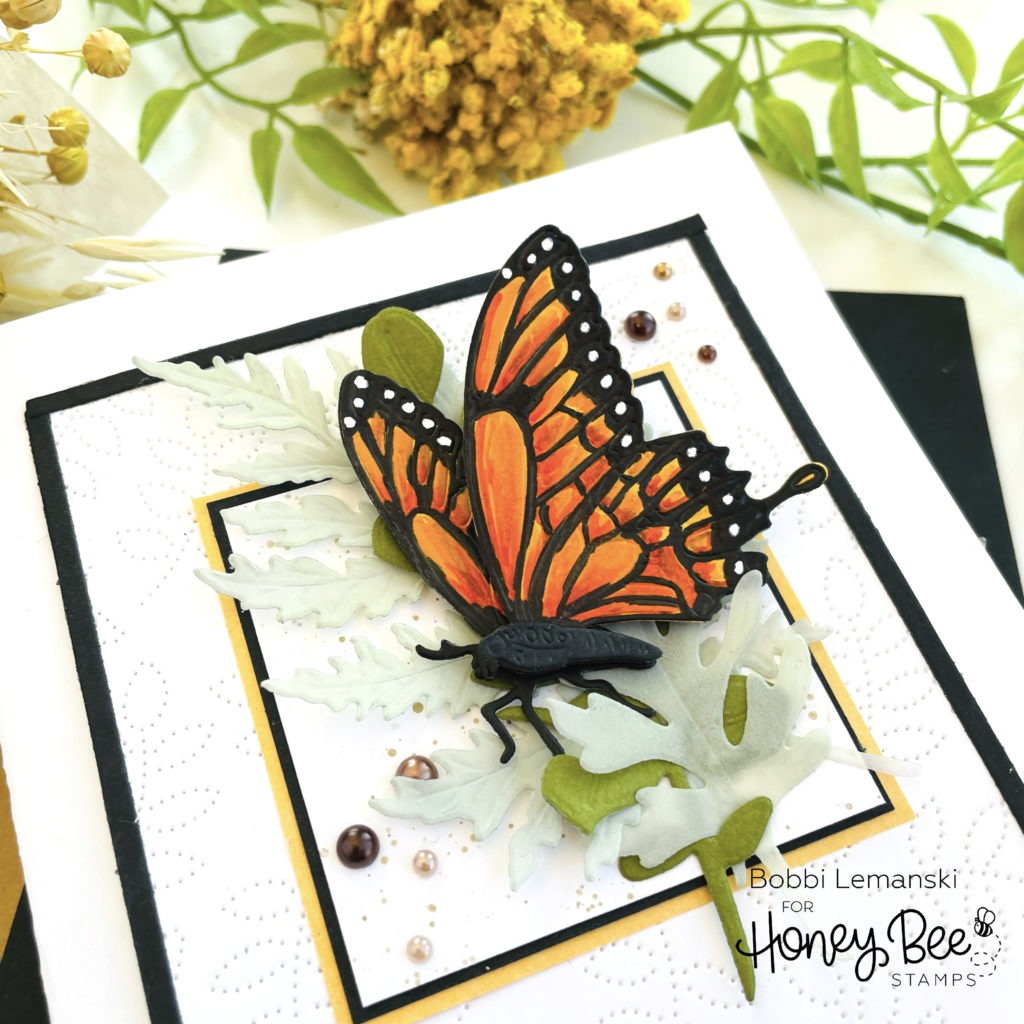
I also die cut the pierced leaf design using the Spring Leaves A2 Pierced Cover Plate die on a white cardstock panel measuring 5″ X 7″. I added 1/8″ black strips around the pierced design to frame it and attached the three-layer, matted square on it. I attached the leaves, butterfly and the die cut phrases from the Small Card Big Hug stamp and coordinating die set to the front panel. I attached the panel to a white A7 card base. Lastly, I added Warm Pearl Stickers to the design to complete the look.
Thoughtful Bees
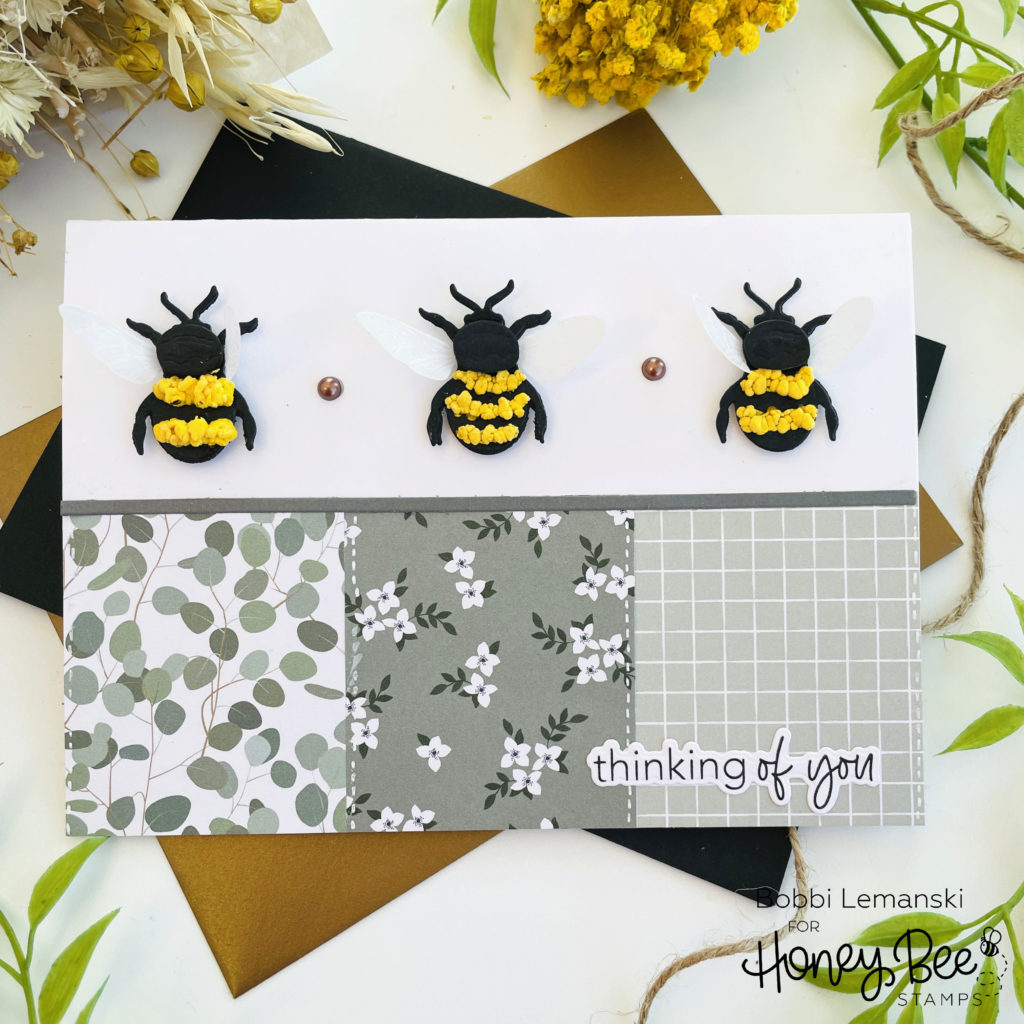
For my second card, I created three bees using the Lovely Layers: Bugs die set. The body parts were die cut from black and the wings were cut from vellum. For the yellow sections, I used Liquid Applique in yellow. You just fill in the yellow striped areas with the liquid and heat set it with a embossing gun. Yellow Liquid Applique could be replaced with a yellow flock for a similar look. I attached the bees to the top half of the card front.
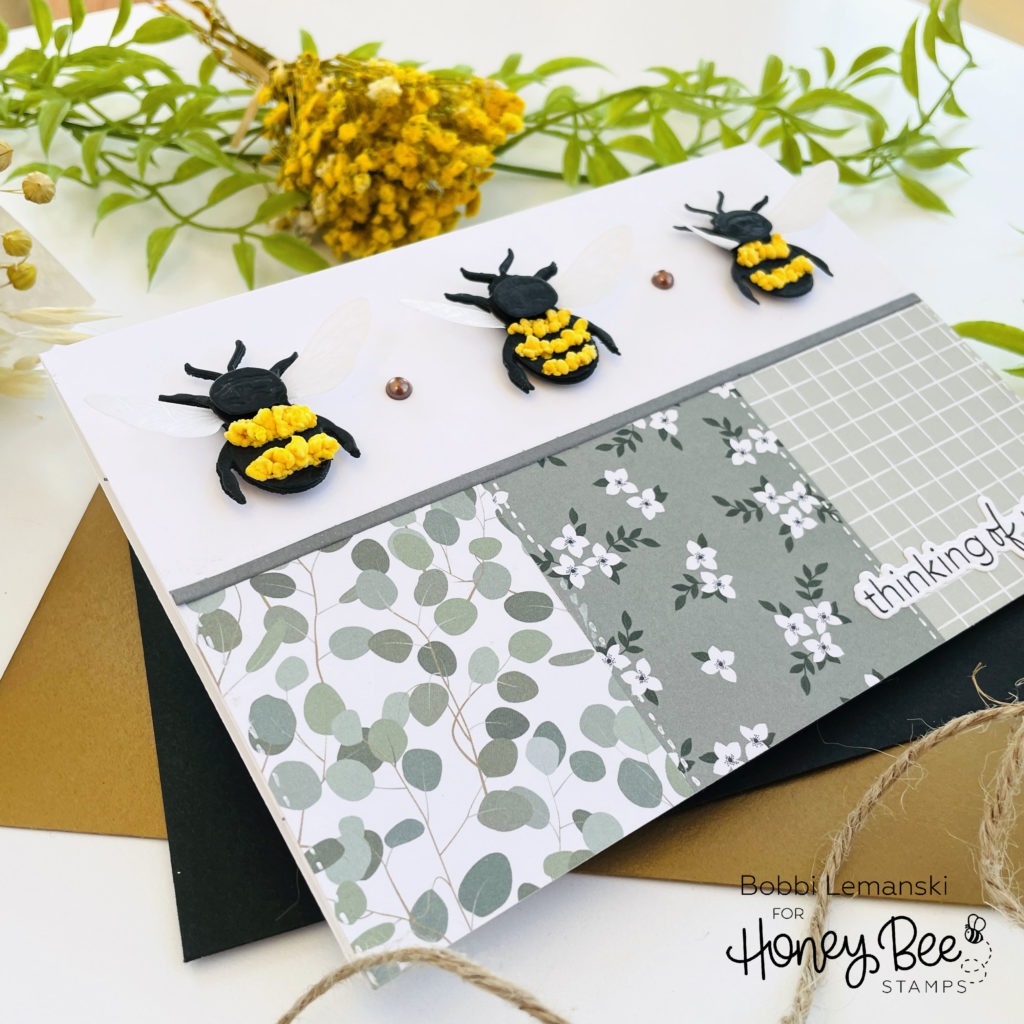
I cut three equal strips of pattern paper from the Modern Spring 6″ X 6″ paper pad and attached them to the lower half of the card front panel. For a clean transition, I added a 1/8″ strip of gray cardstock to cover the paper edges. I added white faux stitching lines to the edges of the strips using my Gelly Roll white gel pen. Two Warm Pearl Stickers were added between the bees for extra detail.
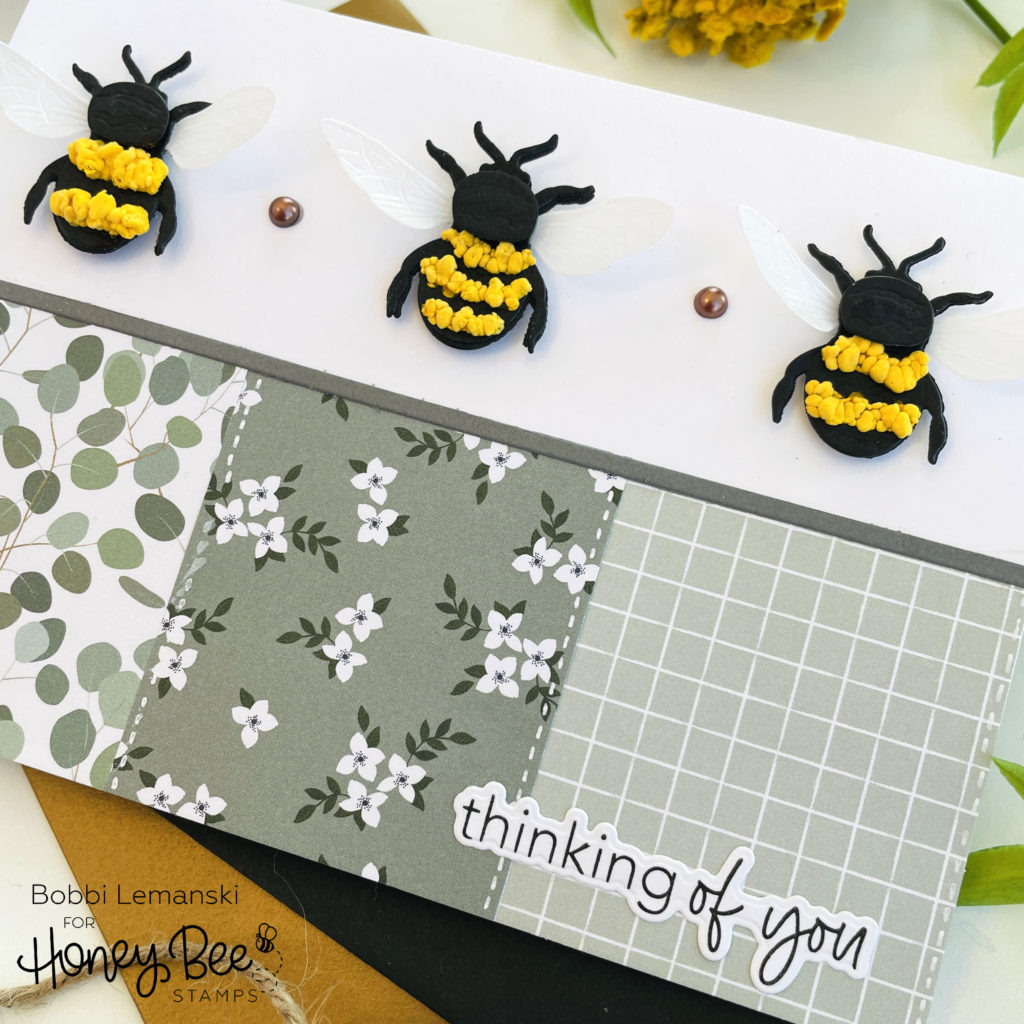
Lastly, I stamped and die cut a phrase from the Get Well Soon stamp set and coordinating die set in the lower right corner.
You can shop Honey Bee Stamps here. If you decide to place an order, please use the links in this post so that Honey Bee knows how you found these products!
Thanks for stopping by today. If you want to see more ideas and inspiration from me, subscribe to my blog, BobbiHartDesign.com. I’ll send you updates on new posts! You can also find me on Instagram as @BobbiHartDesign and on Facebook as BobbiHartDesign.
Bobbi Hartmann Lemanski, Bobbi Hart♥ Design, Adding h♥art into every design
One response to “Beautiful Bees and Butterflies”
Gorgeous cards! Love those bugs.