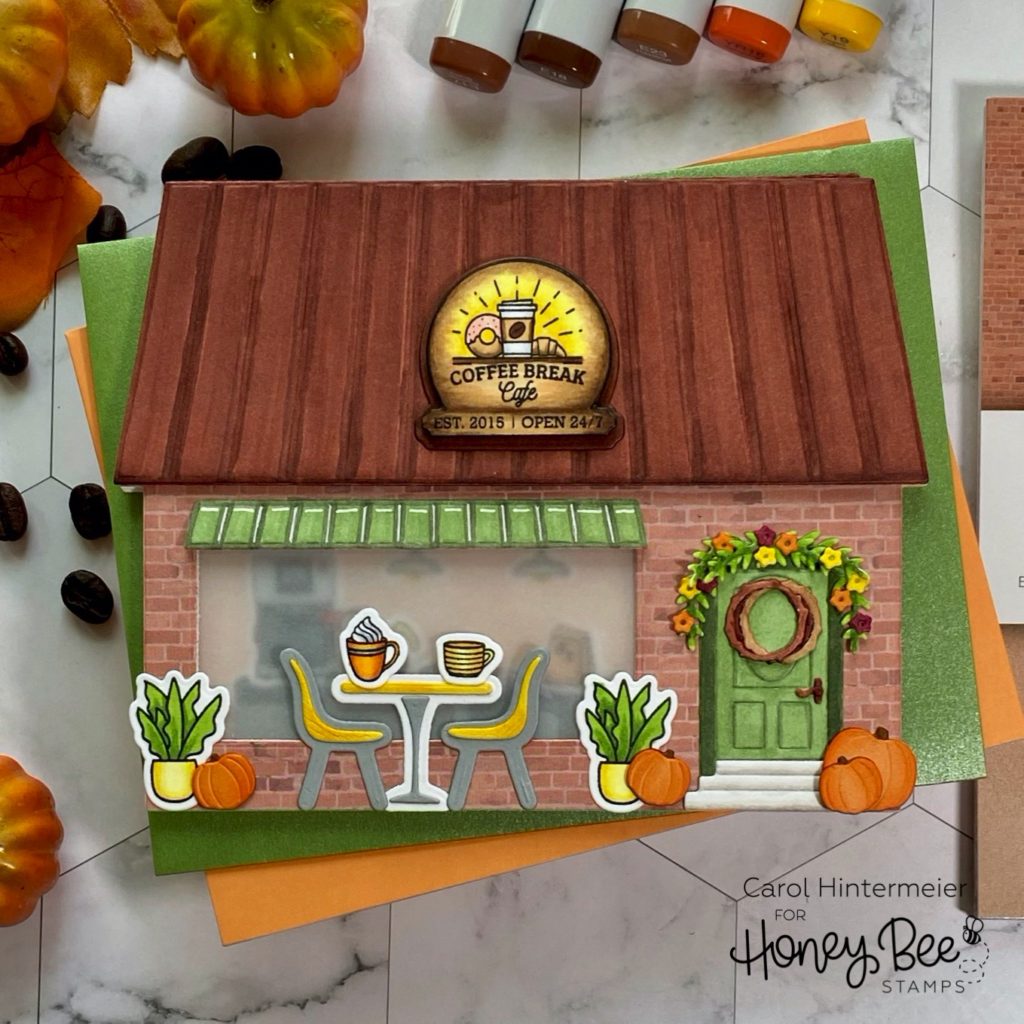
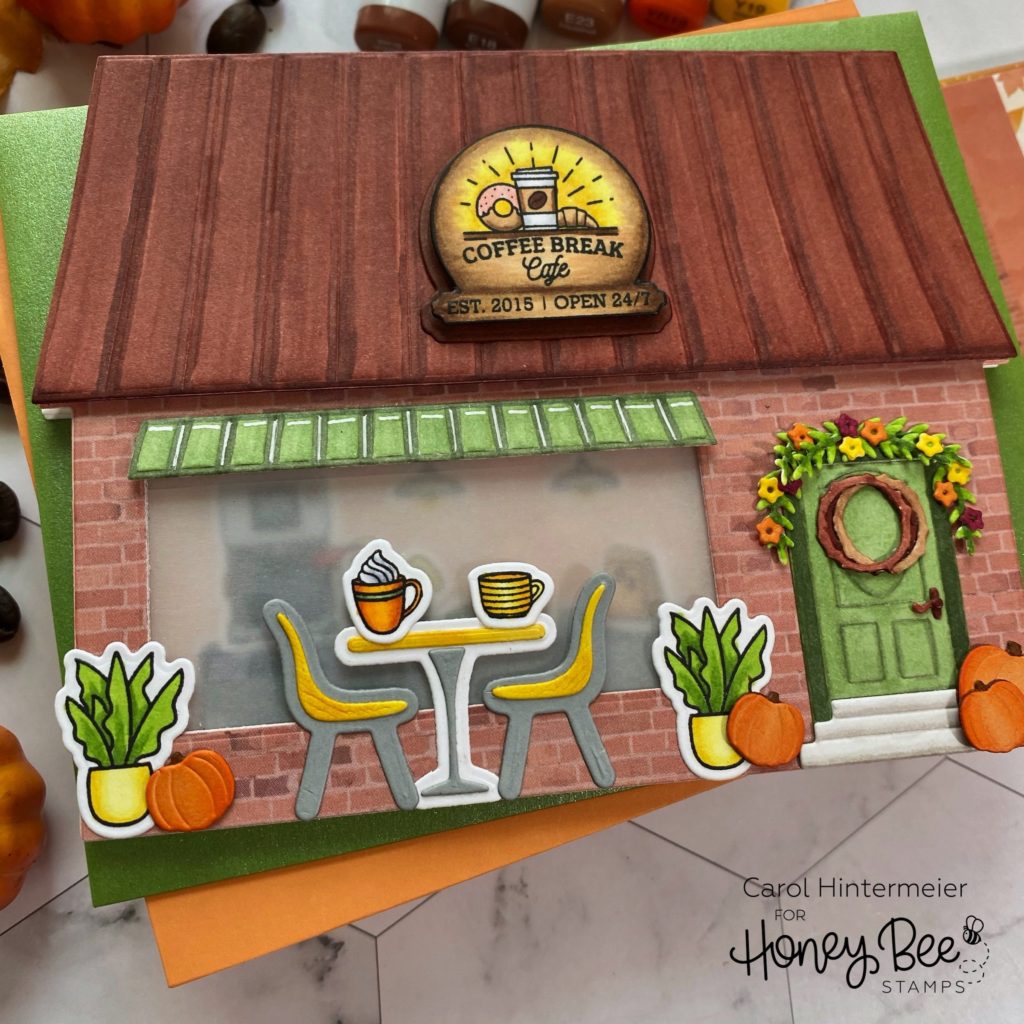
Hello Honey Bee friends! Today my card features the new Coffee Shop House Builder Add-on Stamps and Honey Cuts! I have it all fixed up for autumn with cute pumpkins and autumn colors!
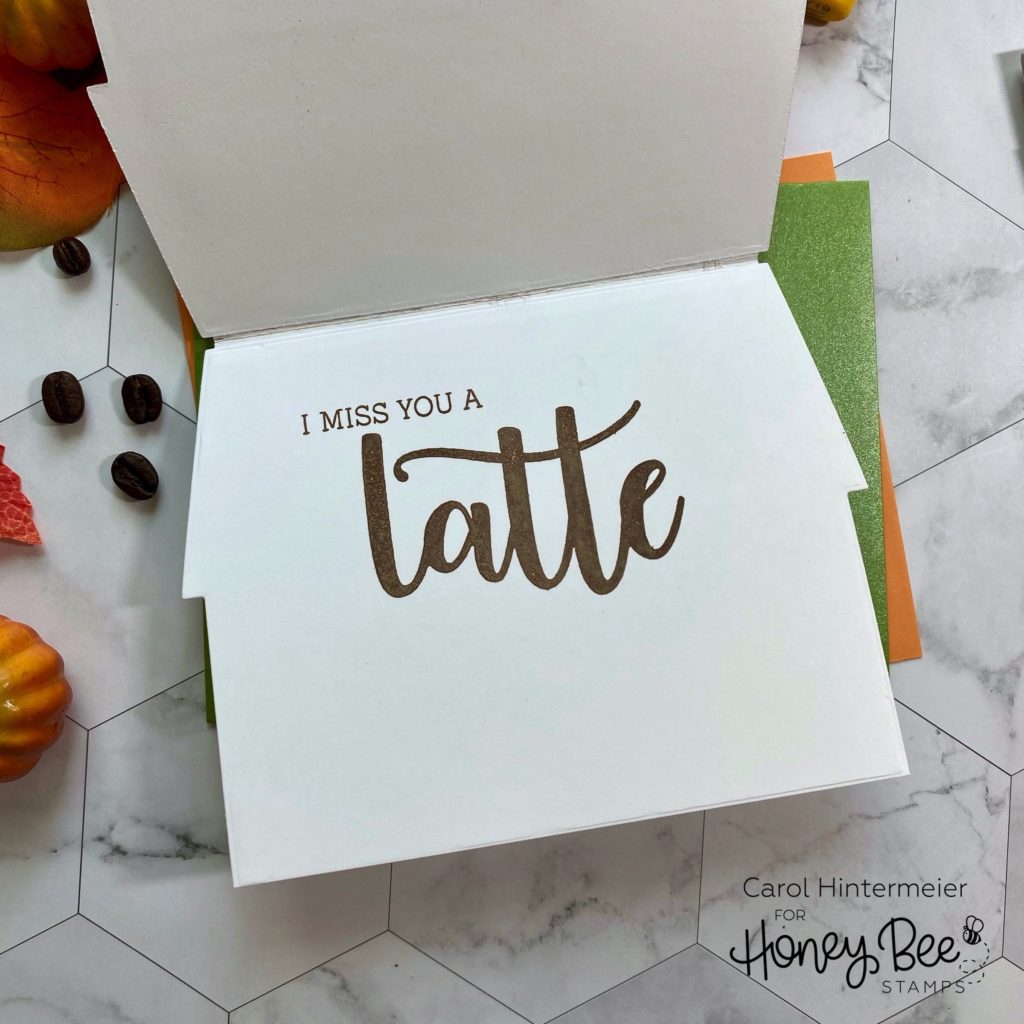
I began by die cutting three house bases from the House Builder Card Base Honey Cuts. I cut these from Neenah 80# Solar White card stock. This set is the very first house builder set and is the base for all of the subsequent add-ons. Next I die cut the hinge and adhered two of the base pieces together. I inked up sentiments from Latte stamp set in Vintage Photo Distress Oxide ink and stamped them on the inside of the card.
My best advice for this type of card is to get your theme planned and then stamp and/or die cut all of the elements. I decided on an Autumn themed Coffee Shop, So I chose a brick patterned paper from the Autumn Afternoon paper pad. The papers in this pad are some of my most favorite ever! I die cut the brick paper with the House Builder base and adhered it to the remaining white card stock house base. I die cut the window next (which is in the Coffee Shop add-on). While I had this set out, I die cut the door, steps, tiny flowers, wreath, leafy branches and door handle from white card stock. I colored them with Copic markers.
All of the other detail elements are die cut from either white or colored card stock and these are all from the Coffee Shop add-on. I used up a lot of my scraps this way! I used Copic markers to color the white pieces. The pumpkins are from the so cute Itty Bitty Pumpkins Honey Cuts. Using the Coffee Shop Add-on stamps, I stamped the sign, coffee cups, plants, and images in the window. Then I colored them with my markers and die cut them with the coordinating Coffee Shop Honey Cuts.
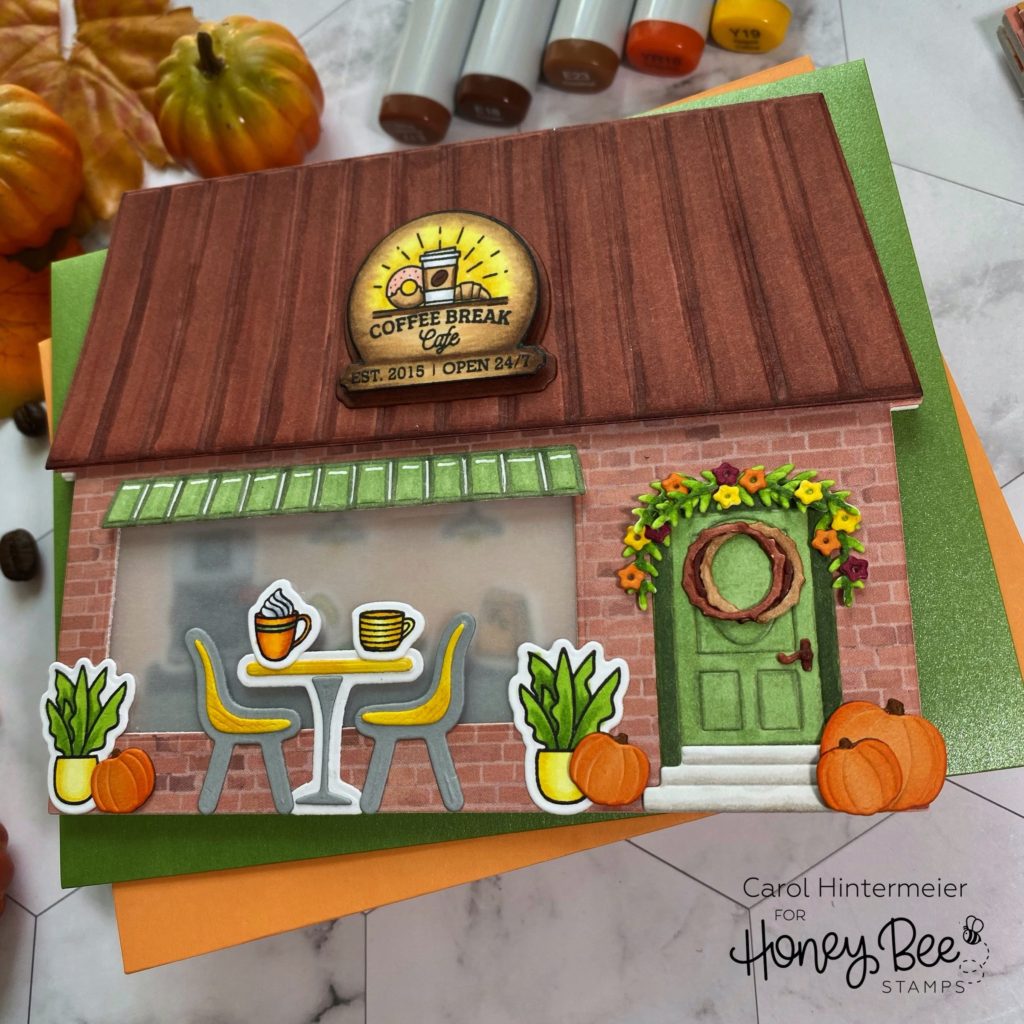
You probably noticed the muted images in the window, right? I began with a piece of clear acetate for the window. As I was testing out my arrangement, those images made the card look way too busy. I had already adhered the coffee machine, coffee post and others to the patterned paper I chose for the back wall, so Plan B took effect! I added a piece of vellum to the acetate! Much better now! I’m a believer that you can almost always save a card! With the vellum in place I added foam tape to the back of this layer and adhered it to my prepared card base.
I arranged all of the other pieces and adhered them with either a foam square or Bee Creative Precision Tip glue. (FYI, I’ve used over ½ of my bottle of this glue and it hasn’t clogged up one single time! It’s great!)
This was SO much fun to make! Have you tried one of the House Builder sets? I really love all of them! Thanks so very much for stopping by today!
2 responses to “Autumn Coffee Shop Card”
This is amazing!
I’m going to share in the Coffee Loving Papercrafters FB group!
Thank you so much Amy!