Hello crafty friends! Leanne here today. I have a very fun slimline scene to share with you. Tall skinny Christmas trees seem to be a very popular trend in holiday decor. I’ve seen them referred to as pencil trees. So I decided to create my own version of a pencil tree for this Woodland Winter Animals scene.
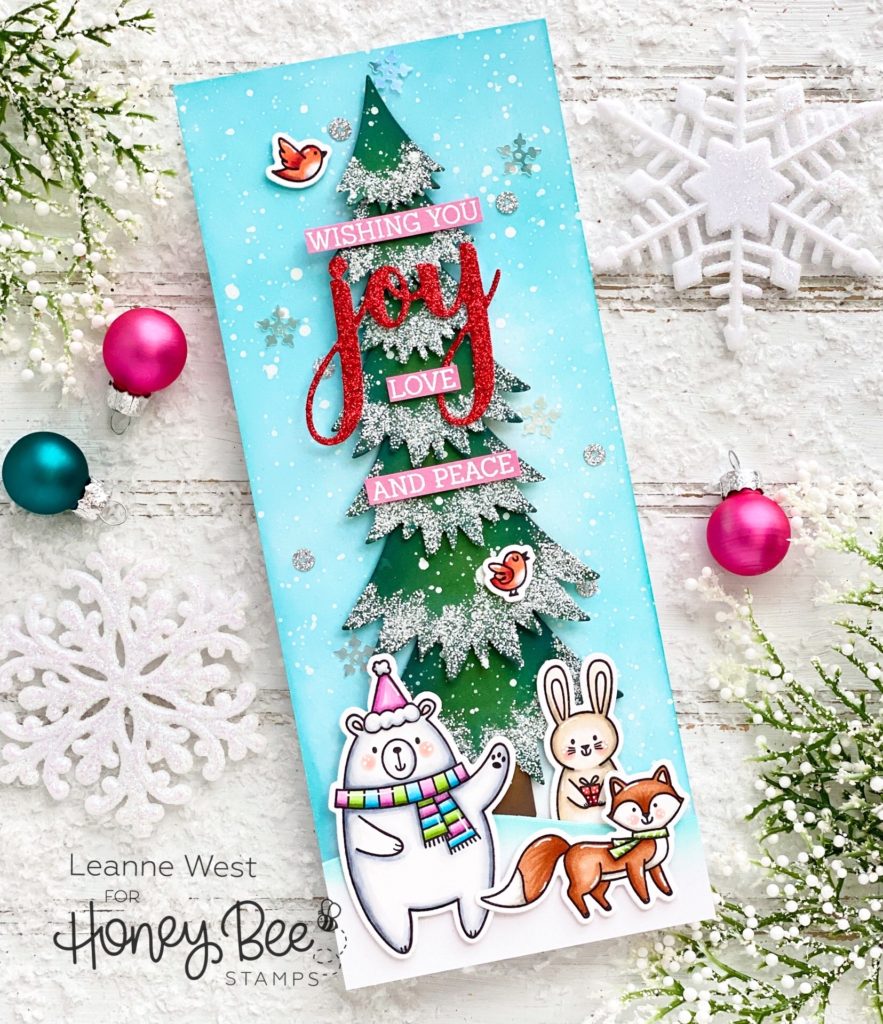
This tall skinny tree is very easy to make. I used dies from the Toy Store House Builder Add-on set. There are dies in this set to create a layered tree. I simply die cut multiple layers and stacked them to make my tall tree. I die cut two of each tier except the very top tier which I only used one of. The body of the tree is cut from green card stock. I then shaded the edges with a dark green ink and splattered with thinned white paint. I also added a dusting of snow (opaque white glitter) to the tips.
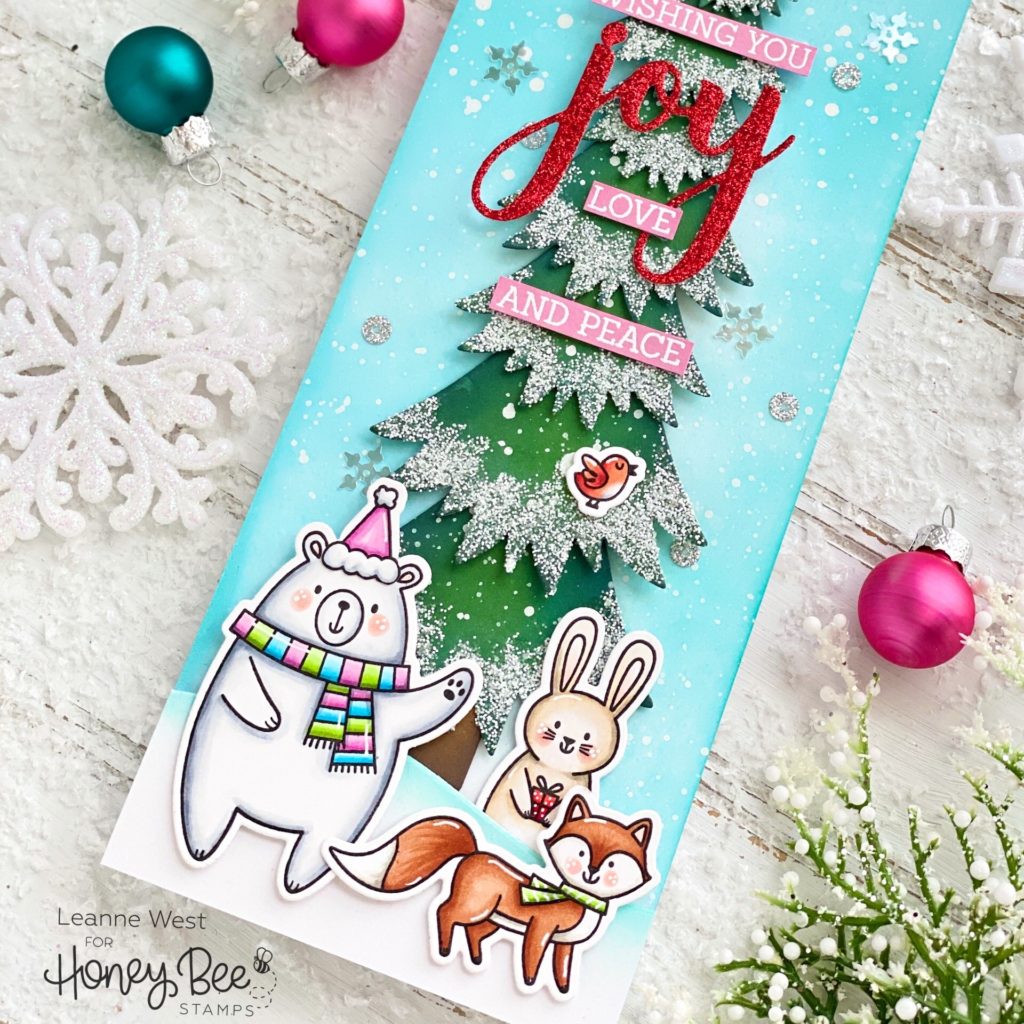
For the background of this scene, I started with a slimline panel (8.5″ x 3.5″) I colored it with Tumbled Glass Oxide Ink and splattered with thinned white painted. I then added the snow bank to the bottom. Next I Copic colored some of the images from Woodland Winter Animals.
Copic colors used:
bunny – E40, E41, E42; fox – E13, E15, E17; bear – C01, C03; rosy cheeks – R00; birds – R12, R14, R27; scarf and hat – RV52, RV63, RV55, B00, B02, B04, YG11, YG13, YG17
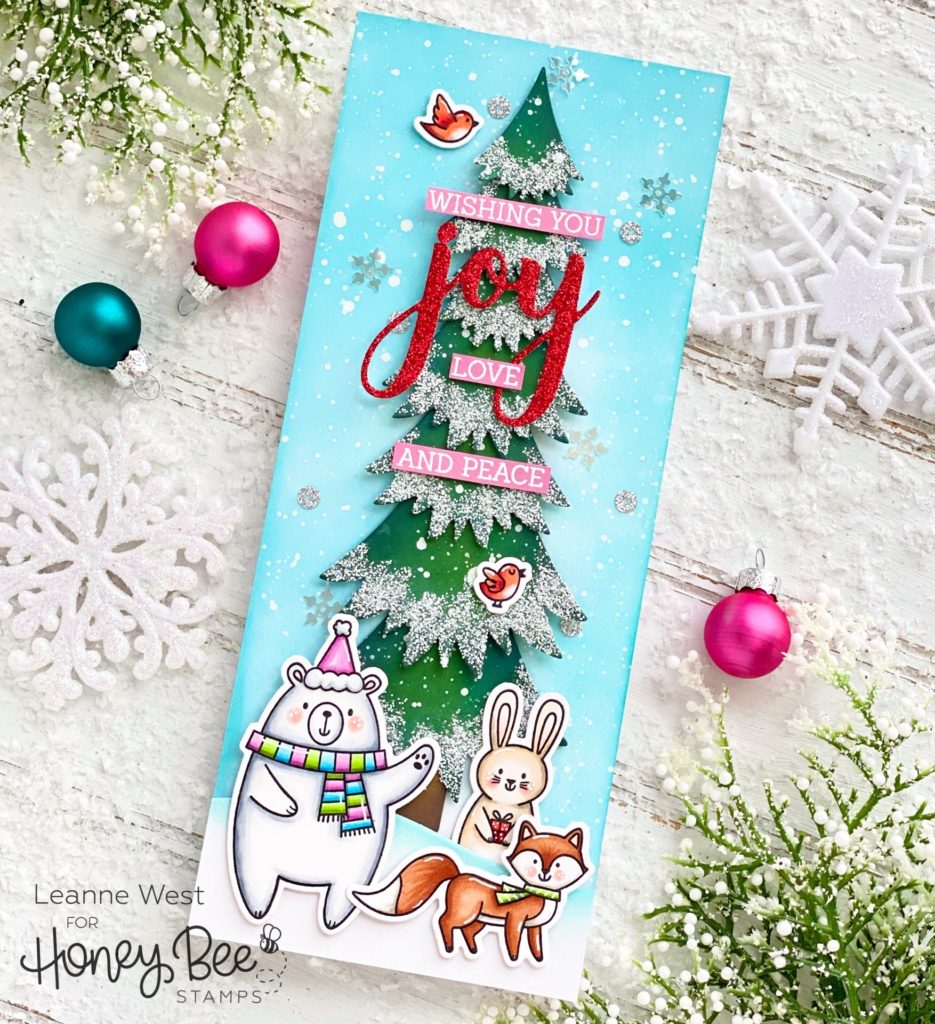
Once I had the scene assembled, I could add the greeting. I used the Joy 4×4 stamp set and coordinating Honey Cuts to create this custom greeting. To finish off the card, I added a few sequins from the new Fantasy Flurry mix.
One response to “Woodland Winter Animals Slimline Card”
Very cute!