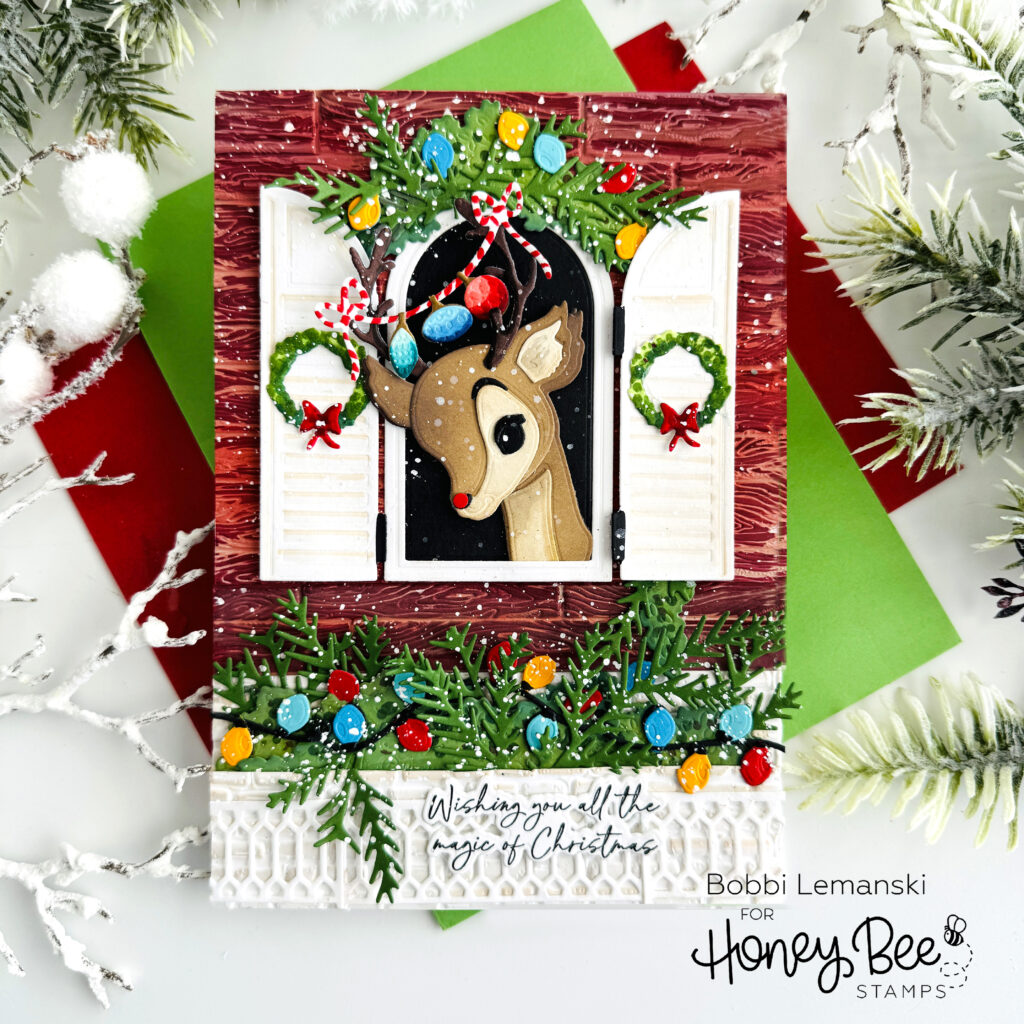
Hello Bee friends! It’s Bobbi and Rudolph here, sharing a little holiday inspiration this season. I went to see Rudolph the other day and we decorated his barn stall. With a little cardstock and some Honey Bee magic, we decorated his North Pole Headquarters for the holiday season! Here’s what we used:
Lovely Layers: Vintage Reindeer Honey Cuts dies
Lovely Layers: Window Honey Cuts dies
Postcard Holiday Add-On Honey Cuts dies
Wonder of Christmas stamp set and coordinating Honey Cuts dies
Wood Planks 3D Embossing Folder
Rustic Brick Wall 3D Embossing Folder
For the basics… my featured project below is made from Neenah 80lb Solar White cardstock for the card base. All of the black ink stamping was done using Honey Bee’s Bee Creative Intense Black Ink. I use Honey Bee Stamps Bee Creative Precision Glue to layer all the fun stuff on this card. When I want more dimension, I use Bee Creative Foam Dots With Tab for adhering my elements to the card front. My blender brushes (large and small) are a must for ink blending color on the background, too. For white highlights, I use my white Gelly Roll pen. My card is 5″ X 7″ in size. Here’s the rest of the details…
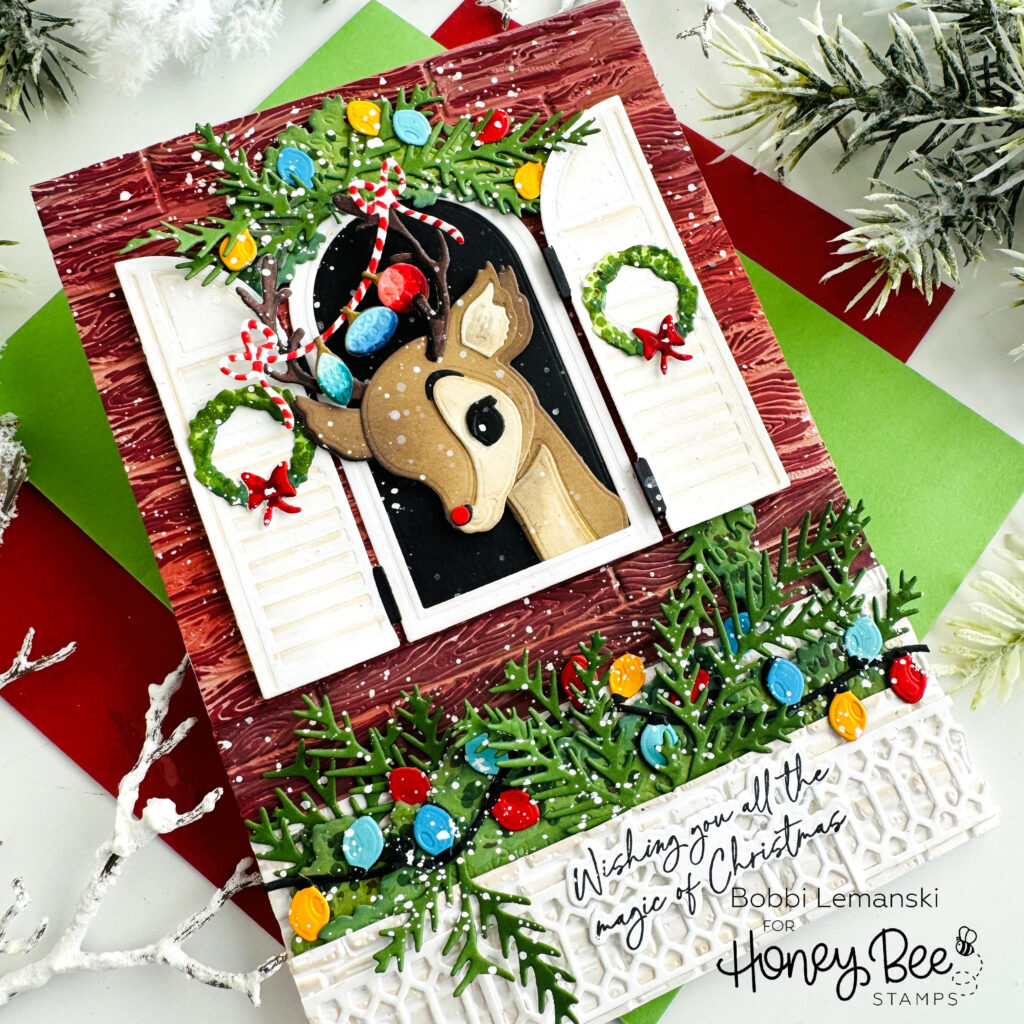
To make this festive card, I began by creating the horse stable for the background. For the top half, I used the Wood Planks 3D Embossing Folder. I ran a light tan cardstock through my die cutting machine and then blended on Distress Oxide Ink in Aged Mahogany. Once the reddish brown ink color dried, I ran my Copic Sketch Marker in R89 over the embossed pattern to get a more rustic feel of an aged red barnwood. I cut the piece down to 5″ square and attached it to the top of my white 5″ X 7″
card base.
For the bottom half of my barn, I created a brick foundation by embossing white cardstock using the Rustic Brick Wall 3D Embossing Folder and then discoloring the bricks a bit by running a Copic Sketch E42 marker over the embossed bricks for an aged brick look. I cut the foundation piece to 5″ wide X 2″ tall and attached it at the bottom. I cut another piece for a brick planter panel. It measures 5″ wide X 1-1/8″ tall. I attached this over the foundation piece, making sure to only add adhesive to the bottom half. Some greenery using the evergreen branch from the Postcard Holiday Add-On Honey Cuts dies and the greenery clumps from the Lovely Layers: Window Honey Cuts dies were tucked in between the brick layers to create the look of planter outside the barn walls.
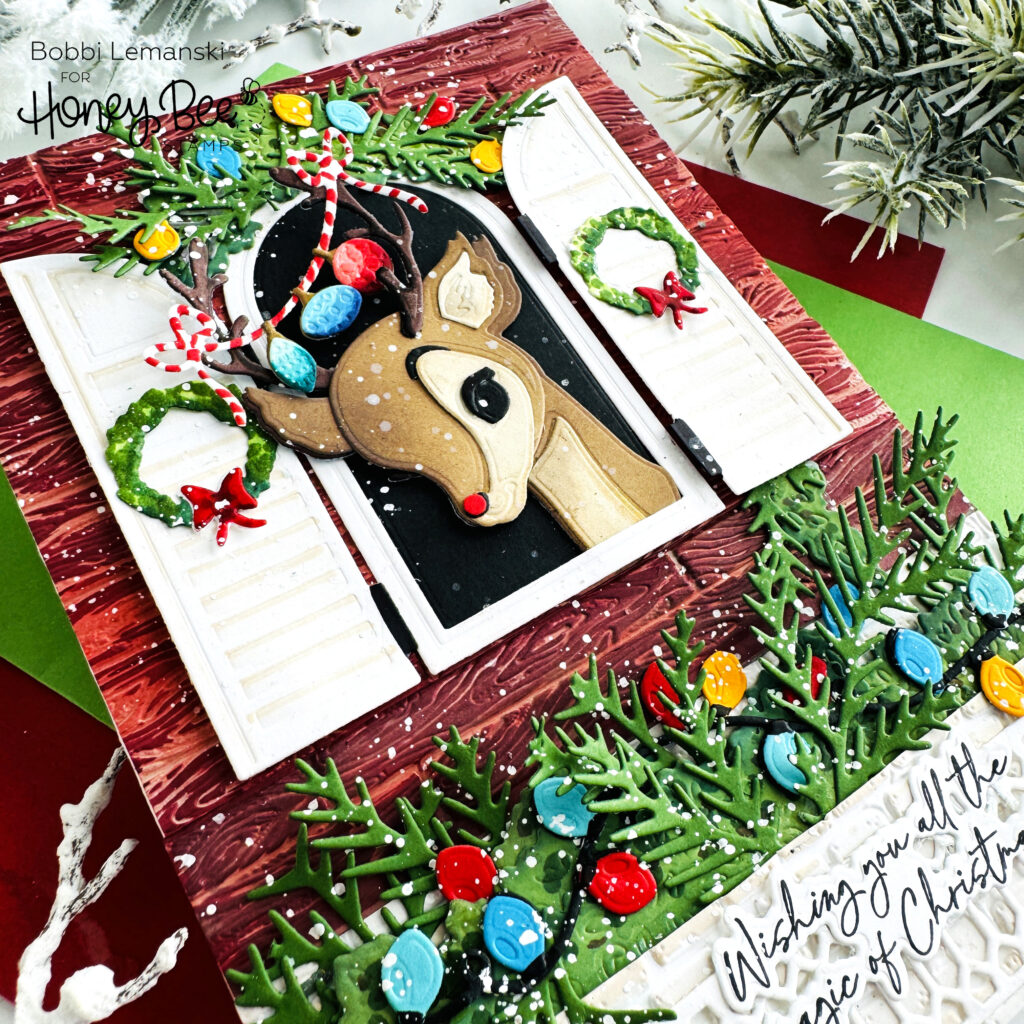
Once I added the greenery to the planter, I die cut the Postcard Holiday Add-On Honey Cuts dies string of lights from black cardstock and the bulbs from red, blue, aqua, and yellow cardstock and attached the lights to the string and adhered the string to the evergreens in the planter.
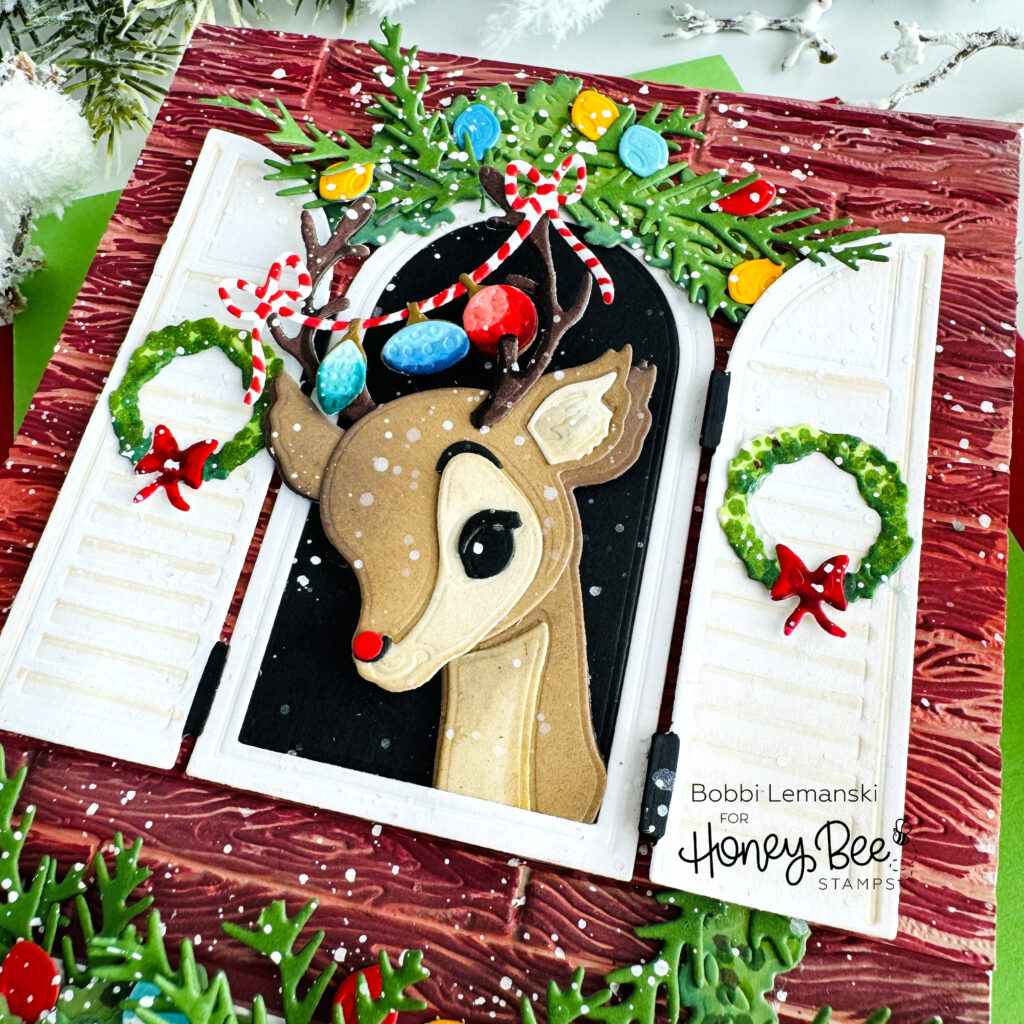
For Rudolph’s window, I used the Lovely Layers: Window Honey Cuts dies to make the white-trimmed, shutter flanking window. I used a Copic E42 and E41 to age the shutters. I used a black background for the window. I colored the hinges in black and attached the shutters to the sides of the window using foam tabs on the outer side edges and glue on the inner side so that they are not flat to the card front. Note: I attached the window trim after positioning Rudolph in the window. Here’s why…
Now for my friend, Rudolph… I used the gorgeous, Lovely Layers: Vintage Reindeer Honey Cuts dies to make the reindeer. I added a string of ornaments between his antlers. He needed a red nose so I used a hole punch and red cardstock to create one. I attached the reindeer inside the window, cutting off a portion of the neck at the base to make him fit at an angle and then attached the window trim piece over him. I wanted him to look like he was enjoying the falling snow outside his stable window.
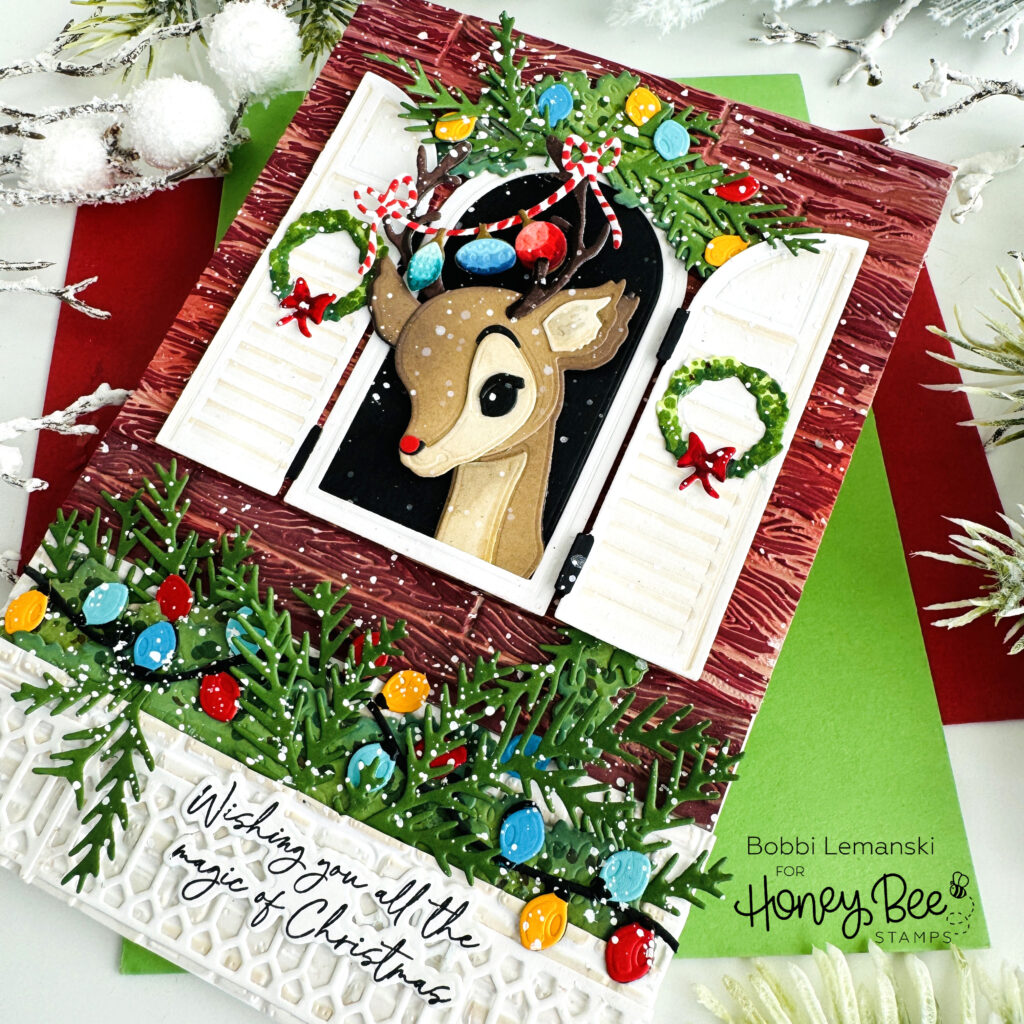
I added two small wreaths to each shutter for a festive look and more evergreens and lights above the arched window opening. The wreaths are from the Postcard Holiday Add-On Honey Cuts dies. I added the white iron railing design over the planter and then the sentiment from the Wonder of Christmas stamp set and coordinating Honey Cuts dies. Lastly, lots of snow was splattered over the entire front using Dr. PH Marten’s white ink and a watercolor fan-shaped brush.
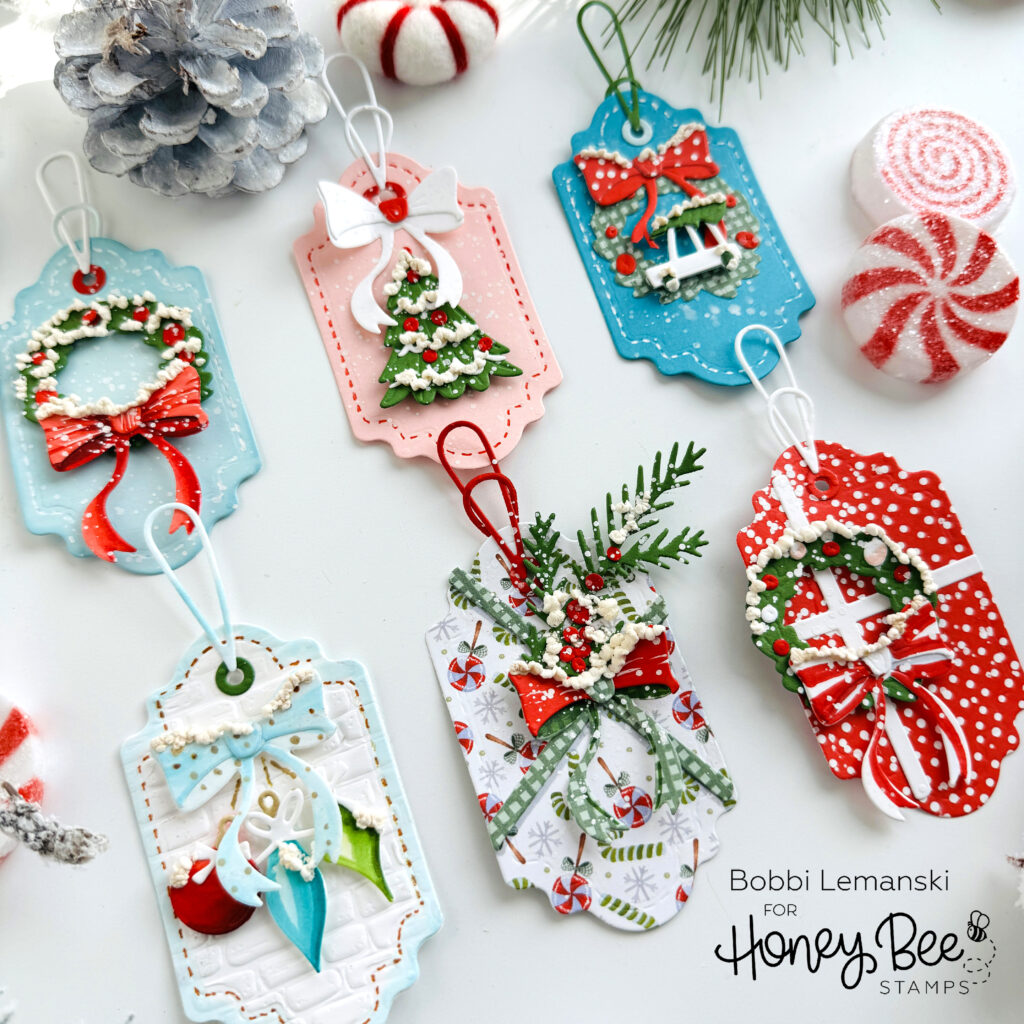
Do you want a FREE BEE?
You can shop the entire Honey Bee Stamps , Cozy Christmas release. If you decide to place an order, please use the links in this post so that Honey Bee knows which ideas inspired you! When you spend $100 or more, you get a cute tag set for holiday tag making (While supplies last). I made these tags shown above using the FREE BEE with purchase and accented some of them using the Postcard Holiday Add-On Honey Cuts dies that I also used on the Rudolph card above!
Thanks for stopping by today. If you want to see more ideas and inspiration from me, subscribe to my blog, BobbiHartDesign.com. I’ll send you updates on new posts! You can also find me on Instagram as @BobbiHartDesign and on Facebook as BobbiHartDesign.
